1. Introduction
Thank you for choosing the Irfora ET692A Thermal Imager Camera. This handheld, portable device is designed for accurate temperature measurement and thermal imaging across various fields. With a 32x32 infrared resolution, a wide temperature range of -20℃ to 300℃, and multiple color palettes, it is an essential tool for professionals and enthusiasts alike. This manual provides detailed instructions to help you operate and maintain your thermal imager effectively.
The ET692A is widely used in applications such as fire fighting, archaeology, traffic management, agriculture, geology, energy audits, smelting, and electronic manufacturing. Its large LCD display screen ensures clear imaging, and its portable size makes it convenient for on-the-go use.

Figure 1.1: Irfora ET692A Thermal Imager in diverse application environments.
2. Product Overview
Familiarize yourself with the components of your ET692A Thermal Imager:
- LCD Display: 2.0-inch color screen for clear thermal imaging.
- ON / OFF Button: Powers the device on or off.
- Palette Button: Cycles through available color palettes.
- Mode / Data Storage Button: Accesses modes and saves data.
- ℃ / ℉ Button: Switches between Celsius and Fahrenheit temperature units.
- Infrared Imaging Sensor: Captures thermal data.
- Trigger: Initiates measurement or captures images.
- Battery Case: Houses the 1400mAh lithium battery.

Figure 2.1: Key components of the Irfora ET692A Thermal Imager.

Figure 2.2: Front and side view of the Irfora ET692A Thermal Imager.
3. Setup
- Charging the Battery: Before first use, fully charge the integrated 1400mAh lithium battery using the provided USB cable. Connect the USB cable to the device's charging port and a compatible USB power source.
- Attaching the Wrist Strap: For secure handling, attach the included wrist strap to the designated loop on the device. Adjust the strap to fit comfortably around your wrist.
- Power On: Press and hold the ON/OFF button until the display illuminates and the device initializes.
4. Operating Instructions
4.1 Power On/Off
- To Power On: Press and hold the ON/OFF button until the screen displays the startup logo and then the thermal image.
- To Power Off: Press and hold the ON/OFF button until the screen turns off.
4.2 Temperature Unit Switching (℃/℉)
- While in the measurement interface, press and hold the ℃/℉ button to toggle between Celsius (℃) and Fahrenheit (℉) temperature units.
4.3 Color Palette Selection
The ET692A offers two primary color palettes for thermal imaging:
- Iron Red: Focuses on displaying color variations, ideal for high heat contrast to improve distinction between high and low temperatures.
- White Hot: Provides an even linear color distribution.
To switch between palettes, press the PALETTE button.
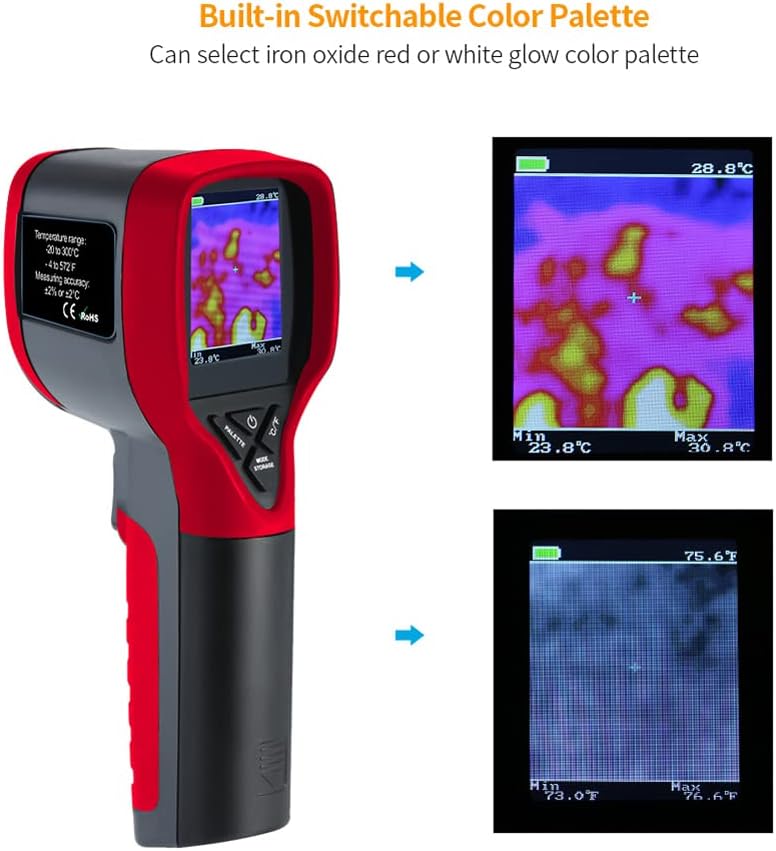
Figure 4.1: Switchable color palettes for thermal imaging.
4.4 Taking Measurements and Capturing Images
- Point the thermal imager at the target object. The display will show the thermal image with real-time temperature readings (center, max, min).
- To capture an image, press the Trigger button. The image will be saved to the device's internal storage (16MB).
4.5 Accessing Settings
- Press the Mode / Data Storage button to enter the settings menu.
- Use the arrow buttons to navigate through options such as Albums, Emissivity, Distance, Display Settings, Color Distribution, Super Resolution, Alarm, Temperature Range, Capture Mode, and more settings (Laser, Auto Power-off, Auto Sleep, About, Save Logs, Format Storage, Restore Device, Language).
- Press the ON/OFF button to select an option or confirm a setting.
5. Maintenance
- Cleaning: Use a soft, dry cloth to clean the device's exterior. For the lens, use a specialized lens cleaning cloth and solution to avoid scratches.
- Storage: Store the thermal imager in a cool, dry place away from direct sunlight and extreme temperatures (-10℃ to 50℃).
- Battery Care: Recharge the battery regularly, even if not in use, to maintain its lifespan. Avoid fully discharging the battery for extended periods.
6. Troubleshooting
- Device not powering on: Ensure the battery is fully charged. If the issue persists, try resetting the device (if a reset option is available in settings).
- Inaccurate temperature readings: Check the emissivity setting for the material being measured. Ensure the lens is clean and free from obstructions.
- Screen freezing/unresponsive: Power off the device and restart it. If the problem continues, consider performing a 'Restore Device' from the settings menu (this will erase saved data).
- Images not saving: Check if the internal storage is full. Delete unnecessary images or format the storage if needed.
7. Specifications
| Feature | Specification |
|---|---|
| Material | ABS |
| Display | 2.0 inch color screen |
| Measuring Range | -20℃ to 300℃ |
| Measurement Accuracy | ±2% / ±2℃ |
| Field of View | 33° x 33° |
| Focusing Mode | Fixed |
| Frame Rate | 5Hz ~ 6Hz |
| Wavelength Range | 8-14um |
| Infrared Imaging Resolution | 32 x 32 |
| Photo Resolution | 176 x 220 |
| Photo Format | BMP |
| Storage Space | 16MB |
| Palette | Iron Red, White Hot |
| Battery | 1 x Lithium battery, 1400mAh (INCLUDED) |
| Working Voltage | 3.4V ~ 4.2V |
| Working Temperature | 0℃ ~ 50℃ |
| Storage Temperature | -10℃ ~ 50℃ |
| Item Size | 165 x 69 x 60mm / 6.5 x 2.7 x 2.4in |
| Item Weight | 13.1 ounces |
8. Warranty and Support
For warranty information, technical support, or service inquiries, please refer to the contact details provided with your purchase documentation or visit the official Irfora website. Keep your proof of purchase for warranty claims.

