1. Product Overview
The Irfora FJ3390A is a multifunctional professional weather station designed to provide comprehensive environmental data. It accurately detects indoor and outdoor temperature, humidity, wind speed, wind direction, and rainfall. This device also features a weather forecast clock, perpetual calendar, and alarm functions, making it a versatile tool for monitoring local weather conditions.

Image 1.1: The Irfora FJ3390A weather station, showing the main display unit and the integrated outdoor sensor for wind, rain, temperature, and humidity.
2. Package Contents
Please check the package carefully to ensure all items are present and undamaged:
- 1 x Weather Station (Main Display Unit)
- 1 x USB Power Cable
- 1 x Outdoor Sensor for Wind Speed and Rainfall (Multi-combination Wireless Remote Sensor)
- 1 x Instruction Manual (EN/DE/FR/IT/ES)
- 1 x Installation Accessories (mounting bracket, screws, etc.)
3. Product Features
- Time/Date Display: Perpetual Calendar up to the year 2099.
- Multi-language Week Display: Supports eight languages (English, German, French, Italian, Spanish, Dutch, Danish, Russian).
- Dual Alarms & Snooze: Two daily alarms with an automatic snooze function (adjustable from OFF or 5-60 minutes).
- Warning Functions: Alerts for upper and lower limits of temperature and humidity, upper limit of wind speed, and upper limit of rainfall.
- Advanced Weather Indices: Displays somatosensory temperature, wind chill index, thermal index, and dew point temperature, calculated from detected environmental data.
- Atmospheric Pressure: Real-time air pressure detection and display.
- Background Lighting: Adjustable backlight for clear visibility.
- Wireless Sensors: Reliable wireless communication between the main unit and outdoor sensor.
4. Setup Guide
4.1 Main Display Unit Setup
- Power Connection: Connect the main display unit to a power source using the provided USB power cable.
- Initial Settings: Upon first power-up, the unit may prompt for initial settings such as time zone, time format (12/24 hour), and date format. Follow the on-screen instructions.
- Placement: Place the main unit indoors on a flat surface or mount it on a wall using the integrated hanging holes. Ensure it is away from direct sunlight or heat sources for accurate indoor readings.
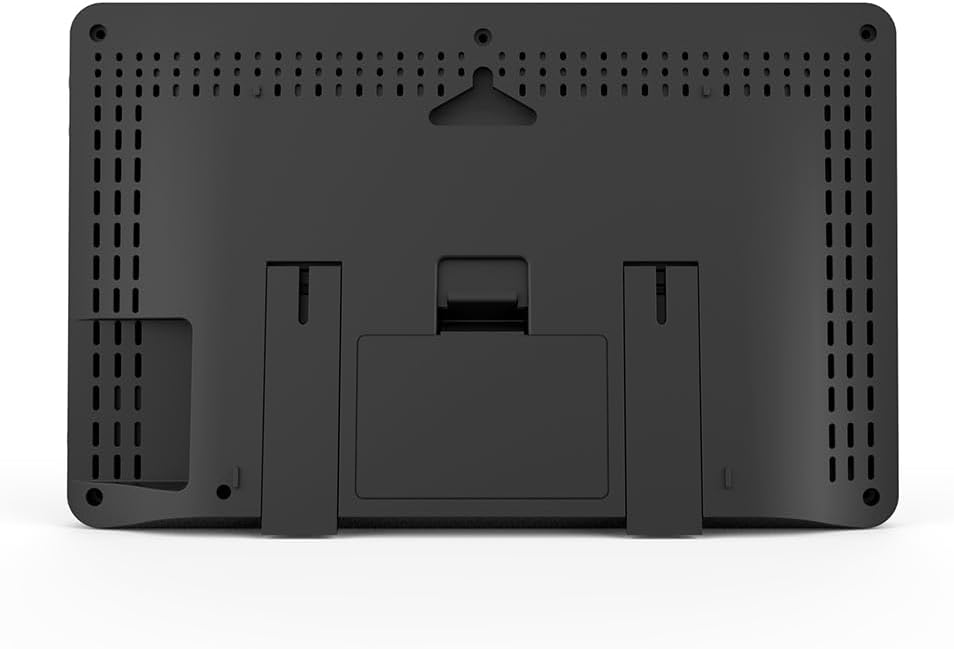
Image 4.1: Rear view of the main display unit, showing the stand and wall-mounting options.
4.2 Outdoor Sensor Setup
- Battery Installation: The outdoor sensor requires 3xAA batteries (not included). Open the battery compartment, insert the batteries, and close the compartment securely.
- Assembly: Assemble the wind speed cups, wind direction vane, and rain funnel onto the sensor unit as per the diagrams in the printed manual.
- Mounting Location: Choose an open location outdoors, free from obstructions, to ensure accurate readings for wind, rain, and temperature. The sensor should be mounted securely using the provided installation accessories. A pole or sturdy post is recommended.
- Leveling: Use the integrated bubble level on the sensor to ensure it is perfectly horizontal. This is crucial for accurate rainfall measurement.
- Pairing: The outdoor sensor should automatically pair with the main unit upon power-up. If pairing fails, refer to the troubleshooting section.

Image 4.2: Exploded view of the outdoor sensor, highlighting the rain funnel, solar panel, wind speed cups, bubble level, wind direction vane, temperature/humidity induction box, and installation base.

Image 4.3: Example of the weather station setup, showing the main unit indoors and the outdoor sensor mounted in an open area for optimal data collection.
5. Operating Instructions
The main display unit features several buttons for navigation and setting adjustments. Refer to the specific button labels on your device for precise control.

Image 5.1: Close-up of the main display unit, illustrating various data points such as time, date, weather forecast, temperature, humidity, wind speed, and atmospheric pressure.
5.1 Time and Date Setting
Press the 'MODE' button to cycle through display modes until the time setting option appears. Use the 'UP'/'DOWN' buttons to adjust values and 'SET' to confirm. The perpetual calendar automatically updates the date.
5.2 Alarm Functions
To set alarms, press the 'ALARM' button. Use 'UP'/'DOWN' to set the desired alarm time and 'SET' to confirm. The snooze duration can also be adjusted in the alarm settings menu.
5.3 Weather Data Display
The main display continuously shows current indoor/outdoor temperature, humidity, wind speed, wind direction, rainfall, and atmospheric pressure. The weather forecast icon updates based on atmospheric pressure changes.
5.4 Unit Selection
To change units (e.g., °C/°F for temperature, km/h/mph for wind speed, mm/in for rainfall), navigate to the 'UNIT' settings menu using the 'MODE' button and select your preferred units.
6. Maintenance
6.1 Sensor Cleaning
Periodically inspect the outdoor sensor for dirt, leaves, or debris, especially in the rain funnel and wind cups. Clean gently with a soft, damp cloth. Ensure the rain funnel is clear to prevent inaccurate rainfall readings.
6.2 Battery Replacement
When the low battery indicator appears on the main unit for the outdoor sensor, replace the 3xAA batteries in the outdoor sensor. Use high-quality alkaline batteries for optimal performance and longevity. Ensure proper polarity during installation.
7. Troubleshooting
- No Outdoor Data Display:
- Check if the outdoor sensor batteries are correctly installed and not depleted.
- Ensure the outdoor sensor is within the wireless range of the main unit (typically up to 100 meters in open air).
- Relocate the main unit or sensor to minimize interference from electronic devices or large metal objects.
- Try re-pairing the sensor by removing and reinserting batteries in both units, then initiating a manual search on the main unit if available.
- Inaccurate Rainfall Readings:
- Verify the outdoor sensor is perfectly level using the bubble level.
- Check the rain funnel for any obstructions (leaves, debris).
- Inaccurate Wind Readings:
- Ensure the wind cups and vane rotate freely without obstruction.
- Confirm the sensor is mounted in an open area, away from buildings or trees that could block wind flow.
- Display Not Working:
- Check the USB power cable connection to the main unit and power source.
- If using batteries (if applicable for main unit), ensure they are fresh and correctly installed.
8. Specifications
| Measurement | Range | Details |
|---|---|---|
| Indoor Temperature | 0 ~ +50°C (32 ~ 122°F) | Detection cycle: 60 seconds |
| Indoor Humidity | 20 ~ 95% | Detection cycle: 60 seconds |
| Outdoor Temperature | -40 ~ +70°C (-40 ~ 158°F) | |
| Outdoor Humidity | 20 ~ 95% | |
| Air Pressure | 600 ~ 1100 HPA (17.72 ~ 32.48 INHG & 450 ~ 825.1 mmHg) | |
| Wind Speed | 0 ~ 180 km/h (0 ~ 111 mph) | |
| Wind Direction | 0 ~ 359 degrees | |
| Rainfall | 0 ~ 9999mm (0 ~ 393.7in) | |
| Host Size | 20.5 * 13 * 3 cm (8.07 * 5.12 * 1.18 inch) | |
| Sensor Size | 38 * 30 * 9 cm (14.96 * 11.81 * 3.54 inch) | |
| Product Dimensions (Overall) | 14.96 x 10.63 x 5.51 inches | |
| Color | Black |

Image 8.1: Dimensional overview of the main display unit and the outdoor sensor.
9. Warranty and Support
This Irfora product is covered by a standard manufacturer's warranty. Please refer to the warranty card included in your package for specific terms and conditions, including the warranty period and coverage details.
For technical support, troubleshooting assistance, or warranty claims, please contact the retailer or manufacturer directly. Keep your purchase receipt as proof of purchase.