
Introduction
This manual provides detailed instructions for the setup, operation, and maintenance of your Nadex CR600 Cash Register. Please read this manual thoroughly before using the device to ensure proper functionality and longevity.
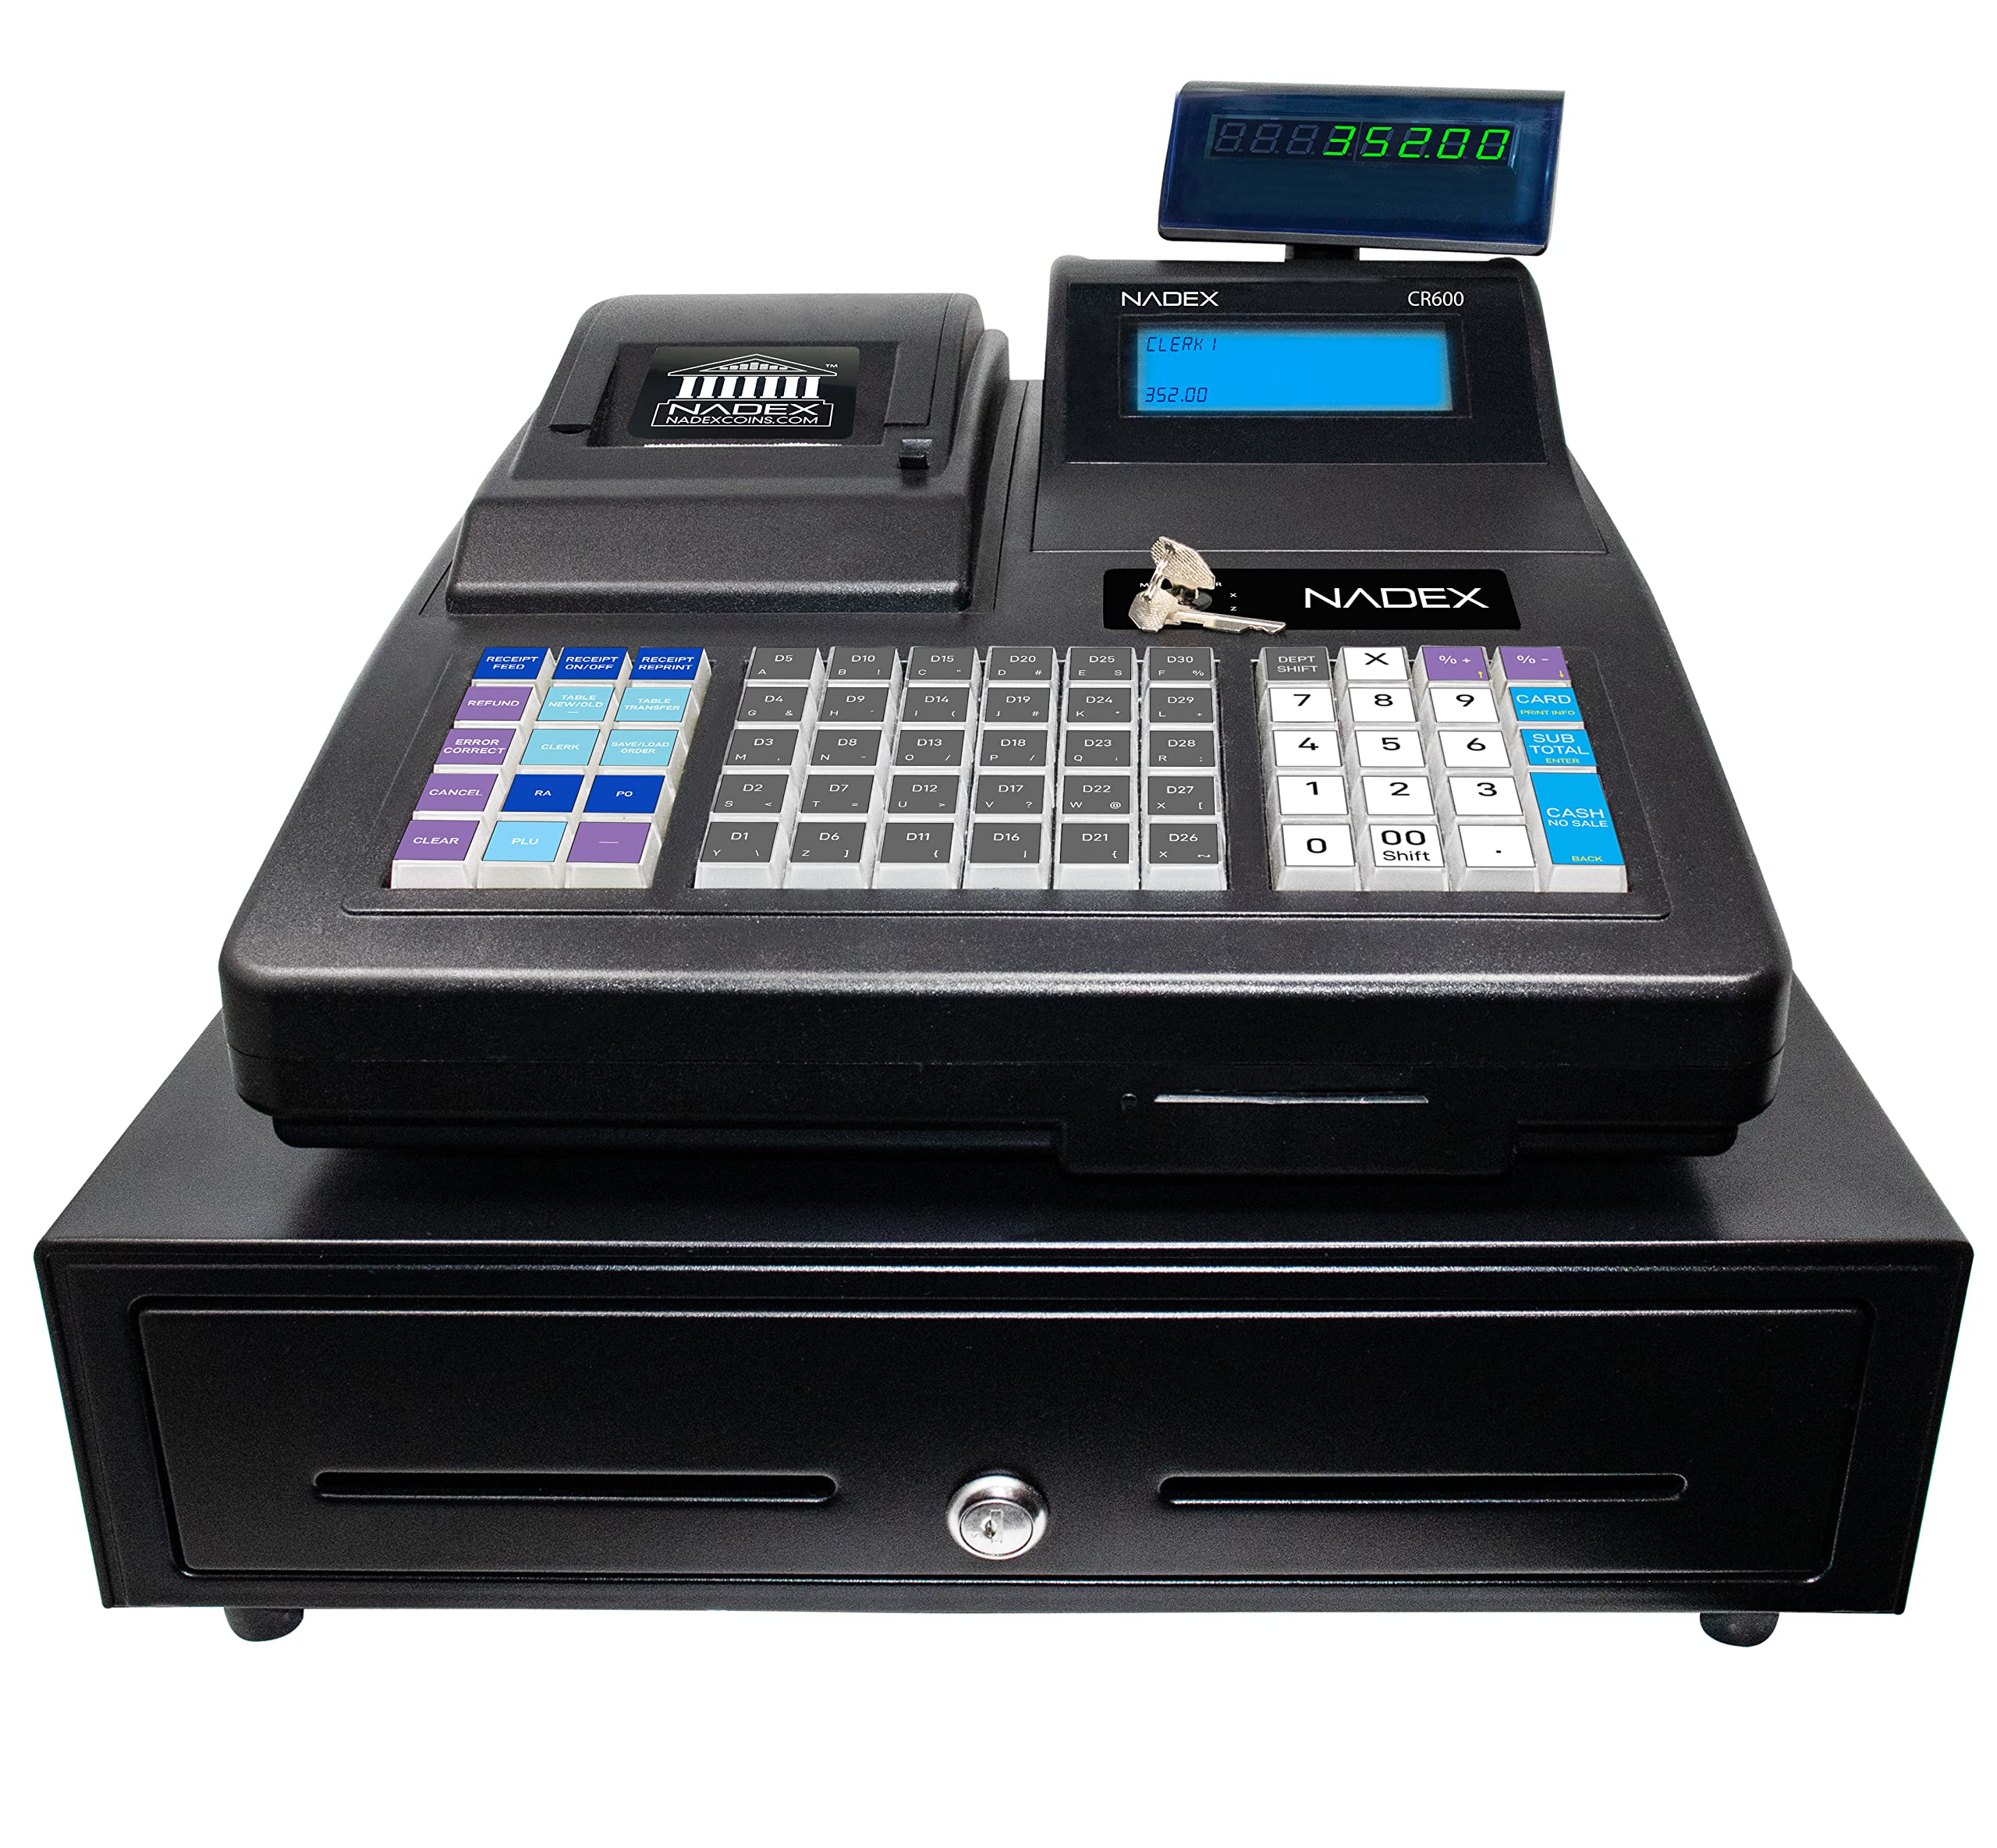
Image: The Nadex CR600 Cash Register, featuring its keyboard, display, and thermal printer slot.
Setup
Follow these steps to set up your Nadex CR600 Cash Register for first-time use.
1. Unpacking and Placement
Carefully remove all components from the packaging. Place the cash register on a stable, flat surface. Ensure adequate space for operation and ventilation.
2. Power Connection
Connect the power adapter to the cash register and then to a standard electrical outlet. The device will power on automatically or require a press of the power button.
3. Key Installation
The CR600 uses specific keys for different operational modes: Manager, Clerk, X-Read, and Z-Reset. Insert the appropriate key into the key slot and turn it to the desired position for programming or operation.

Image: Close-up of the key slot and different keys for the Nadex CR600, including SUP CLERK, SP MANAGER, and CASH DRAWER keys.
4. Loading Receipt Paper
The CR600 uses 58mm wide thermal paper rolls. Open the printer cover, place the paper roll as shown in the video below, and close the cover. Ensure the paper feeds correctly.
Video: Instructions on how to load receipt paper into the Nadex CR600 Cash Register.
5. Setting Time and Date
Accurate time and date settings are crucial for reporting. Refer to the video for detailed steps on how to configure these settings.
Video: Guide on setting the correct time and date on the CR600 cash register.
6. Presetting Tax Rates
Configure the tax rates applicable to your business. This ensures accurate calculations during transactions.
Video: Tutorial on how to preset tax rates on the Nadex CR600.
7. Setting Department Presets
Organize your products or services by setting up department presets for quick and efficient sales processing.
Video: Instructions for setting up department presets on the CR600 cash register.
8. Customizing Receipt Header/Footer
Personalize your receipts by customizing the header and footer with your business information or messages.
Video: Guide on how to customize the header and footer of receipts on the CR600.
9. Multiport Connections
The CR600 features multiple ports for connecting external devices such as barcode scanners, kitchen printers, scales, and for PC programming. Refer to the specific device manuals for connection instructions.
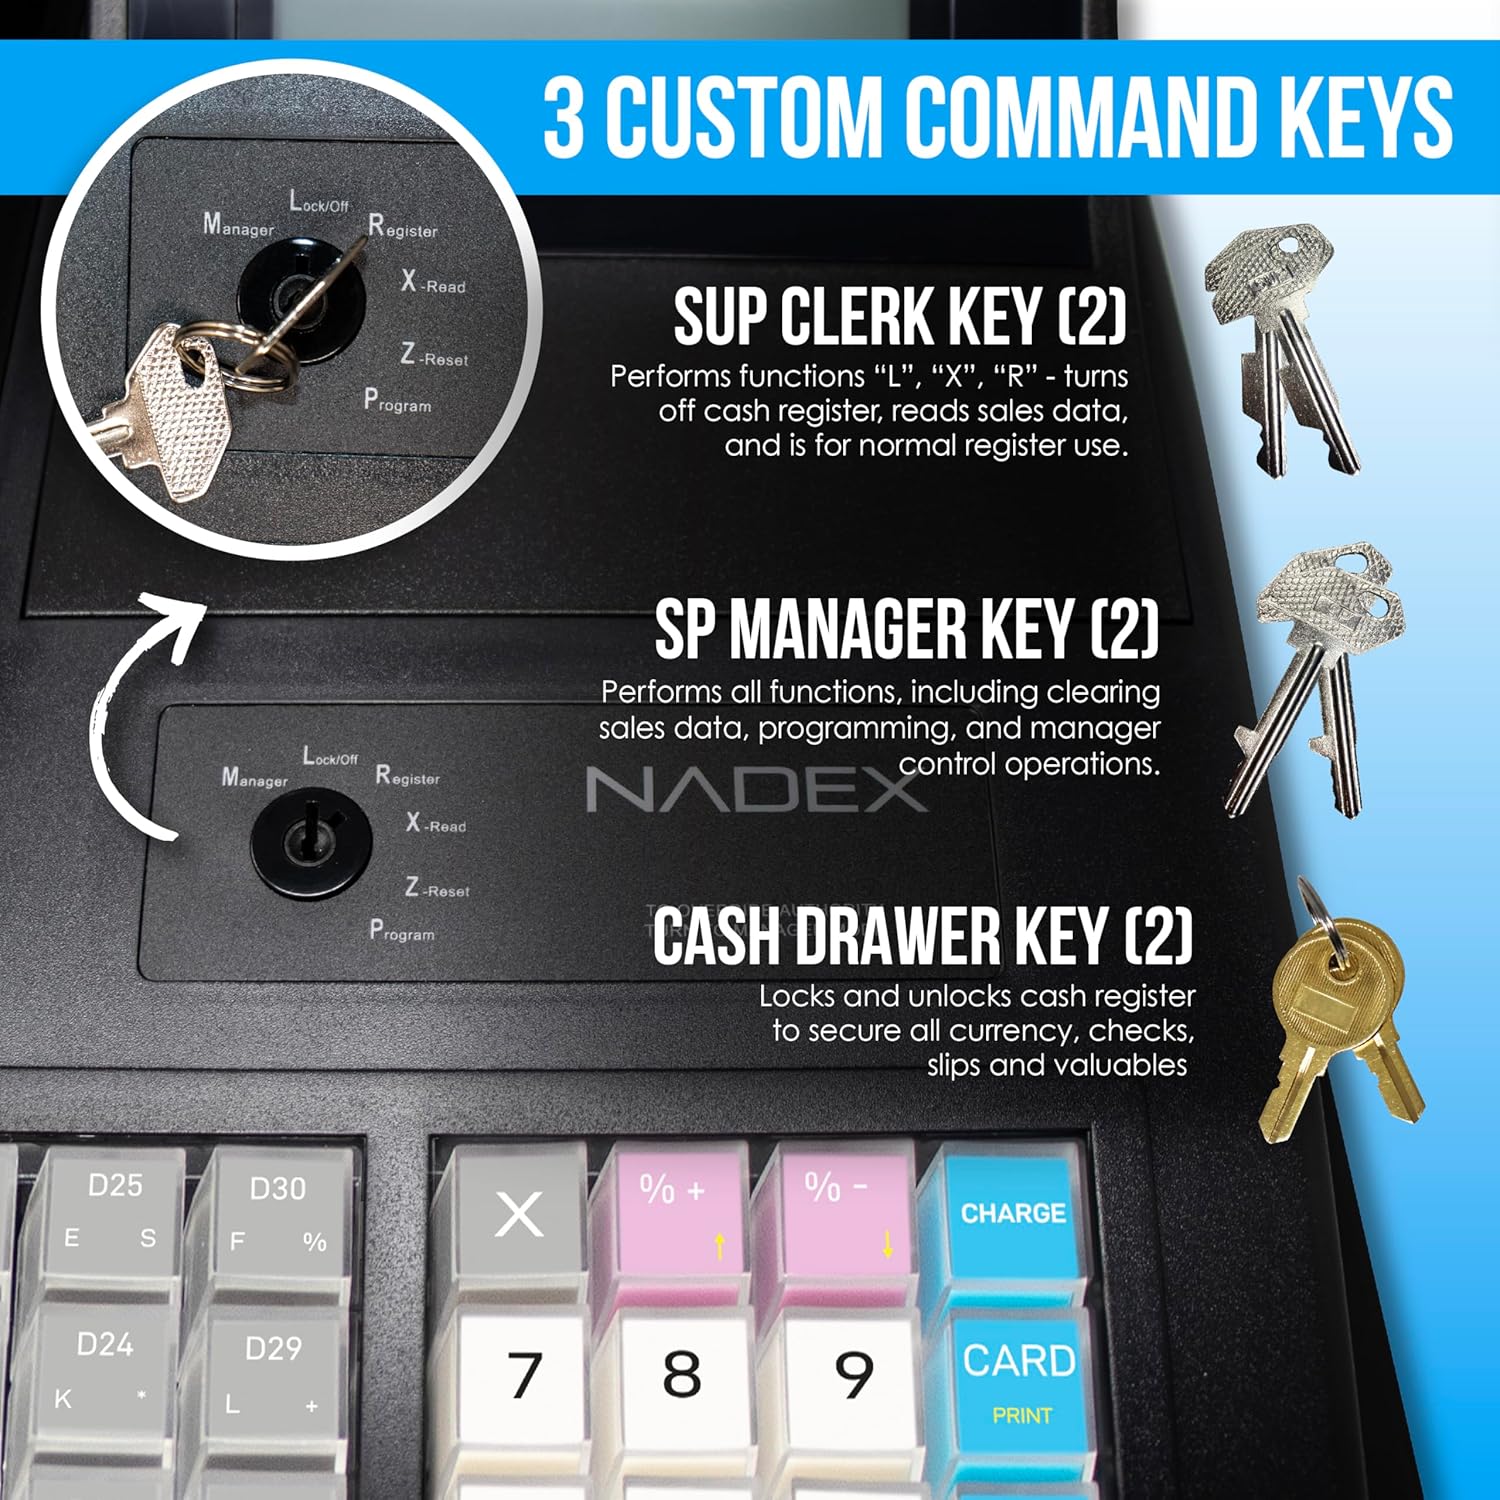
Image: The rear panel of the Nadex CR600, highlighting its PS/2, DK, COM, and USB-B connection ports.
Operating Instructions
This section covers the basic operations of the Nadex CR600 Cash Register.
1. Basic Sales Transaction
Perform standard sales transactions using the numeric keypad and department keys.
Video: Demonstrates how to perform basic sales transactions on the CR600.
2. Canceling a Transaction
Learn how to cancel a transaction if an error occurs or a customer changes their mind.
Video: Instructions on how to cancel a transaction on the CR600 cash register.
3. Processing Refunds
Follow these steps to process a refund for returned items.
Video: Guide on how to process a refund using the CR600.
4. Processing Split Payments
The CR600 supports multiple payment methods. Learn how to handle transactions involving split payments.
Video: Tutorial on processing split payments on the Nadex CR600.
5. Using the Cash Drawer
The heavy-duty steel cash drawer features 5 bill compartments, 8 coin compartments, and 2 check slots. It also has a removable coin tray for additional storage underneath.

Image: The open cash drawer of the Nadex CR600, displaying its 5 bill and 8 coin compartments.
Video: Overview of the Nadex CR600 Cash Register's 5 bill and 8 coin slots.
6. PLU Lookups, Departments, Cashiers, and Tables
The CR600 supports up to 9500 PLUs, 60 departments, 50 cashiers, and 50 tables, allowing for comprehensive inventory and sales management.
7. Reporting
Generate various reports including Electronic Journal, Financial, Departmental, PLU, Cashier, Hourly, Period, and Refund Reports to track your business performance.
Maintenance
Regular maintenance ensures the optimal performance and longevity of your cash register.
1. Cleaning
Wipe the exterior of the cash register with a soft, damp cloth. Avoid using abrasive cleaners or solvents. Regularly clean the thermal printer area to prevent paper jams and ensure clear printing.
2. Thermal Printer Care
Ensure only 58mm thermal paper is used. Replace paper rolls promptly when empty. Avoid pulling paper forcefully from the printer, as this can damage the print head.
3. Cash Drawer Care
Keep the cash drawer free of debris. Do not force the drawer open or closed. The drawer mechanism should operate smoothly.
4. Built-in Memory System
The Nadex CR600 features a built-in memory system that retains all programmed data, including transactions, even when unplugged or not in use for extended periods. This safeguards your critical information.

Image: The Nadex CR600 highlighting its built-in memory system, which retains programmed data even when unplugged.
Troubleshooting
If you encounter issues with your Nadex CR600, refer to the following common solutions.
- No Power: Ensure the power adapter is securely connected to both the cash register and a working electrical outlet. Check if the power button is pressed.
- Printer Not Printing: Verify that the thermal paper is loaded correctly and that the printer cover is closed. Check for any paper jams.
- Incorrect Calculations: Review your tax rate settings and PLU programming. Ensure all entries are accurate.
- Cash Drawer Not Opening: Ensure the cash register is powered on and the correct key is in the 'Register' position. Check for any obstructions in the drawer mechanism.
- Display Issues: Check the connections of the display units. The 7.5-inch LCD operator display and 8-digit rotating customer display should be clear.
For further assistance, refer to the support section or contact customer service.
Specifications
| Feature | Detail |
|---|---|
| Model Number | NXTE-1388 |
| Product Dimensions | 18.11 x 12.4 x 18.7 inches |
| Item Weight | 24.6 pounds |
| Cash Drawer | 5 Bill, 8 Coin Compartments, 2 Check Slots |
| Printer Type | 58mm Thermal Printer |
| Displays | 7.5-inch LCD Operator Display, 8-Digit Rotating Customer Display |
| Keys | 64 Keys |
| PLU Capacity | 9500 PLUs |
| Departments | 60 Departments |
| Cashiers | 50 Cashiers |
| Payment Methods | 20 Payment Methods |
| Tables | 50 Tables |
| Reports | Electronic Journal, Financial, Departmental, PLU, Cashier, Hourly, Period, Refund |
| Connectivity | Serial Port (for barcode scanner, kitchen printer, scale, PC programming) |
Warranty Information
For detailed warranty information regarding your Nadex CR600 Cash Register, please refer to the warranty card included with your product or contact Nadex customer support directly. Warranty terms and conditions may vary.
Support
Should you require further assistance or have questions not covered in this manual, please utilize the following support resources:
- USA Customer Support Phone Line: Refer to the contact information provided with your product for the dedicated support line.
- Online How-To Videos and Tutorials: A comprehensive library of instructional videos is available to guide you through various functions and troubleshooting steps.