
1. Introduction
This manual provides comprehensive instructions for the installation, operation, and maintenance of your Gebildet 22mm Momentary Push Button, Model E1380. This high-quality, waterproof, self-resetting metal push button features dual-color LED illumination and is designed for various applications including automotive, industrial control, and home appliances.
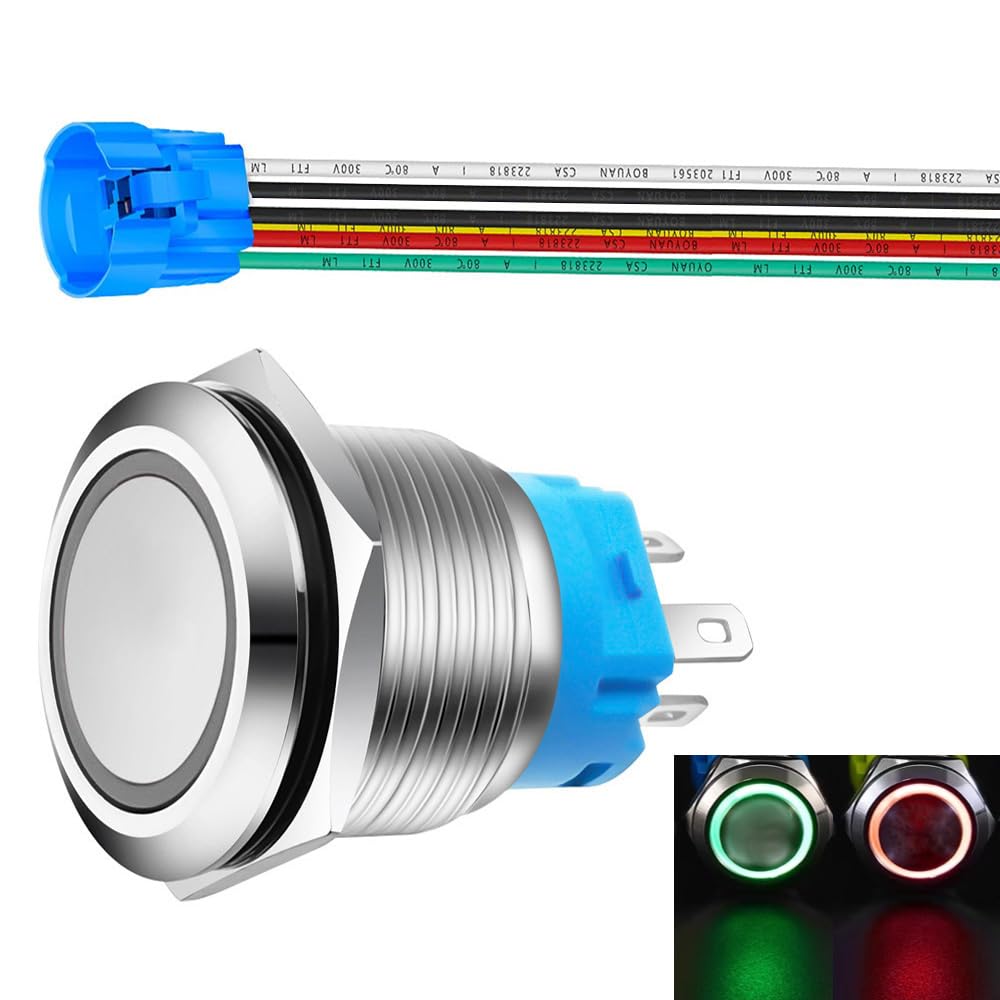
Image 1.1: Gebildet 22mm Momentary Push Button with wire socket and a visual representation of its momentary (push ON, release OFF) operation.
2. Product Features
- Momentary Action: Press and hold for ON, release for OFF.
- Durable Construction: Nickel-plated copper shell and silver alloy contacts ensure high conductivity and extended lifespan.
- Dual-Color LED: Integrated red and green LED indicator lights. The LED can be configured to show red in normal state and green when pressed, or vice-versa.
- High Protection Rating: IP65 waterproof and IK09 anti-vandalism rating, suitable for complex environments.
- Wide Application: Ideal for automotive, computer, instrumentation, doorbells, and various home appliances.
3. Safety Information
WARNING: Electrical shock hazard. Always disconnect power before installation or maintenance. Installation should be performed by a qualified professional if you are unsure about electrical wiring.
- Ensure the power supply matches the switch's rated voltage (110V-230VAC).
- Do not exceed the maximum current rating of 3A.
- Verify all connections are secure to prevent short circuits.
- Keep the product away from children.
4. Package Contents
The package typically includes:
- 1 x Gebildet 22mm Momentary Push Button (Model E1380)
- 1 x Wire Socket Connector with pre-attached wires
5. Specifications
| Specification | Value |
|---|---|
| Model Number | E1380 |
| Mounting Hole Size | 22mm (7/8") |
| Operation Type | Momentary (Self-Reset) |
| Contact Configuration | 1 Normally Open (NO), 1 Normally Closed (NC) - SPDT |
| LED Rating | 3A / 110V-230VAC |
| LED Life | 40,000 hours |
| Electrical Life | 100,000 cycles |
| Mechanical Life | 500,000 cycles |
| Protection Rating | IP65 (Waterproof), IK09 (Anti-Vandalism) |
| Shell Material | Nickel-plated copper |
| Contact Material | Silver alloy |
| Product Dimensions (L x W x H) | 22 x 10 x 2.2 cm (approx.) |
| Item Weight | 39 grams (approx.) |
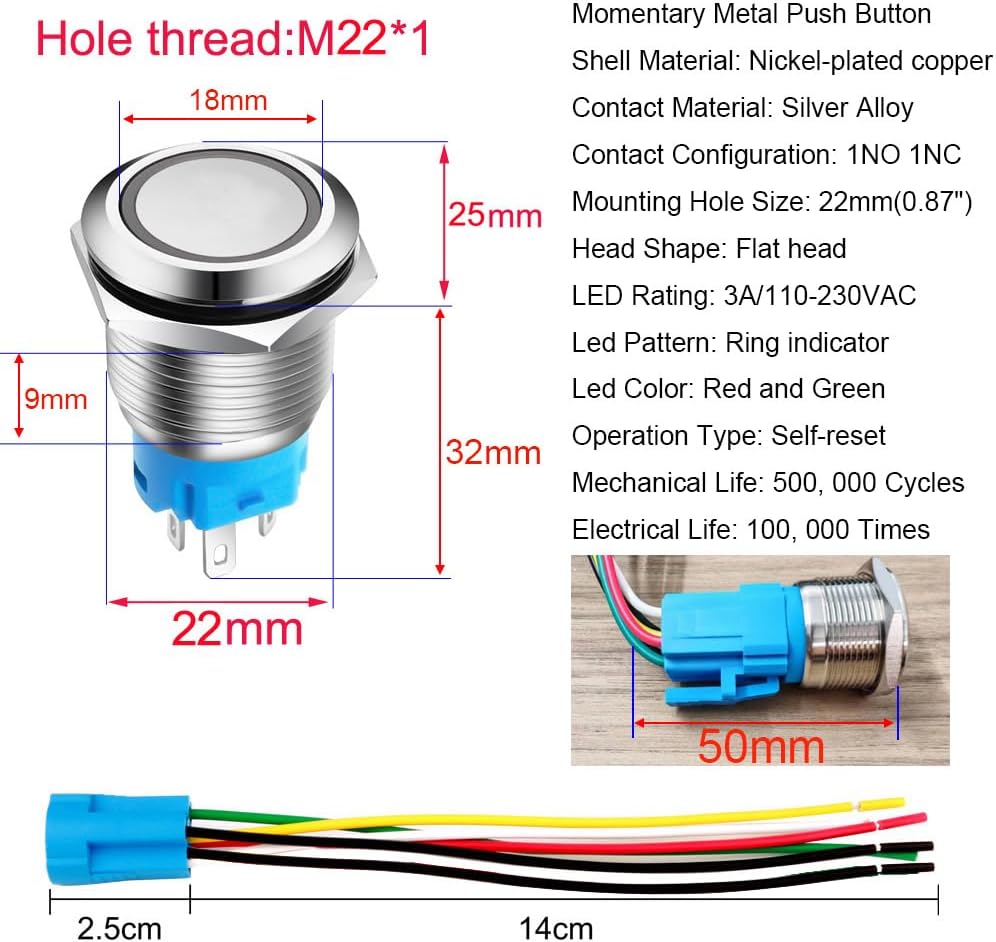
Image 5.1: Detailed dimensions of the push button, including mounting hole size (22mm) and overall length.
6. Setup and Installation
6.1 Mounting
- Drill a 22mm (7/8 inch) diameter hole in the desired mounting surface.
- Insert the push button into the hole from the front.
- Secure the button from the back using the provided nut. Ensure it is tightened firmly but do not overtighten.
6.2 Wiring
The push button comes with a wire socket connector for easy wiring. Refer to the diagrams below for connection details. The switch has 1 Normally Open (NO) and 1 Normally Closed (NC) contact, and separate terminals for the LED.

Image 6.1: View of the wire socket connector and the labeled terminals on the switch: C (Common), NO (Normally Open), NC (Normally Closed), and LED terminals (Red LED, Green LED).

Image 6.2: Example wiring for the push button. The button indicator light is red in the normal state (device OFF). When the button is pressed, the indicator light turns green, and the device activates. This is a common wiring configuration; consult a professional for different requirements.
Wiring Key:
- C (Common): Connect to one side of the power supply or the common terminal of your circuit.
- NO (Normally Open): This contact is open when the button is not pressed and closes when pressed.
- NC (Normally Closed): This contact is closed when the button is not pressed and opens when pressed.
- LED Terminals: These are for the internal LED. Connect to the appropriate voltage (110V-230VAC) to illuminate. The dual-color LED allows for flexible indication. For example, connect one LED terminal to power and the other to a common ground/neutral, and the second LED terminal to a different power source or switch output to change color.
For specific wiring configurations, especially for the dual-color LED, refer to the product's detailed wiring instructions or consult an electrician.
7. Operating Instructions
This is a momentary push button. Its operation is as follows:
- Press and Hold: When the button is pressed and held, the circuit connected to the NO contact will close, and the circuit connected to the NC contact will open. The LED indicator will illuminate according to its wiring.
- Release: When the button is released, it will automatically return to its original position. The NO contact will open, and the NC contact will close. The LED indicator will revert to its initial state.
The dual-color LED can be configured to indicate the switch's state (e.g., red for OFF/standby, green for ON/active).
8. Maintenance
The Gebildet Momentary Push Button is designed for durability and requires minimal maintenance.
- Cleaning: Periodically wipe the button surface with a soft, damp cloth. Avoid abrasive cleaners or solvents.
- Inspection: Regularly check for any signs of physical damage or loose connections.
- Environmental Protection: While rated IP65, avoid prolonged submersion or exposure to harsh chemicals to maximize lifespan.
9. Troubleshooting
| Problem | Possible Cause | Solution |
|---|---|---|
| Switch does not activate device | Incorrect wiring (NO/NC), no power to device, faulty device. | Verify wiring according to Section 6.2. Check power supply to the device. Test the device independently. |
| LED does not light up | Incorrect LED wiring, no power to LED, reversed polarity (less common for AC LED). | Ensure LED terminals are correctly connected to the power source (110V-230VAC). Check for loose connections. |
| Switch feels stiff or stuck | Debris lodged in mechanism, physical damage. | Inspect for foreign objects. If damaged, replacement may be necessary. |
10. Warranty and Support
For warranty information and technical support, please contact Gebildet customer service directly. Refer to your purchase documentation for contact details or visit the official Gebildet website.