Introduction
This manual provides detailed instructions for the safe and effective operation of your Clemas Telescopic Camping Light Z2. Please read this manual thoroughly before using the product and retain it for future reference.
The Clemas Z2 is a versatile, rechargeable LED camping light designed for various outdoor and indoor lighting needs. It features a telescopic design, multiple lighting modes, a magnetic base, and a built-in power bank function.
Safety Information
- Do not disassemble or modify the device. Unauthorized modifications can lead to hazards and void the warranty.
- Keep the device away from extreme temperatures, direct sunlight, and open flames.
- Avoid direct eye exposure to the LED light, as it can cause temporary vision impairment.
- Ensure the charging cable is properly connected to prevent electrical hazards.
- When collapsing the light, exercise caution to avoid pinching fingers. Refer to the image below for guidance.
- Dispose of the battery according to local regulations. Do not incinerate.

Image: Illustration demonstrating the correct way to collapse the light panels to prevent finger pinching.
Package Contents
Verify that all items are present in the package:
- Clemas Telescopic Camping Light Z2
- Type-C Charging Cable
- Ground Stakes (3 pieces)
- User Manual (this document)

Image: Contents of the Clemas Z2 package, showing the camping light, Type-C charging cable, ground stakes, and user manual.
Product Overview
The Clemas Z2 features a compact design that extends into a tall lighting solution. It includes adjustable light panels and a stable base.
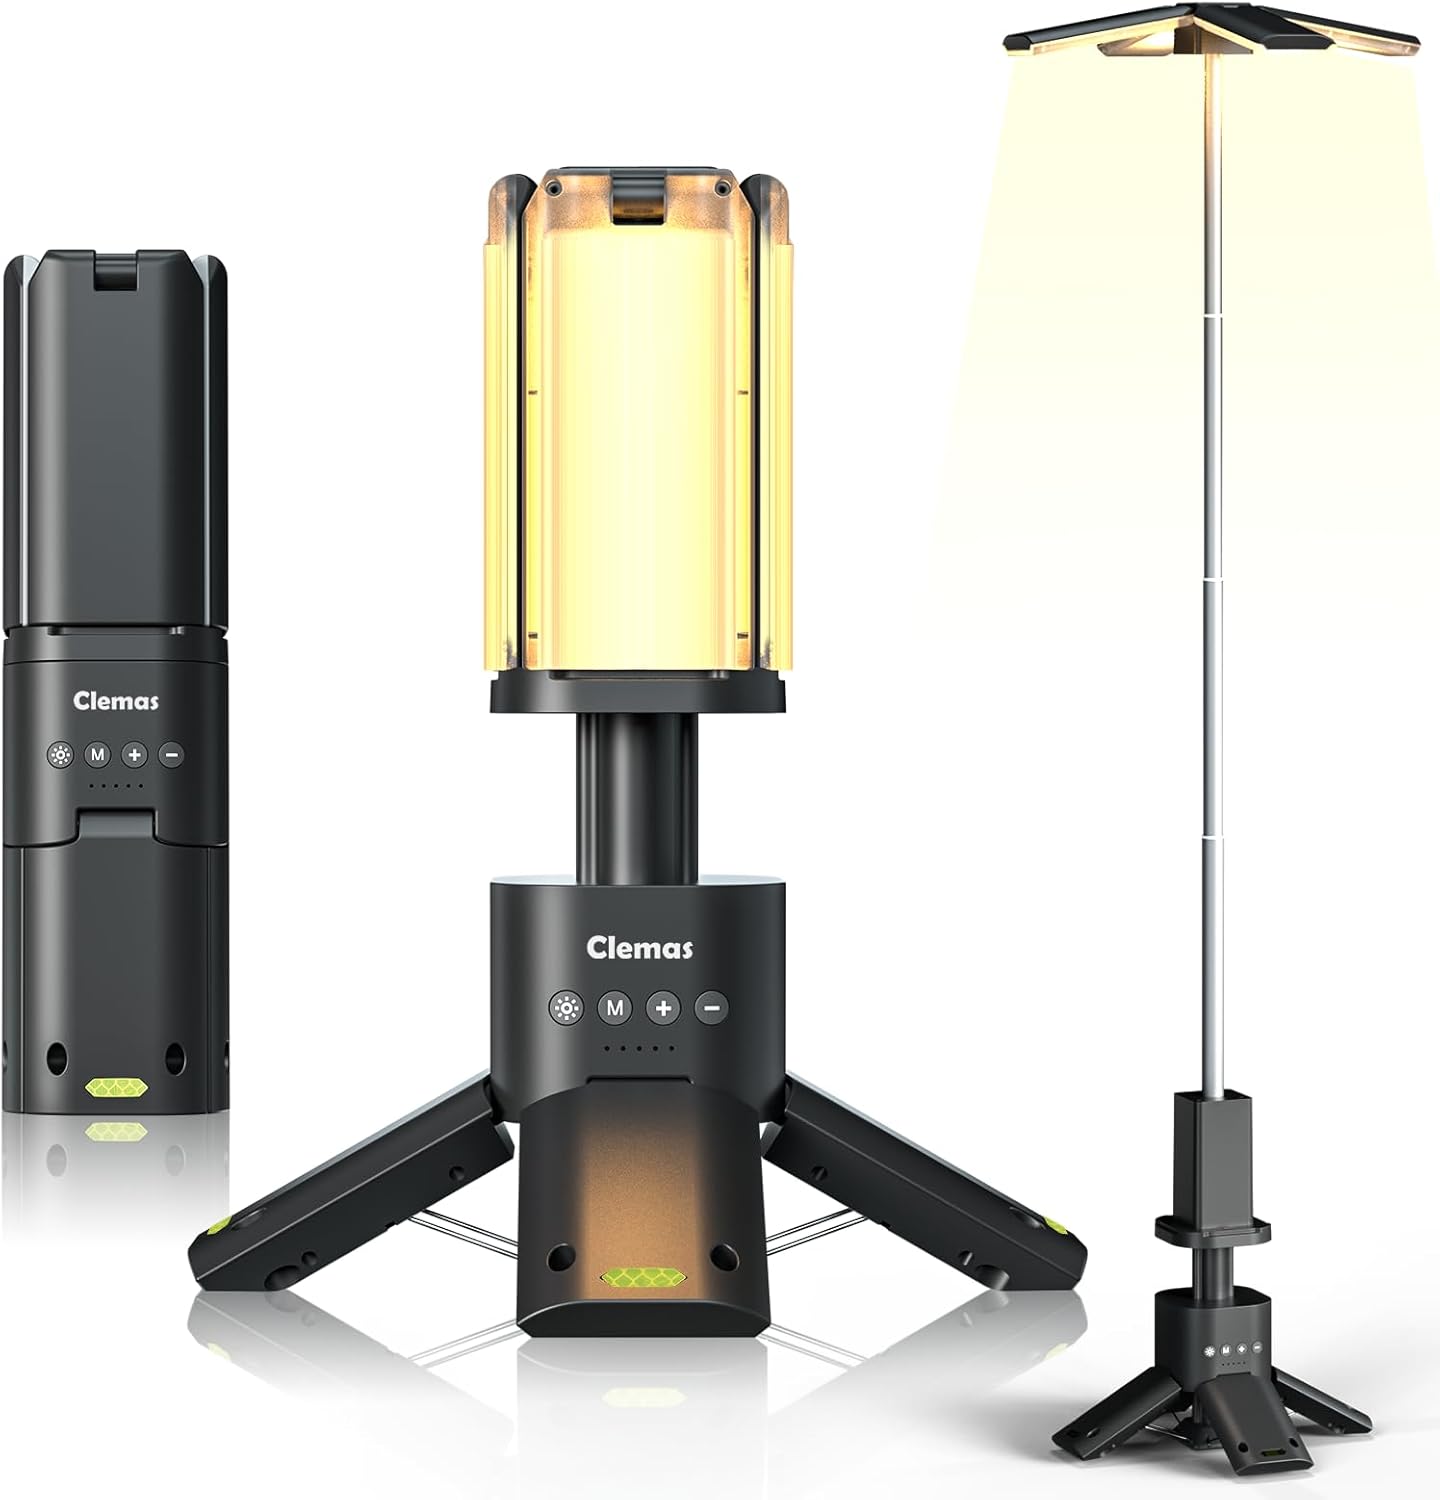
Image: The Clemas Z2 camping light shown in its compact, partially extended (tabletop), and fully extended configurations, highlighting its versatility.
Components:
- Telescopic Pole: Extends from 285 mm (11 inches) to 1100 mm (43 inches).
- Light Panels: Four leaf-shaped LED panels, adjustable 180° vertically and 270° horizontally.
- Control Panel: Located on the main body, with buttons for power, mode, brightness increase, and decrease.
- Battery Indicators: LEDs below the control buttons show charging status and power level.
- Magnetic Base: Six Neodymium magnets for attachment to metal surfaces.
- Anchoring Holes: Located on the base for securing with ground stakes.
- USB-C Input/USB-A Output: For charging the device and using it as a power bank.

Image: Detailed view of the control buttons (Power, Increase, Mode, Decrease) and battery indicators, along with an anchoring hole on the base for stability.
Setup
Initial Charging:
- Connect the provided Type-C charging cable to the charging port on the device.
- Connect the other end of the cable to a compatible USB power adapter (not included).
- The battery indicators will illuminate to show the charging progress. Charge fully before first use.
Assembling and Positioning:
- Unfold the Base: Gently pull out the three legs of the base until they lock into position, forming a stable tripod.
- Extend the Telescopic Pole: Hold the base firmly and pull the top section upwards to extend the telescopic pole to your desired height (up to 1100 mm / 43 inches).
- Adjust Light Panels: The four leaf-shaped light panels can be individually adjusted. Rotate them 180° vertically and 270° horizontally to direct light as needed.
- Securing the Light (Optional): For added stability, especially in windy conditions, use the provided ground stakes. Insert the stakes through the anchoring holes on the base into the ground.
- Magnetic Mounting (Optional): The base contains six Neodymium magnets, allowing the light to be attached to suitable metal surfaces like car hoods or workbenches.

Image: Illustration of the Clemas Z2's telescopic height adjustment (11 to 43 inches) and the rotational capabilities of its light panels (180° vertical, 270° horizontal).
Operating Instructions
Power On/Off:
- Press the Power Button (marked with a sun icon) to turn the light on or off.
- The light will remember the last used brightness and color mode.
Adjusting Brightness:
- With the light on, press the '+' Button to increase brightness.
- Press the '-' Button to decrease brightness.
- The light offers 9 stepless brightness levels.

Image: Visual representation of the 9-gear stepless brightness adjustment and the three available color temperature settings: Warm Light (1500K), Warm White Light (6000K), and Cool White Light (6500K).
Changing Lighting Modes/Color Temperature:
- Press the Mode Button (marked with 'M') to cycle through the available lighting modes:
- Warm Light (1500K)
- Warm White Light (6000K)
- Cool White Light (6500K)
- SOS Mode 1 (Flashing)
- SOS Mode 2 (Flashing)
- Top Flashlight (Press 5 times from off state to activate, or cycle through modes)

Image: Comparison of the Clemas Z2's light output at different color temperatures: Warm (1500K), Warm White (6000K), and Cool White (6500K).

Image: The Clemas Z2 demonstrating its emergency SOS mode, useful for roadside assistance or signaling.
Using as a Portable Power Supply:
- The Clemas Z2 can charge mobile devices via its USB-A output port.
- Connect your device's charging cable to the USB-A output port on the camping light.
- The light will provide power to your device.

Image: The Clemas Z2 functioning as a portable power bank, charging a smartphone from its 14000 mAh battery.
Maintenance
Cleaning:
- Wipe the device with a soft, damp cloth.
- Do not use abrasive cleaners or solvents.
- Ensure all ports are dry before charging.
Storage:
- Store the light in a cool, dry place when not in use.
- For long-term storage, charge the battery to approximately 50% every 3-6 months to maintain battery health.
Battery Care:
- The device uses a built-in Lithium-Ion battery.
- Avoid fully discharging the battery frequently to prolong its lifespan.
- If the battery life significantly decreases, it may be nearing the end of its service life.
Troubleshooting
| Problem | Possible Cause | Solution |
|---|---|---|
| Light does not turn on. | Battery is depleted. | Charge the device using the Type-C cable. |
| Light is dim or flickers. | Low battery level. | Recharge the device. |
| Cannot charge external devices. | Device battery is too low; incorrect cable. | Ensure the camping light has sufficient charge. Use a compatible USB-A cable for your external device. |
| Light panels are stiff to adjust. | Normal operation; minor friction. | Apply gentle, even pressure. Do not force movement beyond intended range. |
Specifications
| Feature | Detail |
|---|---|
| Model | Z2 |
| Battery Capacity | 14000 mAh (Lithium-Ion) |
| Brightness | 1500-6000 Lumens (Max 6000LM with all four lamps) |
| Color Temperature | 1500K (Warm), 6000K (Warm White), 6500K (Cool White) |
| Telescopic Height | 285 mm (11 inches) to 1100 mm (43 inches) |
| Light Panel Adjustment | 180° Vertical, 270° Horizontal |
| Water Resistance | Body: IPX5, Lamps: IPX7 |
| Charging Input | 5V/2A 10W Max (USB-C) |
| Power Bank Output | 5V/2.4A 12W Max (USB-A) |
| Item Weight | 980 Grams (2.16 pounds) |
| Product Dimensions (Collapsed) | 75 mm x 75 mm x 285 mm (2.95"L x 2.95"W x 11"H) |
| Material | Polycarbonate (PC) |
| Certifications | CE, FCC |
Warranty and Support
For warranty information and customer support, please refer to the official Clemas website or contact your retailer. Keep your purchase receipt as proof of purchase.
If you encounter any issues not covered in the troubleshooting section, please contact Clemas customer service for assistance.


