1. Introduction
This manual provides important information for the safe and efficient operation, maintenance, and troubleshooting of your Parkside 2-in-1 Electric Scarifier 1800 A1. Please read these instructions carefully before first use and keep them for future reference.
2. Safety Instructions
Always observe the following safety precautions to prevent injury and damage to the product.
- Read the entire manual before operating the machine.
- Wear appropriate personal protective equipment (PPE), including eye protection, sturdy footwear, and gloves.
- Ensure the work area is clear of stones, sticks, wires, and other debris that could be thrown by the machine.
- Keep children and bystanders away from the operating area.
- Never operate the machine in wet conditions or rain.
- Always disconnect the power supply before cleaning, maintenance, or when changing accessories.
- Inspect the power cord for damage before each use. Do not use if damaged.
- Do not modify the machine. Use only original spare parts and accessories.
- In case of malfunction, switch off the machine immediately and disconnect it from the power supply.
3. Product Overview
The Parkside 2-in-1 Electric Scarifier 1800 A1 is designed for effective lawn care, combining scarifying and dethatching functions. It features two interchangeable rollers for versatile use.
3.1 Components
- Main Unit (Motor Housing)
- Height-Adjustable Handlebar
- Scarifier Roller (with 10 double stainless steel blades)
- Fan Roller (with 44 flexible steel spring claws)
- Collection Bag (approx. 50 L)
- Central Depth Adjustment Lever
- Safety Switch
- Power Cord Strain Relief
- Rear Wheels
- Wall Mount (accessory)
3.2 Key Features
- 2-in-1 Functionality: Easily switch between scarifying (blade roller) and dethatching/aerating (fan roller).
- Powerful Motor: 1800 W motor for efficient operation on lawns up to 600 m².
- Adjustable Depth: 4 central working depth levels plus a transport position.
- Ergonomic Design: Height-adjustable handlebar with soft grip for comfortable use.
- Durable Construction: Robust, impact-resistant plastic housing.
- Convenient Storage: Foldable handlebar and included wall mount for space-saving storage.
- Safety Features: Safety switch and automatic motor overload protection.
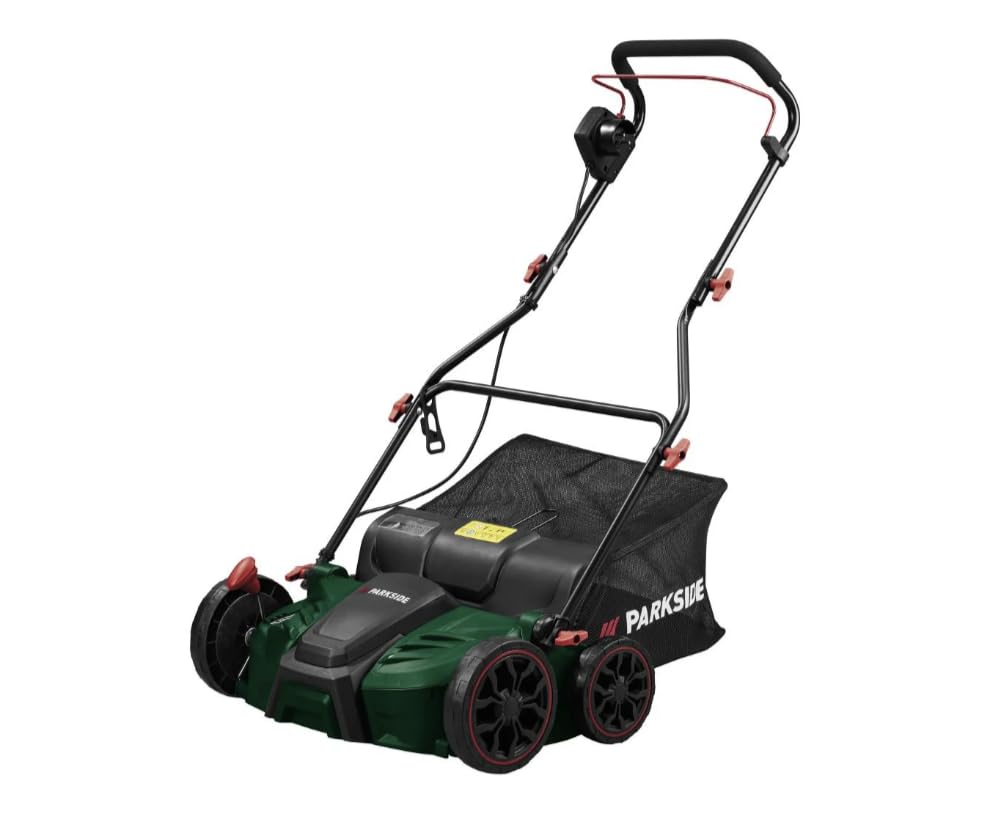
Image 1: Overview of the Parkside 2-in-1 Electric Scarifier 1800 A1, showing the main unit, handlebar, collection bag, and interchangeable rollers.
4. Setup
4.1 Unpacking and Assembly
- Carefully remove all components from the packaging.
- Assemble the handlebar sections, ensuring all locking mechanisms are securely engaged.
- Attach the handlebar to the main unit. Adjust the height to a comfortable working position.
- Mount the collection bag frame and attach the bag.
4.2 Roller Installation
The machine comes with two interchangeable rollers: the scarifier roller and the fan roller.
- Ensure the machine is switched off and disconnected from the power supply.
- Turn the machine on its side to access the roller compartment.
- Locate the roller locking mechanism (refer to the diagram in your printed manual for exact location).
- Release the locking mechanism and carefully remove the currently installed roller.
- Insert the desired roller (scarifier or fan roller), ensuring it clicks securely into place.
- Close the roller compartment cover.
Note: The scarifier roller is equipped with blades for deeper cutting into the turf, while the fan roller uses spring claws to gently remove moss and thatch.
4.3 Depth Adjustment
The working depth can be adjusted using the central lever on the side of the machine.
- There are 4 working depth settings for scarifying or dethatching.
- An additional transport position lifts the rollers completely off the ground for easy movement.
- Select a shallower depth for initial passes or lighter dethatching, and gradually increase for more intensive scarifying.
5. Operating Instructions
5.1 Preparing the Lawn
- Mow your lawn to a short height (approx. 2-4 cm) a few days before scarifying/dethatching.
- Ensure the lawn is dry. Operating on wet grass can clog the machine and reduce effectiveness.
- Remove any large debris, stones, or toys from the lawn.
5.2 Starting and Stopping
- Connect the power cord to a suitable outdoor extension cord, ensuring the strain relief is properly used.
- Plug the extension cord into a grounded power outlet.
- To start, press and hold the safety button, then pull the switch lever towards the handlebar.
- To stop, release the switch lever. The motor will stop automatically.
5.3 Working with the Machine
- Begin working at the edge of the lawn, moving in straight, overlapping lines.
- Push the machine at a steady, moderate pace. Do not force it.
- For scarifying, it is often beneficial to make two passes: one lengthwise and one crosswise, adjusting the depth as needed.
- Empty the collection bag regularly to maintain optimal performance and prevent clogging.
- Avoid operating the machine on slopes that are too steep. Work across slopes, not up and down.
6. Maintenance
Regular maintenance ensures the longevity and optimal performance of your scarifier.
6.1 Cleaning
- Always disconnect the machine from the power supply before cleaning.
- Remove grass clippings, moss, and soil from the housing, rollers, and collection bag after each use.
- Use a brush or a damp cloth for cleaning. Do not use high-pressure cleaners or running water directly on the machine.
- Ensure all ventilation openings are clear of debris.
6.2 Roller Inspection and Replacement
- Regularly inspect the blades of the scarifier roller and the claws of the fan roller for wear or damage.
- Worn or damaged rollers should be replaced immediately to ensure effective operation and safety.
- Refer to section 4.2 for roller installation/removal instructions. Use only genuine Parkside replacement rollers.
6.3 Storage
- Clean the machine thoroughly before storing.
- Store the machine in a dry, well-ventilated area, protected from frost and direct sunlight.
- The handlebar can be folded for space-saving storage.
- Utilize the included wall mount for convenient storage.
7. Troubleshooting
This section addresses common issues you might encounter.
| Problem | Possible Cause | Solution |
|---|---|---|
| Machine does not start. | No power supply; Safety switch not engaged; Motor overload protection activated. | Check power connection; Ensure safety button and lever are pressed correctly; Allow motor to cool down, then restart. |
| Poor scarifying/dethatching performance. | Rollers worn; Depth setting too shallow; Collection bag full; Wet lawn. | Inspect/replace rollers; Adjust to a deeper setting; Empty collection bag; Wait for lawn to dry. |
| Machine vibrates excessively. | Damaged or unbalanced roller; Debris caught in roller. | Disconnect power, inspect and clean roller; Replace damaged roller. |
| Motor stops during operation. | Motor overload; Obstruction. | Disconnect power, clear any obstructions; Allow motor to cool down. Reduce working depth or speed. |
If the problem persists after attempting these solutions, contact customer support or a qualified technician.
8. Technical Specifications
| Model | 1800 A1 |
| Power Connection | 1800 W |
| Voltage | 230 V |
| Blade Speed | 3600 rpm |
| Working Width | Max. 37 cm |
| Collection Bag Volume | Approx. 50 L |
| Recommended Lawn Area | Up to 600 m² |
| Dimensions (Scarifier) | Approx. 1050 x 605 x 930 mm (L x W x H) |
| Weight (Scarifier) | Approx. 9 kg |
| Material (Housing) | Plastic |
| Material (Rollers) | Steel |
9. Warranty and Support
Information regarding warranty terms and customer support is typically provided in a separate document included with your purchase or available on the manufacturer's official website. Please refer to those resources for detailed warranty coverage and contact information for technical assistance or spare parts.


