1. Important Safety Information
Read all safety warnings and instructions carefully before using this product. Failure to follow these instructions may result in electric shock, fire, or serious injury. Keep this manual for future reference.
- Always ensure the device is in good working condition before use.
- Do not attempt to measure voltages or currents exceeding the specified maximum limits.
- Use caution when working with live circuits.
- Replace batteries promptly when the low battery indicator appears.
- Do not operate the device in wet environments or explosive atmospheres.
- Ensure test leads are properly connected and undamaged.
2. Product Overview
The MGL MASTECH MS8236 is a versatile 2-in-1 instrument combining a digital multimeter and a network cable track tester. It is designed for electrical measurements, network cable diagnostics, and telephone line checks.

Image: The Mastech MS8236 main unit (left) and the cable tracker receiver (right).
Key Features:
- 2000 Counts Display
- Auto & Manual Ranging
- Auto Power Off
- Non-Contact Voltage (NCV) Detector
- Diode Test (Open Voltage 1.7V)
- Continuity Buzzer (<70Ω)
- Data Hold Function
- Low Battery Display
- Display Backlight
- Network Cable Check (Open circuits, shorts, miss-wires, reversals, split pairs, shield detection)
- Phone Check (Identify Busy, Ringing, or Clear state)
- Tone Generator for cable tracking
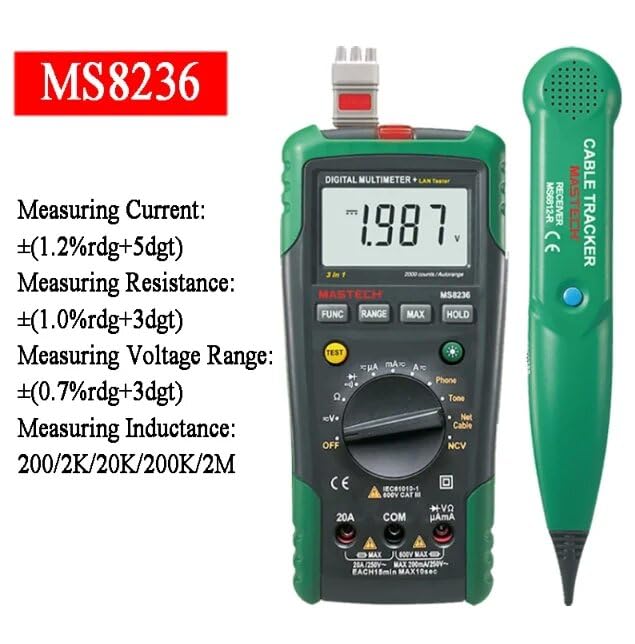
Image: The Mastech MS8236 main unit displaying its measurement capabilities for current, resistance, and voltage.
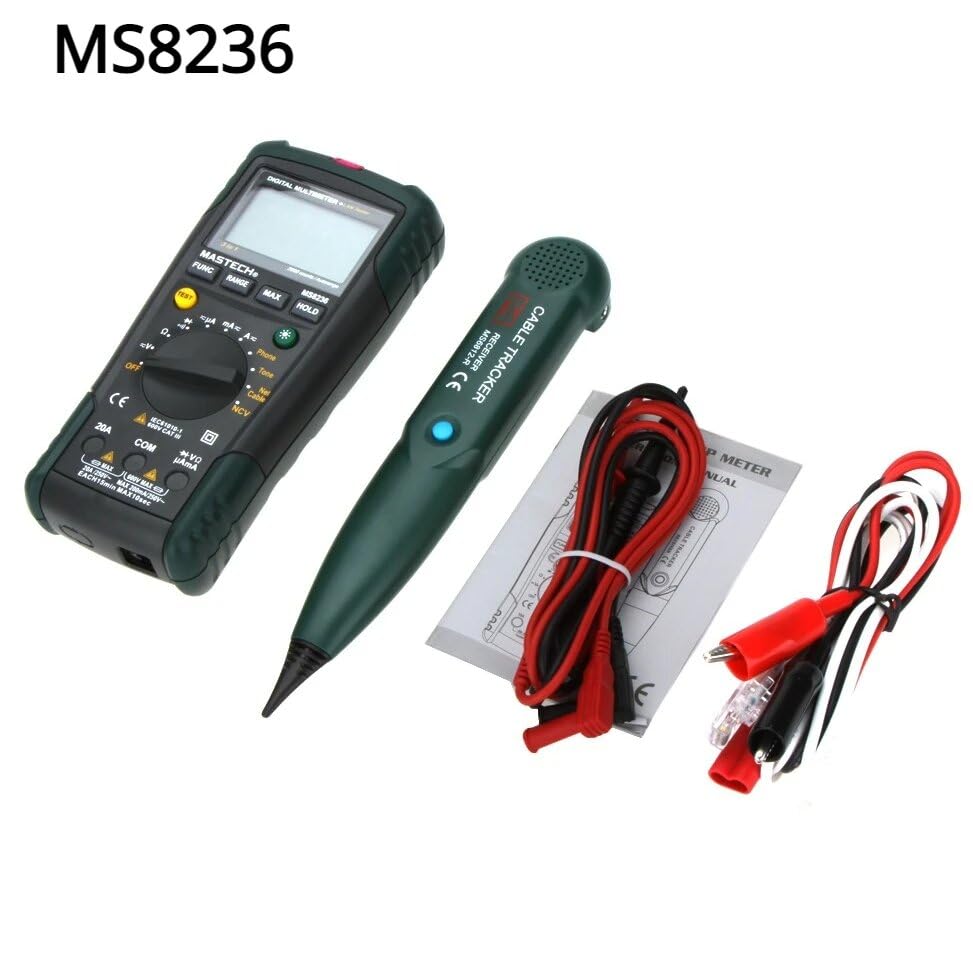
Image: The Mastech MS8236 device, cable tracker, test leads, and network cable adapter, showing all included components.
3. Setup
3.1 Battery Installation
The MS8236 requires 2 LR44 batteries (included) for operation. To install or replace batteries:
- Ensure the device is powered off.
- Locate the battery compartment cover on the back of the device.
- Use a screwdriver to open the compartment.
- Insert the LR44 batteries, observing correct polarity (+/-).
- Close the battery compartment securely.
3.2 Connecting Test Leads
For multimeter functions, connect the test leads as follows:
- Insert the black test lead into the COM (Common) jack.
- Insert the red test lead into the VΩmA jack for voltage, resistance, and current measurements up to 200mA.
- For current measurements up to 10A, insert the red test lead into the 10A jack.
4. Operating Instructions
Turn the rotary switch to the desired function to begin measurements.
4.1 Multimeter Functions
- DC/AC Voltage Measurement (V~ / V-):
- Connect test leads as described in Section 3.2.
- Turn the rotary switch to the V~ (AC Voltage) or V- (DC Voltage) position.
- Touch the test probes to the circuit points to be measured. The reading will appear on the display.
- DC/AC Current Measurement (A~ / A-):
- Connect test leads to the appropriate current jacks (VΩmA for mA, 10A for A).
- Turn the rotary switch to the A~ (AC Current) or A- (DC Current) position.
- Open the circuit and connect the meter in series with the load. The reading will appear on the display.
- Resistance Measurement (Ω):
- Connect test leads to COM and VΩmA jacks.
- Turn the rotary switch to the Ω position.
- Touch the test probes across the component to be measured. Ensure the circuit is de-energized.
- Continuity Test:
- Connect test leads to COM and VΩmA jacks.
- Turn the rotary switch to the continuity symbol (speaker icon).
- Touch the test probes to the points to be tested. A buzzer will sound if continuity exists (resistance less than 70Ω).
- Diode Test:
- Connect test leads to COM and VΩmA jacks.
- Turn the rotary switch to the diode symbol.
- Connect the red probe to the anode and the black probe to the cathode of the diode. The forward voltage drop will be displayed. Reverse the probes to check for open circuit.
- Non-Contact Voltage (NCV) Detection:
- Turn the rotary switch to the NCV position.
- Move the top part of the multimeter near a live AC voltage source. The NCV indicator will light up and an audible alarm will sound if AC voltage is detected.
4.2 Network Cable Track Tester Functions
The MS8236 includes a cable tracker receiver and a network cable test function.
- Network Cable Check:
- Connect one end of the network cable to the RJ45 port on the main unit.
- Connect the other end of the network cable to the remote unit (if applicable, or directly to the main unit for short cables).
- Turn the rotary switch to the "Net Cable" position.
- Press the "TEST" button. The display will show the wiring status (open, short, miss-wire, reversal, split pair, shield detection). Refer to the display codes for detailed fault identification.
- Phone Check:
- Connect the telephone line to the RJ11 port on the main unit.
- Turn the rotary switch to the "Phone" position.
- The display will indicate the state of the telephone line: "Busy", "Ringing", or "Clear".
- Tone Generation for Cable Tracking:
- Connect the test leads or RJ11/RJ45 connector to the cable you wish to trace.
- Turn the rotary switch to the "Tone" position. The main unit will emit an audible tone.
- Use the separate cable tracker receiver to follow the tone along the cable path to locate it or diagnose breaks.
5. Maintenance
5.1 Cleaning
Wipe the device with a dry, soft cloth. Do not use abrasives or solvents.
5.2 Battery Replacement
When the low battery indicator appears on the display, replace the batteries as described in Section 3.1. Dispose of old batteries responsibly.
5.3 Fuse Replacement
If the current measurement function fails, the fuse may need replacement. Refer to the specifications for the correct fuse type and rating. Fuse replacement should only be performed by qualified personnel.
6. Troubleshooting
- No Display / Device Not Turning On:
- Check if batteries are correctly installed and have sufficient charge. Replace if necessary.
- Ensure the rotary switch is turned to an ON position.
- Incorrect Readings:
- Verify test leads are properly connected to the correct jacks for the selected function.
- Ensure the correct measurement range is selected (if not in auto-ranging mode).
- Check for damaged test leads.
- Ensure the circuit is de-energized for resistance and continuity tests.
- Network Cable Test Fails:
- Ensure both ends of the cable are securely connected.
- Check the cable for visible damage.
- Verify the remote unit (if used) has power.
- No Tone from Cable Tracker:
- Ensure the main unit is set to "Tone" function.
- Check the cable connection to the main unit.
- Verify the cable tracker receiver has power and is functioning.
7. Specifications
The following table details the technical specifications of the MGL MASTECH MS8236.

Image: Detailed specifications table for the Mastech MS8236, including ranges, resolutions, and accuracies for various measurements.
| Feature | Detail |
|---|---|
| Display | 2000 Counts |
| Ranging | Auto & Manual |
| Power Source | 2 LR44 batteries (included) |
| Auto Power Off | Yes |
| Non-Contact Voltage Detector | Yes |
| Continuity Buzzer | <70Ω |
| Data Hold | Yes |
| Display Backlight | Yes |
| Product Dimensions | 20 x 15 x 25 cm |
| Item Weight | 1 Kilogram |
| Operating Temperature | Up to 50 Degrees Celsius |
| Certifications | CE, RoHS, UL |
| Country of Origin | Taiwan |
| Measurement | Range | Resolution | Accuracy |
|---|---|---|---|
| DC Voltage | 200mV/2V/20V/200V/600V | 0.1mV/1mV/10mV/100mV/1V | ±(0.5%+5) |
| AC Voltage | 200mV/2V/20V/200V/600V | 0.1mV/1mV/10mV/100mV/1V | ±(0.8%+5) |
| DC Current | 200µA/2000µA/20mA/200mA/2A/10A | 0.1µA/1µA/10µA/0.1mA/1mA/10mA | ±(1.2%+5) / ±(2.0%+10) |
| AC Current | 200µA/2000µA/20mA/200mA/2A/10A | 0.1µA/1µA/10µA/0.1mA/1mA/10mA | ±(1.5%+5) / ±(3.0%+10) |
| Resistance | 200Ω/2kΩ/20kΩ/200kΩ/2MΩ/20MΩ | 0.1Ω/1Ω/10Ω/100Ω/1kΩ/10kΩ | ±(1.0%+5) / ±(1.5%+5) |
8. Warranty & Support
8.1 Warranty Information
This Mastech MS8236 product comes with a 1-year warranty from the date of purchase. The warranty covers manufacturing defects and material faults under normal use. It does not cover damage caused by misuse, accident, unauthorized modification, or neglect.
8.2 Customer Support
For technical assistance, warranty claims, or product inquiries, please contact your retailer or the manufacturer's customer service department. Please have your model number (MS8236) and proof of purchase available when contacting support.


