
1. Introduction
This manual provides instructions for the safe and effective operation of the Mastech MS2006B Digital AC Clamp Leakage Current Meter. This device is designed for measuring AC leakage current, offering a reliable tool for electrical testing and troubleshooting.
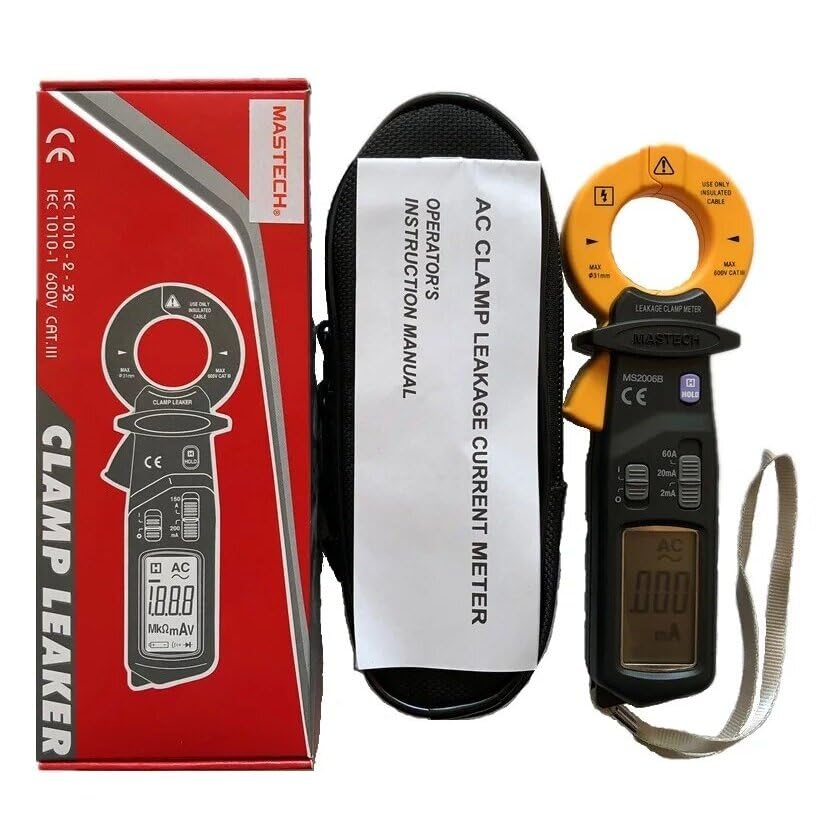
Image 1.1: The Mastech MS2006B Digital AC Clamp Leakage Current Meter, shown with its protective carrying case and instruction manual, alongside its retail packaging.
2. Safety Information
To ensure safe operation, please read and understand all safety warnings and operating instructions before using the meter. Failure to observe these warnings can result in severe injury or damage to the instrument.
- Always adhere to local and national safety codes.
- Do not use the meter if it appears damaged or if the insulation is compromised.
- Ensure the meter's range is appropriate for the measurement being taken.
- Avoid contact with live circuits when replacing batteries or opening the case.
- Keep fingers behind the finger guards during operation.
- Do not operate the meter in explosive gas, vapor, or dust environments.
3. Product Features
The Mastech MS2006B offers several key features for efficient and accurate measurements:
- Display: 2000 counts digital display for clear readings.
- Jaw Opening: Maximum jaw opening of Φ31mm (1.2 inches) to accommodate various cable sizes.
- Auto Power Off: Automatically powers off after a period of inactivity to conserve battery life.
- Data Hold: Freezes the displayed reading for convenient recording.
- Low Battery Display: Indicates when battery replacement is needed.
- AC Current Ranges: Includes 60A, 20mA, and 2mA measurement ranges.

Image 3.1: A clear front view of the Mastech MS2006B meter, highlighting its digital display, rotary switch for range selection, and the clamp jaw.
4. Components and Packaging Contents
Upon unpacking, verify that all items listed below are present and undamaged:
- Mastech MS2006B Digital AC Clamp Leakage Current Meter
- Protective Carry Bag
- Calibration Certificate
- Quick Start Guide
- 2 x 1.5V LR44 Batteries (pre-installed or included separately)

Image 4.1: An informational diagram detailing the main applications, contents, and packaging information for the MS2006B meter.
5. Setup
5.1 Battery Installation
The MS2006B meter requires two (2) LR44 1.5V batteries for operation. These batteries are typically included with the device.
- Locate the battery compartment cover on the back of the meter.
- Use a suitable tool (e.g., a small screwdriver or coin) to open the battery compartment.
- Insert the two LR44 batteries, observing the correct polarity (+ and -) as indicated inside the compartment.
- Replace the battery compartment cover and secure it firmly.

Image 5.1: An internal view of the MS2006B, illustrating the battery compartment and the meter's internal components.
6. Operating Instructions
6.1 Powering On/Off
To power on the meter, rotate the rotary switch from the 'OFF' position to any desired measurement range (e.g., 60A, 20mA, 2mA). To power off, rotate the switch back to the 'OFF' position.
6.2 AC Leakage Current Measurement
- Select the appropriate AC current range (60A, 20mA, or 2mA) using the rotary switch. Start with the highest range if the current value is unknown.
- Open the clamp jaw by pressing the trigger.
- Enclose the single conductor (not multiple conductors) through which the leakage current is to be measured within the clamp jaw. Ensure the jaw is fully closed.
- Read the current value displayed on the LCD. If the reading is too low for the selected range, switch to a lower range for better resolution.
6.3 Data Hold Function
Press the 'HOLD' button to freeze the current reading on the display. Press the 'HOLD' button again to release the reading and resume live measurement.
6.4 Auto Power Off
The meter is equipped with an Auto Power Off feature to conserve battery life. If no operation is performed for approximately 15 minutes, the meter will automatically power off. To reactivate the meter, rotate the rotary switch to 'OFF' and then back to a measurement range, or press any button.
7. Maintenance
7.1 Cleaning
Wipe the meter's case with a damp cloth and a mild detergent. Do not use abrasives or solvents. Ensure the meter is completely dry before use.
7.2 Battery Replacement
When the low battery indicator appears on the display, replace the batteries as described in Section 5.1. Always use two new LR44 1.5V batteries.
7.3 Storage
If the meter is not to be used for an extended period, remove the batteries to prevent leakage and store the meter in a cool, dry place away from direct sunlight.
8. Troubleshooting
- No Display: Check battery installation and ensure batteries are not depleted. Replace if necessary.
- Inaccurate Readings: Ensure the clamp jaw is fully closed around a single conductor. Verify the correct measurement range is selected.
- Meter Does Not Power On: Confirm batteries are correctly installed and charged. Rotate the function switch to an 'ON' position.
9. Specifications
| Parameter | Value |
|---|---|
| Display | 2000 Counts |
| Jaw Opening | Φ31mm (1.2 inches) |
| AC Current Ranges | 60A, 20mA, 2mA |
| Power Source | 2 x LR44 1.5V Batteries |
| Product Dimensions | 7.87 x 5.91 x 9.84 inches |
| Item Weight | 1 Kilogram (2.2 Pounds) |
| Manufacturer | MASTECH |
| Model Number | YQ-MS2006B |
10. Warranty and Support
For warranty information and technical support, please refer to the documentation included with your product or contact Mastech customer service directly. Keep your purchase receipt as proof of purchase.


