
1. Introduction
Thank you for choosing the ARENTI Power1Q Wireless Surveillance Camera. This 2K 4 MP camera features a built-in 9600 mAh Li-ion battery, AI-assisted person detection, full duplex audio, and a spotlight for enhanced night vision. Designed for both indoor and outdoor use, it provides reliable security monitoring with easy wireless installation.
This manual provides detailed instructions on how to set up, operate, and maintain your ARENTI Power1Q camera. Please read it thoroughly before use to ensure proper functionality and safety.
2. Safety Information
Please observe the following safety precautions to prevent damage to the product or injury to yourself:
- Use only the provided USB power adapter and cable for charging.
- Ensure the camera is installed within a stable 2.4 GHz Wi-Fi network range. 5 GHz Wi-Fi networks are not supported.
- Do not expose the camera to extreme temperatures outside the operating range of -20 °C to 50 °C (-4 °F to 122 °F).
- While the camera is IP65 rated for weather resistance, avoid submerging it in water or exposing it to high-pressure water jets.
- Keep the camera and its components out of reach of children.
- Do not attempt to disassemble or modify the camera. This will void the warranty.
- Test the Wi-Fi signal strength at the intended installation location before permanent mounting.
3. Package Contents
Verify that all items listed below are included in your package:
- ARENTI Power1Q Battery-Powered Wi-Fi Surveillance Camera
- USB Power Adapter
- USB Type-C Cable
- Quick Start Guide
- Mounting Hardware (screws, wall plugs)
- Magnetic Mount
4. Product Overview
Familiarize yourself with the components of your ARENTI Power1Q camera.

Figure 4.1: Front view of the ARENTI Power1Q camera with its magnetic mount attached. The camera features a lens, a blue status indicator light, and a PIR motion sensor.

Figure 4.2: Close-up front view of the ARENTI Power1Q camera, highlighting the main lens, integrated spotlight, and the ARENTI branding.

Figure 4.3: Top view of the ARENTI Power1Q camera, showing the DC 5V charging port, Reset button, and Power button, protected by a rubber cover.

Figure 4.4: Side view of the ARENTI Power1Q camera, illustrating its compact design and the attachment point for the magnetic mount.
5. Setup
5.1 Initial Charging
Before first use, fully charge the camera's built-in 9600 mAh Li-ion battery. Connect the USB Type-C cable to the camera's DC 5V port (located under the rubber cover on top) and the other end to the USB power adapter. A full charge may take several hours.
5.2 App Download and Account Creation
Download the official ARENTI app from the App Store (iOS) or Google Play Store (Android). Search for "ARENTI".
Once installed, open the app and follow the on-screen instructions to create an account or log in if you already have one.
5.3 Connecting to Wi-Fi
- Ensure your smartphone or tablet is connected to a 2.4 GHz Wi-Fi network. The camera does not support 5 GHz Wi-Fi.
- In the ARENTI app, tap "Add Device" or the "+" icon.
- Select the ARENTI Power1Q camera from the list of devices.
- Follow the app's instructions to put the camera into pairing mode (usually by pressing and holding the power button or reset button until a specific indicator light behavior is observed).
- Enter your 2.4 GHz Wi-Fi network name (SSID) and password into the app.
- The app will generate a QR code. Hold your camera's lens facing the QR code on your phone screen at a distance of 15-20 cm (6-8 inches) until you hear a confirmation sound from the camera.
- Once connected, the camera's status indicator light will change, and the app will confirm successful pairing.
Important: A stable Wi-Fi connection is crucial for optimal performance. Test the Wi-Fi signal strength at your desired installation location before proceeding with mounting.
5.4 Mounting the Camera
The ARENTI Power1Q camera can be installed wirelessly and offers flexible mounting options:
- Magnetic Mounting: The camera comes with a magnetic mount. Attach the camera to the magnetic mount, then secure the mount to a metallic surface. This allows for easy adjustment of the viewing angle.
- Wall Mounting: Use the provided mounting hardware (screws and wall plugs) to securely attach the magnetic mount base to a wall or ceiling. Once the base is fixed, the camera can be magnetically attached and adjusted.
Ensure the camera is positioned to cover the desired area, and its IP65 weather resistance makes it suitable for outdoor use in various weather conditions.
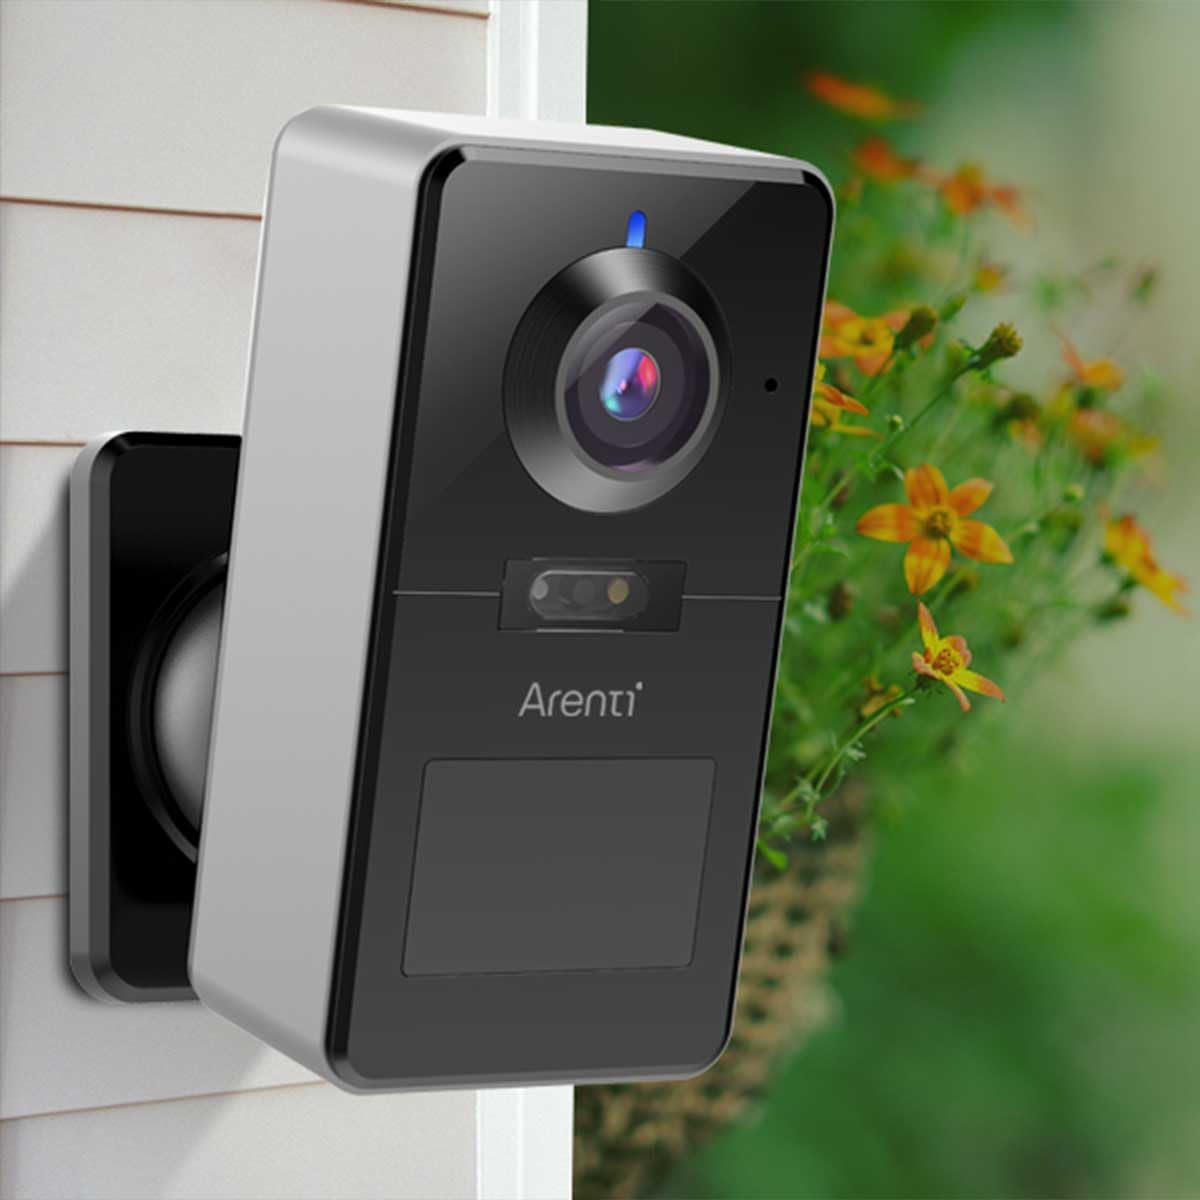
Figure 5.1: Example of the ARENTI Power1Q camera installed outdoors, demonstrating its compact size and discreet placement.
6. Operating Instructions
6.1 Live View and Recording
Access the live video feed from your camera through the ARENTI app. The camera records in 2K (2560 x 1440 pixels) resolution with H.265 video compression for efficient storage.
Recordings can be stored directly on an optional microSD card (up to 256 GB) inserted into the camera, or via the paid Arenti Cloud service (AWS - Amazon Cloud).
6.2 Motion Detection and AI Person Detection
The camera features an integrated PIR motion sensor with a 120° detection angle and a range of up to 9 meters. It supports AI-based person detection to minimize false alarms caused by pets, falling leaves, or insects.
You can adjust the detection sensitivity and range within the ARENTI app. When motion is detected, you will receive push notifications on your smartphone.
6.3 Night Vision and Spotlight
The ARENTI Power1Q offers versatile night vision capabilities:
- Infrared Night Vision: Provides clear black-and-white images up to 10 meters in complete darkness.
- Color Night Vision: Utilizes the integrated 3000K warm white LED spotlight to capture full-color video even in low-light conditions. The spotlight can be activated automatically upon motion detection.

Figure 6.1: The ARENTI Power1Q camera with its integrated spotlight actively illuminating the area, enabling color night vision.

Figure 6.2: A smartphone screen displaying a comparison between daytime and nighttime views captured by the camera, showcasing the clarity of both modes.
6.4 Two-Way Audio
Communicate with visitors or deter intruders using the built-in microphone and speaker, supporting full duplex (two-way) audio. You can speak and listen simultaneously through the app from anywhere.
6.5 Active Defense
In addition to the spotlight, the camera features an active defense function with a strobe light to deter intruders upon detection.
6.6 Smart Home Integration
The ARENTI Power1Q is compatible with Amazon Alexa and Google Assistant. You can stream live video feeds to your smart displays using voice commands.
7. Maintenance
- Cleaning: Gently wipe the camera lens and body with a soft, dry cloth. Do not use harsh chemicals or abrasive cleaners.
- Battery Care: For optimal battery life, avoid completely draining the battery frequently. Charge the camera fully when the battery level is low.
- Firmware Updates: Regularly check the ARENTI app for firmware updates. Updates often include performance improvements, new features, and security enhancements.
8. Troubleshooting
| Problem | Possible Cause | Solution |
|---|---|---|
| Camera fails to connect to Wi-Fi. | Incorrect Wi-Fi band (5 GHz not supported), weak signal, incorrect password. | Ensure your router is broadcasting a 2.4 GHz network. Verify Wi-Fi password. Move camera closer to the router or use a Wi-Fi extender. Reset the camera and try pairing again. |
| Frequent false alarms. | High motion detection sensitivity, environmental factors (e.g., swaying branches, passing cars). | Adjust the motion detection sensitivity and detection zones in the ARENTI app. Ensure AI person detection is enabled. |
| Poor video quality or lag. | Weak Wi-Fi signal, network congestion. | Improve Wi-Fi signal strength. Reduce the number of devices on your network. Check your internet speed. |
| Battery drains quickly. | Frequent motion detection events, continuous live viewing, extreme temperatures. | Reduce motion detection sensitivity or frequency. Limit live viewing. Ensure camera operates within recommended temperature range. |
For further assistance, please refer to the Quick Start Guide or visit the official ARENTI support website.
9. Specifications
| Model Name | Arenti POWER1Q |
| Video Resolution | 2K (2560 x 1440 pixels), 4 MP |
| Video Compression | H.265 |
| Battery | 9600 mAh Li-ion (rechargeable, included) |
| Wireless Connectivity | Wi-Fi 2.4 GHz (IEEE802.11b/g/n) |
| Night Vision Range | Up to 10 meters (infrared) |
| Spotlight | Integrated 3000K LED for color night vision |
| Motion Detection | PIR Sensor, 120° detection angle, up to 9m range, AI Person Detection |
| Audio | Full Duplex Two-Way Audio (built-in microphone and speaker) |
| Storage Options | MicroSD card (up to 256 GB, not included), Arenti Cloud Storage (subscription-based) |
| Smart Home Compatibility | Amazon Alexa, Google Assistant |
| Material | Metal |
| Dimensions (L x W x H) | 7.9 x 5.6 x 11.5 cm (3.1 x 2.2 x 4.5 inches) |
| Weight | 361 grams (0.79 lbs) |
| Water Resistance | IP65 (Weatherproof) |
| Operating Temperature | -20 °C to 50 °C (-4 °F to 122 °F) |
10. Warranty and Support
For warranty information, please refer to the warranty card included in your product packaging or visit the official ARENTI website. Warranty terms and conditions may vary by region.
If you encounter any issues not covered in this manual or require technical assistance, please contact ARENTI customer support through their official website or the contact information provided in your Quick Start Guide.


