Introduction
This manual provides detailed instructions for the installation, operation, and maintenance of your GAMEMAX Siege E-ATX Mid-Tower Gaming Case. Please read this manual carefully before beginning installation to ensure proper setup and to maximize the performance and longevity of your system components.
Product Overview
The GAMEMAX Siege is a high-performance E-ATX mid-tower gaming case designed for optimal airflow and aesthetic appeal. It features a tempered glass side panel, a full mesh front panel, and comes with four pre-installed 120mm ARGB fans to provide excellent cooling and customizable lighting.
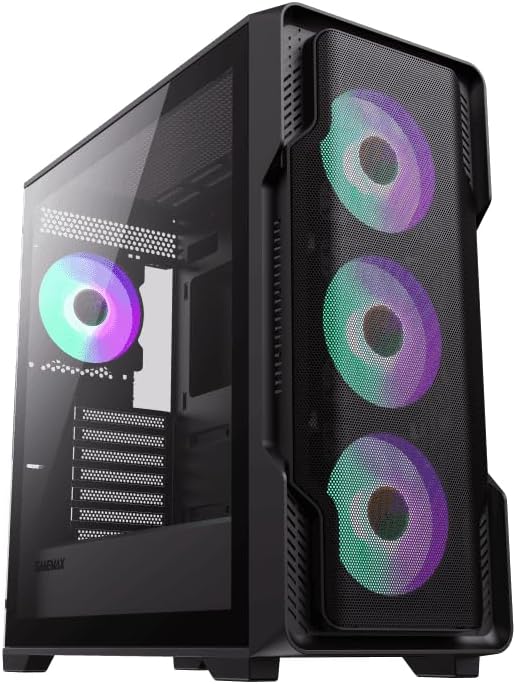
Figure 1: Angled view of the GAMEMAX Siege case, highlighting the mesh front and tempered glass side panel.
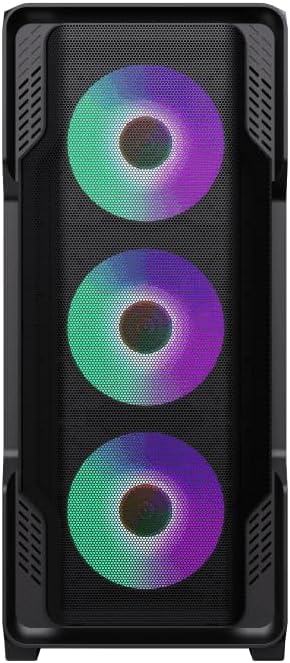
Figure 2: Front view of the GAMEMAX Siege case, showcasing the full mesh design and pre-installed ARGB fans.

Figure 3: Rear view of the GAMEMAX Siege case, detailing the layout for component installation.
Setup
1. Unpacking
Carefully remove the case from its packaging. Inspect for any shipping damage. Retain the original packaging for future transport or storage.
2. Removing Panels
- Tempered Glass Side Panel: Locate the thumbscrews on the rear of the case securing the tempered glass panel. Unscrew them and carefully slide the panel off. Place it on a soft, flat surface to prevent scratches.
- Right Side Panel: Remove the thumbscrews on the rear securing the right metal side panel. Slide the panel off.
3. Motherboard Installation
- Install the I/O shield that came with your motherboard into the cutout at the rear of the case.
- Align your E-ATX, ATX, Micro-ATX, or Mini-ITX motherboard with the pre-installed standoffs. Additional standoffs may be required for smaller form factors; install them as needed.
- Secure the motherboard with the appropriate screws.
4. Power Supply Unit (PSU) Installation
- The GAMEMAX Siege supports bottom-mount power supplies. Position your PSU into the dedicated compartment at the bottom rear of the case.
- Secure the PSU to the case using screws from the rear.
5. Storage Drive Installation
Locate the drive bays for 2.5" SSDs and 3.5" HDDs. Install your storage devices according to the case's internal mounting mechanisms, typically involving trays or direct screw mounting.
6. Graphics Card and Expansion Card Installation
- Remove the necessary PCIe slot covers from the rear of the case.
- Insert your graphics card or other expansion cards into the motherboard's PCIe slots.
- Secure the cards with screws.
7. Cable Management
Utilize the cable routing cutouts and tie-down points behind the motherboard tray to manage cables. This improves airflow and aesthetics.
8. Radiator Installation (Optional)
The case supports up to a 360mm radiator on both the top and front panels. Install radiators and their fans as per the radiator manufacturer's instructions, ensuring proper airflow direction.
9. Front Panel Connections
Connect the front panel cables (USB 3.0, HD Audio, Power Switch, Reset Switch, Power LED, HDD LED) to the corresponding headers on your motherboard. Refer to your motherboard manual for header locations.
Operating
Powering On
Once all components are installed and connected, replace the side panels. Connect your monitor, keyboard, mouse, and power cable to the PSU. Press the power button on the top I/O panel of the case to power on your system.
ARGB Fan Control
The pre-installed ARGB fans are designed for motherboard synchronization. Connect the ARGB cables to your motherboard's 5V ARGB header. Use your motherboard's software (e.g., ASUS Aura Sync, MSI Mystic Light, Gigabyte RGB Fusion) to control the lighting effects and colors of the fans.
Airflow Optimization
The full mesh front panel is designed to maximize airflow into the case. Ensure that the pre-installed fans are oriented correctly for intake (front) and exhaust (rear) to maintain optimal internal temperatures.
Maintenance
Cleaning
- Dust Filters: Regularly remove and clean the dust filters located on the top, front, and bottom of the case. Use compressed air or a soft brush to remove accumulated dust.
- Exterior: Wipe the exterior surfaces with a soft, damp cloth. Avoid abrasive cleaners.
- Interior: Periodically use compressed air to clear dust from internal components and fans. Ensure the system is powered off and unplugged before cleaning.
Fan Maintenance
Ensure that fan blades are free from obstructions and dust buildup. If a fan becomes noisy or stops spinning, check its cable connection to the motherboard or fan controller.
Tempered Glass Care
Handle the tempered glass panel with care to prevent chipping or cracking. Clean it with a microfiber cloth and a glass cleaner. Avoid placing heavy objects on the panel or exposing it to sharp impacts.
Troubleshooting
No Power
- Ensure the PSU is switched on and the power cable is securely connected to both the PSU and the wall outlet.
- Verify that the front panel power switch cable is correctly connected to the motherboard's power header.
- Check all internal power connections (24-pin ATX, CPU 8-pin, GPU PCIe power).
Fans Not Spinning / ARGB Not Lighting
- Confirm that fan power cables are securely connected to the motherboard or fan controller.
- Ensure ARGB cables are connected to a 5V ARGB header on the motherboard and not a 12V RGB header.
- Check motherboard software settings for fan speed and ARGB control.
Overheating Issues
- Verify that all case fans are spinning and oriented correctly for optimal airflow (front intake, rear/top exhaust).
- Clean dust filters and internal components to ensure unrestricted airflow.
- Ensure proper thermal paste application on CPU and GPU.
Specifications
| Brand | GAMEMAX |
| Model Name | SIEGE BK |
| Case Type | Mid Tower |
| Motherboard Compatibility | Extended ATX, ATX, Micro-ATX, Mini-ITX |
| Material | Metal, Tempered Glass |
| Color | Black |
| Item Weight | 7.85 Kilograms (17.26 pounds) |
| Package Dimensions | 21.1 x 20.2 x 10.4 inches |
| USB 3.0 Ports | 2 |
| Cooling Method | Air |
| Power Supply Mounting | Bottom Mount |
| Pre-installed Fans | 4x 120mm ARGB (3 Front, 1 Rear) |
| Radiator Support | Up to 360mm (Top and Front) |
Warranty and Support
For warranty information and technical support, please refer to the official GAMEMAX website or contact your local retailer. Keep your proof of purchase for warranty claims.
For further assistance, you may visit the GAMEMAX store online: GAMEMAX Store