
MOVA VFF12A
Contents
MOVA AeroChef FD10 Pro Air Fryer
User Manual
1. Introduction
Thank you for choosing the MOVA AeroChef FD10 Pro Air Fryer. This appliance is designed to provide a healthier and more efficient way to cook your favorite meals, utilizing advanced thermal air circulation and a dual heating system. Please read this manual thoroughly before using the appliance to ensure safe and optimal operation. Keep this manual for future reference.
Key features of your AeroChef FD10 Pro include:
- Powerful 1800W heating for quick and crispy results up to 230°C.
- Dual heating process for even cooking and energy efficiency.
- Large 6-liter capacity, ideal for family meals.
- Durable metal interior to preserve flavor and prevent odors.
- 11 pre-programmed modes for versatile cooking.
- Clear viewing window and interior light for real-time monitoring.
- Automatic pause function when the basket is removed.
2. Important Safety Instructions
When using electrical appliances, basic safety precautions should always be followed to reduce the risk of fire, electric shock, and injury to persons.
- Read all instructions: Before operating the air fryer.
- Hot Surfaces: Surfaces may become hot during use. Do not touch hot surfaces. Use handles or knobs. Always use oven mitts when handling hot materials.
- Electrical Safety: Do not immerse cord, plugs, or the appliance in water or other liquid to protect against electrical shock.
- Children: Close supervision is necessary when any appliance is used by or near children.
- Unplug When Not in Use: Unplug from outlet when not in use and before cleaning. Allow to cool before putting on or taking off parts.
- Appliance Malfunction: Do not operate any appliance with a damaged cord or plug or after the appliance malfunctions or has been damaged in any manner.
- Accessories: The use of accessory attachments not recommended by the appliance manufacturer may cause injuries.
- Outdoor Use: Do not use outdoors.
- Power Cord: Do not let cord hang over edge of table or counter, or touch hot surfaces.
- Placement: Do not place on or near a hot gas or electric burner, or in a heated oven.
- Moving Hot Oil: Extreme caution must be used when moving an appliance containing hot oil or other hot liquids.
- Disconnect: To disconnect, turn any control to "off", then remove plug from wall outlet.
- Intended Use: Do not use appliance for other than intended use.
- Air Circulation: Ensure adequate air circulation around the appliance during operation. Do not block any ventilation openings.
- Overfilling: Do not overfill the basket.
- Metal Grille: The air fryer is equipped with a metal grille to prevent the heating tube from directly contacting food, reducing the risk of overheating. Do not remove or tamper with this grille.
3. Product Overview
Familiarize yourself with the components of your MOVA AeroChef FD10 Pro Air Fryer.

Figure 3.1: Front view of the MOVA AeroChef FD10 Pro Air Fryer, showcasing its sleek black design and transparent viewing window.
Components:
- Main Unit: Houses the heating elements and fan.
- Control Panel: Touch-sensitive interface with LED display for settings and presets.
- Frying Basket: Non-stick coated basket for holding food.
- Viewing Window: Transparent window to monitor cooking progress without opening the basket.
- Interior Light: Illuminates the cooking chamber for better visibility.
- Air Inlet/Outlet: For proper air circulation.
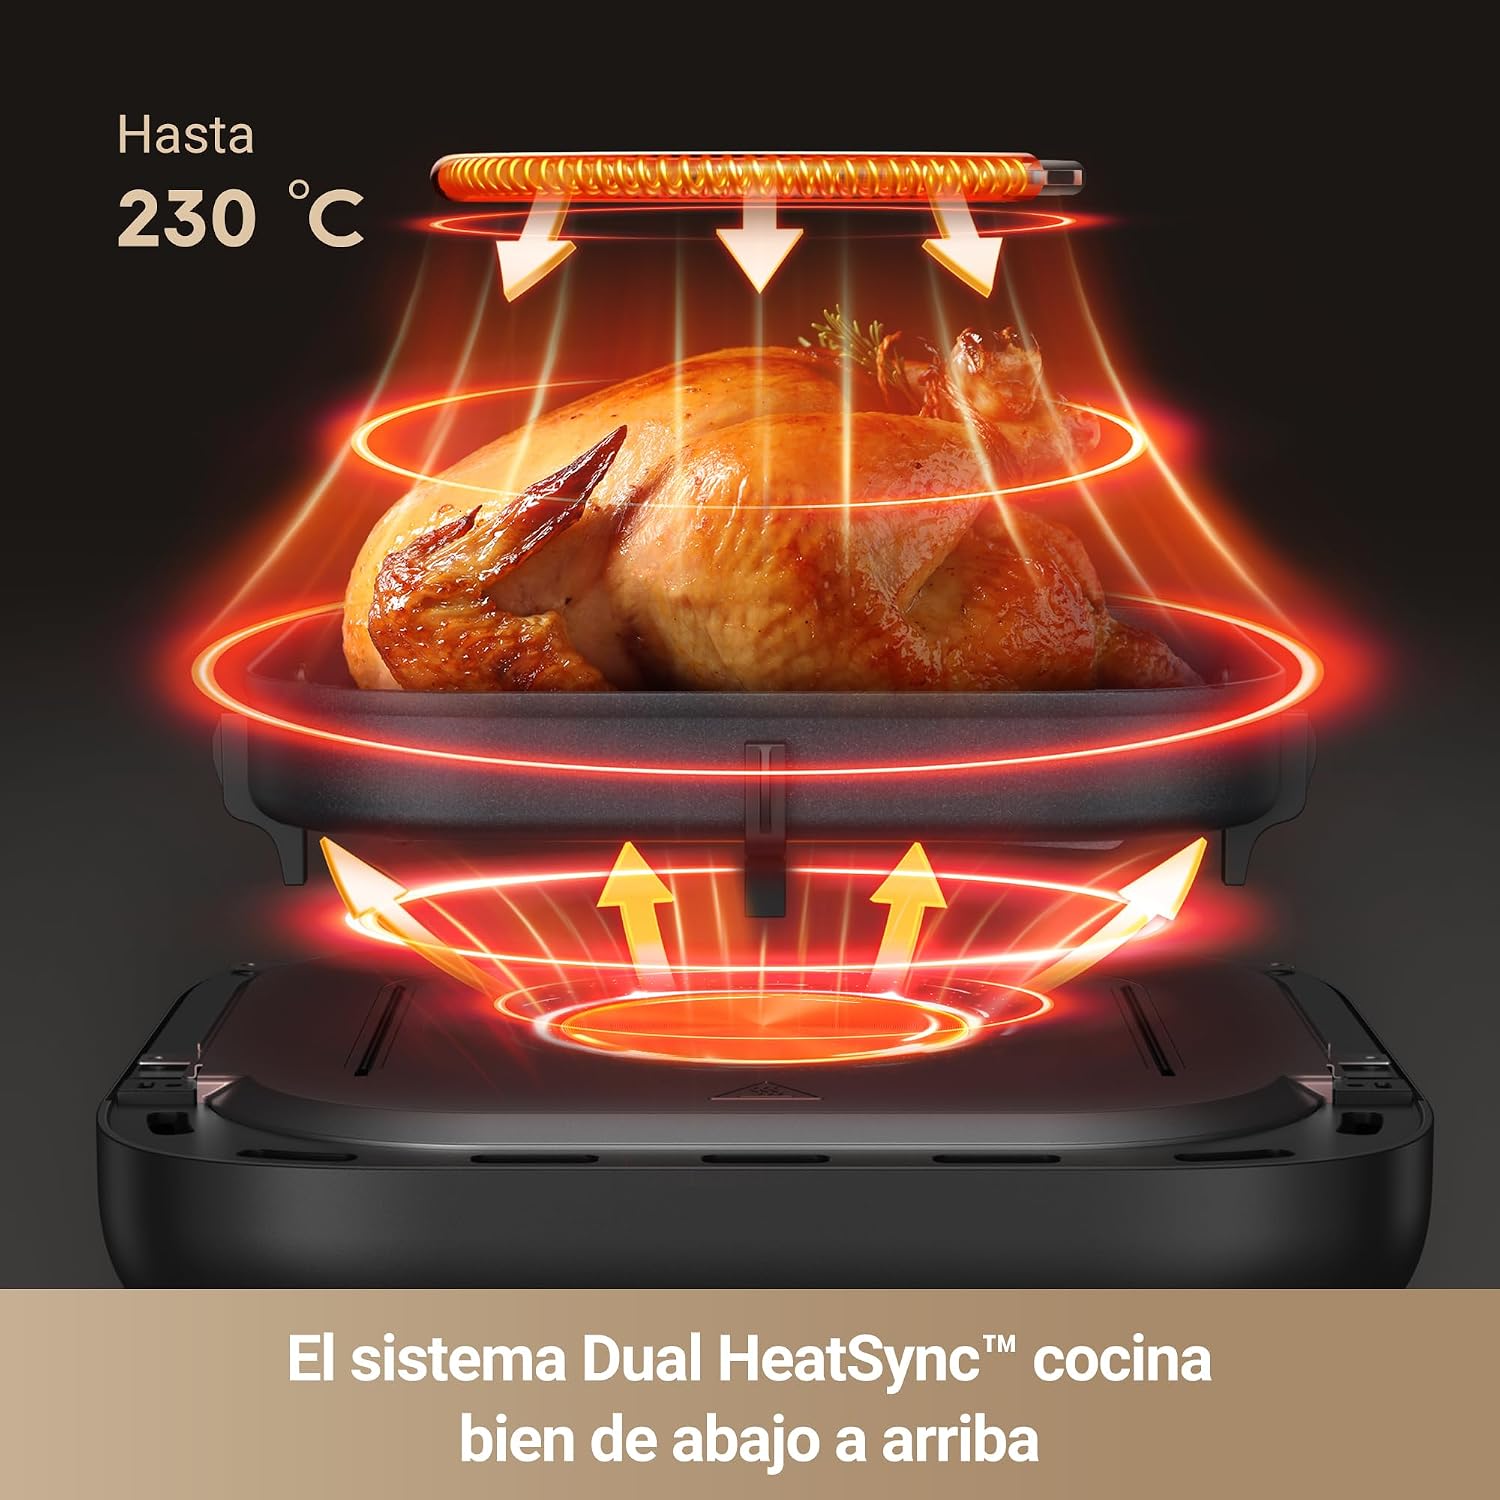
Figure 3.2: Illustration of the Dual HeatSync™ system, demonstrating how heat is applied from both top and bottom for thorough cooking up to 230°C.

Figure 3.3: Visual representation of the 360° Thermal Air Circulation, ensuring hot air reaches all sides of the food for crispy and evenly cooked results.

Figure 3.4: A close-up view of the air fryer's metal interior, highlighting its design to preserve food flavor and prevent unwanted odors during cooking.

Figure 3.5: The spacious 6-liter frying basket, shown with a whole chicken and vegetables, illustrating its large capacity suitable for family-sized meals.

Figure 3.6: The air fryer positioned on a kitchen counter, with its clear viewing window and interior light allowing users to monitor cooking progress without opening the basket.
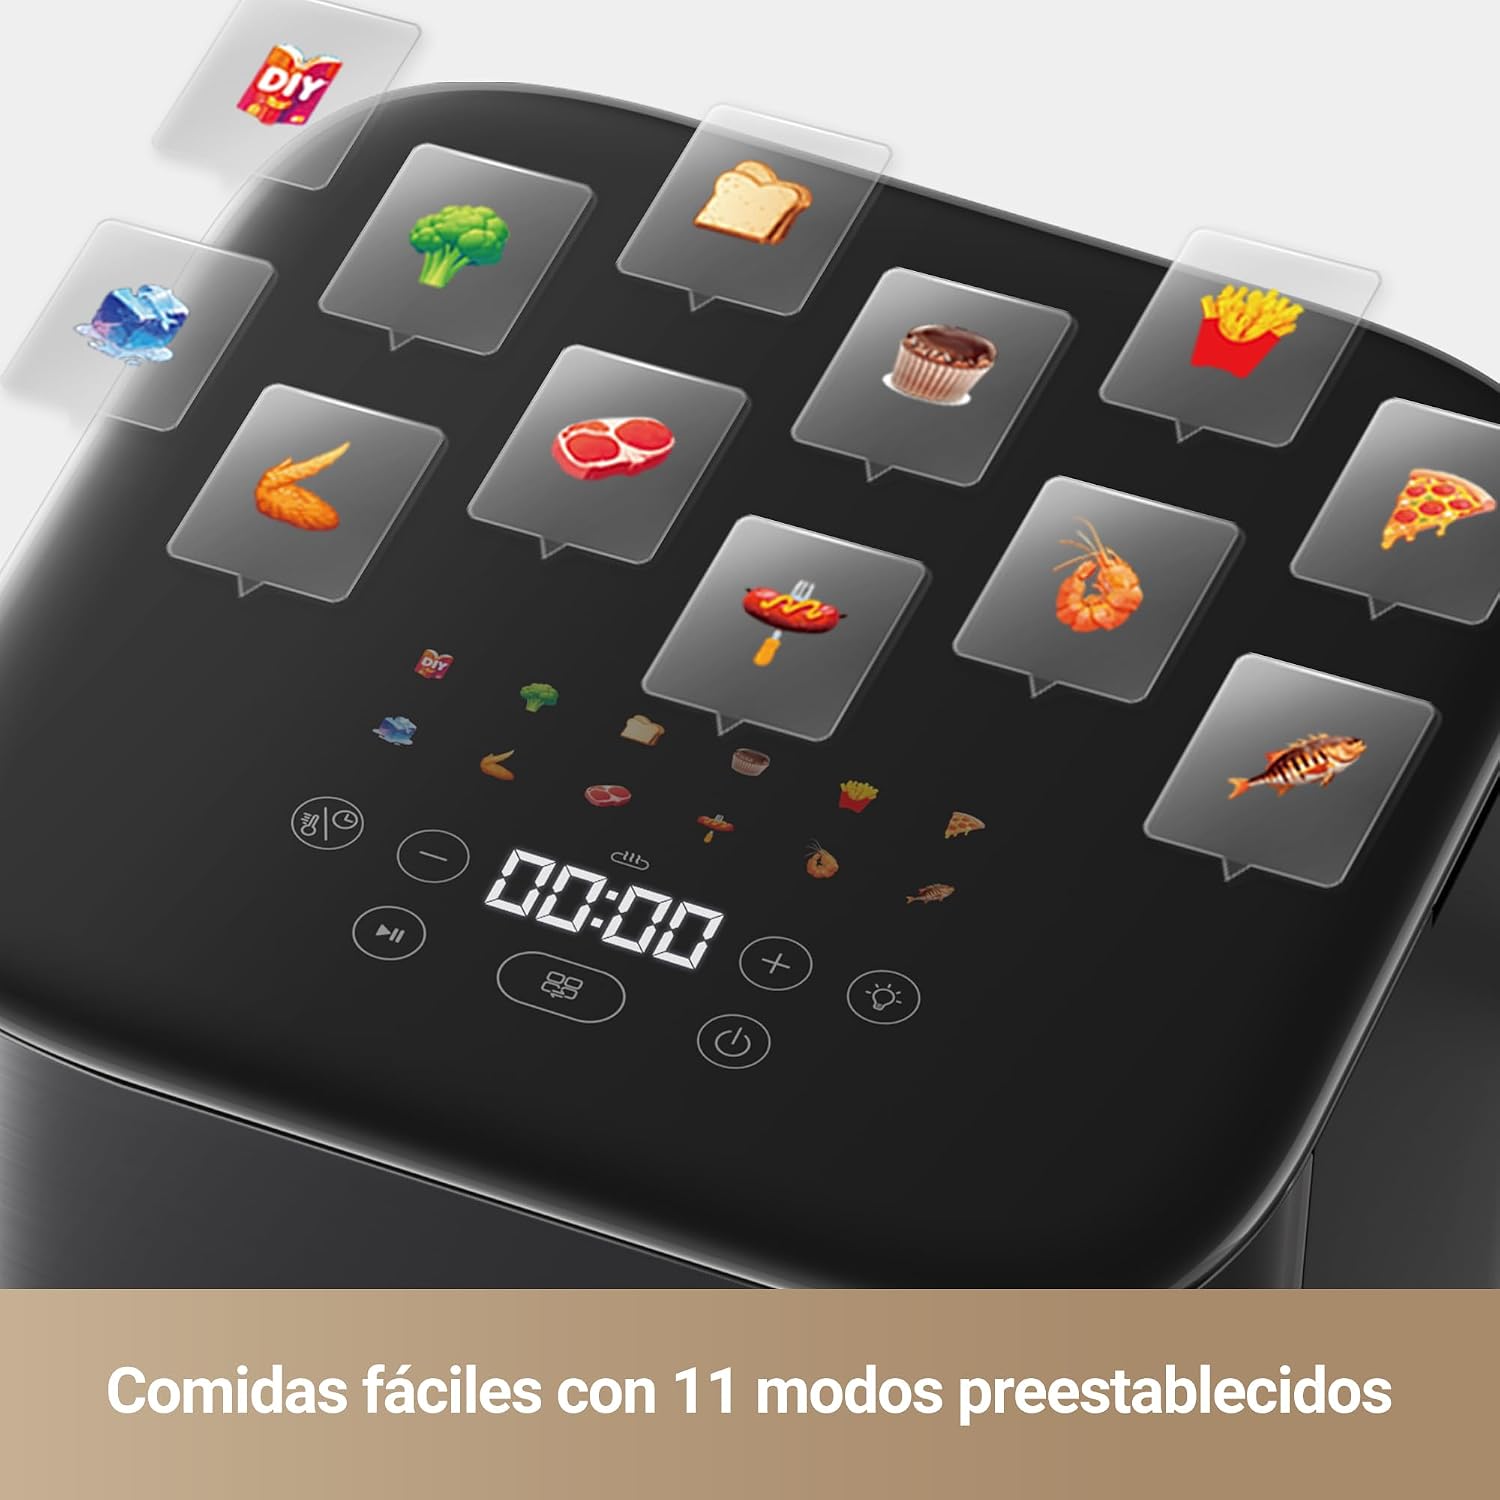
Figure 3.7: The intuitive control panel displaying the 11 preset cooking modes, simplifying meal preparation for various dishes.
4. Setup
- Unpacking: Carefully remove the air fryer and all packaging materials. Ensure all components are present and undamaged.
- Initial Cleaning: Before first use, wipe the exterior of the air fryer with a damp cloth. Wash the frying basket and any removable accessories with warm, soapy water. Rinse thoroughly and dry completely.
- Placement: Place the air fryer on a stable, heat-resistant, and level surface. Ensure there is at least 10 cm (4 inches) of clear space around the back and sides of the appliance to allow for proper air circulation. Do not place it directly against a wall or under cabinets.
- Power Connection: Plug the power cord into a grounded electrical outlet. Ensure the voltage matches the specifications of your appliance.
5. Operating Instructions
5.1. Basic Operation
- Power On: Plug in the air fryer. The LED display will illuminate.
- Preheating (Optional): For best results, preheat the air fryer for 3-5 minutes at the desired cooking temperature.
- Load Food: Place food into the frying basket. Do not overfill the basket to ensure even cooking.
- Insert Basket: Slide the frying basket firmly back into the main unit. The appliance will not operate if the basket is not fully inserted.
- Set Temperature and Time: Use the touch controls on the LED panel to adjust the temperature (50°C - 230°C) and cooking time.
- Start Cooking: Press the Start/Pause button to begin the cooking cycle.
- Monitoring: Use the clear viewing window and interior light to monitor cooking progress.
- Automatic Pause: If you pull out the basket during cooking, the air fryer will automatically pause. Reinsert the basket to resume cooking. This allows for easy addition of ingredients or shaking the basket.
- End of Cooking: The air fryer will beep when the cooking cycle is complete. Carefully remove the basket and transfer food to a serving dish.
5.2. Using Preset Modes
The AeroChef FD10 Pro features 11 pre-programmed modes for common dishes. To use a preset mode:
- Select Mode: On the control panel, press the preset mode button (often indicated by an icon representing the food type).
- Adjust (Optional): The air fryer will automatically set a recommended temperature and time for the selected preset. You can manually adjust these settings if desired.
- Start: Press the Start/Pause button to begin cooking.
Refer to the icons on the control panel for specific preset options, which typically include options for fries, chicken, fish, steak, cake, vegetables, and more.
6. Maintenance and Cleaning
Regular cleaning ensures the longevity and optimal performance of your air fryer.
- Unplug and Cool: Always unplug the air fryer from the power outlet and allow it to cool completely before cleaning.
- Frying Basket and Accessories: The non-stick frying basket and any stainless steel accessories are dishwasher safe, or can be washed by hand with warm, soapy water and a non-abrasive sponge. Rinse thoroughly and dry completely before storing.
- Interior: Wipe the interior of the air fryer, including the metal surfaces, with a damp cloth. For stubborn food residue, use a mild detergent and a soft brush. Ensure no water enters the electrical components.
- Exterior: Clean the exterior of the air fryer with a soft, damp cloth. Do not use abrasive cleaners or scouring pads, as they may damage the finish.
- Heating Element: If necessary, gently clean the heating element with a soft brush to remove any food particles. Do not use water or liquid cleaners directly on the heating element.
- Storage: Store the cleaned and dried air fryer in a cool, dry place.
7. Troubleshooting
If you encounter issues with your air fryer, refer to the following common problems and solutions:
| Problem | Possible Cause | Solution |
|---|---|---|
| Air fryer does not turn on. | Not plugged in; power outlet malfunction; basket not fully inserted. | Ensure the power cord is securely plugged into a working outlet. Push the frying basket in completely until it clicks into place. |
| Food is not cooked evenly. | Basket is overfilled; food pieces are too large; insufficient shaking/flipping. | Do not overfill the basket. Cut food into smaller, more uniform pieces. Shake or flip food halfway through cooking. |
| Food is not crispy. | Not enough oil (for certain foods); temperature too low; cooking time too short. | Lightly coat food with oil if needed. Increase temperature or cooking time. Ensure proper preheating. |
| White smoke coming from the appliance. | Cooking fatty food; oil residue from previous use. | This is normal for fatty foods. Clean the basket and interior thoroughly after each use to remove oil residue. |
| Appliance smells like burning plastic. | New appliance odor; plastic parts touching heating element. | Initial use may produce a slight odor, which should dissipate. Ensure no plastic packaging or accessories are inside the cooking chamber during operation. The metal interior prevents plastic odors from food. |
If the problem persists after trying these solutions, please contact customer support.
8. Specifications
| Feature | Specification |
|---|---|
| Brand | MOVA |
| Model Number | VFF12A |
| Colour | Black |
| Product Dimensions | 36.5 x 33.7 x 26.8 cm |
| Capacity | 6 litres |
| Power / Wattage | 1800 watts |
| Voltage | 230 Volts (AC) |
| Material | Metal, Plastic |
| Auto Shutoff | Yes |
| Special Features | Temperature Control, Timer, Touch control, LED screen, Dual Heating System |
| Item Weight | 4.9 kg |
9. Warranty and Support
For warranty information, please refer to the warranty card included with your product packaging or visit the official MOVA website. Keep your purchase receipt as proof of purchase for warranty claims.
If you require technical support, have questions about your product, or need to report an issue, please contact MOVA customer service through the contact information provided on the official MOVA website or your purchase platform.
Ask a question about this manual
Ask about setup, troubleshooting, compatibility, parts, safety, or missing instructions. Manuals+ will review the question and use this page’s manual context to help answer it.