
1. Product Overview
The OBPEAK K1 Dash Cam is an advanced vehicle video recorder designed to enhance your driving safety and convenience. This mirror-mounted DVR integrates CarPlay and Android Auto functionalities, offering seamless smartphone integration for navigation, communication, and entertainment. It features a comprehensive 3-camera system (front, interior, and rear) to capture a wide range of perspectives, ensuring detailed recording of your journeys and surroundings.
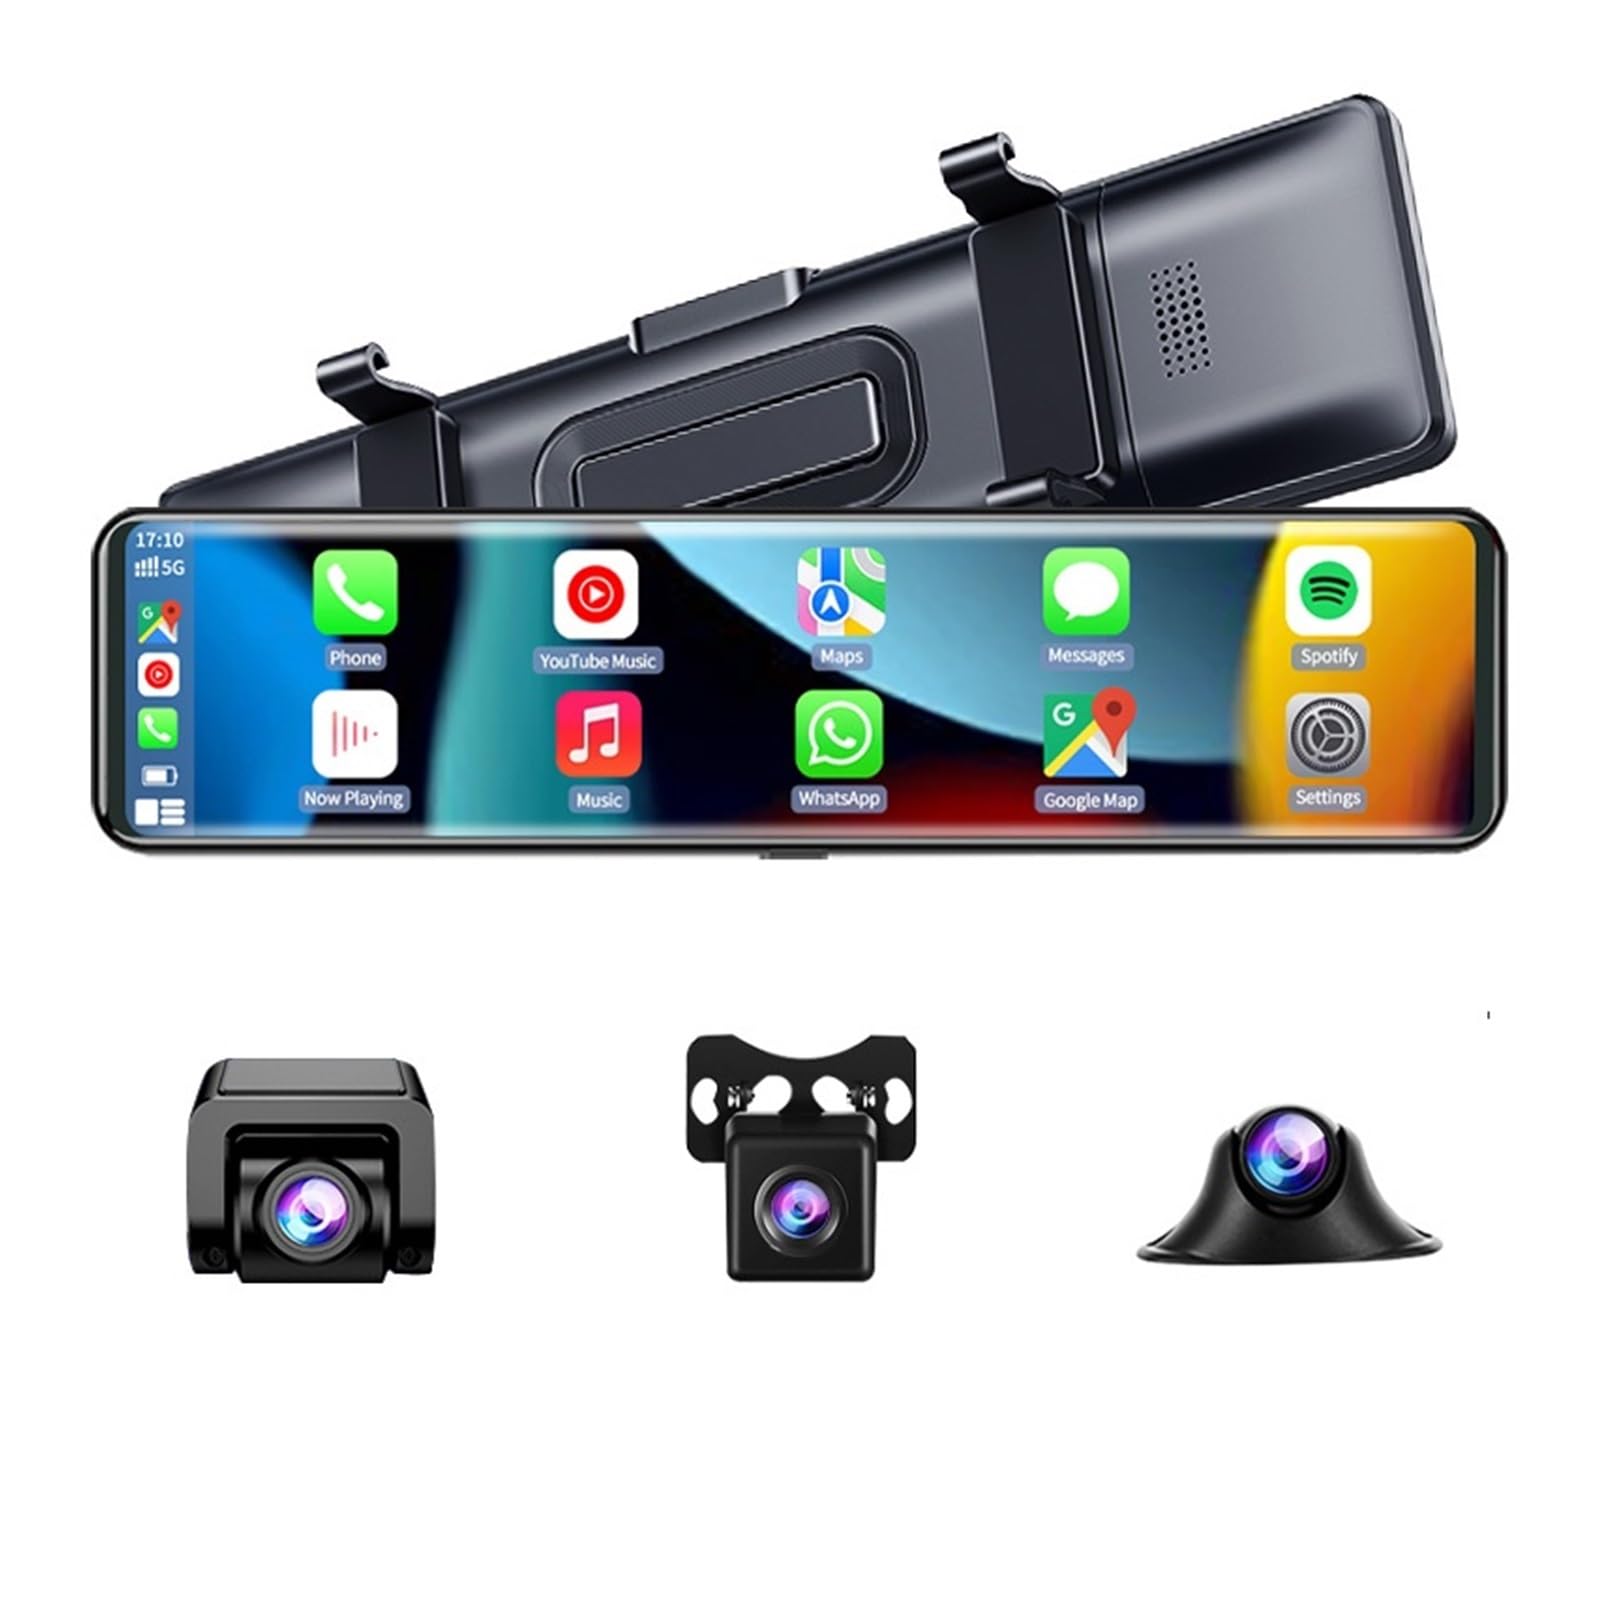
Image 1.1: OBPEAK K1 Dash Cam main unit, showing the mirror display with CarPlay and live camera feed, along with the three individual camera modules.
2. Package Contents
Please check the package for the following items. If any item is missing or damaged, please contact customer support.
- OBPEAK K1 Mirror Dash Cam Unit
- Front Camera (detachable)
- Interior Camera
- Rear Camera
- Car Power Adapter (with cable)
- Mounting Straps/Accessories
- User Manual (this document)
- 64GB MicroSD Card (if included in package variant)

Image 2.1: Included components: three camera modules and the car power adapter cable.
3. Setup and Installation
3.1. Inserting the MicroSD Card
- Locate the MicroSD card slot on the main dash cam unit.
- Insert the provided (or a compatible Class 10 or higher) MicroSD card into the slot until it clicks into place. Ensure the card is inserted correctly to avoid damage.
- Format the MicroSD card through the dash cam's settings menu upon first use for optimal performance.
3.2. Mounting the Main Unit
- Attach the mirror dash cam unit over your vehicle's existing rearview mirror using the provided rubber straps or clips. Ensure it is securely fastened and does not obstruct your view.
- Adjust the angle of the main unit to ensure the integrated front camera captures the road ahead clearly.
3.3. Connecting the Cameras
The K1 system includes a detachable front camera, an interior camera, and a rear camera.
- Detachable Front Camera: This camera can be installed directly on the DVR or detached and placed elsewhere on the windshield (cable length approx. 40 cm). Connect its cable to the designated port on the main unit.
- Interior Camera: Connect the interior camera to its dedicated port on the main unit. Position it to capture the vehicle's interior.
- Rear Camera: Route the rear camera cable from the main unit to the rear of your vehicle. Mount the rear camera above your license plate or on the rear window. Connect the red wire of the rear camera cable to your vehicle's reverse light power source for automatic reverse view display.
3.4. Power Connection
- Plug the car power adapter into your vehicle's cigarette lighter socket.
- Connect the other end of the power cable to the power input port on the main dash cam unit.
- Route the power cable neatly along the windshield trim to avoid obstruction.
- The dash cam will automatically power on and begin recording when your vehicle starts.
4. Operating Instructions
4.1. Basic Controls
- Power On/Off: The device powers on automatically with vehicle ignition. To manually power off, press and hold the power button.
- Screen On/Off: Briefly press the power button to turn the screen display on or off while recording continues in the background.
- Menu Navigation: Use the touch screen or physical buttons (if available) to navigate through settings and modes.
4.2. CarPlay and Android Auto
The K1 Dash Cam supports both Apple CarPlay and Android Auto for enhanced connectivity. Note: Android Auto requires Android 10 or higher. Huawei phones may not support Android Auto.
- Ensure your smartphone's Bluetooth and Wi-Fi are enabled.
- On the dash cam, select the CarPlay or Android Auto icon from the main menu.
- Follow the on-screen prompts to pair your smartphone. This typically involves connecting via Bluetooth first, then confirming a Wi-Fi connection.
- Once connected, your phone's compatible apps (navigation, music, calls, messages) will be accessible on the dash cam screen.

Image 4.1: Screen interfaces for Carplay mode (top) and Dash Cam mode (bottom).
4.3. Recording Modes
- Continuous Loop Recording: The dash cam automatically records video in segments. When the MicroSD card is full, it overwrites the oldest unlocked files to ensure continuous recording.
- Emergency Recording (G-Sensor): In the event of a sudden impact or collision, the built-in G-sensor will automatically lock the current video file, preventing it from being overwritten.
- Parking Monitoring: When enabled, the dash cam will automatically start recording if it detects a collision or vibration while the vehicle is parked. This feature requires a continuous power supply (hardwire kit, sold separately, may be needed for 24/7 monitoring).
4.4. Display Modes
The K1 offers multiple display options:
- Front Camera (full screen)
- Rear Camera (full screen)
- Split View: Front + Rear cameras
- Split View: Front + Interior cameras
- Triple View: Front + Interior + Rear cameras (1:1:1 display)
- CarPlay/Android Auto (full screen)
- CarPlay/Android Auto + Camera View (1:1 display)
Swipe left/right or tap the screen to switch between different display modes.
4.5. Video Playback
You can review recorded videos directly on the dash cam screen or by removing the MicroSD card and viewing them on a computer.
- On Dash Cam: Access the 'Playback' or 'Gallery' option from the main menu to browse and play recorded files.
- On Computer: Insert the MicroSD card into a computer's card reader. Use a compatible video player. For GPS data playback (if GPS module is present), dedicated player software may be required.

Image 4.2: Example of video playback on a computer, showing driving route, speed, and location coordinates.
5. Key Features
- Triple Camera Recording: Simultaneous recording from front (1440P), interior (1080P), and rear (1080P) cameras for comprehensive coverage.
- CarPlay & Android Auto: Seamless integration with your smartphone for navigation, music, calls, and messages directly on the dash cam display.
- Detachable Front Camera: The front camera can be mounted directly on the main unit or separately on the windshield for flexible positioning.
- Multiple Display Modes: Choose from five different screen layouts, including full-screen camera views, split-screen, triple view, and integrated CarPlay/Android Auto displays.
- Real-time Reverse Parking View: Automatic display of the rear camera feed with parking guidelines when shifting into reverse, aiding in safe parking.
- Automatic Loop Recording: Ensures continuous recording by overwriting the oldest unlocked files when the memory card is full.
- Instant Video Playback: Review recorded footage directly on the device to analyze events quickly.
- HD Video & Night Vision: Captures clear images and videos even in low-light conditions, enhancing visibility during night driving.
- Parking Surveillance: Monitors your vehicle for impacts or vibrations while parked, providing evidence in case of incidents.
- Wide-Angle Lens: 135-degree wide-angle field of view captures more of the road and surroundings.
6. Maintenance
6.1. Cleaning the Device
- Use a soft, dry cloth to clean the dash cam screen and lens.
- Do not use abrasive cleaners or solvents, as they may damage the surface.
- Ensure the lenses are free from dust and smudges for clear recording quality.
6.2. MicroSD Card Management
- Regularly format the MicroSD card (e.g., once a month) through the dash cam's settings to maintain optimal performance and prevent data corruption.
- Back up important video files to a computer before formatting the card.
- Replace the MicroSD card if you notice frequent errors or degraded performance, as memory cards have a limited lifespan.
7. Troubleshooting
- Q: The dash cam does not power on.
- A: Ensure the car power adapter is securely plugged into both the cigarette lighter socket and the dash cam. Check if the vehicle's cigarette lighter socket is receiving power. Try a different power source if available.
- Q: The dash cam stops recording or shows a 'card full' error.
- A: Format the MicroSD card through the dash cam's settings. Ensure loop recording is enabled. If the issue persists, try a new, high-quality Class 10 (or higher) MicroSD card.
- Q: CarPlay/Android Auto is not connecting.
- A: Ensure your phone's Bluetooth and Wi-Fi are on. Restart both your phone and the dash cam. Check your phone's settings to ensure it's discoverable and allows connections. Verify your phone's operating system meets the minimum requirements (Android 10+ for Android Auto).
- Q: The image is blurry or unclear.
- A: Clean the camera lenses with a soft cloth. Ensure the protective film (if any) has been removed from the lenses. Check if the camera is securely mounted and not vibrating.
- Q: The rear camera is not displaying.
- A: Check the cable connection between the rear camera and the main unit. Ensure the cable is not damaged. If connected to the reverse light, verify that connection is secure and receiving power when in reverse.
8. Specifications
| Model | K1 |
| Brand | OBPEAK (Manufacturer: laiyong1987) |
| Front Camera Resolution | 1440P |
| Interior Camera Resolution | 1080P |
| Rear Camera Resolution | 1080P |
| Field of View | 135 degrees (Front) |
| CarPlay/Android Auto Support | Yes (Android Auto requires Android 10+) |
| Storage | MicroSD Card (Class 10 or higher, up to 64GB included) |
| Loop Recording | Supported |
| G-Sensor | Supported |
| Parking Monitoring | Supported |
| Item Weight | 50 g |
| Package Dimensions | 2.54 x 2.54 x 2.54 cm |
9. Warranty and Support
This product comes with a standard manufacturer's warranty. For specific warranty details, please refer to the documentation provided with your purchase or contact your retailer. For technical support, troubleshooting assistance, or inquiries about replacement parts, please contact the seller or manufacturer directly.
Manufacturer: laiyong1987
Brand: laiyonggr (OBPEAK)