1. Safety Information
Read this instruction manual carefully before installing and using the appliance. Keep this manual for future reference. The manufacturer is not responsible for any injury or damage resulting from incorrect installation or use.
General Safety
- This appliance is intended for domestic use only.
- Ensure adequate ventilation during operation, especially when using gas burners.
- Do not store flammable materials near the appliance.
- Supervise children when the appliance is in use.
- Always disconnect the appliance from the power supply before maintenance or cleaning.
Electrical Safety
- Installation must be performed by a qualified electrician.
- Ensure the appliance is correctly earthed.
- Do not use adapter plugs or extension cables.
Gas Safety
- Installation must be performed by a qualified gas fitter.
- Check for gas leaks after installation using soapy water, never an open flame.
- Ensure the gas supply is compatible with the appliance type (natural gas).
2. Product Overview
The AEG 8000 Mixed Induction Hob HF704193NB combines the efficiency of induction cooking with the traditional control of gas burners on a single 90 cm ceramic glass surface.

Image 1: Top view of the AEG 8000 Mixed Induction Hob HF704193NB, showing two induction zones on the left and two gas burners on the right, with touch controls for induction and rotary knobs for gas.
Components
- Induction Zones: Two cooking zones with various power levels and special functions.
- Gas Burners: Two gas burners with individual control knobs.
- Control Panel: Touch controls for induction zones and rotary knobs for gas burners.
- Ceramic Glass Surface: Durable and easy-to-clean cooking surface.

Image 2: Close-up view of the hob's control panel, featuring digital touch controls for the induction zones and two rotary knobs for the gas burners.
3. Installation
The AEG HF704193NB hob is designed for slide-in installation. Proper installation is crucial for safety and optimal performance. Refer to the detailed installation diagram and consult qualified professionals for electrical and gas connections.
Dimensions and Cut-out
- Product Dimensions (L x W x H): 52 x 88 x 0.48 cm
- Cut-out Dimensions: Refer to the diagram for precise measurements (typically 830mm width, 490mm depth).
- Minimum Clearance: Ensure adequate clearance around the hob as specified in the diagram.
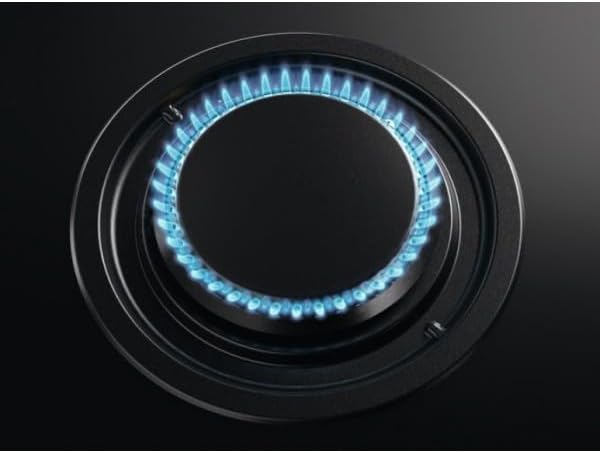
Image 3: Technical diagram illustrating the dimensions of the hob and the required cut-out dimensions for installation into a countertop. It shows measurements in millimeters for length, width, and depth, along with minimum clearances.
OptiFix System
This appliance features the OptiFix system for simplified installation, allowing for quick and secure mounting into the countertop.
Electrical and Gas Connection
- Connect the appliance to a suitable electrical supply as per local regulations.
- Connect the gas burners to a natural gas supply. Ensure all connections are sealed and tested for leaks.
4. Operating Instructions
Familiarize yourself with the controls before operating the hob.
Induction Zones Operation
- Turning On/Off: Press the main power button to activate or deactivate the induction zones.
- Selecting a Cooking Zone: Place suitable cookware on the desired zone. Select the zone using its dedicated touch control.
- Adjusting Power: Use the slider or '+' / '-' buttons to set the desired heat level (1-9).
- Booster Function: Activate the 'Booster' function for maximum power for a short period, ideal for rapid boiling.
- Bridge Function: Combine two induction zones to create a larger cooking area, suitable for griddle plates or large pots. Activate by pressing the bridge function button.
- Stop&Go Function: Pause cooking and resume with the same settings. Press the 'Stop&Go' button to activate and deactivate.
- Timer Function: Set a cooking duration for individual zones. The zone will switch off automatically when the timer expires.
- Residual Heat Indicator: An 'H' will appear on the display when a cooking zone is still hot after use.
- Child Safety Lock: Activate the child lock to prevent accidental operation of the induction zones.
Gas Burners Operation

Image 4: Close-up view of an active gas burner on the hob, showing a steady blue flame, indicating proper operation.
- Ignition: Push and turn the corresponding rotary knob counter-clockwise to the maximum flame position. Hold for a few seconds until the flame is stable.
- Flame Adjustment: Rotate the knob to adjust the flame size from maximum to minimum.
- Turning Off: Turn the knob clockwise to the 'off' position. Ensure the flame is extinguished.
- Cookware: Use pots and pans with a flat base that are appropriate for the burner size.
5. Maintenance and Cleaning
Regular cleaning and maintenance ensure the longevity and safe operation of your hob.
General Cleaning
- Always allow the hob to cool down completely before cleaning.
- Disconnect the appliance from the power supply.
- Use a soft cloth and mild detergent for daily cleaning.
- Avoid abrasive cleaners, scouring pads, or harsh chemicals.
Ceramic Glass Surface
- For stubborn stains, use a ceramic hob scraper.
- Wipe spills immediately to prevent them from baking onto the surface.
Gas Burners
- Remove burner caps and pan supports for cleaning.
- Wash with warm soapy water and dry thoroughly before reassembling.
- Ensure burner ports are clear of food debris.
6. Troubleshooting
Before contacting service, refer to the following common issues and solutions.
| Problem | Possible Cause | Solution |
|---|---|---|
| Induction zone not heating | Incorrect cookware, no power, child lock active | Use induction-compatible cookware, check power supply, deactivate child lock. |
| Gas burner not igniting | No gas supply, igniter dirty, burner cap incorrectly placed | Check gas supply, clean igniter, correctly position burner cap. |
| Hob making unusual noises | Normal operation (fan noise for induction), cookware noise | This may be normal. If persistent or loud, contact service. |
| Error code displayed | Specific fault detected | Refer to the full user manual for specific error code meanings or contact service. |
If the problem persists after attempting these solutions, contact qualified service personnel.
7. Specifications
- Brand: AEG
- Model Number: HF704193NB
- Product Dimensions (L x W x H): 52 x 88 x 0.48 cm
- Installation Type: Slide-In
- Cooking Zones: 2 Induction, 2 Gas Burners
- Hob Type: Mixed (Induction and Gas)
- Surface Material: Ceramic Glass
- Color: Black
- Energy Source: Natural Gas (for gas burners), Electricity (for induction zones)
- Special Features: Bridge Function, Booster Function, Stop&Go Function, Timer, Child Safety Lock, OptiFix Installation System.
8. Warranty and Support
This AEG appliance comes with a manufacturer's warranty. Please retain your proof of purchase for warranty claims.
Warranty Information
Specific warranty terms and conditions may vary by region. Refer to the warranty card included with your product or visit the official AEG website for detailed information.
Customer Support
For technical assistance, spare parts, or service requests, please contact AEG customer support. Contact details can typically be found on the official AEG website or in the product documentation.
When contacting support, please have your model number (HF704193NB) and serial number ready.


