1. Introduction
This manual provides comprehensive instructions for the safe and effective operation of your ATOMSTACK P7 M40 Laser Engraver. Please read this manual thoroughly before operating the device and retain it for future reference.
The ATOMSTACK P7 M40 is a 40W ultrafine laser engraver designed for DIY projects, featuring a fixed focus point and eye protection filter. It offers a 200 x 200 mm engraving area and is capable of engraving various materials including wood, bamboo, cardboard, plastic, leather, MDF, slate, painted metal, and mirror stainless steel. It can also cut materials like cardboard, non-woven fabric, veneer, acrylic, certain thin plastic sheets, sponge, MDF, and leather.
2. Safety Information
WARNING: Laser radiation can cause eye damage and skin burns. Always follow safety guidelines.
- Do not look directly into the laser beam.
- Ensure the protective cover is in place during operation. The integrated panoramic filter glass blocks 97% of UV light, protecting your eyes without additional goggles.
- Operate the machine in a well-ventilated area to avoid inhaling fumes from engraved materials.
- Keep children and pets away from the operating area.
- Do not leave the machine unattended during operation.
- Ensure the work surface is fire-resistant.
- Disconnect power before performing any maintenance or cleaning.
3. Package Contents
Verify that all components listed below are present in your package:
- 4 x Mounting Cushion Blocks
- 1 x Laser Module
- 1 x Laser Carriage
- 4 x Foam Pads
- 1 x USB Cable
- 1 x Open-end Wrench
- 1 x Y-axis Belt Assembly
- 1 x Marker Pen
- 5 x Cable Ties
- 4 x Screws
- 2 x Allen Keys
- 3 x Wood Chips (for testing)
- 1 x Fixed Focus Film
- 3 x Acrylic Plates (for testing)
- 1 x Cutting Support Plate
- 1 x Lower Support Foot
- 1 x Upper Support Foot
- 1 x Control Box
- 1 x X-axis Assembly
- 1 x Y-axis Assembly
- 1 x Power Supply
- 1 x Power Cable

Figure 3.1: Complete list of package contents for the ATOMSTACK P7 M40 Laser Engraver.
4. Setup and Assembly
The ATOMSTACK P7 M40 features an 85% pre-assembled all-metal portable structure, allowing for quick installation, typically within 5 minutes. Follow these general steps for assembly:
- Unpack Components: Carefully remove all parts from the packaging and verify against the package contents list.
- Assemble Frame: Connect the X-axis and Y-axis assemblies to form the main frame. The anodized all-aluminum alloy structure ensures durability and engraving precision.
- Install Support Feet: Attach the upper and lower support feet to the main frame.
- Mount Laser Module: Secure the laser module onto the laser carriage. The laser module features a fixed focus design, eliminating the need for focal length adjustment.
- Connect Control Box: Attach the control box and connect necessary cables, including the USB cable for data transfer.
- Power Connection: Connect the power supply and power cable. Ensure the international standard input (AC 100-240V, 50/60Hz) and output (12V, 5A) are met.
- Initial Placement: Place the assembled engraver on a stable, level, and fire-resistant surface.

Figure 4.1: Assembled ATOMSTACK P7 M40 Laser Engraver.
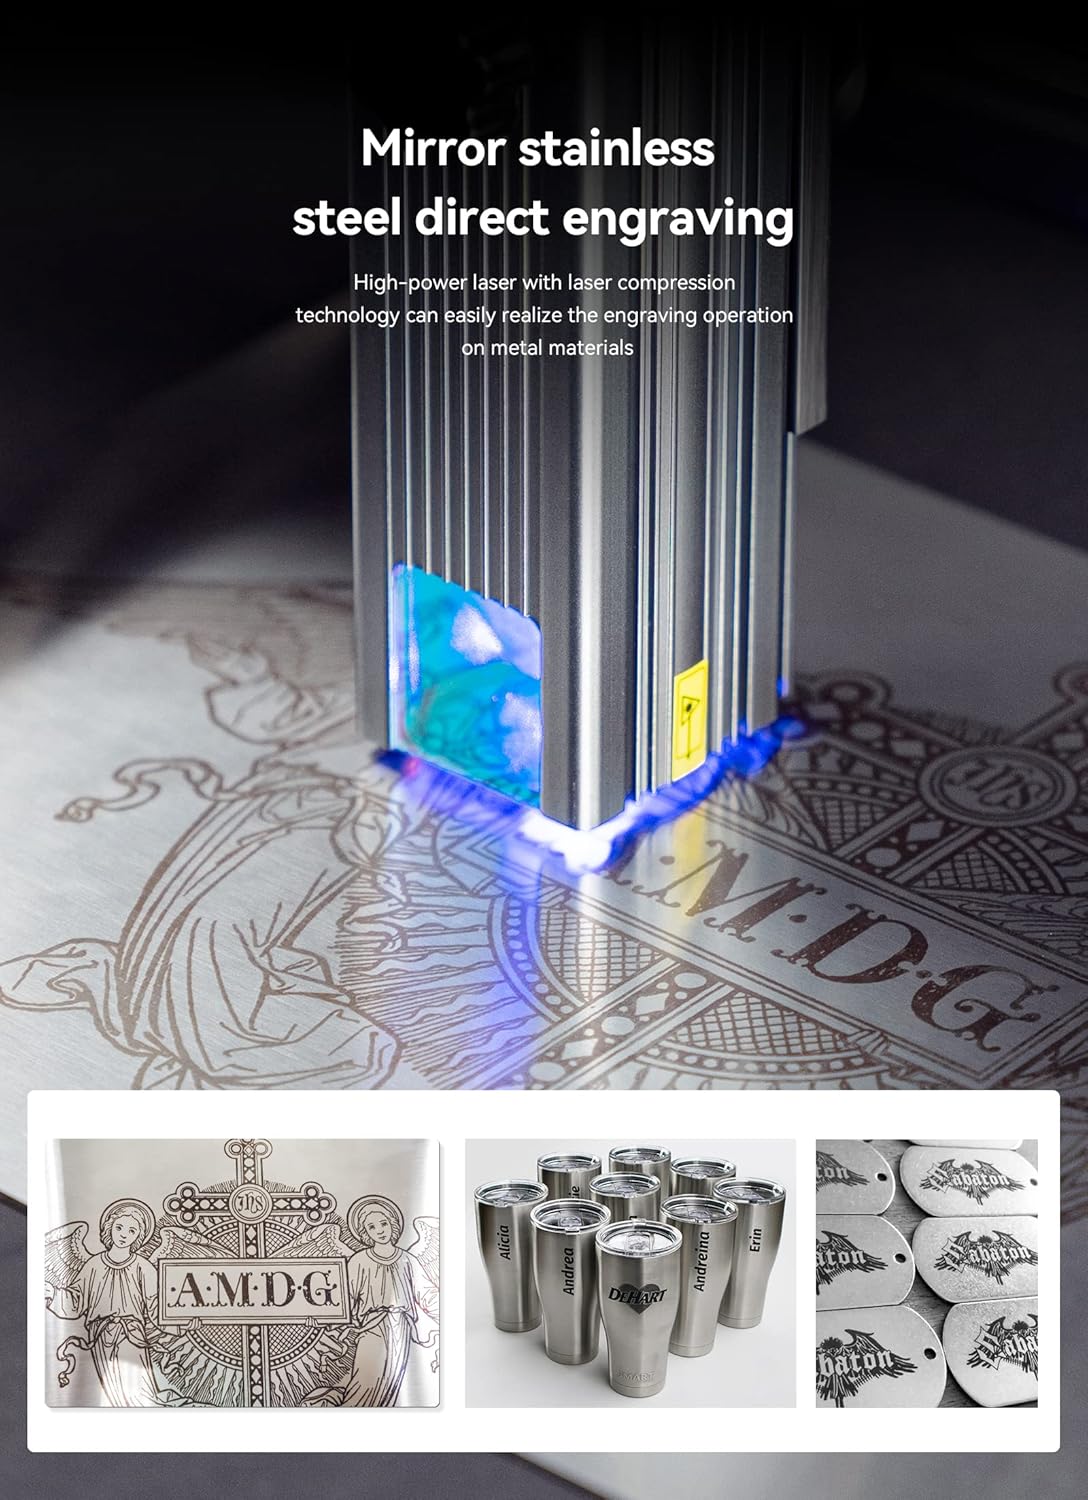
Figure 4.2: Detail of the laser module with its protective filter glass.
5. Operating Instructions
5.1 Software Compatibility
The ATOMSTACK P7 M40 is compatible with various sophisticated engraving software, including LaserGRBL and LightBurn. It supports Win XP/Win 7/Win 8/XP/Win 10 operating systems, and also Mac systems (with LightBurn). Supported file formats include NC, BMP, JPG, PNG, and DXF.
Data transfer is primarily via USB connection.
5.2 Preparing for Engraving/Cutting
- Material Placement: Place the material to be engraved or cut within the 200 x 200 mm engraving area. Use the provided cutting support plate if cutting.
- Focus Adjustment: The laser features a fixed focus, meaning no manual focus adjustment is required. The upgraded compressed spot technology ensures high energy concentration.
- Height Adjustment: Use the spiral adjustment knob on the laser module for convenient height adjustment relative to the material.
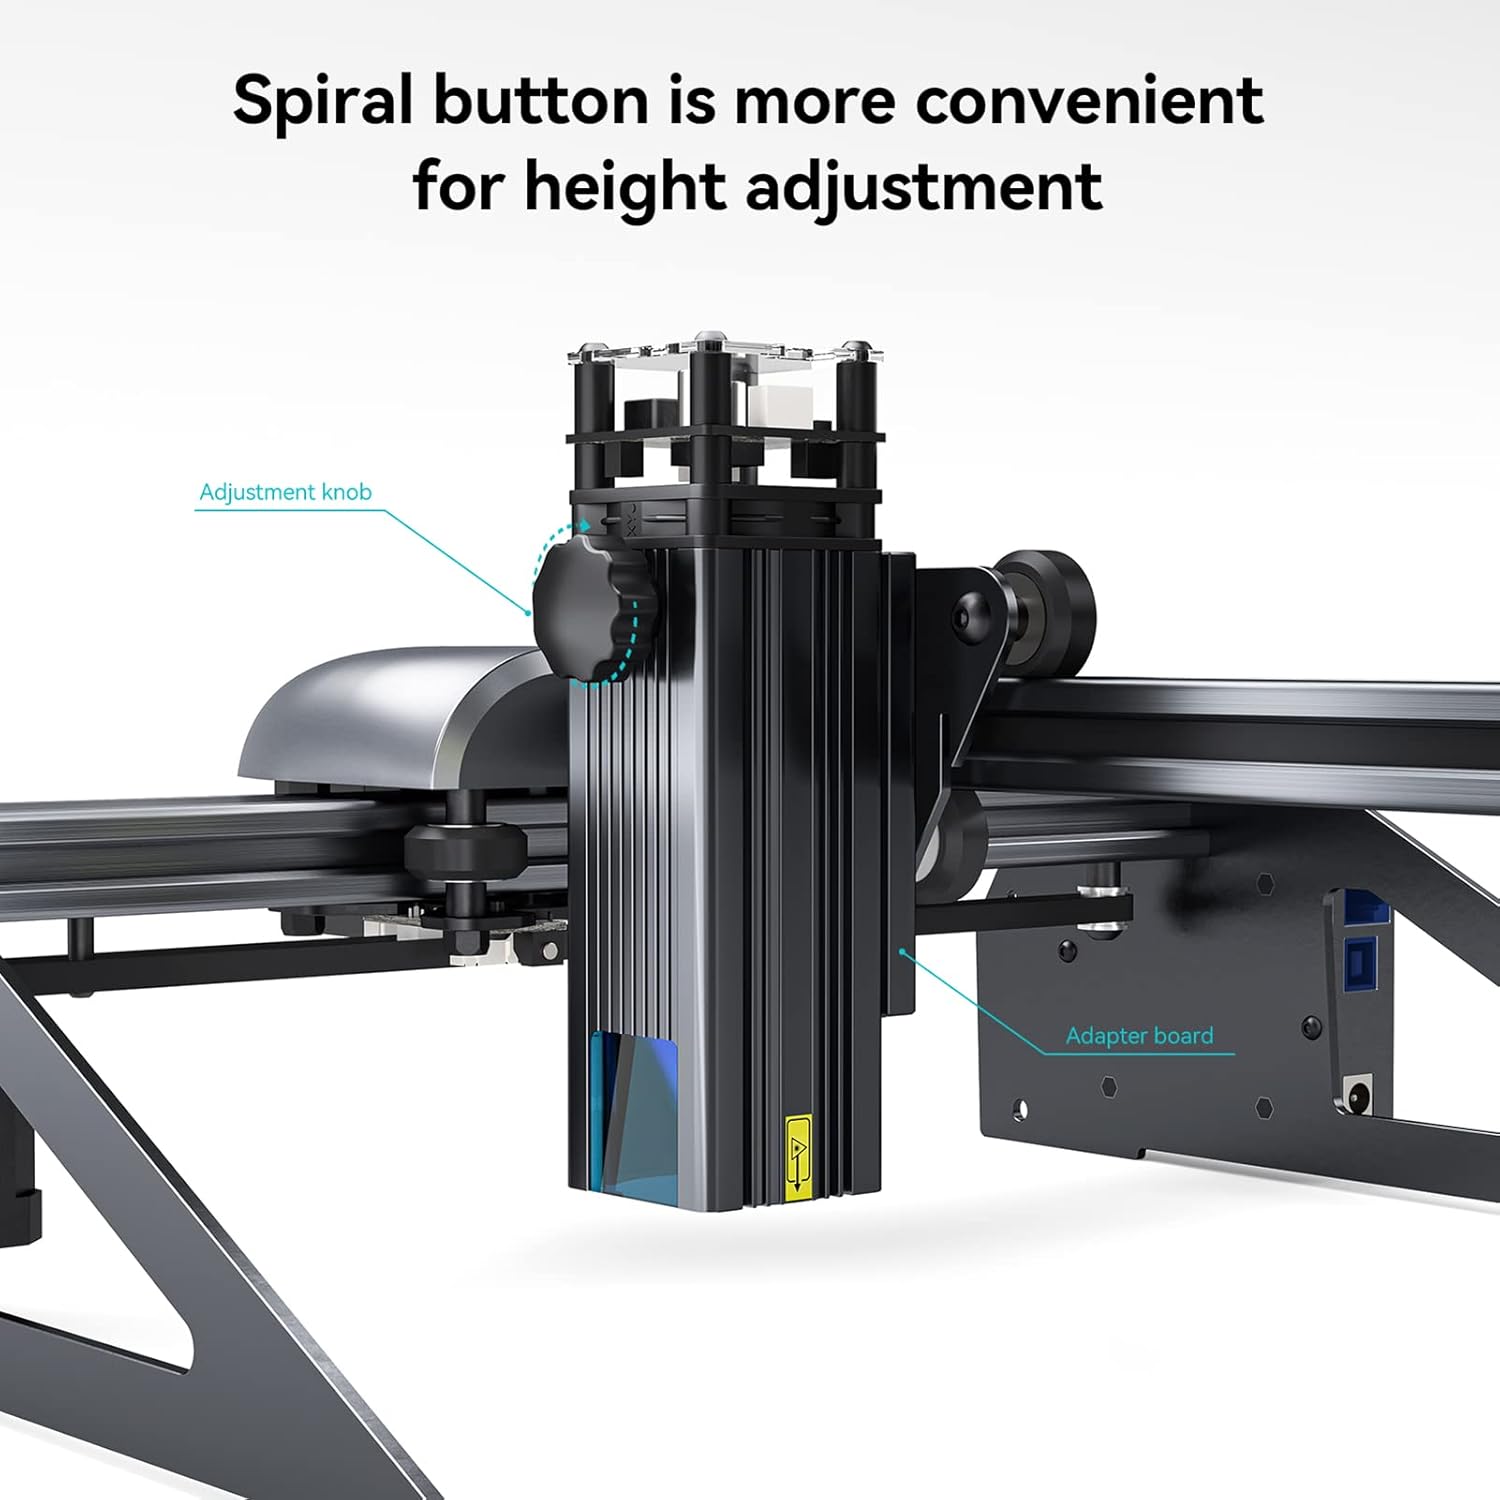
Figure 5.1: Spiral adjustment knob for laser module height.
5.3 Engraving and Cutting Capabilities
The P7 M40's upgraded ultra-fine compression laser, with an optical power of 5-5.5W and a reduced focus range of 0.02mm², allows for precise engraving and efficient cutting.
- Engraving Materials: Wood, bamboo, cardboard, plastic, leather, MDF, slate, painted metal, mirror stainless steel.
- Cutting Materials: Cardboard, non-woven fabric, veneer, acrylic, certain thin plastic sheets, sponge, MDF, leather.
- Cutting Thickness: Easily cuts 8mm thick wood boards and 6mm black acrylic.

Figure 5.2: Cutting capability demonstration on a 10mm wood board.

Figure 5.3: Direct engraving on mirror stainless steel.

Figure 5.4: High precision laser engraving on wood.
6. Maintenance
- Cleaning: Regularly clean the laser lens and the machine's frame to prevent dust and debris buildup, which can affect performance. Use a soft, dry cloth.
- Lubrication: Periodically check and lubricate the moving parts, such as the guide rails and lead screw, to ensure smooth operation. The integrated lead screw design enhances precision and durability.
- Cable Inspection: Inspect all cables for any signs of wear or damage. Replace if necessary.
- Storage: When not in use, store the engraver in a clean, dry environment away from direct sunlight and extreme temperatures.
7. Troubleshooting
| Problem | Possible Cause | Solution |
|---|---|---|
| Laser not firing or weak output | Loose cable connection; dirty laser lens; incorrect power settings in software. | Check all cable connections; clean the laser lens; verify power settings in LaserGRBL/LightBurn. |
| Engraving/Cutting is inaccurate or distorted | Loose belts; unstable machine; incorrect material focus (though fixed focus, ensure material is flat). | Check and tighten Y-axis belt assembly; ensure machine is on a stable surface; ensure material is flat and properly positioned. |
| Software not connecting to machine | Incorrect COM port selected; USB cable issue; driver not installed. | Verify COM port in software; try a different USB port or cable; install necessary drivers. |
| Machine not powering on | Power cable not connected; faulty power supply; power outlet issue. | Ensure power cable is securely connected; test power supply if possible; try a different power outlet. |
8. Specifications
| Feature | Detail |
|---|---|
| Product Model | ATOMSTACK P7 M40 |
| Engraving Dimensions | 200 x 200 mm |
| Laser Power | 40W |
| Laser Optical Output Power | 5-5.5W |
| Laser Wavelength | 455 ± 5 nm |
| Engraving Accuracy | 0.01 mm |
| Focusing Method | Fixed focus laser, free focus |
| Laser Protective Cover | Integrated panoramic filter glass (filters 97% UV light) |
| Operating Software | LaserGRBL, LightBurn |
| Supported OS | Win XP/Win 7/Win 8/XP/Win 10, Mac (LightBurn) |
| Supported File Formats | NC, BMP, JPG, PNG, DXF |
| Data Transfer Method | USB Connection |
| Power Input | AC 100-240V, 50/60Hz |
| Power Output | 12V, 5A |
| Certifications | CE, FCC, RoHS, FDA, PSE |
| Manufacturer | ATOMSTACK MAKER |
| Model Number | P7M40-PIN |
9. Warranty and Support
Information regarding specific warranty terms and availability of spare parts is not provided in the product description. For support, please refer to the manufacturer's official website or contact their customer service directly.
For further assistance or technical inquiries, please visit the ATOMSTACK MAKER official support channels.


