
1. Introduction
Thank you for choosing the Garwarm 23.6" Dimmable LED Flower Ceiling Light. This modern flush mount fixture is designed to provide adjustable lighting for various indoor spaces, including living rooms, bedrooms, kitchens, and dining rooms. This manual provides essential information for safe installation, operation, and maintenance of your new ceiling light.
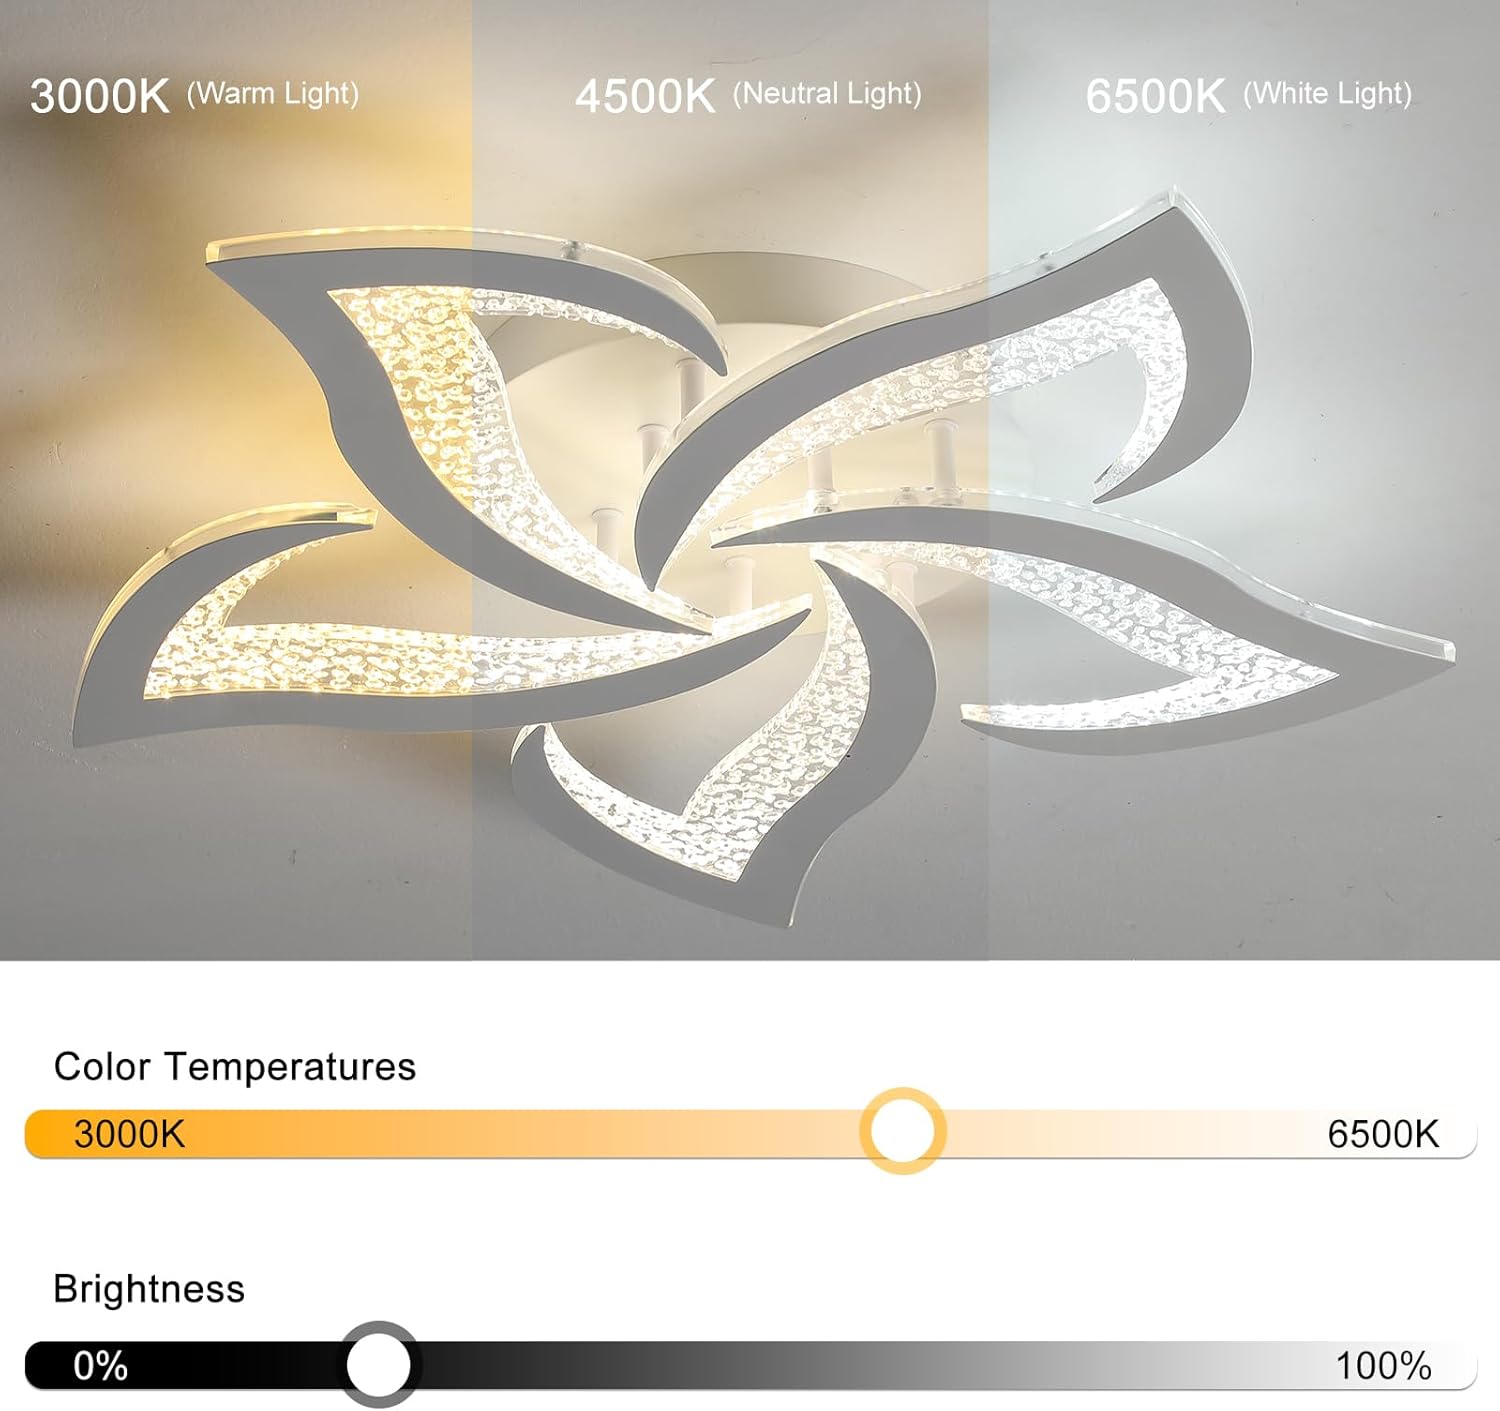
This LED ceiling light features a unique flower petal design, offering both aesthetic appeal and practical illumination. It includes a remote control for adjusting color temperature (3000K-6500K) and brightness (10%-100%), along with a memory function to retain your preferred settings.
2. Safety Information
- Electrical Safety: Always turn off the main power supply at the circuit breaker before attempting any installation, maintenance, or cleaning. Failure to do so can result in electric shock or serious injury.
- Qualified Electrician: Installation should be performed by a qualified electrician or a person with sufficient electrical knowledge to ensure proper and safe wiring.
- Voltage: Ensure the voltage supply to the fixture matches the product's specified voltage (110V AC).
- Dimmer Switches: This LED ceiling light is not compatible with traditional dimmer switches. It is designed for use with a regular on/off wall switch and its included remote control for dimming functions.
- Secure Mounting: Ensure the mounting surface is structurally sound and capable of supporting the weight of the fixture.
- Indoor Use Only: This product is designed for indoor use only. Do not expose it to moisture or outdoor elements.
3. Package Contents
Verify that all components are present before beginning installation:
- Ceiling Light Fixture (unassembled)
- Mounting Hardware
- Remote Control
- Shade (Acrylic petals)
- Instruction Manual
4. Specifications
| Feature | Specification |
|---|---|
| Model Number | 6045-5W |
| Dimensions (L x W x H) | 23.6" x 23.6" x 3.54" (59cm x 59cm x 9cm) |
| Ceiling Plate Diameter | 9.7" (24.7cm) |
| Power | 45W |
| Lumen Output | 2700 Lumens (Max) |
| Voltage | 110V AC (95-265V compatible) |
| Color Temperature | 3000K (Warm Light) - 6500K (Cool White) |
| Brightness | 10% - 100% (Dimmable via remote) |
| Material | Acrylic, Wrought Iron |
| Control Method | Remote Control, Wall Switch (On/Off) |
| Light Source | Integrated LED |
| Number of Light Sources | 5 (Petals) |
| Applicable Area | Up to 15m² |
Image: Product Parameters

5. Setup and Installation
Installation of this ceiling light requires assembly and electrical wiring. It is recommended to have two people for installation due to the size and the need to hold the fixture while connecting wires.
5.1 Pre-Installation Checklist
- Ensure the power is OFF at the circuit breaker.
- Gather necessary tools: screwdriver, wire strippers, electrical tape, drill (if needed).
- Unpack all components and verify against the package contents list.
5.2 Assembly Steps
- Carefully attach the acrylic flower petals to the main fixture body according to the provided diagrams. Ensure all connections are secure.
- Connect the internal wiring of the petals to the main power unit within the fixture body.
Video: Modern Ceiling Light Installation Guide
This video demonstrates the assembly and installation process for the Garwarm modern ceiling light. It covers connecting the light components and mounting the fixture to the ceiling.
Video: Modern Ceiling Light Install Video
This video provides an additional visual guide for installing the modern ceiling light, detailing the steps for secure mounting and electrical connections.
5.3 Electrical Connection and Mounting
- Mount the ceiling bracket to the junction box in your ceiling using the provided screws. Ensure it is firmly secured.
- Connect the household electrical wires to the fixture's wires: typically, black to black (live), white to white (neutral), and bare copper or green to green/bare copper (ground). Use wire nuts to secure connections.
- Carefully tuck all wires into the junction box.
- Align the fixture with the mounted bracket and secure it using the provided screws. Ensure the fixture is flush against the ceiling.
- Restore power at the circuit breaker and test the light.
Image: Switch Compatibility and Remote Control

6. Operating Instructions
Your Garwarm LED ceiling light can be operated using a standard wall switch or the included remote control.
6.1 Remote Control Functions
The remote control allows for comprehensive adjustment of your light fixture:
- Power On/Off: Press the power button to turn the light on or off.
- Color Temperature Adjustment: Use the 'Warm' and 'Cool' buttons or the slider on the remote to adjust the color temperature between 3000K (warm white) and 6500K (cool white).
- Brightness Adjustment: Use the '+' and '-' buttons or the brightness slider to adjust the light intensity from 10% to 100%.
- Memory Function: The light fixture will remember your last used color temperature and brightness settings if it remains on for at least 20 seconds before being turned off. The next time you turn it on, it will resume these settings.
- Night Light Mode: Activates a very low brightness setting for night use.
- Timing Function: Allows you to set a timer for the light to turn off automatically.
Image: Color Temperature and Brightness Adjustment
7. Maintenance
To ensure the longevity and optimal performance of your Garwarm LED ceiling light, follow these maintenance guidelines:
- Cleaning: Before cleaning, always turn off the power supply. Use a soft, dry cloth to wipe the fixture. Do not use abrasive cleaners, solvents, or polishes as they may damage the finish or acrylic components.
- Bulb Replacement: This fixture uses integrated LED lights, which are not user-replaceable. The LEDs are designed for a long lifespan. If the light stops working, contact customer support.
- Inspection: Periodically check for any loose connections or damage to the wiring. If any issues are found, turn off the power and consult a qualified electrician.
8. Troubleshooting
If you encounter issues with your ceiling light, refer to the following common problems and solutions:
| Problem | Possible Cause | Solution |
|---|---|---|
| Light does not turn on. | No power supply. Loose wiring connection. Remote control battery depleted. | Check circuit breaker. Ensure all wires are securely connected (power off first). Replace remote control batteries. |
| Light flickers or dims unexpectedly. | Incompatible dimmer switch. Loose wiring. Power fluctuations. | Ensure a regular on/off switch is used. Check wiring connections (power off first). Consult an electrician if power fluctuations are suspected. |
| Remote control not working. | Battery depleted. Remote not paired. Obstruction between remote and light. | Replace remote control batteries. Refer to remote pairing instructions (if applicable, usually holding a button near the light). Ensure clear line of sight. |
| Light does not remember settings. | Light turned off too quickly. | Ensure the light remains on for at least 20 seconds after setting before turning it off for the memory function to activate. |
If the problem persists after trying these solutions, please contact Garwarm customer support.
9. Warranty and Support
Your Garwarm LED Flower Ceiling Light comes with a 2-year manufacturer's warranty. This warranty covers defects in materials and workmanship under normal use.
For warranty claims, technical assistance, or any questions regarding your product, please contact Garwarm customer support through the official Garwarm Store on Amazon or via the contact information provided with your purchase.
Visit the official Garwarm Store for more products and support: Garwarm Store