
1. Introduction
Thank you for choosing the DEWENWILS Indoor Countdown Timer Outlet. This digital timer is designed to provide convenient and energy-saving control over your indoor electrical appliances. It features customizable countdown settings, a daily repeat function, and a clear digital display, making it ideal for various applications such as fans, lights, chargers, and small appliances. Please read this manual thoroughly before use to ensure proper operation and safety.

Figure 1: DEWENWILS Indoor Countdown Timer Outlet (Model ITE-04)
This image displays two units of the DEWENWILS Indoor Countdown Timer Outlet. The top unit shows the front face with a digital display indicating "0:30 ON AUTO" and buttons for "+1Min", "-1Min", "+30Min", and "Repeat". The bottom unit shows a slightly angled view, revealing a side switch with "OFF", "AUTO", and "ON" positions, along with the same front display and buttons. Both units are white with the "dewenwils" logo.
2. Important Safety Information
WARNING: To reduce the risk of fire, electric shock, or injury, strictly follow these instructions.
- Do not immerse the timer in water or any other liquid.
- Do not connect any appliance that exceeds the timer's maximum load rating (15A/1000W, 1/2 HP).
- Do not use with extension cords or adapters that are not grounded.
- Ensure the timer is fully inserted into a grounded wall outlet.
- Do not disassemble or attempt to repair the unit. Refer all servicing to qualified personnel.
- Keep out of reach of children.
- Unplug the timer from the outlet before cleaning.
- This timer is for indoor use only. Do not use in wet or damp locations.
3. Product Overview and Features
The DEWENWILS Indoor Countdown Timer Outlet is designed for ease of use and reliability. Key features include:
- Large Digital Display: Clear and easy-to-read screen for time and mode status.
- Customizable Countdown: Set precise countdown times up to 19 hours and 59 minutes.
- Repeat Function: Automatically applies settings daily at the same time.
- Mode Switch: Easily toggle between Always On, Always Off, and Auto (countdown) modes.
- Memory Function: Built-in battery retains programmed settings for up to 3 months during power interruptions or when unplugged.
- Space-Saving Design: Compact size ensures it does not block adjacent outlets.
- Grounded Outlet: Features a 3-prong grounded outlet for safety.
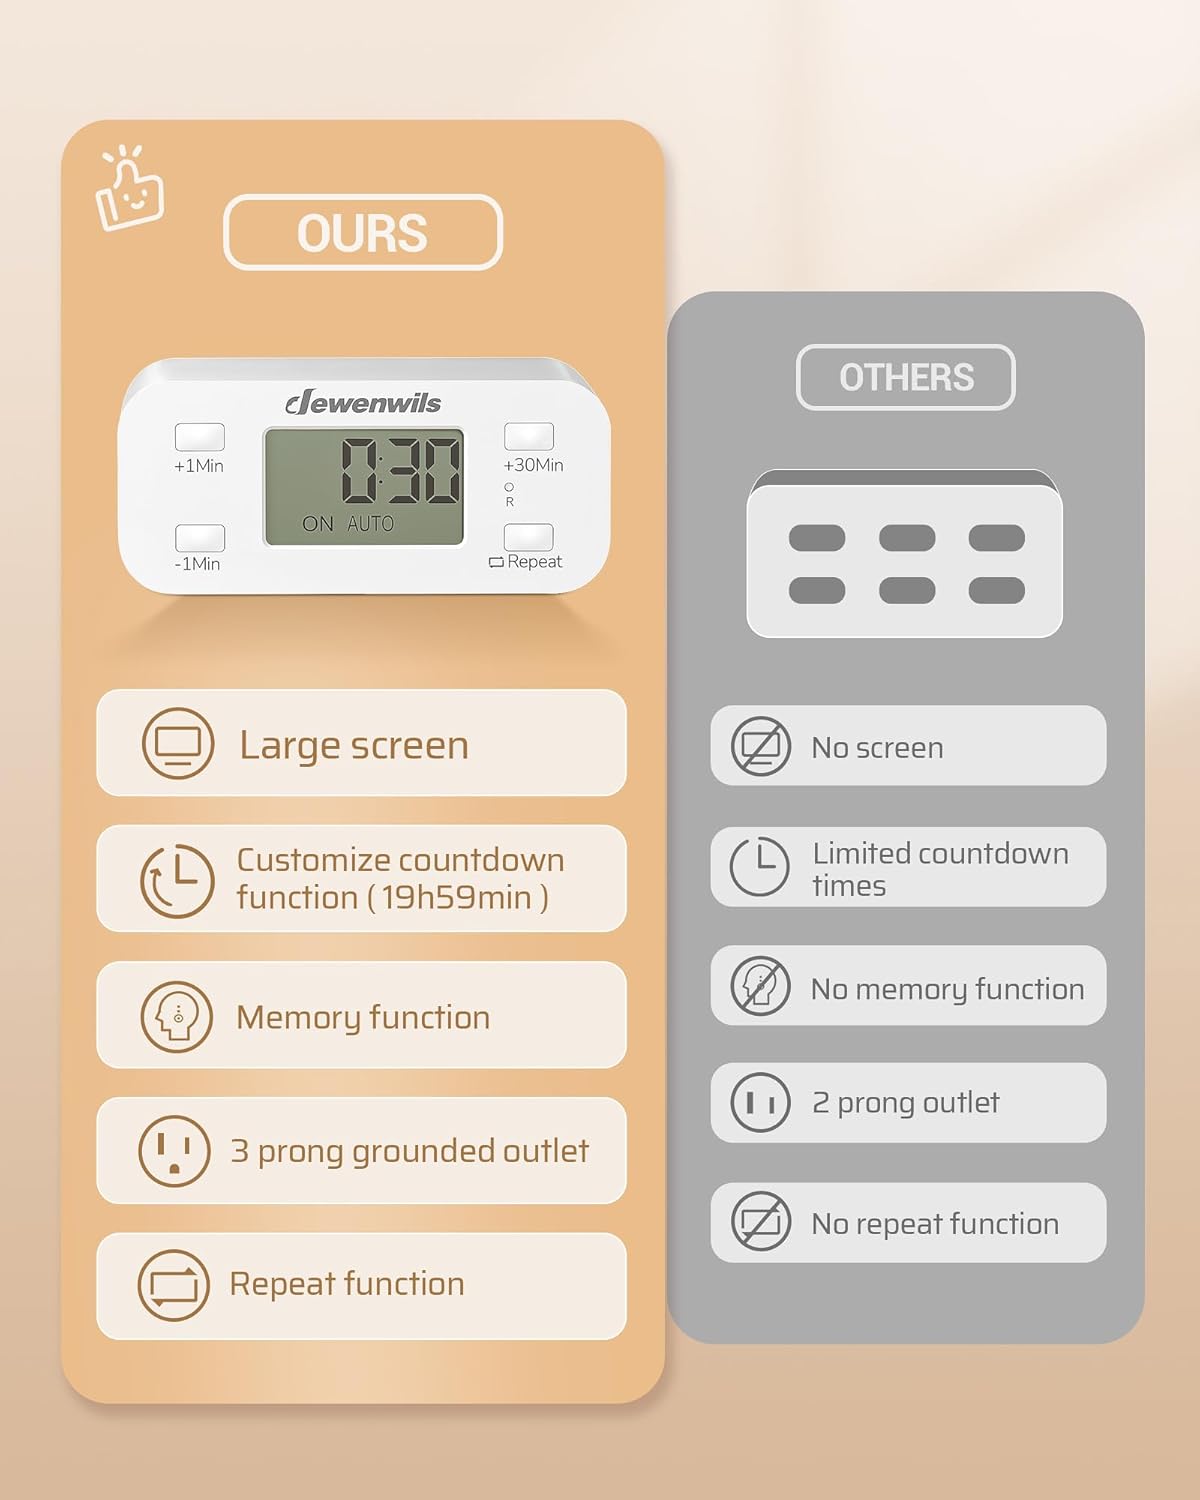
Figure 2: Key Features of the DEWENWILS Timer
This image presents a comparison between the DEWENWILS timer and a generic timer. The DEWENWILS side highlights its features: Large screen, Customizable countdown function (19h59min), Memory function, 3-prong grounded outlet, and Repeat function. The "Others" side shows a generic timer with no screen, limited countdown times, no memory function, 2-prong outlet, and no repeat function, emphasizing the advantages of the DEWENWILS product.

Figure 3: Space-Saving Design
This image shows the DEWENWILS timer plugged into a standard wall outlet, demonstrating its compact and slim design. A power cord is plugged into the side of the timer, illustrating that it does not obstruct the second outlet. Dimensions are indicated as 1.54 inches (width), 3.45 inches (length), and 1.52 inches (height), highlighting its space-saving capability. Icons for "Grounded Plug" and "Grounded Outlet" are also present.
4. Setup
- Unpack the Timer: Carefully remove the timer from its packaging.
- Initial Charge (Optional): The timer has a built-in backup battery. For optimal performance and to ensure settings are retained during power outages, it is recommended to plug the timer into an active outlet for at least 30 minutes before initial programming.
- Reset the Timer: Before first use or if you wish to clear all previous settings, use a small pointed object (like a paperclip) to press the recessed "Reset" button. This button is typically located near the display or on the side.
- Plug into Outlet: Insert the timer firmly into a standard 3-prong grounded wall outlet.
- Connect Appliance: Plug the appliance you wish to control into the 3-prong outlet on the side of the timer. Ensure the appliance is switched to its "ON" position if it has a manual power switch.

Figure 4: Resetting and Setting Up the Timer
This diagram illustrates the initial setup steps for the DEWENWILS timer. Step 1 points to the recessed reset button, instructing the user to "Reset the timer" using a pin. Step 2 shows the display and buttons, explaining how to "Set up a program" by pressing "+30Min", "+1Min", or "-1Min" buttons, with a maximum setting of 19 hours and 59 minutes. Step 3 advises to "Set up a program" for the daily cycle according to user needs.
5. Operating Instructions
5.1 Mode Selection
The timer features a side switch to select the operating mode:
- ON: The connected appliance will remain continuously ON. The display will show "ON".
- OFF: The connected appliance will remain continuously OFF. The display will show "OFF".
- AUTO: The timer will operate according to your programmed countdown settings. The display will show "ON AUTO" or "OFF AUTO" depending on the current state of the countdown.

Figure 5: Auto/Manual Control Switch
This image illustrates the side switch on the DEWENWILS timer, which allows manual adjustment of the operating mode. The switch has three positions: OFF, AUTO, and ON. Below the timer, three display examples show the corresponding screen outputs for each mode: "ON" for Always ON, "12:00 ON AUTO" for Countdown (Auto mode), and "OFF" for Always OFF.
5.2 Setting the Countdown Time (AUTO Mode)
When the side switch is set to AUTO, you can set the desired countdown duration:
- Use the "+1Min" button to increase the countdown time by one minute per press.
- Use the "-1Min" button to decrease the countdown time by one minute per press.
- Use the "+30Min" button to increase the countdown time by thirty minutes per press.
- Press and hold any of these buttons to rapidly adjust the time. The maximum countdown time is 19 hours and 59 minutes.
- Once the desired time is set, the timer will automatically begin the countdown. The display will show the remaining time.

Figure 6: Once Countdown Function
This image shows the DEWENWILS timer plugged into a wall outlet, with a fan connected to it. The timer's display shows "0:45 ON AUTO", indicating a 45-minute countdown. The text "45min later OFF today" clarifies the function, suggesting it's perfect for appliances like coffee machines, curling irons, and hair straighteners to increase electricity safety.
5.3 Using the Repeat Function
The Repeat function allows the timer to automatically apply your set countdown daily at the same time until deactivated. This is useful for daily routines or to make your home appear occupied.
- First, set your desired countdown time as described in Section 5.2.
- Press the "Repeat" button. A small "R" or repeat icon will appear on the display, indicating that the repeat function is active.
- The timer will now activate and deactivate at the same time each day based on the initial countdown start time.
- To deactivate the repeat function, press the "Repeat" button again. The "R" or repeat icon will disappear from the display.
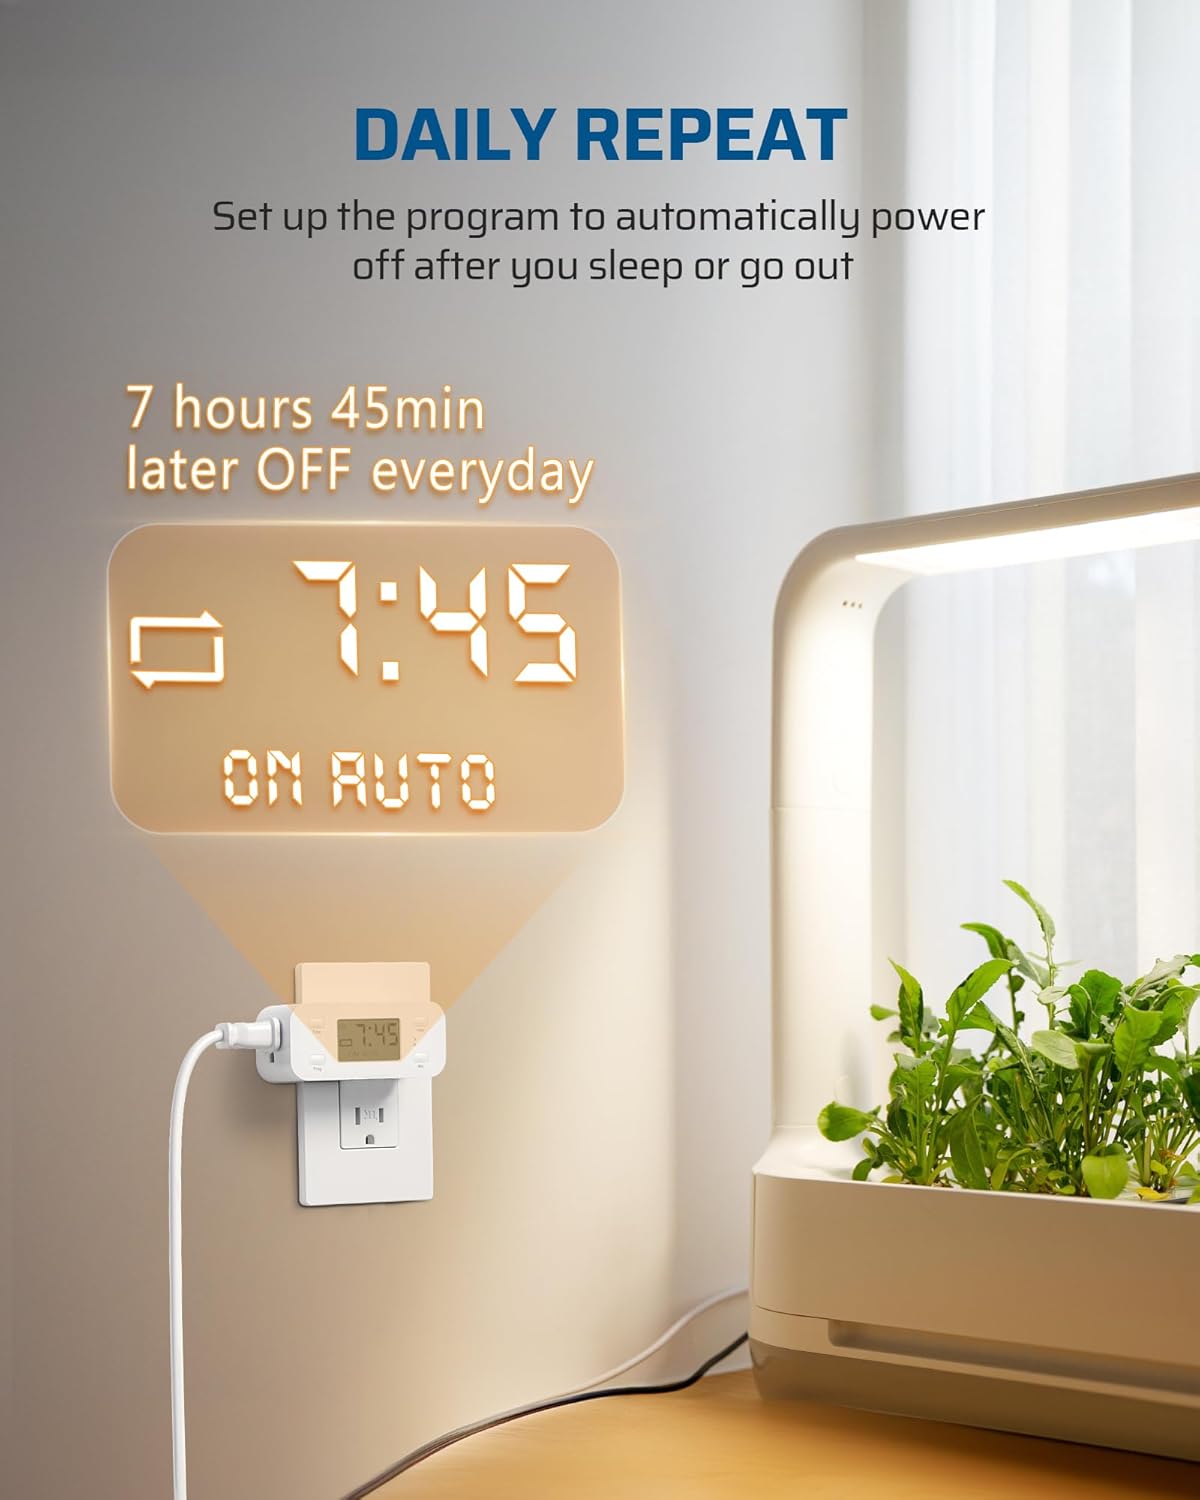
Figure 7: Daily Repeat Function
This image shows the DEWENWILS timer plugged into a wall outlet, controlling a plant grow light. The timer's display shows "7:45 ON AUTO" with a repeat icon, indicating a daily repeat function set for 7 hours and 45 minutes. The text "7 hours 45min later OFF everyday" explains its purpose: to automatically power off after you sleep or go out, and to help make your home appear occupied, deterring potential burglars.

Figure 8: Enhancing Home Security
This image illustrates how the DEWENWILS timer can enhance home security. It shows a timer plugged into an outdoor wall outlet (though the product is for indoor use, this depicts the concept of automated lighting). A house with lights on is shown at night, while a figure resembling a burglar is seen outside. The text explains that setting lights to turn on/off automatically can prevent potential theft, creating the impression that the home is occupied.
6. Maintenance
- Cleaning: Unplug the timer from the wall outlet before cleaning. Use a soft, dry cloth to wipe the surface. Do not use abrasive cleaners or solvents.
- Storage: If storing the timer for an extended period, ensure it is unplugged and kept in a cool, dry place. The internal battery will retain settings for up to 3 months.
- Battery Backup: The timer has a built-in battery for memory retention. This battery is not user-replaceable. If the timer consistently loses settings after power interruptions, it may indicate the battery needs recharging by keeping the unit plugged in, or it may be nearing the end of its lifespan.
7. Troubleshooting
| Problem | Possible Cause | Solution |
|---|---|---|
| Timer display is blank or not responding. | No power to the outlet; internal battery drained. | Check the wall outlet with another device. Plug the timer into a live outlet for at least 30 minutes to charge the internal battery. |
| Appliance does not turn ON/OFF as programmed. | Timer is not in AUTO mode; appliance is not switched ON; incorrect program setting; overload. | Ensure the side switch is set to AUTO. Verify the appliance's power switch is ON. Double-check your countdown settings. Ensure the appliance's wattage does not exceed 1000W. |
| Timer loses settings after unplugging or power outage. | Internal backup battery is low or depleted. | Plug the timer into a live outlet for several hours to fully charge the internal battery. If the problem persists, the battery may be at the end of its life. |
| Buttons are unresponsive. | Unit malfunction; temporary software glitch. | Perform a full reset using the recessed reset button. If the issue continues, contact customer support. |
8. Specifications
| Attribute | Value |
|---|---|
| Model Number | ITE-04 |
| Voltage | 125V~, 60Hz |
| Max Load | 15A / 1000W (Resistive) |
| Motor Rating | 1/2 HP |
| Product Dimensions | 4.21 x 1.85 x 3.62 inches (10.7 x 4.7 x 9.2 cm) |
| Item Weight | 7.8 ounces (221 g) |
| Material | Plastic |
| Color | White |
| Indoor/Outdoor Use | Indoor Use Only |
9. Warranty and Support
DEWENWILS products are designed and manufactured to the highest quality standards. For warranty information, technical support, or any questions regarding your DEWENWILS Indoor Countdown Timer Outlet, please contact DEWENWILS customer service. You can typically find contact details on the product packaging or the official DEWENWILS website.
Website: www.dewenwils.com (Example, verify actual website)
Please have your model number (ITE-04) and purchase information ready when contacting support.