Introduction
This instruction manual provides essential information for the safe and efficient operation, assembly, maintenance, and troubleshooting of your HYCHIKA 1500W 110 Bar Pressure Washer, Model MO1503. Please read this manual thoroughly before using the appliance and keep it for future reference.

Figure 1: HYCHIKA 1500W 110 Bar Pressure Washer with included accessories.
Product Components
Familiarize yourself with the main components of your pressure washer:

Figure 2: Key components of the HYCHIKA Pressure Washer. This includes the machine body, power switch, water inlet connector, water outlet connector, high-pressure hose, and high-pressure gun.
Included Accessories:
- 1x HPG15 High-Pressure Gun
- 1x 5m High-Pressure Hose
- 1x Foam Bottle
- 1x Water Inlet Connector
- 1x Nozzle Cleaning Needle
- 2x Screws for Transport Handle
- 1x User Manual

Figure 3: All items included in the product packaging for the HYCHIKA Pressure Washer.
Setup and Assembly
Follow these steps to assemble your pressure washer before first use:
- Install the Handle: Secure the transport handle to the main unit using the two provided screws. Ensure it is firmly attached.
- Connect the High-Pressure Hose: Attach one end of the 5m high-pressure hose to the water outlet connector on the machine body. Ensure a secure, leak-free connection.
- Assemble the High-Pressure Gun and Nozzle: Connect the nozzle to the high-pressure gun. Then, attach the other end of the high-pressure hose to the high-pressure gun.
- Connect the Water Supply: Attach the water inlet connector to the machine's water inlet. Connect your garden hose to the water inlet connector. Ensure the water supply is clean and free of debris. The pressure washer can draw water from a tap or a bucket.

Figure 4: Visual guide for assembling the pressure washer, including attaching the handle, connecting the high-pressure hose, assembling the spray gun, and connecting the water supply.
Operating Instructions
Once assembled, your HYCHIKA pressure washer is ready for use. Always ensure a stable footing and wear appropriate safety gear.
General Operation:
- Ensure all connections are tight.
- Turn on the water supply completely before switching on the pressure washer.
- Plug the power cable into a suitable electrical outlet.
- Press the power switch to the 'ON' position.
- Squeeze the trigger on the high-pressure gun to start the water flow. The unit features an auto-stop function, which means the motor stops when the trigger is released and restarts when squeezed again.
Specific Cleaning Applications:
Car Washing:
For effective car cleaning, use the foam bottle attachment. Fill it with appropriate car shampoo. Apply foam evenly over the vehicle, allow it to dwell, then rinse thoroughly with the high-pressure jet.

Figure 5: Applying foam to a car for thorough cleaning with the pressure washer.
Patio and Floor Cleaning:
For stubborn dirt on patios, driveways, or other hard surfaces, use the high-pressure jet. Maintain a safe distance from the surface to avoid damage.

Figure 6: Cleaning a patio surface using the powerful jet of the pressure washer.
Garden Furniture Cleaning:
To clean garden furniture, adjust the nozzle to a wider spray pattern or increase your distance from the object to prevent damage to delicate surfaces. The powerful water flow quickly removes dirt and grime.

Figure 7: Restoring cleanliness to garden furniture using the pressure washer.
Maintenance
Regular maintenance ensures the longevity and optimal performance of your pressure washer.
After Each Use:
- Turn off the power switch and unplug the unit.
- Turn off the water supply.
- Squeeze the trigger on the gun to release any remaining pressure in the system.
- Disconnect the water inlet hose and high-pressure hose.
- Drain all water from the pump and hoses to prevent freezing in cold weather.
- Clean the exterior of the machine with a damp cloth.
- Use the nozzle cleaning needle to clear any blockages in the nozzle.
Storage:
The HYCHIKA pressure washer is designed for convenient storage with integrated hooks for the power cable, high-pressure hose, and gun.
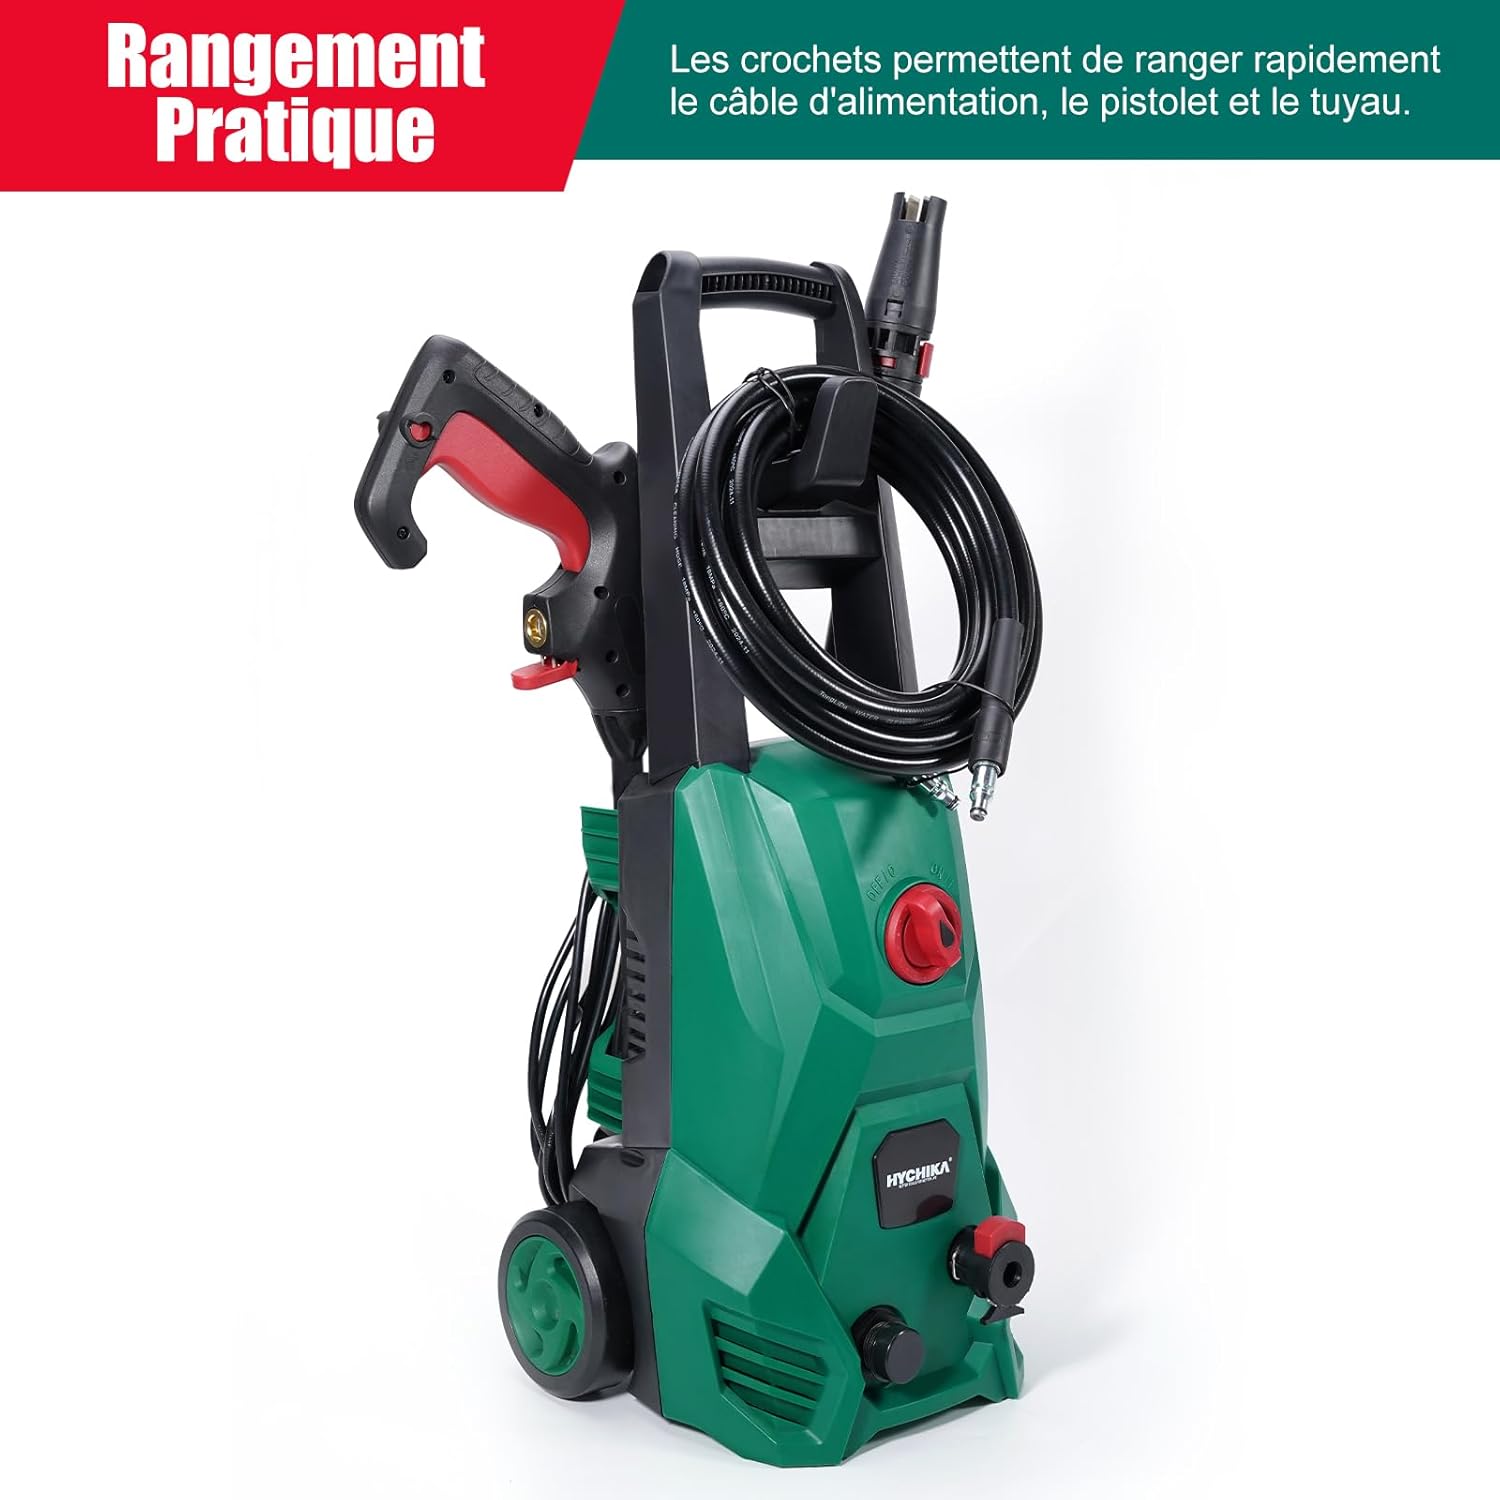
Figure 8: The pressure washer features integrated storage for its accessories, including the power cable, high-pressure gun, and hose.
- Store the unit in a dry, frost-free location.
- Ensure all accessories are properly stored on the unit to prevent loss or damage.
Troubleshooting
Here are some common issues and their solutions:
| Problem | Possible Cause | Solution |
|---|---|---|
| Motor does not start | No power supply; Power switch OFF; Thermal overload activated | Check power connection; Turn switch ON; Allow unit to cool down |
| Low pressure | Insufficient water supply; Clogged nozzle; Air in pump | Check water tap; Clean nozzle with needle; Bleed air from pump by running without nozzle until steady flow |
| Water leakage | Loose connections; Damaged O-rings | Tighten all connections; Replace damaged O-rings |
| Motor runs intermittently | Air in pump; Water supply interruptions | Bleed air from pump; Ensure continuous water supply |
Specifications
| Feature | Specification |
|---|---|
| Manufacturer | HYCHIKA |
| Model Number | MO1503 |
| Product Dimensions (L x W x H) | 30 x 23 x 23 cm |
| Item Weight | 6.4 Kilograms |
| Power Source | Corded Electric |
| Wattage | 1500 Watts |
| Maximum Pressure | 110 Bar (1600 PSI) |
| Flow Rate | 410 l/h |
| Hose Length | 5 meters |
| Cable Length | 5 meters |
| Material | Aluminum |
| Special Features | Efficient Cleaning, Portable, Auto-Stop System |
Warranty and Support
For warranty information, technical support, or to purchase replacement parts, please refer to the contact details provided on the product packaging or visit the official HYCHIKA website. Keep your purchase receipt as proof of purchase for warranty claims.


