1. Introduction
Thank you for choosing the Xilecam Night Vision Goggles. This device is designed to provide clear vision in low-light and complete darkness conditions, making it ideal for various outdoor activities such as camping, hunting, security, and wildlife observation. Featuring 1080P video recording, 12MP image capture, 8X digital zoom, and a 3-inch display, these binoculars offer enhanced visibility and recording capabilities. Please read this manual thoroughly to ensure proper operation and maintenance of your device.

Image 1.1: Xilecam Night Vision Goggles displaying a leopard on its screen, highlighting its night vision capabilities.
2. What's in the Box
Upon unpacking, please verify that all the following items are included:
- Night Vision Goggles
- User Manual
- Lanyard
- 32GB Memory Card
- Charging Cable (USB Type-C)

Image 2.1: The complete package contents, including the night vision goggles, 32GB memory card, USB charging cable, and lanyard.
3. Product Overview
Familiarize yourself with the main components and controls of your Night Vision Goggles:
- Objective Lens: Captures light from the scene. Features a 25mm multi-layer coated optical lens.
- Infrared Illuminator (IR): Provides invisible light for night vision in complete darkness. Features 7 adjustable levels.
- Focus Adjustment Ring: Manual adjustment for clear images at various distances.
- Eyepiece/Display Screen: 3.0-inch high-definition screen for viewing images and videos.
- Control Buttons: Power, Mode, IR Level, Zoom, Menu, Record/Capture.
- Battery Compartment: Houses the 5000mAh rechargeable Lithium-Ion battery.
- USB-C Port: For charging the device.
- TF Card Slot: For inserting the 32GB memory card to store recordings.
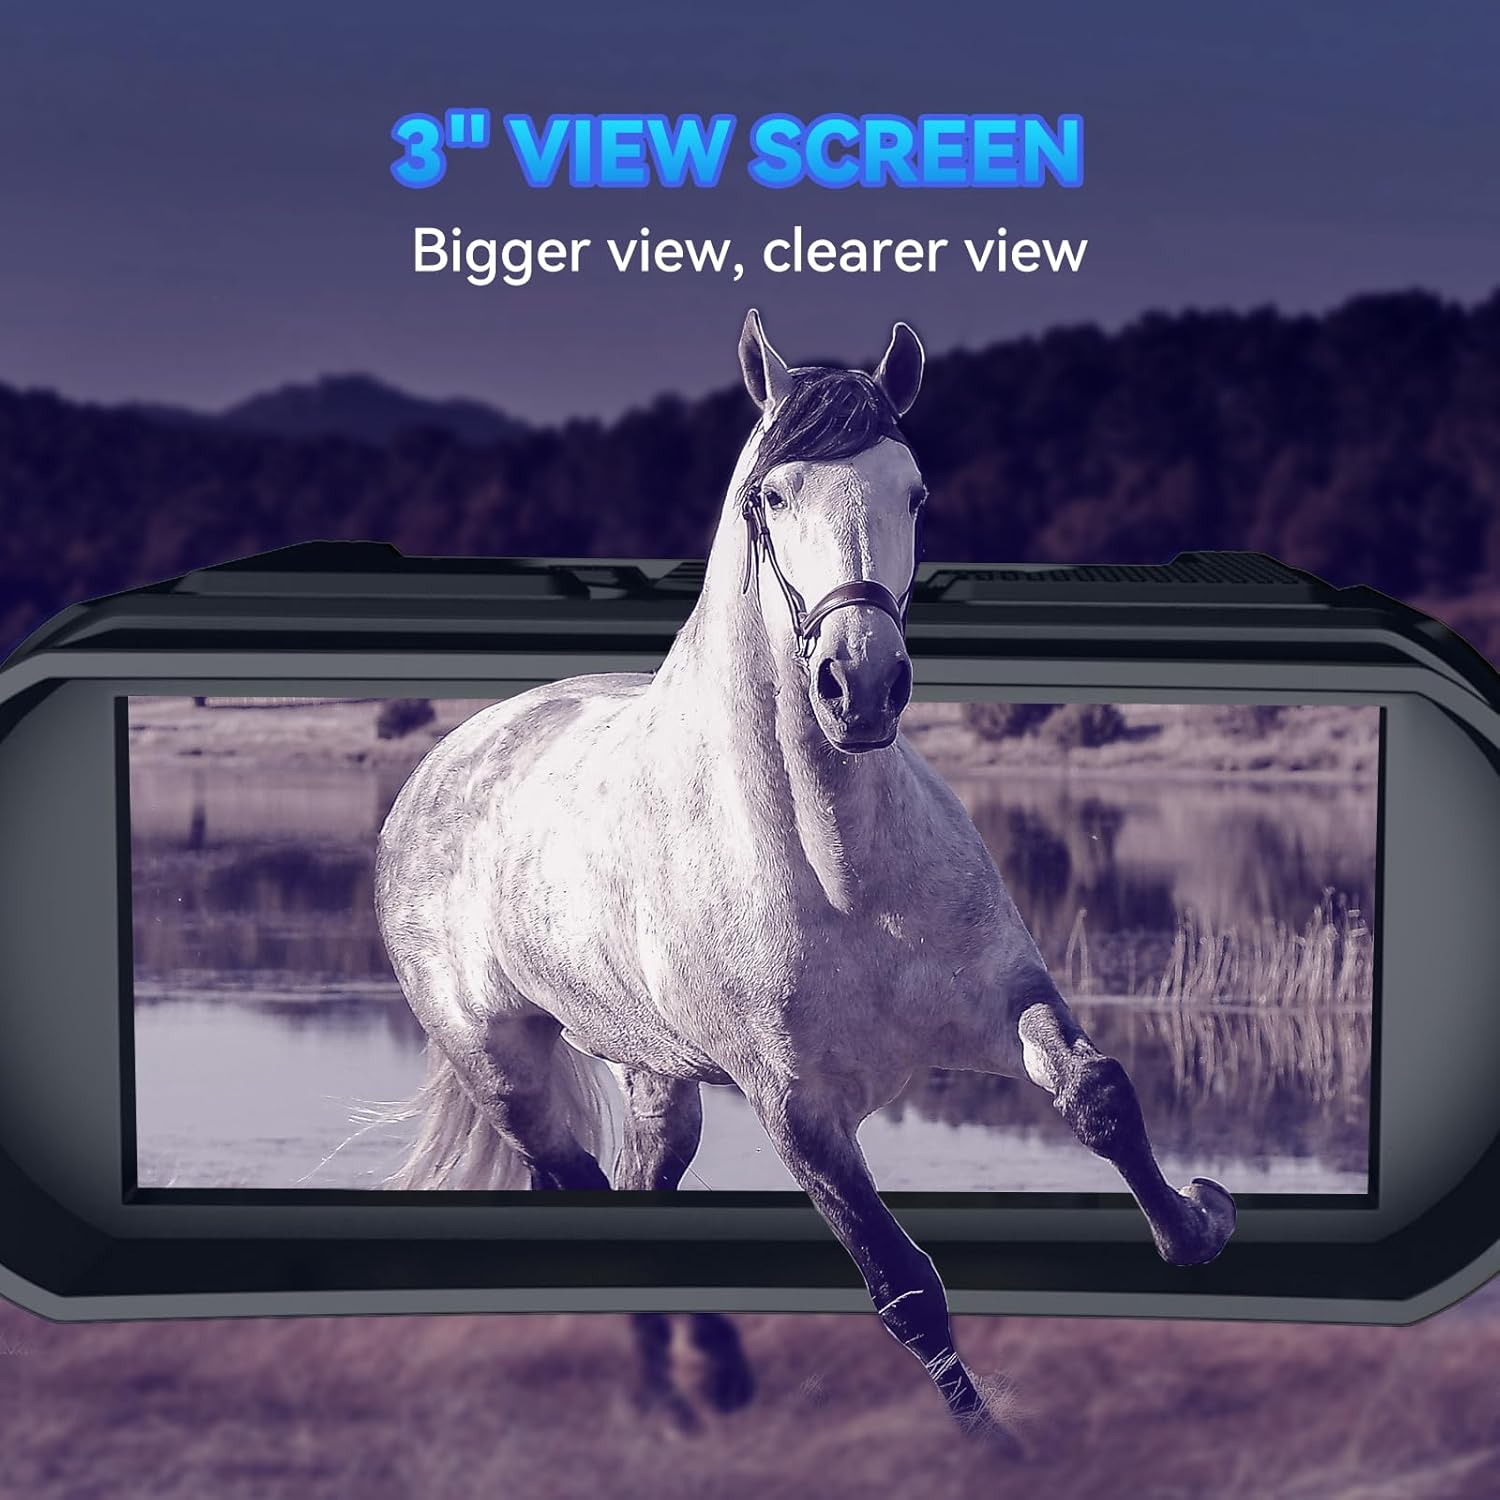
Image 3.1: The 3-inch view screen, providing a larger and clearer viewing experience.

Image 3.2: Illustration of the 8X digital zoom and manual focus capabilities, showing how to achieve clear images.
4. Setup
4.1 Charging the Battery
The device comes with a built-in 5000mAh rechargeable Lithium-Ion battery. Before first use, fully charge the device.
- Connect the provided USB-C charging cable to the device's USB-C port.
- Plug the other end of the cable into a USB power adapter (not included) or a computer's USB port.
- The charging indicator will show the charging status. Once fully charged, the indicator will change (refer to the device's display for specific icons).
4.2 Inserting the Memory Card
A 32GB memory card is included for storing photos and videos.
- Locate the TF card slot on the side of the device.
- Gently insert the memory card into the slot with the gold contacts facing down until it clicks into place.
- To remove, push the card in slightly until it springs out.

Image 4.1: Location of the USB port and TF card slot, illustrating how to connect the charging cable and insert the memory card.
5. Operating Instructions
5.1 Power On/Off
- Power On: Press and hold the Power button for a few seconds until the screen illuminates.
- Power Off: Press and hold the Power button again until the screen turns off.
5.2 Mode Selection
The device supports Photo Mode and Video Mode.
- Press the Mode button to switch between Photo (12MP) and Video (1080P) recording modes.

Image 5.1: Day and Night modes, illustrating the Photo (12MP) and Video (FHD) options.
5.3 Adjusting Infrared (IR) Levels
The infrared illuminator enhances visibility in dark conditions. There are 7 adjustable IR levels.
- In night vision mode, press the IR+ button to increase the IR intensity.
- Press the IR- button to decrease the IR intensity.
- Higher IR levels provide brighter images in darker environments but may consume more battery.

Image 5.2: The 7 levels of infrared illumination, demonstrating how visibility improves with higher IR settings.
5.4 Digital Zoom
The device features an 8X digital zoom to magnify distant objects.
- Use the Zoom+ button to zoom in.
- Use the Zoom- button to zoom out.
5.5 Manual Focus
For optimal clarity, adjust the focus ring on the objective lens.
- Rotate the Focus Adjustment Ring (located around the objective lens) until the image on the screen appears sharp.
5.6 Capturing Photos and Videos
- In Photo Mode, press the Record/Capture button once to take a picture.
- In Video Mode, press the Record/Capture button once to start recording. Press it again to stop recording.
5.7 Screen Brightness Adjustment
Adjust the screen brightness to protect your eyes and avoid startling wildlife.
- Navigate to the menu settings to find the screen brightness option.
- Select your desired brightness level (e.g., 10%, 30%, 50%, 70%, 90%).
Image 5.3: Screen brightness adjustment options, demonstrating how different levels impact visibility and user discretion.
6. Maintenance
6.1 Cleaning
- Lenses: Use a soft, lint-free cloth specifically designed for optical lenses. Gently wipe the lens surfaces. For stubborn smudges, use a small amount of lens cleaning solution.
- Body: Wipe the body of the device with a soft, damp cloth. Avoid using harsh chemicals or abrasive cleaners.
6.2 Storage
- Store the device in a cool, dry place, away from direct sunlight and extreme temperatures.
- Use the provided storage bag to protect the device from dust and scratches.
- If storing for an extended period, ensure the battery is partially charged (around 50%) to prolong its lifespan.
7. Troubleshooting
| Problem | Possible Cause | Solution |
|---|---|---|
| Device does not power on | Low battery; Power button not pressed correctly | Charge the battery fully; Press and hold the Power button for several seconds |
| Image is blurry | Improper focus; Dirty lens | Adjust the manual focus ring; Clean the objective lens |
| Cannot see in total darkness | IR illuminator off or too low | Increase IR level using the IR+ button |
| Cannot record photos/videos | Memory card full or not inserted; Incorrect mode selected | Insert/replace memory card; Ensure card is properly formatted; Switch to Photo or Video mode |
| Short battery life | High IR level usage; Frequent recording | Reduce IR level when not needed; Fully charge battery before use; Consider using a power bank for extended use |
8. Specifications
- Model: B0D2MQDY9S
- Image Resolution: 12MP
- Video Resolution: 1080P FHD
- Display Screen: 3.0-inch High-Definition
- Objective Lens Diameter: 25mm
- Digital Zoom: 8X
- Infrared Illuminator: 7 Levels adjustable
- Battery: 5000mAh Rechargeable Lithium-Ion (included)
- Storage: Supports TF Card (32GB included)
- Item Weight: 7.1 ounces
- Package Dimensions: 7.76 x 7.01 x 3.07 inches
- Special Feature: Night Vision
- Age Range (Description): Adult

Image 8.1: Key features and specifications of the Xilecam Night Vision Goggles.
9. Warranty Information
Xilecam products are manufactured to high-quality standards. For specific warranty details, including coverage period and terms, please refer to the warranty card included with your product or visit the official Xilecam website. Keep your purchase receipt as proof of purchase for any warranty claims.
10. Customer Support
If you encounter any issues or have questions regarding your Xilecam Night Vision Goggles that are not covered in this manual, please contact our customer support team. You can typically find contact information on the official Xilecam website or through the retailer where you purchased the product.
For online resources and frequently asked questions, please visit: Xilecam Brand Store on Amazon
