1. Introduction
This manual provides detailed instructions for the installation, operation, and maintenance of your VECHTEL 8-Core Android 13 Car Radio. This unit is specifically designed for Toyota Sienna models manufactured between 2011 and 2014. Please read this manual thoroughly before installation and use to ensure proper functionality and safety.
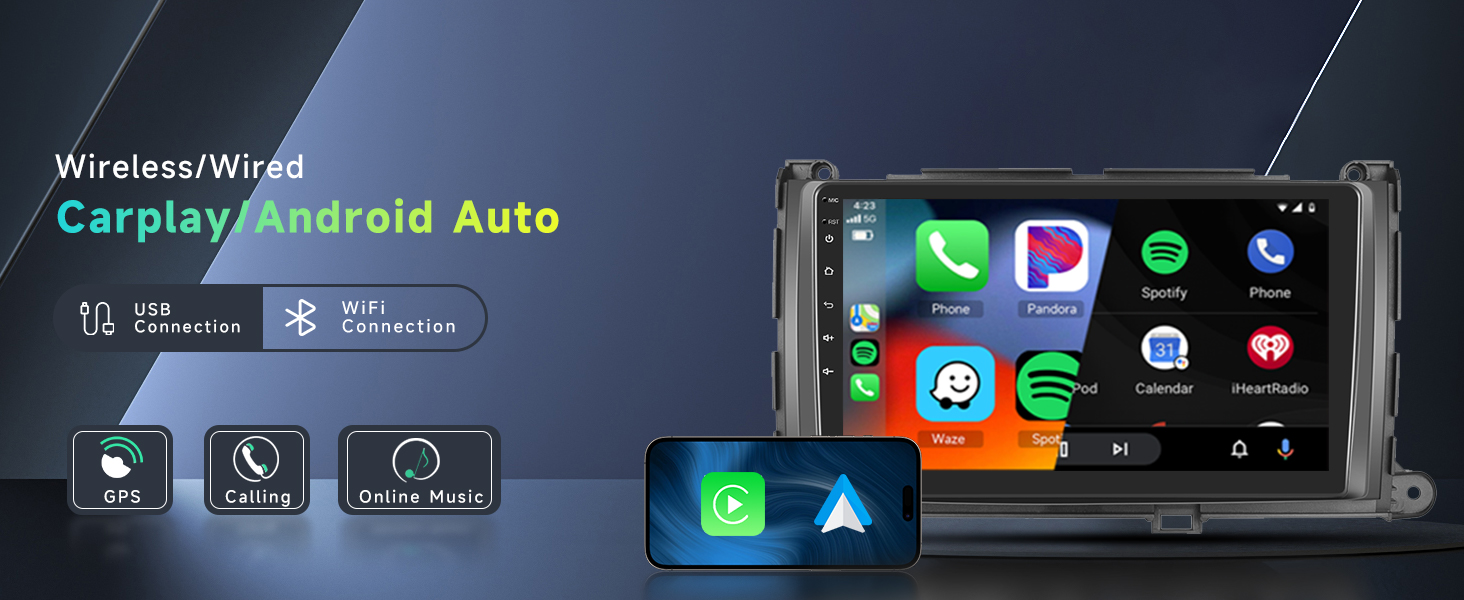
Image 1.1: Overview of the VECHTEL 8-Core Android 13 Car Radio interface, highlighting compatibility with Toyota Sienna 2011-2014 models.
1.1 Compatibility Notice
This car radio is compatible with Toyota Sienna models from 2011 to 2014. However, it is crucial to verify your vehicle's center console design. The unit may not fit all configurations within this model year range. Please compare your vehicle's original center console with the images provided below to confirm compatibility before proceeding with installation.

Image 1.2: Example of an incompatible Toyota Sienna center console. If your console matches this design, the unit will not fit.
If you are uncertain about compatibility, please consult with a professional installer or contact customer support with a picture of your vehicle's center console and original car stereo.
2. Package Contents
Please check the package carefully to ensure all items are present and undamaged. If any items are missing or damaged, contact customer support immediately.

Image 2.1: Visual representation of the main unit and included accessories.
- VECHTEL 8-Core Android 13 Car Radio Unit
- Power Cable
- RCA Input/Output Cables
- Reversing Camera Input Cable
- USB Cables (x2)
- GPS Antenna
- Radio Antenna
- HD Backup Camera
- Microphone (MIC)
- User Manual (this document)
- Installation Tool (plastic pry tool)
- Canbus Decoder (if applicable to your vehicle model)
3. Setup and Installation
Installation of this car radio requires basic automotive electrical knowledge. If you are not comfortable with the installation process, it is highly recommended to seek professional assistance to avoid damage to the unit or your vehicle.
3.1 Pre-Installation Checklist
- Ensure vehicle compatibility (refer to Section 1.1).
- Gather necessary tools: trim removal tools, screwdrivers, wire strippers/crimpers (if splicing is required).
- Disconnect the vehicle's negative battery terminal to prevent electrical shorts.
- Protect interior surfaces with a cloth or mat.
3.2 Removing the Original Stereo
The process for removing the original stereo may vary slightly depending on your specific Toyota Sienna trim level. Generally, it involves:
- Carefully remove any trim panels surrounding the factory radio using a plastic pry tool.
- Unscrew any retaining bolts or screws holding the factory radio in place.
- Gently pull the factory radio out of the dashboard.
- Disconnect all wiring harnesses and antenna cables from the back of the factory radio.

Image 3.1: Comparison of the vehicle's dashboard before and after the installation of the VECHTEL car radio.
3.3 Wiring Connections
Refer to the wiring diagram provided in the package and the image below for correct connections. Ensure all connections are secure.

Image 3.2: Detailed diagram of the wiring harness connections for the VECHTEL car radio, showing various connectors for power, audio, USB, and camera inputs.
- Power Cable: Connect the main power harness to the vehicle's corresponding harness.
- GPS Antenna: Mount the GPS antenna in a location with a clear view of the sky (e.g., on the dashboard near the windshield).
- Radio Antenna: Connect the vehicle's radio antenna to the unit.
- USB Cables: Route the USB extension cables to a convenient location (e.g., glove compartment) for connecting external devices.
- HD Backup Camera: Install the backup camera at the rear of the vehicle. Connect its video output to the "Reversing Camera Input" on the main unit and its power to the vehicle's reverse light circuit.
- Microphone: Connect the external microphone for improved call quality and voice commands.
- Steering Wheel Control (SWC): If your vehicle supports SWC, connect the appropriate wires. Configuration may be required in the unit's settings (refer to Section 4.5).
3.4 Installing the New Unit
- Carefully slide the VECHTEL car radio into the dashboard opening.
- Secure the unit with the retaining bolts or screws.
- Reinstall any trim panels removed earlier, ensuring they snap securely into place.
- Reconnect the vehicle's negative battery terminal.
- Turn on the vehicle's ignition and power on the car radio to test functionality.
4. Operating Instructions
This section details the primary functions and features of your VECHTEL Android 13 Car Radio.
4.1 Wireless Carplay & Android Auto
The unit supports both wireless and wired Apple Carplay and Android Auto, allowing seamless integration with your smartphone for navigation, music, calls, and more.

Image 4.1: Illustration of wireless Carplay and Android Auto connectivity options, including USB and WiFi.
- Wireless Connection: Enable Bluetooth and Wi-Fi on your smartphone. Pair your phone with the car radio via Bluetooth. Follow the on-screen prompts to initiate Carplay or Android Auto.
- Wired Connection: Connect your smartphone to one of the unit's USB ports using a high-quality USB cable. The system should automatically detect and launch Carplay or Android Auto.
- Voice Control: Utilize Siri (for Carplay) or Google Assistant (for Android Auto) for hands-free operation.

Image 4.2: Depiction of voice assistant integration (Siri/Google) for hands-free control of music, calls, and navigation.
4.2 GPS Navigation & Wi-Fi
The unit supports both online and offline navigation. Connect to Wi-Fi to access online maps, real-time traffic, and download additional applications.

Image 4.3: Display showing GPS navigation with both offline and online map options, alongside Wi-Fi connectivity for app downloads.
- GPS: The included GPS antenna provides accurate positioning for navigation applications.
- Wi-Fi: Connect to a Wi-Fi hotspot (e.g., from your smartphone) to enable internet access for streaming, app downloads, and online navigation services.
4.3 Bluetooth 5.0 & FM/RDS Radio
Enjoy hands-free calling and audio streaming via Bluetooth 5.0, and access your favorite radio stations with the built-in FM/RDS tuner.

Image 4.4: Interface showing Bluetooth 5.0 for phone calls and music streaming, and the FM/RDS radio tuner with station presets.
- Bluetooth Pairing: Go to the Bluetooth settings on the unit and your phone. Search for available devices and select "VECHTEL Car Radio" to pair.
- FM/RDS Radio: Use the radio application to scan for stations. RDS (Radio Data System) provides station information where available.
4.4 Mirror Link
Mirror Link allows you to display your smartphone's screen directly onto the car radio's display. This feature supports both Android and iOS devices.

Image 4.5: Visual representation of Mirror Link, showing a smartphone screen duplicated on the car radio display.
- Access the "CarbitLink" or "Mirror Link" application on the head unit.
- Follow the on-screen instructions to connect your Android or iOS device, typically via USB or Wi-Fi.
4.5 Steering Wheel Control (SWC)
The unit supports your vehicle's original steering wheel controls, allowing you to manage audio and calls without taking your hands off the wheel.

Image 4.6: Depiction of steering wheel controls and the display of the HD reverse camera feed with dynamic guidelines.
- Navigate to "Factory Settings" (password may be required, consult customer support if not provided).
- Select the correct protocol for your vehicle or use the "Steering Wheel Learning" function to map buttons.
- If issues persist, contact customer support for assistance.
4.6 HD Backup Camera
The included waterproof night vision camera provides clear reversing images, automatically activating when the vehicle is put into reverse gear.
- Guide Lines: To enable or disable dynamic and static tracklines, go to "Car Info" > "About" > "Custom Set" and toggle "show dynamic trackline" and "show static trackline".
- Note: This unit does not support the original factory backup camera.
4.7 Digital Sound Processor (DSP) with 32-band EQ
Customize your audio experience with the integrated DSP and 32-band equalizer, allowing precise tuning of sound output.

Image 4.7: Screenshot of the 32-band equalizer interface, demonstrating various sound presets and manual adjustment options.
- Access the DSP or Equalizer application from the main menu.
- Adjust frequency bands, balance, fader, and subwoofer output to achieve desired sound quality.
4.8 Split-Screen Display & UI Themes
Enhance multitasking with the split-screen feature and personalize your interface with various UI themes.

Image 4.8: Example of the split-screen feature, showing navigation and music applications running simultaneously.

Image 4.9: A selection of available UI themes for personalizing the car radio's interface.
- Split-Screen: Long-press an app icon and drag it to one side of the screen to activate split-screen mode. Select another app for the other side.
- UI Themes: Access the "Themes" or "Settings" menu to browse and apply different user interface themes.
5. Maintenance
Proper maintenance ensures the longevity and optimal performance of your car radio.
- Screen Cleaning: Use a soft, lint-free cloth to gently wipe the touchscreen. For stubborn smudges, slightly dampen the cloth with water or a screen-safe cleaner. Avoid harsh chemicals or abrasive materials.
- Software Updates: Periodically check for software updates from the manufacturer's website or through the unit's settings (if available). Updates can improve performance and add new features.
- General Care: Avoid exposing the unit to extreme temperatures, direct sunlight for prolonged periods, or excessive moisture.
- Cable Management: Ensure all cables are securely connected and not pinched or damaged.
6. Troubleshooting
This section addresses common issues you might encounter. For problems not listed here, please contact customer support.
| Problem | Possible Cause | Solution |
|---|---|---|
| Unit does not power on. | Loose power connection, blown fuse, incorrect wiring. | Check all power cable connections. Inspect vehicle fuses and the unit's fuse. Verify wiring against the diagram. |
| No sound or distorted sound. | Speaker wires incorrectly connected, volume too low, DSP settings. | Check speaker wire connections. Adjust volume. Reset DSP/EQ settings to default. |
| Touchscreen unresponsive. | Software glitch, screen calibration issue. | Restart the unit (turn vehicle off and on). If persistent, perform a factory reset (data will be lost). |
| Carplay/Android Auto not connecting. | Bluetooth/Wi-Fi off, incorrect USB cable, software issue. | Ensure Bluetooth/Wi-Fi is enabled on phone and unit. Try a different USB cable. Re-pair devices. Update phone OS. |
| Steering Wheel Controls not working. | Incorrect wiring, protocol not set, learning not performed. | Verify SWC wiring. Go to Factory Settings to select correct protocol or perform "Steering Wheel Learning". |
| Backup camera not displaying. | Camera not powered, video cable loose, incorrect input selected. | Check camera power and video connections. Ensure vehicle is in reverse. Verify camera input settings. |
7. Specifications
| Feature | Detail |
|---|---|
| Operating System | Android 13.0 |
| CPU | 8-Core Processor |
| RAM | 4GB |
| ROM | 64GB |
| Screen Size | 9 Inches |
| Display Type | IPS HD Touch Screen |
| Resolution | 1280 x 720 |
| Bluetooth Version | 5.0 |
| Connectivity | Bluetooth, USB, Wi-Fi |
| Special Features | Wireless Carplay, Wireless Android Auto, Mirror Link, GPS, DSP (32-band EQ), SWC, HD Backup Camera Support, Split-Screen |
| Audio Output Mode | Stereo |
| Item Weight | 3.1 pounds |
| Package Dimensions | 12.44 x 7.4 x 3.43 inches |

Image 7.1: Details on the IPS HD screen, including 1280x720 resolution, 2.5D screen, and wide viewing angles.

Image 7.2: Illustration of the high-performance 8-core processor and memory configuration (4GB RAM, 64GB ROM).
8. Warranty and Support
8.1 Product Warranty
The VECHTEL 8-Core Android 13 Car Radio comes with a 2-year warranty from the date of purchase. This warranty covers manufacturing defects and malfunctions under normal use. It does not cover damage caused by improper installation, misuse, accidents, unauthorized modifications, or natural disasters. Please retain your proof of purchase for warranty claims.
8.2 Customer Support
For technical assistance, troubleshooting, or warranty inquiries, please contact VECHTEL customer support. Refer to the contact information provided with your purchase or visit the official VECHTEL website for support resources.
When contacting support, please have the following information ready:
- Product Model: VECHTEL 8-Core Android 13 Car Radio (4G+64G)
- ASIN: B0D2LHPB2F
- Date of Purchase
- Detailed description of the issue


