
1. Introduction
Thank you for choosing the Protmex Cordless Impact Wrench. This manual provides essential information for the safe and efficient operation, maintenance, and troubleshooting of your new tool. Please read this manual thoroughly before first use and keep it for future reference. This powerful tool is designed for various applications, including automotive tasks, construction, and DIY projects, offering high torque and portability.
2. Safety Information
Always observe basic safety precautions to reduce the risk of fire, electric shock, and personal injury. Failure to follow these warnings may result in serious injury or property damage.
General Power Tool Safety Warnings:
- Work Area Safety: Keep your work area clean and well-lit. Cluttered or dark areas invite accidents. Do not operate power tools in explosive atmospheres, such as in the presence of flammable liquids, gases, or dust.
- Electrical Safety: Avoid body contact with earthed or grounded surfaces such as pipes, radiators, ranges, and refrigerators. There is an increased risk of electric shock if your body is earthed or grounded.
- Personal Safety: Always wear eye protection (safety glasses or goggles) and hearing protection. Use appropriate personal protective equipment (PPE) such as non-skid safety shoes, hard hat, or hearing protection when necessary.
- Tool Use and Care: Do not force the power tool. Use the correct power tool for your application. It will do the job better and safer at the rate for which it was designed. Disconnect the battery pack from the power tool before making any adjustments, changing accessories, or storing power tools.
Battery Pack Safety:
- Only use the charger specified by the manufacturer. A charger that is suitable for one type of battery pack may create a risk of fire when used with another battery pack.
- Do not short-circuit a battery pack. Do not store battery packs indiscriminately in a box or drawer where they may short-circuit each other or be short-circuited by conductive materials.
- Do not expose battery packs to heat or fire. Avoid storage in direct sunlight.
- Do not use a battery pack or appliance that is damaged or modified. Damaged or modified batteries may exhibit unpredictable behavior resulting in fire, explosion or risk of injury.
3. Package Contents
Your Protmex Cordless Impact Wrench kit includes the following items:
- 1 x Cordless Impact Wrench
- 2 x 21V 4.0Ah Lithium-Ion Battery Packs
- 1 x Fast Charger
- 4 x Impact Sockets (17mm, 19mm, 21mm, 24mm)
- 1 x Extension Rod
- 1 x Durable Carrying Case
- Additional accessories: 1 x 13*20mm pin, 2 x 3*22mm pins, 1 x 3*25mm pin, large, medium and small rubber rings.
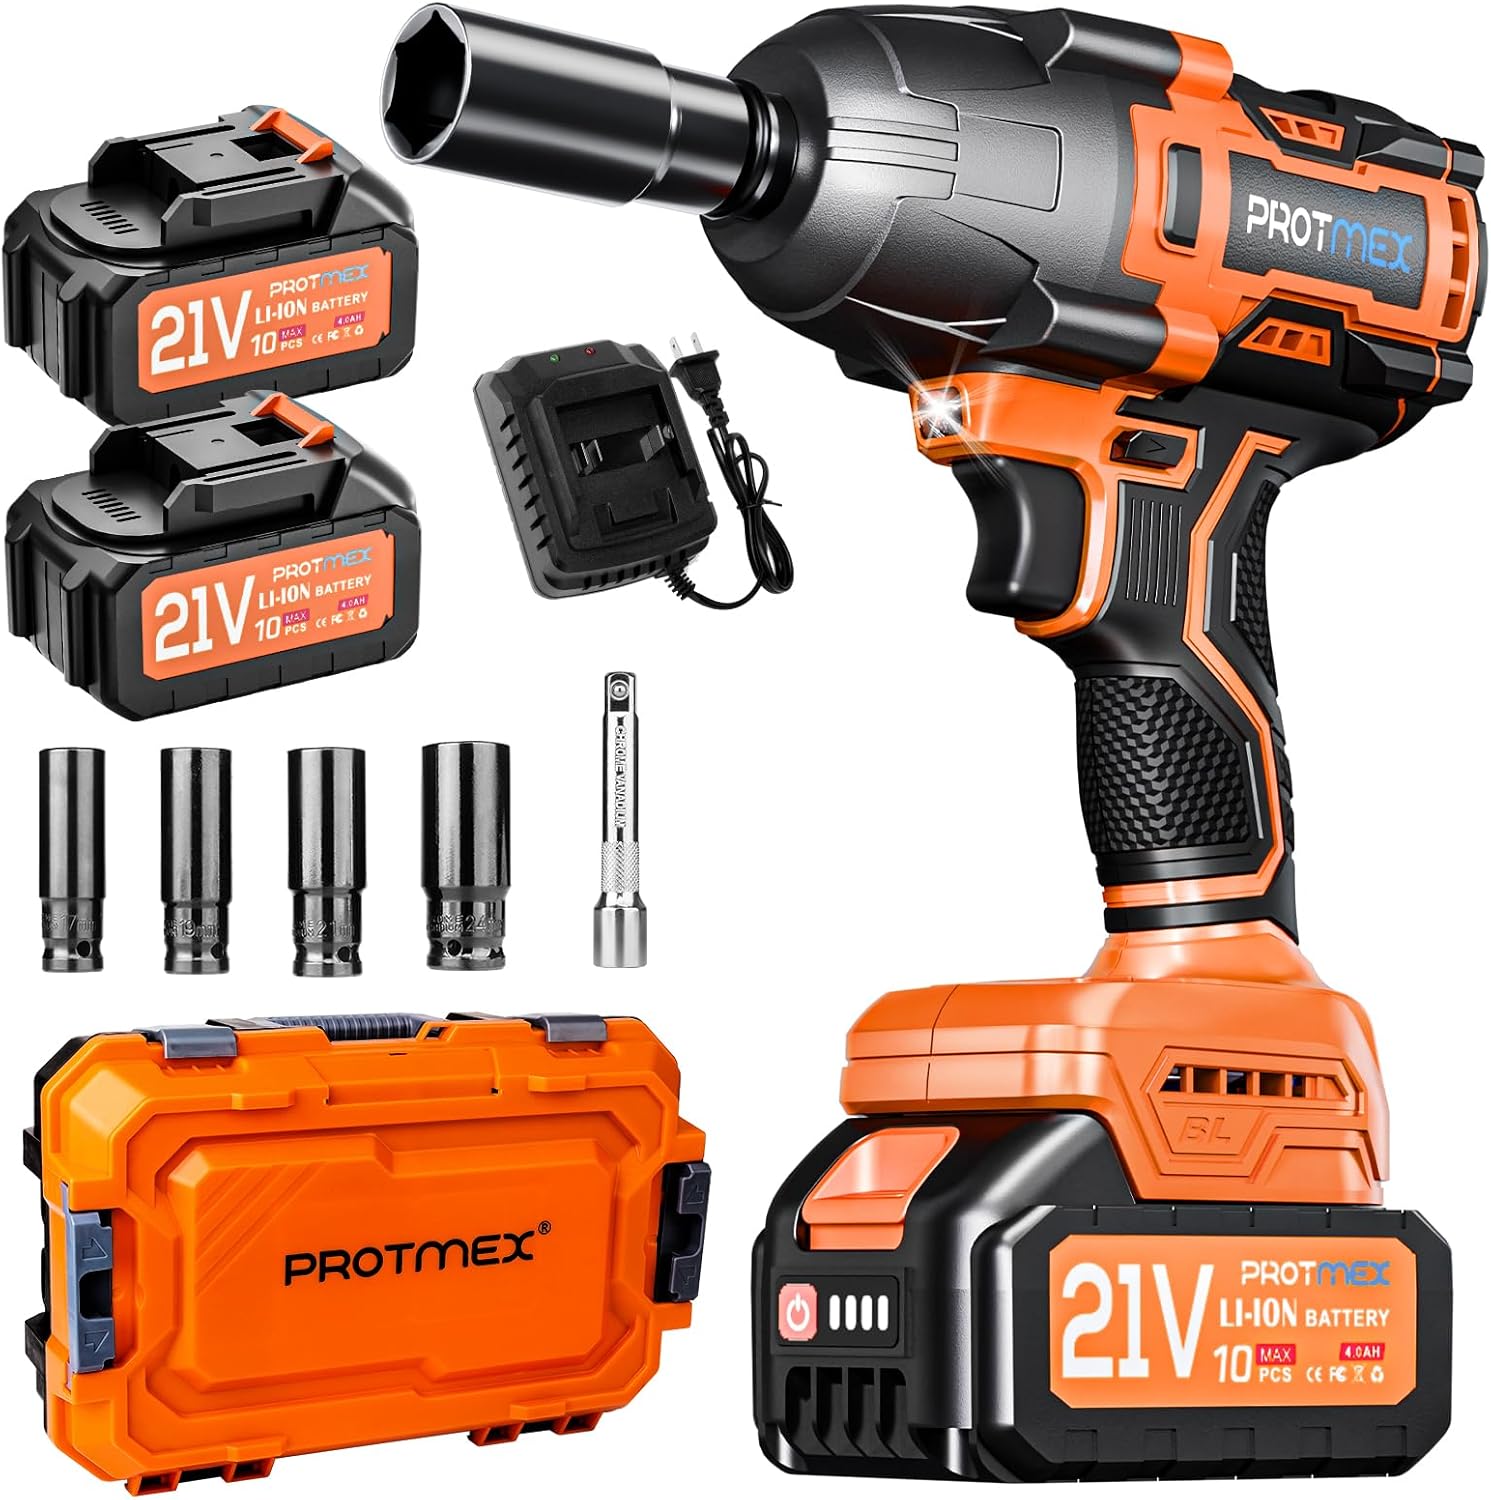
Image: Complete Protmex Cordless Impact Wrench kit, showing the wrench, two batteries, charger, four sockets, extension rod, and carrying case.

Image: Visual representation of the impact wrench kit components, highlighting its readiness for various tasks.
4. Product Overview
Familiarize yourself with the components and features of your Protmex Cordless Impact Wrench.

Image: Detailed diagram of the cordless impact wrench, pointing out key features such as the 1/2" square drive, brushless motor, LED light, forward/reverse switch, variable speed switch, soft rubberized handle, battery pack release button, 4.0Ah Lithium battery, and smart control panel.
Key Features:
- Brushless Motor: Provides higher efficiency, longer run time, and increased durability compared to brushed motors. It operates quieter and is spark-free.
- High Torque Output: Delivers up to 900 Ft-lbs (1200 N.m) of maximum torque, suitable for heavy-duty applications like lug nut removal.
- Variable Speed Control: Features 3-speed modes (0-2500 RPM, 0-2900 RPM, 0-3500 RPM) for precise control over different tasks.
- Forward & Reverse Switch: Easily switch between tightening and loosening modes.
- Built-in LED Light: Illuminates the work area for improved visibility in dark or confined spaces.
- Brake Stop Function: In reverse mode, the tool automatically reduces speed and torque once the nut or bolt is loose, preventing it from flying off.
- Ergonomic Design: Soft rubberized handle for comfortable grip and reduced fatigue during prolonged use.

Image: Illustration demonstrating the powerful 1200 N.m brushless motor, indicating its suitability for engineering industrial use, tire disassembly, shelf installation, and tightening screws.

Image: Chart comparing the benefits of the Protmex Brushless Motor against other brushless motors, highlighting superior lifetime, speed & acceleration, efficiency, quieter operation, and ease of carry.
5. Setup
5.1. Charging the Battery
Before first use, fully charge both 4.0Ah Lithium-Ion battery packs. The charger is designed for quick charging, typically taking 1 to 2 hours for a full charge.
- Connect the fast charger to a standard power outlet.
- Slide the battery pack onto the charger until it clicks into place.
- The charger's indicator light will show the charging status (refer to charger manual for specific light patterns).
- Once fully charged, remove the battery pack from the charger.

Image: Illustration showing a 4.0Ah Li-ion battery pack being charged on its fast charger, emphasizing longer run time and larger battery capacity.
5.2. Installing and Removing the Battery Pack
- Installation: Align the battery pack with the receptacle on the bottom of the impact wrench. Slide the battery pack into place until it locks securely with a click.
- Removal: Press the battery pack release button (located on the front of the battery) and slide the battery pack out of the tool.
5.3. Attaching and Removing Sockets
- Attaching: Push the desired impact socket (17mm, 19mm, 21mm, or 24mm) onto the 1/2" square drive anvil of the impact wrench until it is firmly seated. Ensure the pin and rubber ring are used to secure the socket if applicable.
- Removing: Pull the socket firmly off the square drive anvil.

Image: A man using the impact wrench on a roof structure, with various sockets and an extension rod displayed below, illustrating the ease of carrying and suitability of different socket sizes for various applications.
6. Operating Instructions
6.1. Powering On/Off and Variable Speed Control
The tool is activated by pressing the trigger switch. The speed of the tool is controlled by the amount of pressure applied to the trigger. Pressing the trigger further increases the speed.
6.2. Adjusting Speed Modes (RPM)
Your impact wrench features three distinct speed modes to match the requirements of your task:
- L (Low Speed): 0-2500 RPM - Ideal for delicate tasks or when precise control is needed.
- M (Medium Speed): 0-2900 RPM - Suitable for general fastening and loosening.
- H (High Speed): 0-3500 RPM - For maximum power and speed, such as removing stubborn bolts.
Use the speed mode selector button on the tool's control panel to cycle through these modes. The selected mode will be indicated on the smart control panel.

Image: Diagram illustrating the three speed modes (L, M, H) with their respective RPM ranges (0-2500, 0-2900, 0-3500) and battery indicators, showing how to meet different work needs.
6.3. Using Forward and Reverse Modes
The forward/reverse switch allows you to change the direction of rotation for tightening or loosening fasteners.
- Forward Rotation (Tighten): Push the switch to the left (when viewed from the rear of the tool).
- Reverse Rotation (Loosen): Push the switch to the right.
- Locking Protection: Position the switch in the center to lock the trigger and prevent accidental operation.

Image: Visual guide demonstrating the forward rotation (tighten screws) and reverse rotation (loosen screws) functions of the impact wrench.

Image: Diagram showing the three positions of the forward and reverse control switch, indicating tightening, neutral (locked), and loosening directions.
6.4. Brake Stop Function (Reverse Mode Only)
When operating in reverse mode, the tool features a brake stop device. Once the nut or bolt is sufficiently loose, the tool will automatically reduce its speed and torque. This prevents the fastener from flying off and helps you catch it easily.

Image: Illustration explaining the reverse self-stopping design, showing how it helps catch nuts/bolts easily and prevents them from flying off the floor.
6.5. Built-in LED Work Light
The integrated LED light automatically illuminates when the trigger is pressed, providing visibility in dimly lit work areas. This feature is particularly useful for working in tight or dark spaces, ensuring accuracy.

Image: A person using the impact wrench to remove a lug nut in a dark environment, with the built-in LED light illuminating the wheel area.

Image: Diagram highlighting the LED work light and efficient heat sink design of the impact wrench, emphasizing efficient work.
6.6. Applications
This cordless impact wrench is versatile and suitable for a wide range of applications, including but not limited to:
- Private car and van tire removal/repair
- Tractor tire removal/repair
- Agricultural machinery maintenance
- Major construction and maintenance tasks
- Assembling furniture
- DIY projects
Note: This tool is not recommended for semi-trailers, container trucks, or large trucks.

Image: Collage showing various applications of the impact wrench, including scaffolding, lawn mower repair, tire replacement, and car engine work, highlighting its high torque and versatility.
7. Maintenance
Regular maintenance ensures the longevity and optimal performance of your impact wrench.
7.1. Cleaning
- Keep the ventilation openings of the tool clean to prevent overheating.
- Use a soft, damp cloth to clean the exterior of the tool. Do not use harsh chemicals or abrasive cleaners.
- Never immerse the tool or battery in water or any other liquid.
7.2. Storage
- Store the tool and battery packs in a cool, dry place, away from direct sunlight and moisture.
- Ensure the battery packs are partially charged (around 50%) before long-term storage to maintain battery health.
- Store the tool in its original carrying case to protect it from dust and damage.
7.3. Battery Care
- Do not store battery packs in temperatures above 120°F (50°C) or below 32°F (0°C).
- Avoid fully discharging the battery packs frequently, as this can reduce their lifespan.
- If the battery pack becomes hot during use, allow it to cool down before recharging.
8. Troubleshooting
If you encounter issues with your Protmex Cordless Impact Wrench, refer to the following common problems and solutions:
| Problem | Possible Cause | Solution |
|---|---|---|
| Tool does not turn on. | Battery not charged or not properly installed. Trigger lock engaged. | Ensure battery is fully charged and securely clicked into place. Disengage the trigger lock by moving the forward/reverse switch to either forward or reverse position. |
| Battery not charging. | Charger not plugged in. Faulty battery or charger. Battery too hot/cold. | Check power connection. Try another battery or charger if available. Allow battery to reach room temperature before charging. |
| Insufficient torque for task. | Wrong speed mode selected. Battery charge low. Fastener is seized. | Switch to a higher speed mode (H). Recharge battery. Apply penetrating oil to seized fasteners and allow time to work. |
| Excessive vibration or noise. | Loose socket or accessory. Internal damage. | Ensure socket is securely attached. Discontinue use and contact customer support if problem persists. |
9. Specifications
Technical specifications for the Protmex Cordless Impact Wrench (Model: C06301):
| Feature | Specification |
|---|---|
| Brand | Protmex |
| Model Number | C06301 |
| Power Source | Battery Powered |
| Voltage | 21 Volts (DC) |
| Amperage | 6.5 Amps |
| Battery Capacity | 4.0 Amp Hours (per battery) |
| Maximum Rotational Speed | 3500 RPM |
| Number of Speeds | 3 (0-2500 RPM, 0-2900 RPM, 0-3500 RPM) |
| Maximum Torque | 1200 Newton Meters (approx. 900 Ft-lbs) |
| Drive Size | 1/2 inch Square Drive |
| Item Weight | Approximately 4.1 Pounds |
| Product Dimensions (L x W x H) | 8.66" x 2.95" x 6.89" |
| Material | Metal |
| Special Features | Adjustable Torque, Quick Release Chuck, Variable Speed, Cordless, Portable, Brushless Motor, Built-in LED Light, Brake Stop Function |
10. Warranty and Customer Support
Protmex is committed to providing high-quality products and excellent customer service. While specific warranty details may vary, we stand behind our products.
If you have any questions, concerns, or require assistance with your Protmex Cordless Impact Wrench, please do not hesitate to contact our customer support team. Our team of experts is always at your side to help with any inquiries you may have.
For support, please refer to the contact information provided on the product packaging or the official Protmex website. You can also reach out through the platform where you purchased the product.

Image: A friendly customer support representative ready to assist.


