
1. Introduction
This manual provides essential information for the safe and efficient operation of your ORIKOOL Back Bar Cooler, Model BBT350S. This unit is designed for commercial and home use, offering a large capacity for beverages with convenient access through three sliding glass doors.
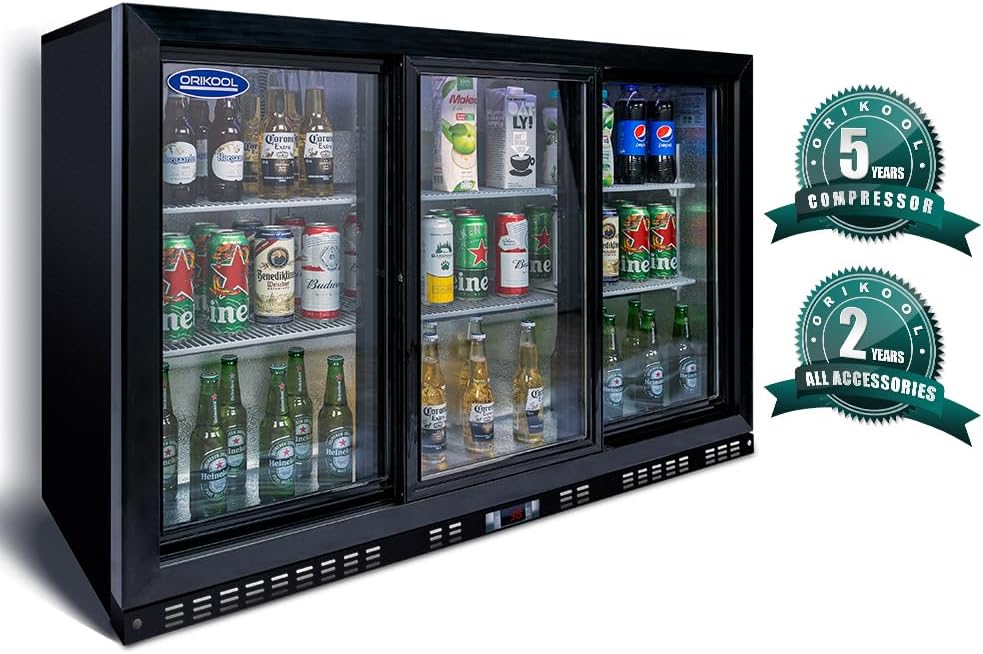
Image 1.1: The ORIKOOL Back Bar Cooler, Model BBT350S, showcasing its three sliding glass doors and internal storage.
Key Features:
- Sliding Door Design: Three anti-fog glass sliding doors for easy display and access.
- Optimal Cooling: 360-degree circulating cooling system with an intelligent temperature control, maintaining temperatures between 35.6°F and 46.4°F.
- Ample Storage: 11.3 cubic feet internal capacity, accommodating up to 480 standard 12-ounce cans.
- Adjustable Shelves: Six adjustable wire shelves, each capable of holding up to 60 pounds.
- Energy Efficiency: Equipped with high-efficiency compressors and R600a refrigerant for reduced energy consumption.
- Durable Construction: Built with high-quality materials for long-term stable operation.
2. Safety Information
Read all safety warnings and instructions carefully before installing, operating, or performing maintenance on this appliance. Failure to follow these instructions may result in electric shock, fire, or property damage.
General Safety Precautions:
- Ensure the unit is connected to a properly grounded electrical outlet (115 Volts).
- Do not operate the appliance with a damaged cord or plug.
- Keep ventilation openings clear of obstructions.
- Do not store explosive substances such as aerosol cans with a flammable propellant in this appliance.
- Unplug the unit before cleaning or performing any maintenance.
- This appliance is heavy; use caution and proper lifting techniques during installation.
- The refrigerant used is R600a, which is flammable. Handle with care and ensure proper ventilation during servicing.
3. Package Contents
Verify that all items are present upon unpacking:
- 1 x ORIKOOL Back Bar Cooler Unit (Model BBT350S)
- 6 x Wire Shelves
- 1 x Instruction Manual (this document)
- Keys for Safety Door Lock
4. Setup & Installation
4.1 Unpacking
Carefully remove all packaging materials. Inspect the unit for any shipping damage. Report any damage to your supplier immediately.
4.2 Placement
- Place the cooler on a flat, stable surface capable of supporting its weight (approximately 175.3 lbs when empty, plus contents).
- Ensure adequate ventilation around the unit. Maintain a minimum of 4 inches (10 cm) clearance from walls or other objects on all sides, especially the rear where the compressor is located.
- Avoid direct sunlight or proximity to heat sources (e.g., ovens, radiators) to ensure optimal cooling performance and energy efficiency.
- This unit is designed for undercounter installation.
4.3 Leveling
The unit is equipped with adjustable leveling feet. Use a spirit level to ensure the cooler is perfectly level. Adjust the feet by turning them clockwise or counter-clockwise until the unit is stable and level. Proper leveling is crucial for door alignment and efficient operation.

Image 4.1: Key design details including adjustable leveling feet (bottom right).
4.4 Shelf Installation
Insert the six wire shelves into the desired positions. The shelves are adjustable to accommodate various bottle and can sizes. Ensure shelves are securely seated before placing items on them.
4.5 Electrical Connection
- Connect the power cord to a dedicated 115V, 60Hz, 15A grounded electrical outlet. The unit features a NEMA 5-15P plug.
- Do not use extension cords or adapter plugs.
- Allow the unit to stand upright for at least 2-4 hours before plugging it in to allow the refrigerant to settle.
5. Operating Instructions
5.1 Initial Power-On and Temperature Setting
- After plugging in the unit, the LED digital display will show the current internal temperature.
- Use the intelligent temperature control system to set your desired temperature within the range of 35.6°F to 46.4°F (2°C to 8°C). Refer to the specific controls on your unit for adjustment buttons.
- Allow several hours for the cooler to reach the set temperature before loading with beverages.

Image 5.1: Dimensions and recommended temperature ranges for various beverages.
5.2 Loading Beverages
- Distribute beverages evenly on the shelves. Do not overload shelves beyond their 60-pound capacity.
- Avoid blocking the internal air circulation vents to ensure consistent cooling.

Image 5.2: Illustration of the cooler's capacity and adjustable shelving.
5.3 Door Operation
- The unit features three sliding glass doors for easy access. Ensure doors are fully closed after each use to maintain internal temperature.
- A safety door lock is provided for securing contents. Use the supplied keys to lock and unlock the doors.
5.4 LED Lighting
The internal LED lighting illuminates the contents for better visibility. The lighting can typically be controlled via a switch on the control panel.
6. Maintenance
Regular maintenance ensures optimal performance and longevity of your back bar cooler.
6.1 Cleaning the Interior
- Always unplug the unit before cleaning.
- Remove all beverages and shelves.
- Clean the interior with a solution of mild detergent and warm water. Avoid abrasive cleaners or harsh chemicals.
- Wipe dry thoroughly with a soft cloth.
- The removable sealing strip can be detached for thorough cleaning and reattached.
6.2 Cleaning the Exterior and Glass Doors
- Wipe the exterior surfaces with a soft cloth dampened with mild detergent.
- Clean the glass doors with a glass cleaner. The anti-fog feature helps maintain clarity.
- Ensure no water enters the electrical components.
6.3 Defrosting
This unit features a frost-free defrost system, minimizing the need for manual defrosting. However, if excessive ice buildup occurs, unplug the unit and allow the ice to melt naturally. Do not use sharp objects to remove ice.
6.4 Condenser Coil Cleaning
Periodically clean the condenser coils (located at the rear or bottom of the unit) to ensure efficient operation. Use a soft brush or vacuum cleaner to remove dust and debris. This should be done at least every six months, or more frequently in dusty environments.
7. Troubleshooting
Before contacting customer service, review the following common issues and solutions:
- Unit does not operate:
- Check if the power cord is securely plugged into a live outlet.
- Verify the circuit breaker or fuse is not tripped.
- Ensure the unit's power switch (if applicable) is in the 'ON' position.
- Unit is not cooling sufficiently:
- Confirm the temperature setting is appropriate.
- Check if the doors are fully closed and the door seals are intact.
- Ensure there is adequate ventilation around the unit and the condenser coils are clean.
- Avoid placing the unit in direct sunlight or near heat sources.
- Do not overload the cooler, as this can restrict airflow.
- Excessive noise:
- Ensure the unit is level. Adjust leveling feet if necessary.
- Check for any loose parts or items inside the cooler that may be vibrating.
- Normal operating sounds include compressor hum, fan noise, and refrigerant gurgling.
- Water on the floor or inside the unit:
- Check the drain pan (if accessible) for overflow.
- Ensure the drain line is not clogged.
- Verify door seals are functioning correctly to prevent condensation.
8. Specifications
Detailed technical specifications for the ORIKOOL Back Bar Cooler, Model BBT350S:
| Feature | Specification |
|---|---|
| Brand Name | ORIKOOL |
| Model Info | BBT350S |
| Item Weight | 175.3 pounds |
| Product Dimensions (D x W x H) | 20.5 x 53.15 x 35.43 inches |
| Capacity | 11.3 Cubic Feet (480 standard 12-ounce cans) |
| Annual Energy Consumption | 605.9 Kilowatt Hours Per Year |
| Installation Type | Undercounter |
| Special Features | Adjustable Shelves, Digital Temperature Control, Door Lock, Frost Free |
| Color | Black |
| Voltage | 115 Volts |
| Defrost System | Frost Free |
| Door Hinges | Left, Right (Sliding Doors) |
| Door Material Type | Glass |
| Shelf Type | Wire |
| Number of Shelves | 6 |
| Certification | ETL |
| Number Of Doors | 3 |

Image 8.1: Overview of advanced cooling technology and unit weight.

Image 8.2: Illustration of the double hollow tempered glass construction for improved insulation.
9. Warranty & Support
ORIKOOL provides the following warranty for this product:
- 5 Years Warranty on the Compressor.
- 2 Years Warranty on All Accessories.

Image 9.1: ORIKOOL warranty information.
For warranty claims, technical assistance, or replacement parts, please contact ORIKOOL customer support. Keep your purchase receipt and model number (BBT350S) readily available.