
1. Introduction
Thank you for choosing the PTHRAOUTA H10-1 Home Dehumidifier. This manual provides essential information for the safe and efficient operation, maintenance, and troubleshooting of your new appliance. Please read it thoroughly before use and retain it for future reference.
This dehumidifier is designed to effectively reduce humidity in various indoor environments, including bathrooms, bedrooms, living rooms, basements, RVs, and closets. It features two operating modes, a reusable air filter, and an automatic shut-off function for convenience and safety.
2. Safety Instructions
- Always place the dehumidifier on a stable, level surface to prevent tipping.
- Ensure adequate clearance (at least 8 inches) around the unit for proper airflow.
- Do not block the air inlet or outlet.
- Keep the appliance away from water and other liquids. Do not operate with wet hands.
- Unplug the unit before cleaning, maintenance, or when not in use.
- Do not allow children or individuals with reduced physical, sensory, or mental capabilities to operate the appliance without supervision.
- Use only the power adapter provided with the unit.
- If the power cord is damaged, it must be replaced by the manufacturer, its service agent, or similarly qualified persons to avoid a hazard.
- Do not attempt to repair or disassemble the unit yourself. Contact customer support for assistance.
3. Product Overview
Familiarize yourself with the components of your PTHRAOUTA H10-1 Dehumidifier.

Figure 3.1: Front view of the PTHRAOUTA H10-1 Home Dehumidifier.
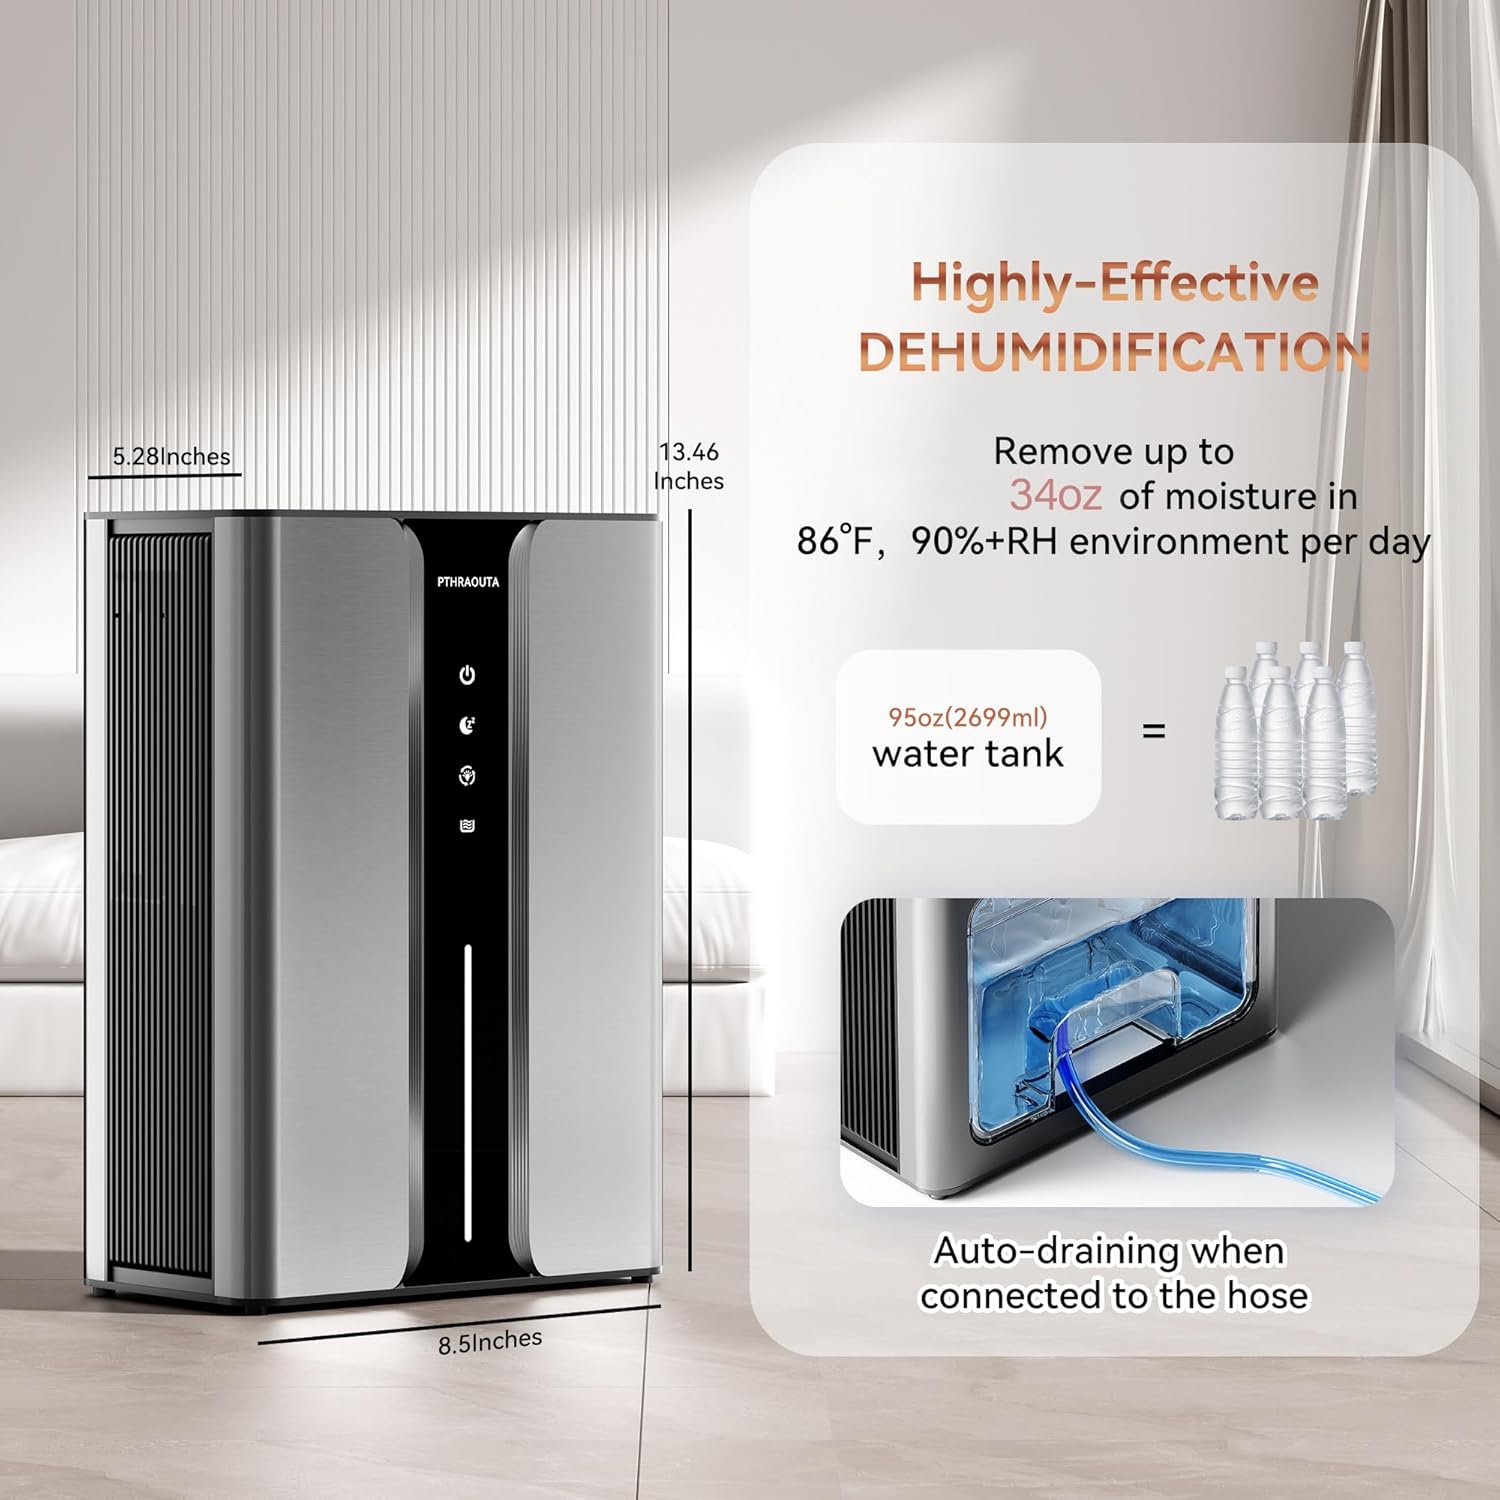
Figure 3.2: Dehumidifier dimensions and water tank capacity (95oz).
Components:
- Dehumidifier Unit
- Water Tank (95 oz capacity)
- Drain Hose
- Instruction Manual
- Reusable Air Filter (pre-installed)
4. Setup
4.1 Unpacking
- Carefully remove the dehumidifier from its packaging.
- Remove all packing materials, including any tape or protective films.
- Check for any damage during transit. If damaged, do not operate and contact customer support.
4.2 Placement
- Place the dehumidifier on a firm, level surface in the desired location.
- Ensure there is at least 8 inches (20 cm) of space around the air inlet and outlet for optimal performance.
- Avoid placing the unit near heat sources, in direct sunlight, or in areas with excessive dust.
4.3 Power Connection
- Plug the power cord into a suitable electrical outlet (AC 100-240V, 50/60Hz).
- The unit is now ready for operation.
5. Operating Instructions
5.1 Control Panel
The control panel is located on the front of the unit and features touch-sensitive buttons and indicators.

Figure 5.1: Control Panel Layout.
- Power Button (⏻): Press to turn the unit ON or OFF.
- Sleep Mode Button (Z²): Activates quiet operation for minimal disturbance during sleep.
- Night Lights Button (💡): Controls the ambiance lighting.
- Water Full Indicator (💧): Illuminates when the water tank is full or incorrectly positioned.
5.2 Operating Modes

Figure 5.2: Dehumidifier operating modes and noise levels.
- Powerful Mode: The default mode for efficient and rapid humidity reduction.
- Sleep Mode: Press the Sleep Mode button to activate. The unit operates at a lower speed, reducing noise levels to below 30 dB for quiet operation, ideal for bedrooms or quiet environments.
5.3 Ambiance Lighting
The dehumidifier features seven color options for ambiance lighting, which can also serve as a night light.
- Press the Power button (⏻) for 5 seconds until the light starts flashing.
- Press the Power button (⏻) again to cycle through the available colors or to turn off the lighting.
5.4 Automatic Shut-off

Figure 5.3: Automatic Shut-off indication.
For safety and convenience, the dehumidifier is equipped with an automatic shut-off function. The unit will automatically stop operating when:
- The water tank is full. The Water Full Indicator (💧) will illuminate, and the LED light strip may turn red.
- The water tank is incorrectly positioned.
Once the water tank is emptied or correctly re-positioned, the unit will resume normal operation.
5.5 Water Drainage
The dehumidifier offers two methods for water drainage: manual emptying of the water tank or continuous drainage via a hose.
Video 5.1: Demonstration of both canister and continuous drainage methods.
Manual Drainage (Water Tank)
- When the Water Full Indicator (💧) illuminates, the water tank needs to be emptied.
- Gently pull out the water tank from the back of the unit.
- Remove the water tank cover and pour out the collected water.
- Replace the cover and slide the water tank back into the unit until it clicks into place.

Figure 5.4: Steps for manual water tank drainage.
Continuous Drainage (Drain Hose)
For uninterrupted operation, you can connect the provided drain hose for continuous drainage.
- Locate the drain port at the bottom rear of the water tank.
- Remove the lower corner plug from the water tank and save it for future use if you wish to revert to manual drainage.
- Insert the provided drain hose firmly into the drain hole of the water tank.
- Ensure the other end of the hose is placed in a suitable drainage area, such as a sink or floor drain, ensuring it is lower than the dehumidifier's drain port for gravity flow.

Figure 5.5: Connecting the drain hose for continuous drainage.
6. Maintenance
Regular maintenance ensures the longevity and optimal performance of your dehumidifier.
6.1 Cleaning the Air Filter
The dehumidifier includes a reusable air filter that helps purify the air. Clean it regularly to maintain efficiency.

Figure 6.1: Location of the reusable air filter.
- Unplug the dehumidifier from the power outlet.
- Locate the air filter cover on the back of the unit.
- Gently pull the filter cover outwards to remove it.
- Remove the air filter from its slot.
- Wash the filter with clean water and a mild detergent. Rinse thoroughly.
- Allow the filter to air dry completely before re-installing. Do not use a dryer or direct heat.
- Once dry, place the filter back into its slot and secure the filter cover.
6.2 Cleaning the Water Tank
Clean the water tank regularly to prevent mold, mildew, and bacterial growth.
- Remove the water tank as described in the manual drainage section.
- Wash the tank with warm water and a mild detergent.
- Rinse thoroughly and dry before placing it back into the unit.
6.3 Exterior Cleaning
- Wipe the exterior of the dehumidifier with a soft, damp cloth.
- Do not use abrasive cleaners or solvents, as these may damage the surface.
6.4 Storage
- If storing the unit for an extended period, ensure the water tank is empty and clean, and the filter is clean and dry.
- Store the dehumidifier in a cool, dry place, away from direct sunlight and extreme temperatures.
7. Troubleshooting
If you encounter issues with your dehumidifier, refer to the table below for common problems and solutions. If the problem persists, contact customer support.
Video 7.1: General overview of the dehumidifier's features and operation, which may assist in troubleshooting.
| Problem | Possible Cause | Solution |
|---|---|---|
| Dehumidifier does not turn on. | No power supply. | Check if the power cord is securely plugged into the outlet. Ensure the outlet is functional. |
| Water Full Indicator is on, but tank is not full. | Water tank incorrectly positioned. | Remove and re-insert the water tank correctly until it clicks into place. |
| No water collected or low dehumidification. |
|
|
| Unit is noisy. | Operating in Powerful Mode. | Switch to Sleep Mode for quieter operation. Ensure the unit is on a stable surface. |
8. Specifications
| Feature | Specification |
|---|---|
| Brand | PTHRAOUTA |
| Model Name | H10-1 |
| Dehumidification Capacity | Up to 34 oz (1000ml) per day (at 86°F and 80% RH) |
| Water Tank Capacity | 95 Fluid Ounces (2.8 Liters) |
| Coverage Area | 107-950 sq ft |
| Product Dimensions | 5.31"D x 8.5"W x 13.46"H |
| Wattage | 80 watts |
| Noise Level (Sleep Mode) | < 30 dB |
| Special Features | Anti-Spill, Automatic Shutoff, Washable Filter, Purify Air, Portable, Drain Hose, Colorful Lights, Removable Tank, Sleep Mode, Ultra Quiet |
| Material | Plastic |
9. Warranty and Support
For warranty information and customer support, please refer to the product packaging or contact the manufacturer directly. Keep your purchase receipt as proof of purchase for any warranty claims.
Manufacturer Contact Information: Please check the official PTHRAOUTA website or your product documentation for the most up-to-date contact details.