
1. Introduction
This manual provides detailed instructions for the safe and effective operation of your Irfora S10 Intelligent 9999 Counts Digital Multimeter. This device is designed for measuring AC/DC voltage, resistance, capacitance, frequency, diode, continuity, and non-contact voltage (NCV) live line detection. Please read this manual thoroughly before use and retain it for future reference.
2. Safety Information
To ensure safe operation, observe the following safety precautions:
- The multimeter is designed with full measuring overload protection and double insulation protection.
- Safety Level: CAT.II 600V, CAT.III 300V. Always adhere to these voltage limits.
- Do not attempt to measure voltages or currents exceeding the specified maximum limits.
- Ensure test leads are in good condition and properly connected before any measurement.
- Do not operate the multimeter if it appears damaged or if the casing is open.
- Exercise extreme caution when working with live circuits.
- Replace batteries promptly when the low battery indicator appears to ensure accurate readings.
3. Product Overview
The Irfora S10 Multimeter features a compact design and an intuitive interface for various electrical measurements.
Key Features:
- Multifunctional measurement of AC/DC voltage, resistance, capacitance, frequency, diode, continuity, and NCV live line.
- Smart functions including diode measurement within 3V, continuity buzzer for resistance less than 50Ω, and live voltage signal recognition with buzzer.
- High-precision 3.5-inch EBTN LCD for enhanced readability in various lighting conditions.
- Auto-ranging 9999 counts display with Data Hold function.
- Full measuring overload protection and double insulation protection (CAT.II 600V, CAT.III 300V).
Components:

Figure 3.1: Front view of the Irfora S10 Digital Multimeter with connected test leads. The display shows various measurement indicators and numerical readouts.
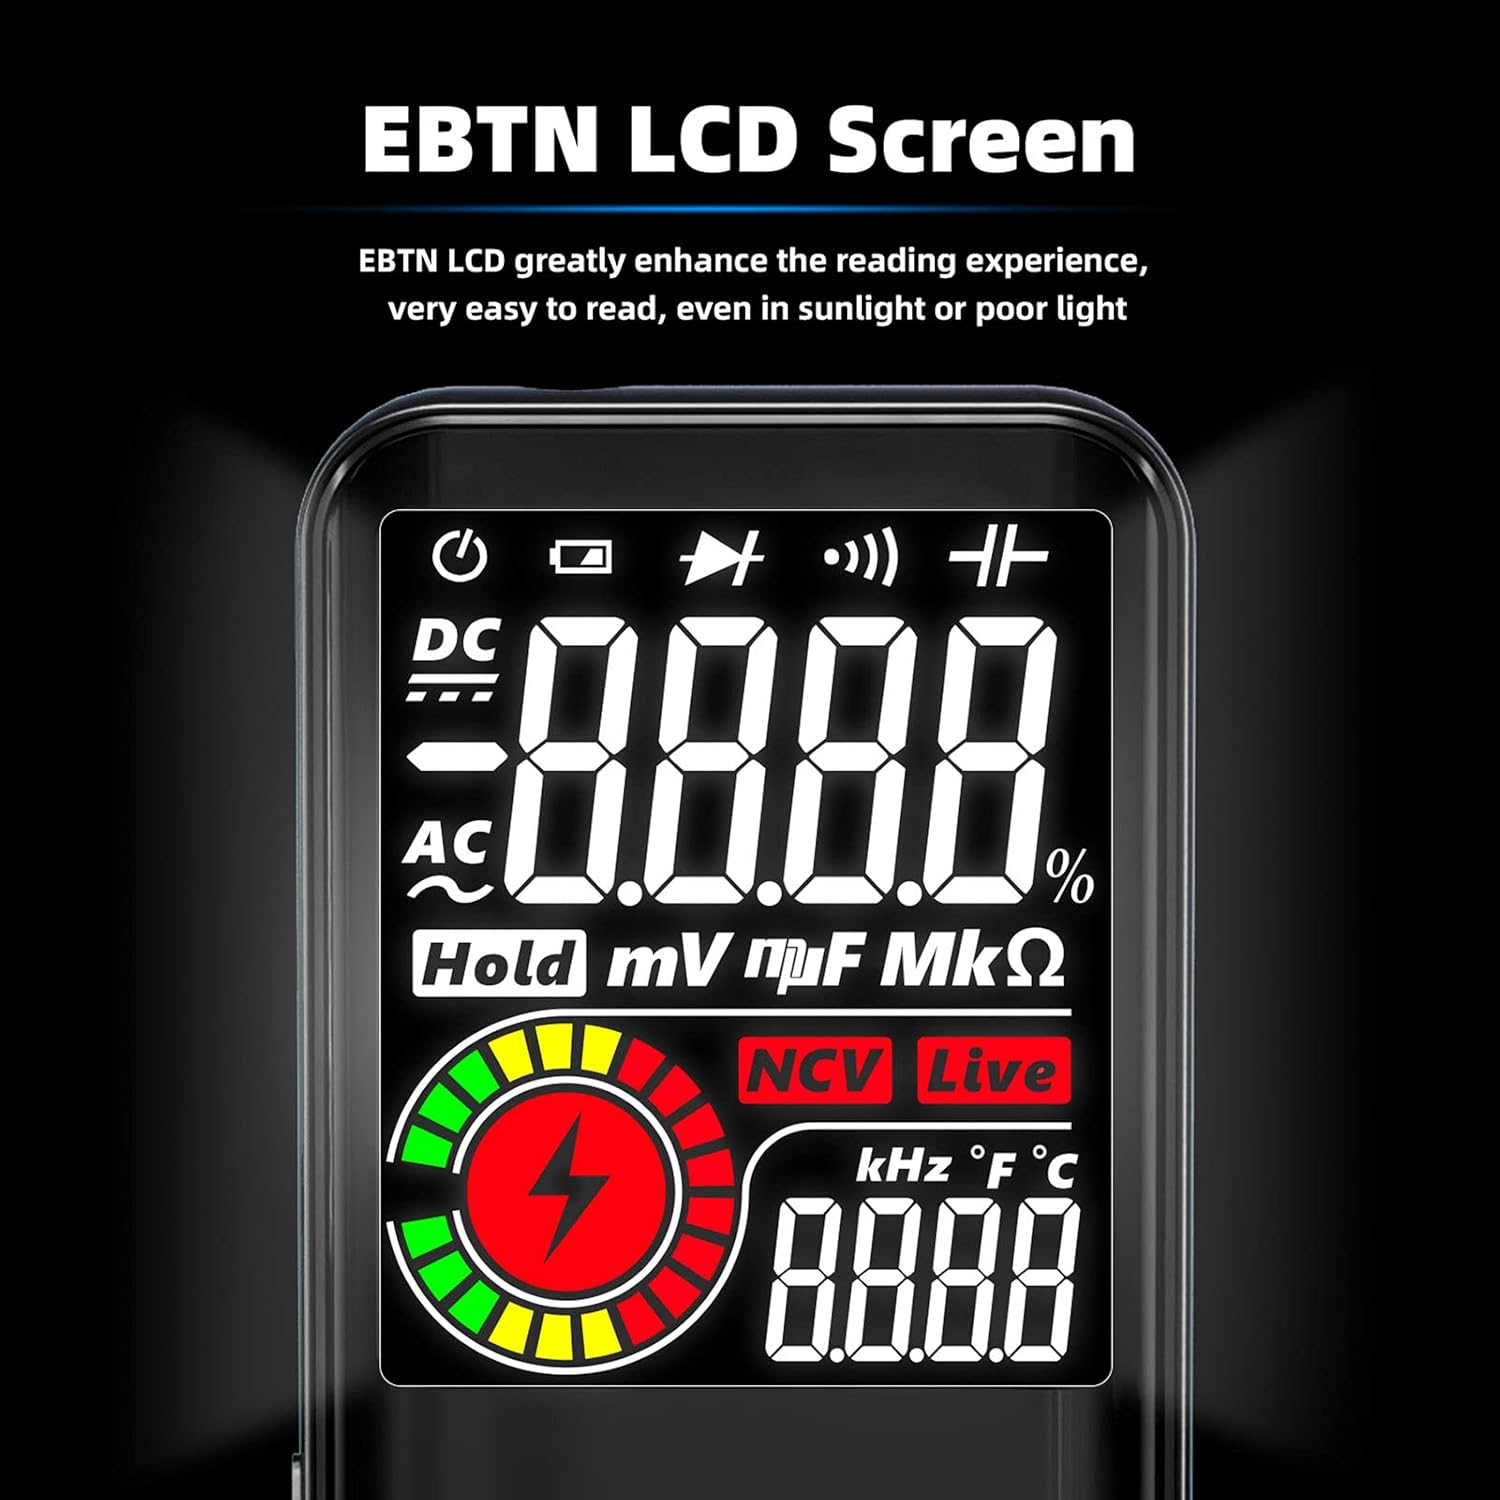
Figure 3.2: Detailed view of the EBTN LCD screen, highlighting its clarity and readability. The screen displays measurement values, units, and function indicators.

Figure 3.3: The multimeter's display showing three simultaneous test results, such as AC voltage, frequency, and an analog bar graph, demonstrating its multi-result display capability.
4. Setup
4.1 Battery Installation
- Ensure the multimeter is powered off.
- Locate the battery compartment on the back of the device.
- Open the battery compartment cover.
- Insert two 1.5V AAA batteries, observing correct polarity (+/-). Batteries are not included with the product.
- Close the battery compartment cover securely.
4.2 Test Lead Connection
- Insert the black test lead into the 'COM' (common) input jack.
- Insert the red test lead into the 'INPUT' jack for most measurements (voltage, resistance, capacitance, frequency, diode, continuity).
- Ensure the test leads are fully inserted and securely connected.
5. Operating Instructions
The Irfora S10 Multimeter operates in auto-ranging mode, simplifying measurement selection.
5.1 Power On/Off
- Press the power button to turn the multimeter on.
- The device will automatically enter auto-ranging mode.
- To power off, press and hold the power button. The multimeter also features an auto power-off function after 5 minutes of inactivity.
5.2 Measurement Functions
Connect the test leads to the circuit or component under test as described for each function.
- DC Voltage Measurement: Connect the red lead to the positive side and the black lead to the negative side of the DC voltage source. The multimeter measures 0.8V to 620V DC.
- AC Voltage Measurement: Connect the test leads across the AC voltage source. The multimeter measures 2.2V to 620V AC.
- Resistance Measurement: Ensure the circuit is de-energized before measuring resistance. Connect the test leads across the component. The multimeter measures 1Ω to 60MΩ. A buzzer will sound if the resistance is less than 50Ω, indicating continuity.
- Capacitance Measurement: Ensure the capacitor is discharged before measurement. Connect the test leads across the capacitor terminals. The multimeter measures 1nF to 99.99mF.
- Frequency Measurement: The multimeter can measure frequency from 1Hz to 1kHz (for ACV 2-10V) and 1Hz to 60kHz (for ACV 10-620V). Connect the test leads to the signal source.
- Diode Test: Ensure the circuit is de-energized. Connect the red lead to the anode and the black lead to the cathode of the diode. The multimeter measures diodes within 3V.
- Continuity Test: Ensure the circuit is de-energized. Connect the test leads across the circuit or component. A buzzer will sound if continuity is detected (resistance less than 50Ω).
- NCV (Non-Contact Voltage) Live Line Detection: Hold the top of the multimeter near the live wire or outlet. The device will detect the presence of AC voltage without physical contact, indicated by a visual alert and an audible buzzer.
5.3 Data Hold Function
Press the 'HOLD' button to freeze the current reading on the display. Press it again to release the hold and resume live measurements.
6. Maintenance
6.1 Cleaning
Wipe the multimeter casing with a damp cloth and mild detergent. Do not use abrasive cleaners or solvents. Ensure the device is dry before storage or use.
6.2 Battery Replacement
When the low battery indicator appears on the display, replace the batteries as described in Section 4.1. Remove batteries if the device will not be used for an extended period.
7. Troubleshooting
If you encounter issues with your multimeter, refer to the following common troubleshooting steps:
- No Display/Device Not Powering On: Check battery installation and ensure batteries are not depleted. Replace if necessary.
- Incorrect Readings: Verify that the test leads are correctly connected to the appropriate input jacks and that they are not damaged. Ensure the correct measurement function is being used for the task.
- No Continuity Beep: For continuity tests, ensure the resistance is below 50Ω. Check test leads for breaks.
- NCV Not Detecting: Ensure the multimeter is held close enough to the live wire. Check for environmental interference.
If problems persist, contact customer support for assistance.
8. Specifications

Figure 8.1: A visual summary of the Irfora S10 Multimeter's technical specifications, including measurement ranges and environmental conditions.
| Parameter | Value |
|---|---|
| DC Voltage Range | 0.8V ~ 620V |
| AC Voltage Range | 2.2V ~ 620V |
| Resistance Range | 1Ω ~ 999.9Ω, 1kΩ ~ 60MΩ |
| Capacitance Range | 1nF ~ 999.9nF, 1μF ~ 99.99mF |
| Frequency Range (ACV 2-10V) | 1Hz ~ 1kHz |
| Frequency Range (ACV 10-620V) | 1Hz ~ 60kHz |
| Duty Ratio (ACV 2-620V) | 0.1% ~ 99.9% |
| Material | ABS |
| Safety Level | CAT.II 600V, CAT.III 300V |
| Ranging | Auto |
| Display | Color LCD |
| Max. Display | 9999 digits |
| Sampling Time | Approximately 0.4 seconds |
| Auto Power-off | 5 minutes |
| Operate Environment | 0~40℃, 0~80%RH |
| Storage Environment | -10~60℃, 0~70%RH |
| Operate Altitude | ≤2000m |
| Power Supply | 2 * 1.5V AAA battery (NOT included) |
| Item Size | 143.4 * 70.9 * 15.7mm / 5.65 * 2.79 * 0.62in |
| Item Weight | 112g / 3.95oz |
| Product Dimensions | 5.79 x 3.35 x 1.65 inches |
| Item Weight (Package) | 7 ounces |
| Manufacturer | Irfora |
9. Warranty and Support
For warranty information or technical support, please refer to the product packaging or contact the manufacturer directly. Keep your purchase receipt as proof of purchase.