
ARES WING GDT1004UCP-2BK
ARES WING Dual Monitor Stand Instruction Manual
Model: GDT1004UCP-2BK
1. Introduction
This manual provides detailed instructions for the installation, operation, and maintenance of your ARES WING Dual Monitor Stand, Model GDT1004UCP-2BK. Please read this manual thoroughly before installation and retain it for future reference.
Key Features:
- Supports two monitors from 17 to 49 inches, with a maximum weight capacity of 44 lbs per arm.
- Features industrial-grade gas springs for smooth and stable adjustments.
- Offers flexible adjustability including -50° to +20° tilt, ±90° swivel, and 360° rotation.
- Integrated base with USB-A (5V/2A) and USB-C (5V/2A) ports for convenient device charging and data transmission.
- Designed for easy installation with C-clamp or grommet mounting options.
- Compatible with VESA patterns 75x75mm and 100x100mm.

Image 1.1: Overview of the ARES WING Dual Monitor Stand, including mounting options and USB connectivity.
2. Safety Information
- Ensure all components are securely fastened before attaching monitors.
- Do not exceed the maximum weight capacity of 44 lbs per arm.
- Verify your monitor's VESA pattern and weight before installation.
- Adjust gas spring tension carefully to match monitor weight. Incorrect tension can cause monitors to drop or spring up unexpectedly.
- Keep children and pets away from the installation area.
- If your monitor lacks VESA holes, a separate VESA adapter is required.
3. Package Contents
Please verify that all parts are present and undamaged. If any parts are missing or damaged, contact customer support.
- Monitor Stand Pole
- Dual Monitor Arms (2 units)
- C-Clamp Mounting Base
- Grommet Mounting Base
- VESA Plates (2 units)
- USB-A to USB-A Cable
- USB-C to USB-C Cable
- Hardware Kit (screws, washers, Allen keys)
- Instruction Manual
4. Setup and Installation
4.1 Check Monitor and Desk Compatibility
Before proceeding, ensure your monitors and desk meet the following requirements:
- Monitor Size: 17 to 49 inches.
- Monitor Weight: 4.4 lbs to 44 lbs per arm.
- VESA Pattern: 75x75mm or 100x100mm. If your monitor does not have VESA holes or requires a different pattern (e.g., Samsung Odyssey G9), a VESA adapter must be purchased separately.
- Desk Thickness (C-Clamp): 0.5 to 1.8 inches.
- Desk Thickness (Grommet): 0.5 to 2.0 inches.
- Desk Edge Width (C-Clamp): Minimum 2.56 inches (65mm) for stable clamping.

Image 4.1: Monitor and desk compatibility guidelines.
4.2 Mounting the Base to the Desk
Choose either C-clamp or Grommet installation based on your desk type.
C-Clamp Installation:
- Attach the C-clamp base to the edge of your desk.
- Tighten the clamp screw until the base is firmly secured to the desk. Ensure it is stable and does not wobble.
Grommet Installation:
- If your desk has a grommet hole, insert the grommet base through the hole.
- Secure the base from underneath the desk using the provided plate and nut.

Image 4.2: Two methods for mounting the stand base to a desk.
4.3 Assembling the Arms
- Slide the monitor arms onto the main pole.
- Adjust the height of each arm to your desired position and secure them using the locking mechanism.
4.4 Attaching Monitors to VESA Plates
- Attach the VESA plates to the back of your monitors using the appropriate screws from the hardware kit. Ensure the VESA holes are central on the monitor for optimal balance.
- For ultrawide or curved monitors, ensure the VESA plate is securely attached and consider any specific manufacturer recommendations for mounting.

Image 4.3: Quick-release VESA plate installation.
4.5 Mounting Monitors to Arms
- Carefully slide the VESA-mounted monitors onto the arms' VESA brackets.
- Secure the monitors in place using the quick-release mechanism or screws as indicated in the hardware instructions.
4.6 Gas Spring Tension Adjustment
The gas springs need to be adjusted to match the weight of your monitors for proper movement and stability.
- Position the arm horizontally.
- Use the provided Allen key to adjust the tension screw on each arm.
- Turn counter-clockwise if the arm drops (to increase tension for heavier monitors).
- Turn clockwise if the arm rises (to decrease tension for lighter monitors).
- Adjust until the arm stays in position when released.
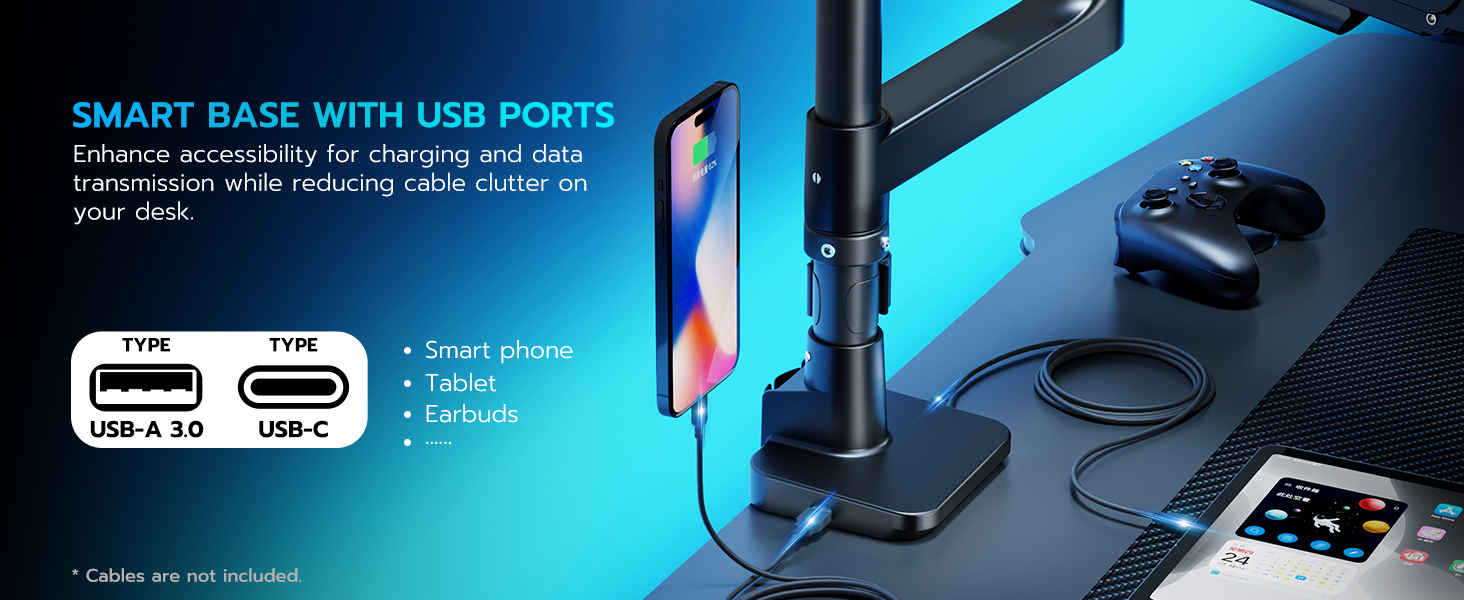
Image 4.4: Gas spring tension adjustment.
4.7 Cable Management
Route your monitor and power cables through the integrated cable management channels on the arms for a tidy setup.
- Push the cable cover upward first, then pull it off to open the channel. Do not force it, as this may cause damage.
- Route cables through the arms.
- Snap the cable covers back in place and push down to secure them.

Image 4.5: Cable management steps.
4.8 USB Port Connection
Connect the integrated USB-A and USB-C cables from the stand's base to your computer's corresponding USB ports to enable charging and data transmission functionality.

Image 4.6: Smart Base with USB ports for charging and data.
5. Operating the Monitor Stand
Once installed and adjusted, your ARES WING Dual Monitor Stand offers a range of motion for optimal viewing comfort.

Image 5.1: Versatile positioning and adjustment ranges.
5.1 Adjusting Monitor Position
- Height Adjustment: Gently push or pull the monitor arm to raise or lower the monitor along the main pole. The gas spring will assist in holding the position. Maximum height is 27.9 inches.
- Extension/Retraction: Extend or retract the monitor arms to adjust the distance of your monitors from your viewing position. Maximum extension is 22.4 inches.
- Tilt: Tilt your monitor screen -50° to +20° vertically to reduce glare and find your preferred viewing angle. For ultrawide monitors, ensure the tilt mechanism is loosened sufficiently before tilting.
- Swivel: Swivel the monitor ±90° horizontally to share your screen or change viewing orientation.
- Rotation: Rotate your monitor 360° from landscape to portrait mode.

Image 5.2: Detailed view of full adjustability options.
5.2 Various Screen Combinations
The flexible design allows for multiple monitor configurations, including stacked or side-by-side arrangements, to suit your workflow or gaming setup.
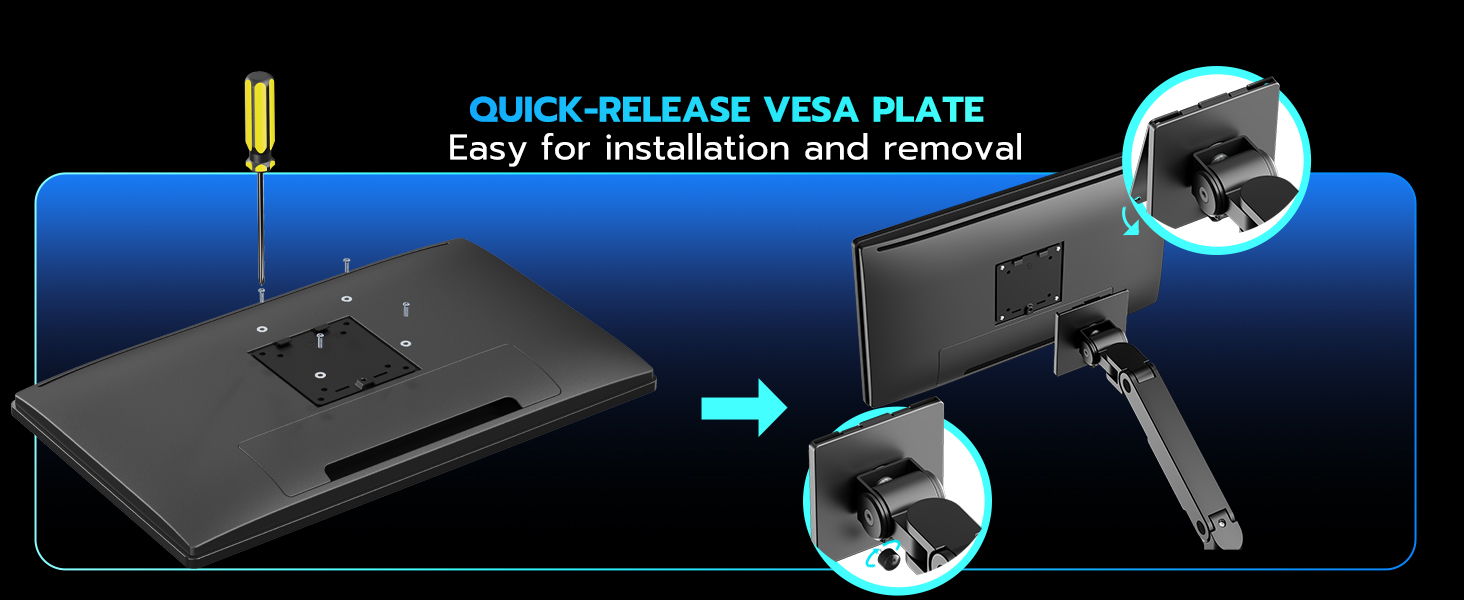
Image 5.3: Examples of various screen combinations.
6. Maintenance
- Cleaning: Wipe the stand with a soft, damp cloth. Avoid abrasive cleaners or solvents.
- Periodic Checks: Periodically check all screws and connections to ensure they remain tight and secure.
- Gas Spring Longevity: The industrial-grade gas springs are tested for over 20,000 cycles, ensuring long-term durability with daily use.
Image 6.1: Gas spring durability information.
7. Troubleshooting
| Problem | Possible Cause | Solution |
|---|---|---|
| Monitor arm drops or rises unexpectedly. | Gas spring tension is not correctly adjusted for monitor weight. | Adjust the gas spring tension using the provided Allen key (refer to Section 4.6). Increase tension for heavier monitors, decrease for lighter ones. |
| Monitor is wobbly or unstable. | Base clamp/grommet not securely tightened; VESA plate not properly attached; monitor weight exceeds capacity. | Ensure the desk clamp or grommet is fully tightened. Verify VESA plate screws are secure. Confirm monitor weight is within the 44 lbs limit per arm. |
| USB ports are not functioning. | USB cables from the stand are not connected to the computer; faulty cable or port. | Check that the USB-A and USB-C cables from the stand's base are securely connected to your computer. Try different USB ports on your computer or test with another device. |
| Difficulty tilting ultrawide monitors. | Tilt mechanism screw is too tight. | Loosen the screw on the tilt mechanism until smooth tilting is achieved. |
8. Specifications
| Feature | Detail |
|---|---|
| Model Number | GDT1004UCP-2BK |
| Monitor Size Compatibility | 17 - 49 inches |
| Weight Capacity (per arm) | 4.4 lbs - 44 lbs |
| VESA Compatibility | 75x75mm, 100x100mm |
| Mounting Type | C-Clamp (0.5-1.8" desk thickness), Grommet (0.5-2.0" desk thickness) |
| Material | Aluminum |
| Max Height Adjustment | 27.9 inches |
| Max Arm Extension | 22.4 inches |
| Tilt Range | -50° to +20° |
| Swivel Range | ±90° |
| Rotation Range | 360° |
| Integrated USB Ports | 1x USB-A (5V/2A), 1x USB-C (5V/2A) |
| Item Weight | 16.85 pounds |
| Package Dimensions | 16.89 x 12.17 x 4.69 inches |

Image 8.1: Weight capacity demonstration.
9. Warranty and Support
ARES WING provides professional support for its products.
- Warranty: The product includes a 3-year warranty.
- Customer Support: If you encounter any issues during use, ARES WING offers one-on-one installation guidance, replacement parts, or monitor arm replacement services. Please contact our customer support team for assistance.
Related documentsGDT1004UCP-2BK

Ask a question about this manual
Ask about setup, troubleshooting, compatibility, parts, safety, or missing instructions. Manuals+ will review the question and use this page’s manual context to help answer it.