
1. Introduction
This manual provides detailed instructions for the installation, operation, and maintenance of your ARES WING Wall Mount Monitor Arm. This heavy-duty single monitor mount is designed to support ultrawide screens from 17 to 49 inches, with a weight capacity of up to 44 lbs. It features a gas spring for fully adjustable positioning and supports 75x75mm and 100x100mm VESA patterns.
The monitor arm allows for ergonomic customization of your viewing posture, helping to reduce strain on your neck and back. Its design also helps to free up desktop space and includes an integrated cable management system for a tidy workspace.
2. Safety Information
- Weight Capacity: Do not exceed the maximum weight capacity of 44 lbs (20 kg). Overloading can cause instability and potential damage.
- Monitor Size: Ensure your monitor is within the recommended size range of 17-49 inches.
- Wall Type: This mount is designed for installation on wood studs, solid concrete, or brick walls. DO NOT install on drywall alone. Use appropriate anchors for your wall type.
- Installation: Follow all installation steps carefully. If you are unsure about any part of the installation, seek professional assistance.
- Moving Parts: Be aware of pinch points when adjusting the arm. Keep hands and fingers clear of moving parts.
- Maintenance: Periodically check all screws and connections to ensure they remain secure.
3. Package Contents
Verify that all components are present before beginning installation:
- Monitor Arm Assembly
- Wall Plate
- VESA Plate
- Mounting Hardware Kit (screws, washers, anchors for various wall types)
- Hex Keys for adjustments
- Instruction Manual
4. Setup and Installation
4.1 Pre-Installation Checks
- Monitor Compatibility: Check if your monitor has VESA mounting holes (75x75mm or 100x100mm). If your monitor does not have VESA holes, a separate VESA adapter is required (not included). Some ultrawide monitors, like certain Samsung G9 models, may come with a compatible VESA adapter.
- Wall Type: Identify your wall type (wood stud, solid concrete, or brick) to use the correct mounting hardware.
- Location: Choose a suitable location on your wall, ensuring there is enough space for the monitor arm's full range of motion and that the wall can support the combined weight of the mount and monitor.

Image: Check monitor compatibility and suitable wall types for mounting.

Image: Instructions for checking VESA holes and preparing an adapter.
4.2 Mounting the Wall Plate
- Position the wall plate at the desired height on your wall.
- Mark the drilling locations through the holes on the wall plate.
- Drill pilot holes according to the recommended drill bit size for your wall type.
- Secure the wall plate to the wall using the appropriate screws and anchors. Ensure it is firmly attached and level.

Image: The monitor arm can be mounted on wood studs, brick, or solid concrete. Do not use on drywall alone.
4.3 Attaching the Monitor Arm
- Slide the monitor arm assembly onto the secured wall plate.
- Tighten any securing screws on the arm to lock it onto the wall plate.
4.4 Attaching the VESA Plate to Your Monitor
- Carefully place your monitor face down on a soft, clean surface.
- Align the VESA plate with the mounting holes on the back of your monitor.
- Secure the VESA plate to the monitor using the provided VESA screws. Ensure a snug fit without overtightening.
4.5 Mounting the Monitor to the Arm
- With the VESA plate attached to your monitor, carefully lift the monitor.
- Hook the VESA plate onto the VESA head of the monitor arm.
- Secure the monitor to the arm using the quick-release mechanism or tightening screw, as indicated in the specific instructions for your model.

Image: Quick-release VESA plate for easy monitor attachment.
5. Operating Instructions
The ARES WING monitor arm offers full flexibility and adjustability to optimize your viewing experience.
5.1 Gas Spring Tension Adjustment
The gas spring tension needs to be adjusted to match the weight of your monitor for smooth movement and stable positioning.
- If the arm rises too easily or does not stay down, turn the adjustment screw clockwise to increase tension.
- If the arm drops too easily or is difficult to raise, turn the adjustment screw counter-clockwise to decrease tension.
- Adjust gradually until the arm holds its position when released.

Image: Gas spring tension adjustment for optimal function.
5.2 Tilt, Swivel, and Rotation Adjustments
The arm allows for a wide range of motion:
- Tilt: Adjust the monitor angle from +50° to -20° to reduce glare and find your preferred viewing angle.
- Swivel: The arm can swivel 180°, and the monitor plate can swivel 360° (±90° at each joint) for flexible screen sharing or repositioning.
- Rotation: Rotate your monitor 360° for landscape or portrait orientation.
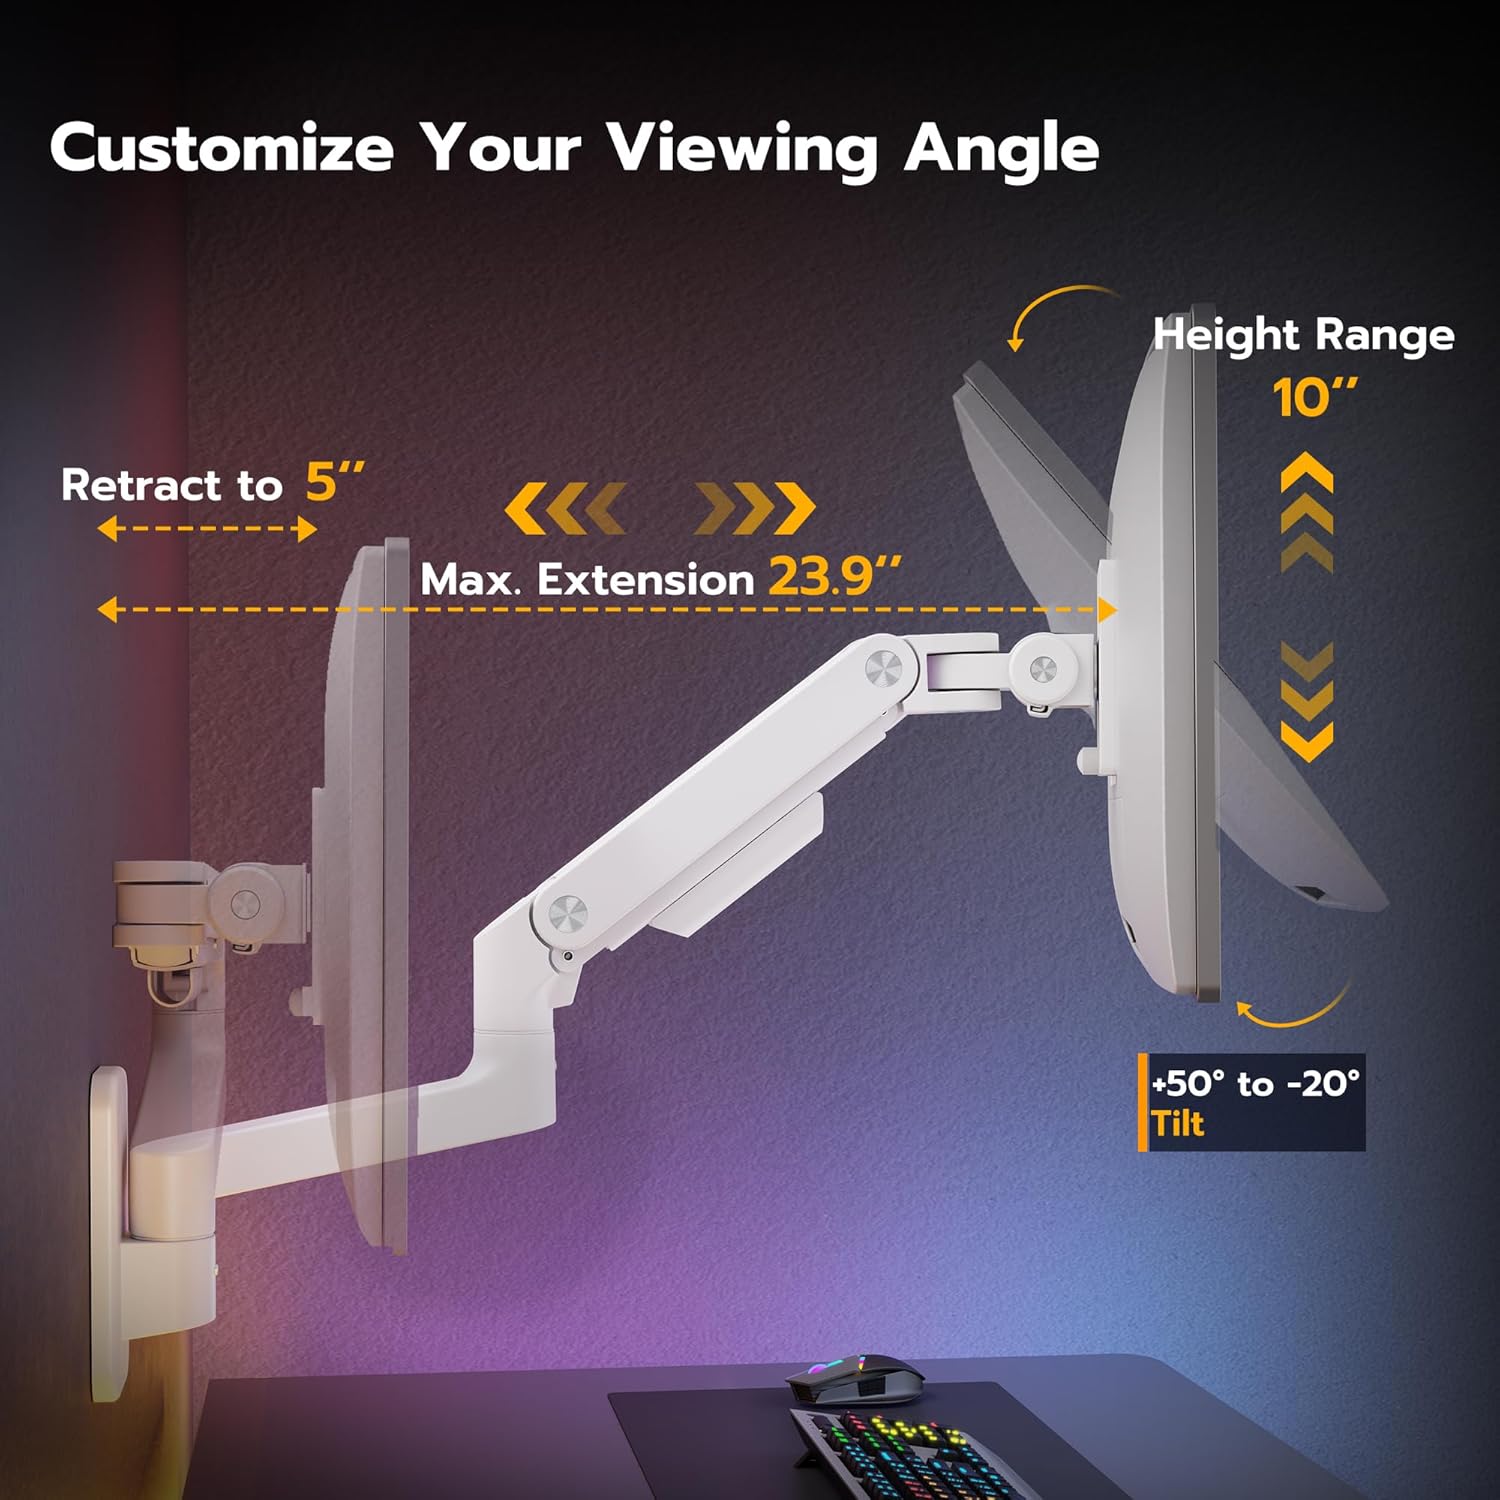
Image: Customize your viewing angle with tilt, height, and extension adjustments.

Image: Easy to swivel the arms for various viewing positions.
5.3 Height Adjustment
The arm provides a 10-inch adjustable height range. Simply move the monitor up or down to achieve your desired ergonomic height. Ensure the gas spring tension is correctly set for smooth movement.

Image: 10-inch height range for ergonomic positioning.
5.4 Retraction and Extension
The arm can retract to just 5 inches from the wall when not in active use, and extend up to 23.9 inches, providing flexibility for various tasks and space-saving.
6. Cable Management
The ARES WING monitor arm includes an integrated cable management system to keep your workspace organized and free of clutter. Route your monitor and power cables along the arm and through the designated channels or clips. This helps to prevent cables from interfering with arm movement and maintains a clean aesthetic.

Image: Integrated cable management for a tidy setup.
7. Maintenance
- Cleaning: Wipe the arm and monitor with a soft, damp cloth. Avoid harsh chemicals or abrasive cleaners.
- Periodic Checks: Regularly inspect all mounting screws and connections to ensure they are tight and secure. Re-tighten if necessary.
- Gas Spring: If the arm's movement becomes stiff or loose over time, re-adjust the gas spring tension as described in Section 5.1.
8. Troubleshooting
- Monitor Sags or Does Not Stay in Position: The gas spring tension may be too low for your monitor's weight. Increase the tension by turning the adjustment screw clockwise (refer to Section 5.1).
- Monitor is Difficult to Move Up/Down: The gas spring tension may be too high. Decrease the tension by turning the adjustment screw counter-clockwise (refer to Section 5.1).
- Monitor Tilts Downward Unexpectedly: Ensure the tilt mechanism's knob or screw is securely tightened. For ultrawide monitors, sometimes the tilt mechanism needs to be loosened and then re-tightened after the monitor is in place to allow for proper adjustment.
- Arm Feels Loose or Wobbly: Check all mounting screws on the wall plate and the arm's connections to ensure they are fully tightened.
- Cables Snagging: Re-route cables through the cable management channels to ensure they do not interfere with the arm's movement.

Image: How to adjust tilt for ultrawide monitors.
9. Specifications
| Feature | Specification |
|---|---|
| Model Number | GDT1004WLWH |
| Screen Size Compatibility | 17 - 49 inches (including 1000R curved monitors) |
| Weight Capacity | 4.4 lbs - 44 lbs (2 kg - 20 kg) |
| VESA Compatibility | 75x75mm, 100x100mm |
| Tilt Range | +50° to -20° |
| Swivel Range | 180° (arm), 360° (monitor plate) |
| Rotation | 360° |
| Height Adjustment | 10 inches |
| Max Arm Extension | 23.9 inches |
| Retraction Distance | 5 inches |
| Mounting Type | Wall Mount (Wood Stud, Solid Concrete, Brick) |
| Material | Premium-grade Steel and Aluminum |
| Color | White |

Image: Detailed dimensions of the monitor arm.

Image: The monitor arm fits 49-inch ultrawide monitors and supports VESA 75x75/100x100.

Image: The ARES WING monitor arm is designed to hold heavier monitors up to 44 lbs.
10. Official Product Video
Video: This video demonstrates the features and functionality of the ARES WING Wall Mount Monitor Arm, including its adjustability and design.
11. Warranty and Support
ARES WING products are manufactured with quality and durability in mind. For warranty information, technical support, or assistance with your product, please refer to the contact information provided with your purchase or visit the official ARES WING website. Please retain your proof of purchase for warranty claims.
