
1. Introduction
This manual provides comprehensive instructions for the safe and efficient operation, setup, and maintenance of the Sonew DC 24V High Speed 100N Drive Welding Wire Feeder. This automatic wire feeder is designed for CO2 MAG welding applications, offering high-speed and versatile compatibility with various welding wires. Please read this manual thoroughly before using the device to ensure proper function and safety.

Figure 1.1: Sonew DC 24V High Speed Welding Wire Feeder, front view.
2. Product Features
- Enhanced Welding Efficiency: Offers a high-speed wire feeding range of 1.5 to 20m/min, significantly improving productivity in CO2 MAG welding.
- Automatic Wire Feeding: Facilitates automatic wire feeding, allowing the user to focus on the welding process without manual intervention, leading to increased accuracy and consistency.
- Multi-Compatibility: Compatible with various welding wire types, supporting diameters from 0.8mm to 1.6mm, making it suitable for diverse welding projects.
- Durable Construction: Built from premium steel materials to ensure longevity and resistance to daily wear and tear, extending the service life of the unit.
- User-Friendly Operation: Features intuitive controls and an easy-to-use interface for adjusting wire feeding speed, suitable for both professional and novice welders.

Figure 2.1: The wire feeder designed for efficient welding operations.
3. Components and Parts Identification
Familiarize yourself with the main components of the welding wire feeder using the diagram below. Understanding each part is essential for proper setup and operation.
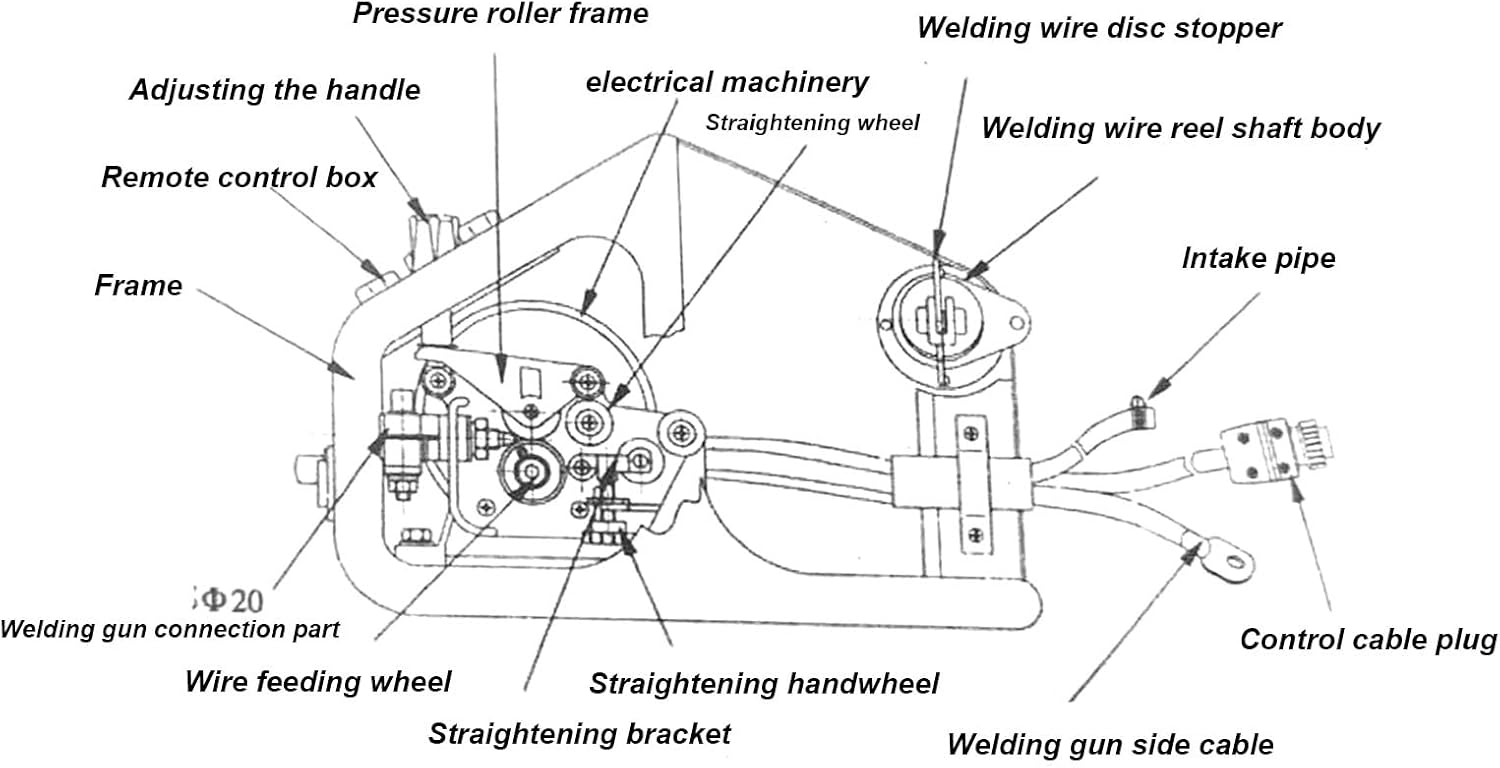
Figure 3.1: Component diagram of the welding wire feeder. Key parts include the pressure roller frame, welding wire disc stopper, adjusting handle, electrical machinery, straightening wheel, welding wire reel shaft body, intake pipe, remote control box, frame, wire feeding wheel, straightening handwheel, straightening bracket, welding gun connection part, and control cable plug.
- Pressure roller frame: Secures the wire.
- Welding wire disc stopper: Prevents wire spool from unwinding excessively.
- Adjusting the handle: Used for various adjustments.
- Electrical machinery: The motor driving the wire feed.
- Straightening wheel: Helps straighten the wire before feeding.
- Welding wire reel shaft body: Holds the wire spool.
- Intake pipe: Guides the wire into the feeder.
- Remote control box: For remote operation (if applicable).
- Frame: The main structural support.
- Wire feeding wheel: Drives the wire forward.
- Straightening handwheel: For fine-tuning wire straightening.
- Straightening bracket: Supports the straightening mechanism.
- Welding gun connection part: Where the welding gun cable connects.
- Control cable plug: Connects to the welding power supply.
4. Setup Instructions
Follow these steps to set up your Sonew welding wire feeder:
- Unpacking: Carefully remove all components from the packaging. Verify that all parts listed in the package contents (Welding Wire Feeder, 2 x Connector, 2 x Feeding Wheel, 1 x Hex Wrench) are present.
- Placement: Place the wire feeder on a stable, level surface near your welding power supply. Ensure adequate ventilation.
- Wire Spool Installation:
- Mount the compatible wire spool (Shaft Diameter: Approx. 50mm / 1.97in, Outer Diameter: Approx. 280mm / 11.02in, Width: Approx. 105mm / 4.13in, Applicable Wire Reel Weight: Approx. 20kg / 44.1 lb) onto the welding wire reel shaft body.
- Secure the wire spool with the welding wire disc stopper.
- Thread the welding wire through the intake pipe and into the wire feeding mechanism. Ensure it passes through the straightening wheel.
- Connecting to Power Supply:
- Connect the DC24V wire feeder motor to the appropriate power output of your welding power supply.
- Use the provided connectors to establish a secure electrical connection.
- Ensure the welding power supply is turned off before making any connections.
- Welding Gun Connection: Connect your welding gun cable to the welding gun connection part on the feeder. Ensure the control cable plug is securely inserted.

Figure 4.1: The wire feeder unit shown with the included connectors, feeding wheels, and hex wrench, essential for setup and maintenance.
5. Operating Instructions
This section details the operation of the wire feeder, including control adjustments and general usage.
5.1 Control Panel Overview

Figure 5.1: Close-up view of the control panel, showing voltage and current adjustment knobs.
- Voltage Adjustment Knob (电压调整): Used to set the output voltage for welding.
- Current Adjustment Knob (电流调整): Used to set the welding current, typically marked for 350A and 500A rated currents, and corresponding wire diameters (0.8-1.2mm for 350A, 1-1.6mm for 500A).
- Manual Feed Button (手动送丝): Activates manual wire feeding for initial setup or troubleshooting.
5.2 Basic Operation
- Power On: Turn on the welding power supply.
- Set Parameters: Adjust the Voltage Adjustment Knob and Current Adjustment Knob according to your welding requirements and the type/diameter of wire being used.
- Wire Feeding Speed: The feeder automatically adjusts speed based on current/voltage settings, but fine-tuning can be done via the control panel if available, or through the welding power supply. The feeding speed range is approximately 1.5 to 20m/min.
- Initiate Welding: Begin your welding process. The automatic wire feeding system will ensure a consistent wire supply.
- Manual Wire Feed: Press the Manual Feed Button to feed wire manually, useful for initial wire setup or clearing blockages.

Figure 5.2: View of the internal wire feeding mechanism, highlighting the motor and rollers responsible for consistent wire delivery.
6. Maintenance
Regular maintenance ensures the longevity and optimal performance of your wire feeder. Always disconnect the power supply before performing any maintenance.
- Cleaning: Regularly clean the exterior of the unit to prevent dust and debris buildup. Use a dry, soft cloth. Avoid using solvents or abrasive cleaners.
- Wire Feeding Mechanism: Inspect the wire feeding wheels and guides for wear or accumulation of wire residue. Clean or replace worn parts as necessary. The included hex wrench can be used for adjustments.
- Electrical Connections: Periodically check all electrical connections for tightness and signs of corrosion. Ensure connectors are clean and secure.
- Motor Inspection: While the motor is designed for durability, ensure it is free from excessive dust and operates smoothly.
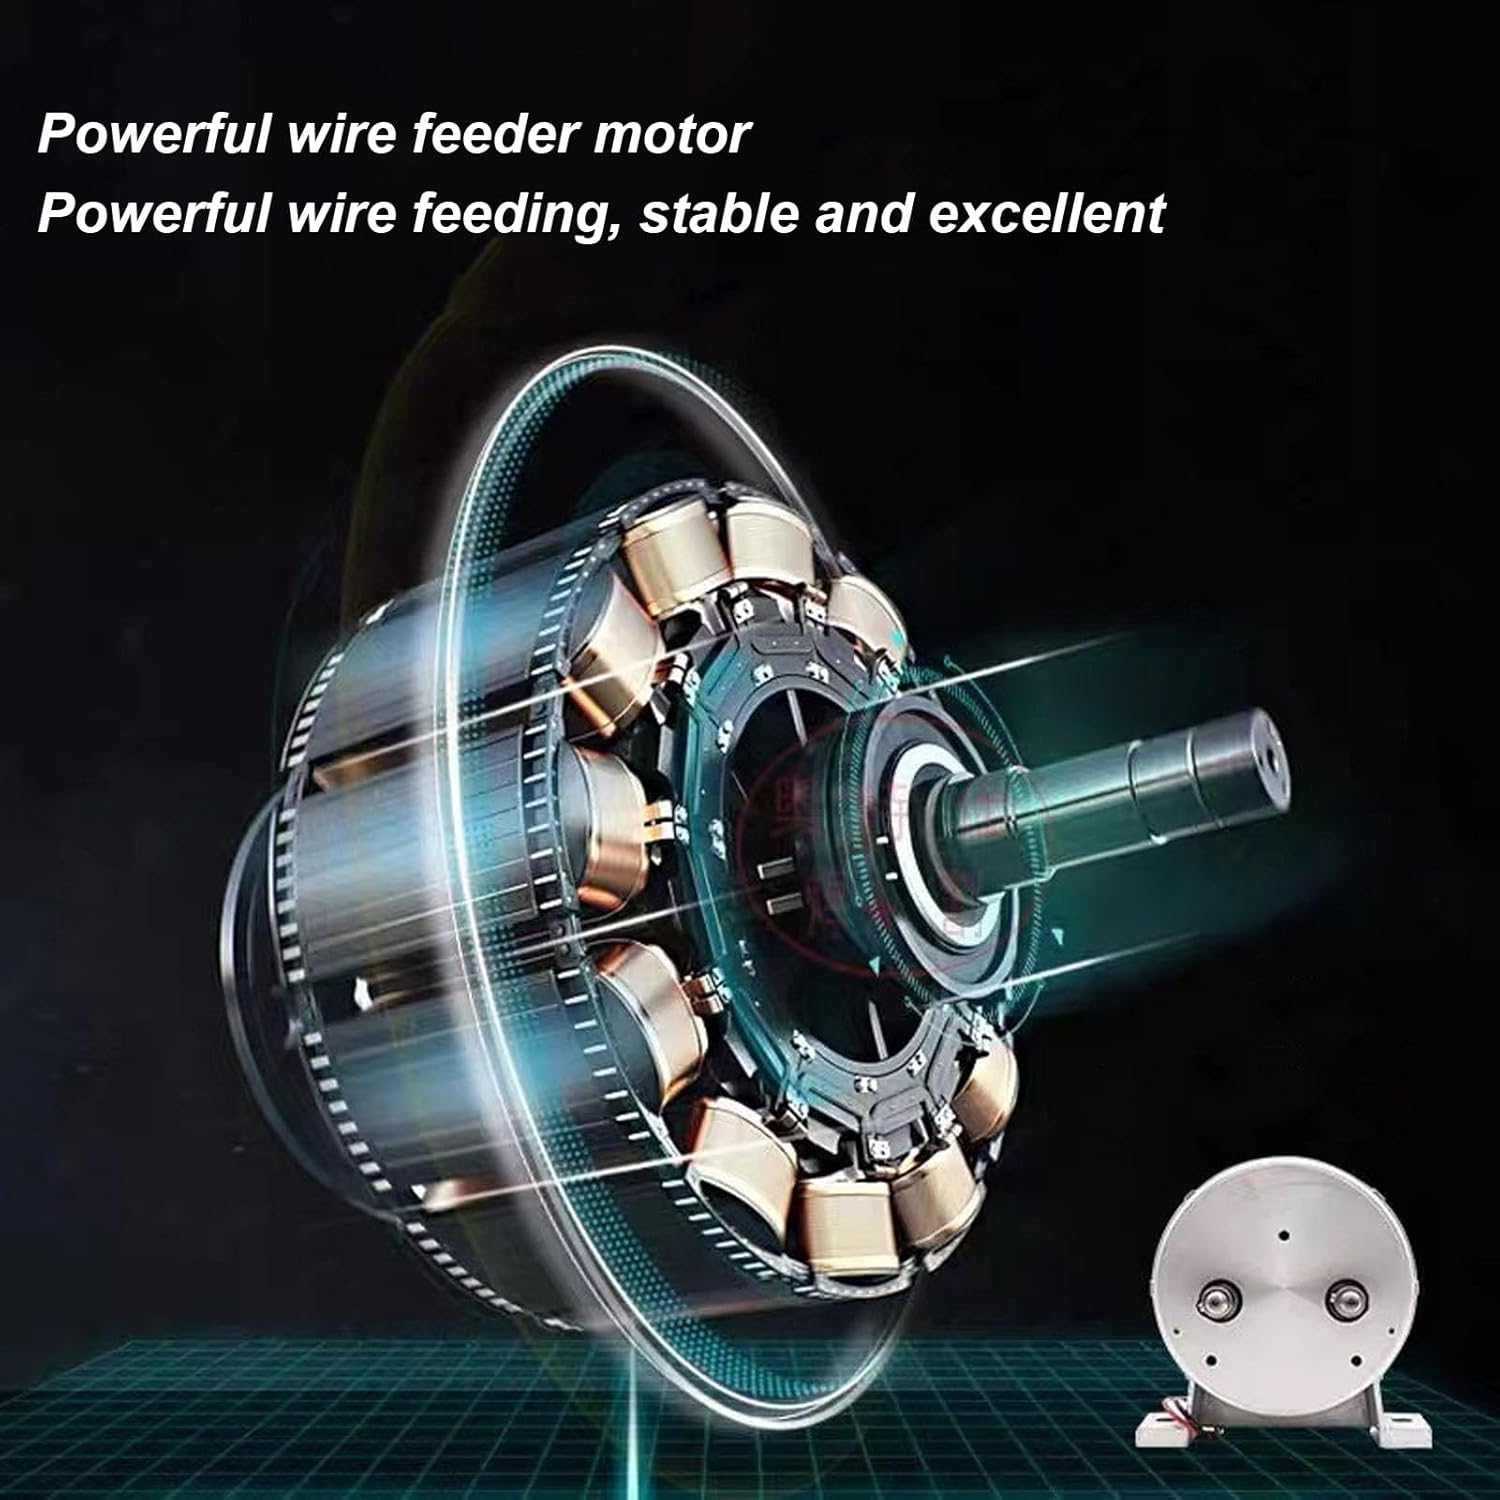
Figure 6.1: Illustration of the powerful wire feeder motor, designed for stable and excellent wire feeding performance.
7. Troubleshooting
This section provides solutions to common issues you might encounter.
| Problem | Possible Cause | Solution |
|---|---|---|
| Wire not feeding |
|
|
| Inconsistent wire feed speed |
|
|
| No power to unit |
|
|
8. Specifications
Detailed technical specifications for the Sonew DC 24V High Speed Welding Wire Feeder.
| Parameter | Value |
|---|---|
| Model Number | Sonew6q45he1dyc |
| Manufacturer | Sonew |
| Rated Current | 350A, 500A |
| Wire Feeder Motor Voltage | DC24V |
| Using Wire Diameter (350A) | Approx. 0.8 to 1.2mm / 0.03 to 0.05in |
| Using Wire Diameter (500A) | Approx. 1 to 1.6mm / 0.04 to 0.06in |
| Compatible Wire Spool Shaft Diameter | Approx. 50mm / 1.97in |
| Compatible Wire Spool Outer Diameter | Approx. 280mm / 11.02in |
| Compatible Wire Spool Width | Approx. 105mm / 4.13in |
| Rated Traction Force | 100N |
| Feeding Speed | Approx. 1.5 to 20m/min |
| Applicable Wire Reel Weight | Approx. 20kg / 44.1 lb |
| Item Weight | 20.1 pounds |
| Package Dimensions | 19.25 x 15.25 x 9.5 inches |
| Country of Origin | China |