
Introduction
Welcome to the user manual for your GLEDOPTO ZigBee 3.0 Mini 5-in-1 LED Strip Light Controller. This device is designed to provide versatile control over various LED strip types, including RGBCCT, RGBW, RGB, CCT, and Dimmer strips, through ZigBee 3.0 protocol. It offers smart home integration for enhanced lighting experiences.
Safety Information
- Ensure the power supply voltage matches the controller's input voltage (DC 5-24V).
- Do not expose the device to moisture or extreme temperatures.
- Disconnect power before installation or maintenance.
- This device is designed for indoor use only.
- Consult a qualified electrician if you are unsure about wiring or installation.
Package Contents
- 1 x Zigbee Ultra Thin Mini 5 in 1 LED Controller
- 1 x 3cm Sticker
- 1 x Wiring Tool
Product Overview
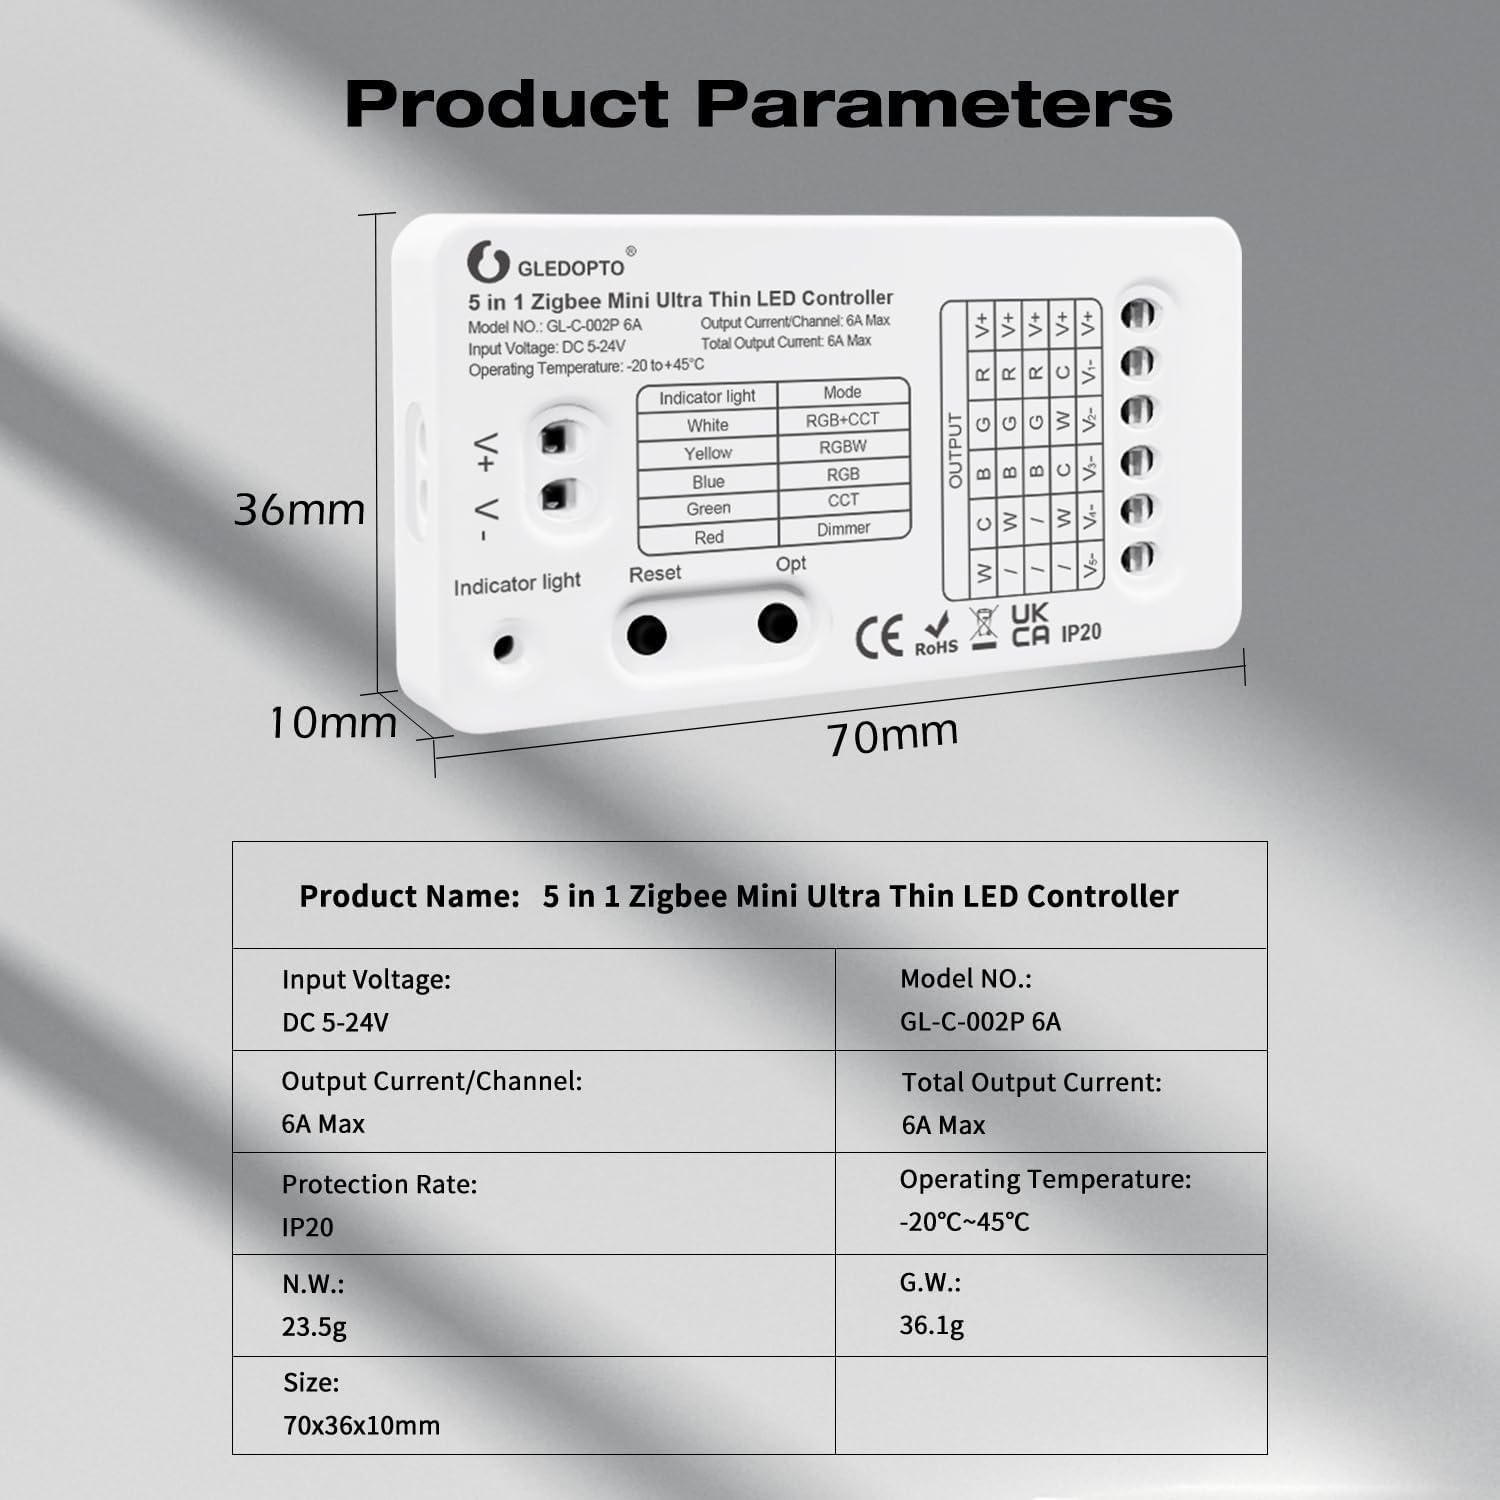
The GLEDOPTO ZigBee 3.0 Mini 5-in-1 LED Controller is a compact and lightweight device (70x36x10mm, 23.5g) designed for controlling LED strip lights. It supports five different LED strip configurations and integrates with ZigBee 3.0 compatible hubs for smart control.
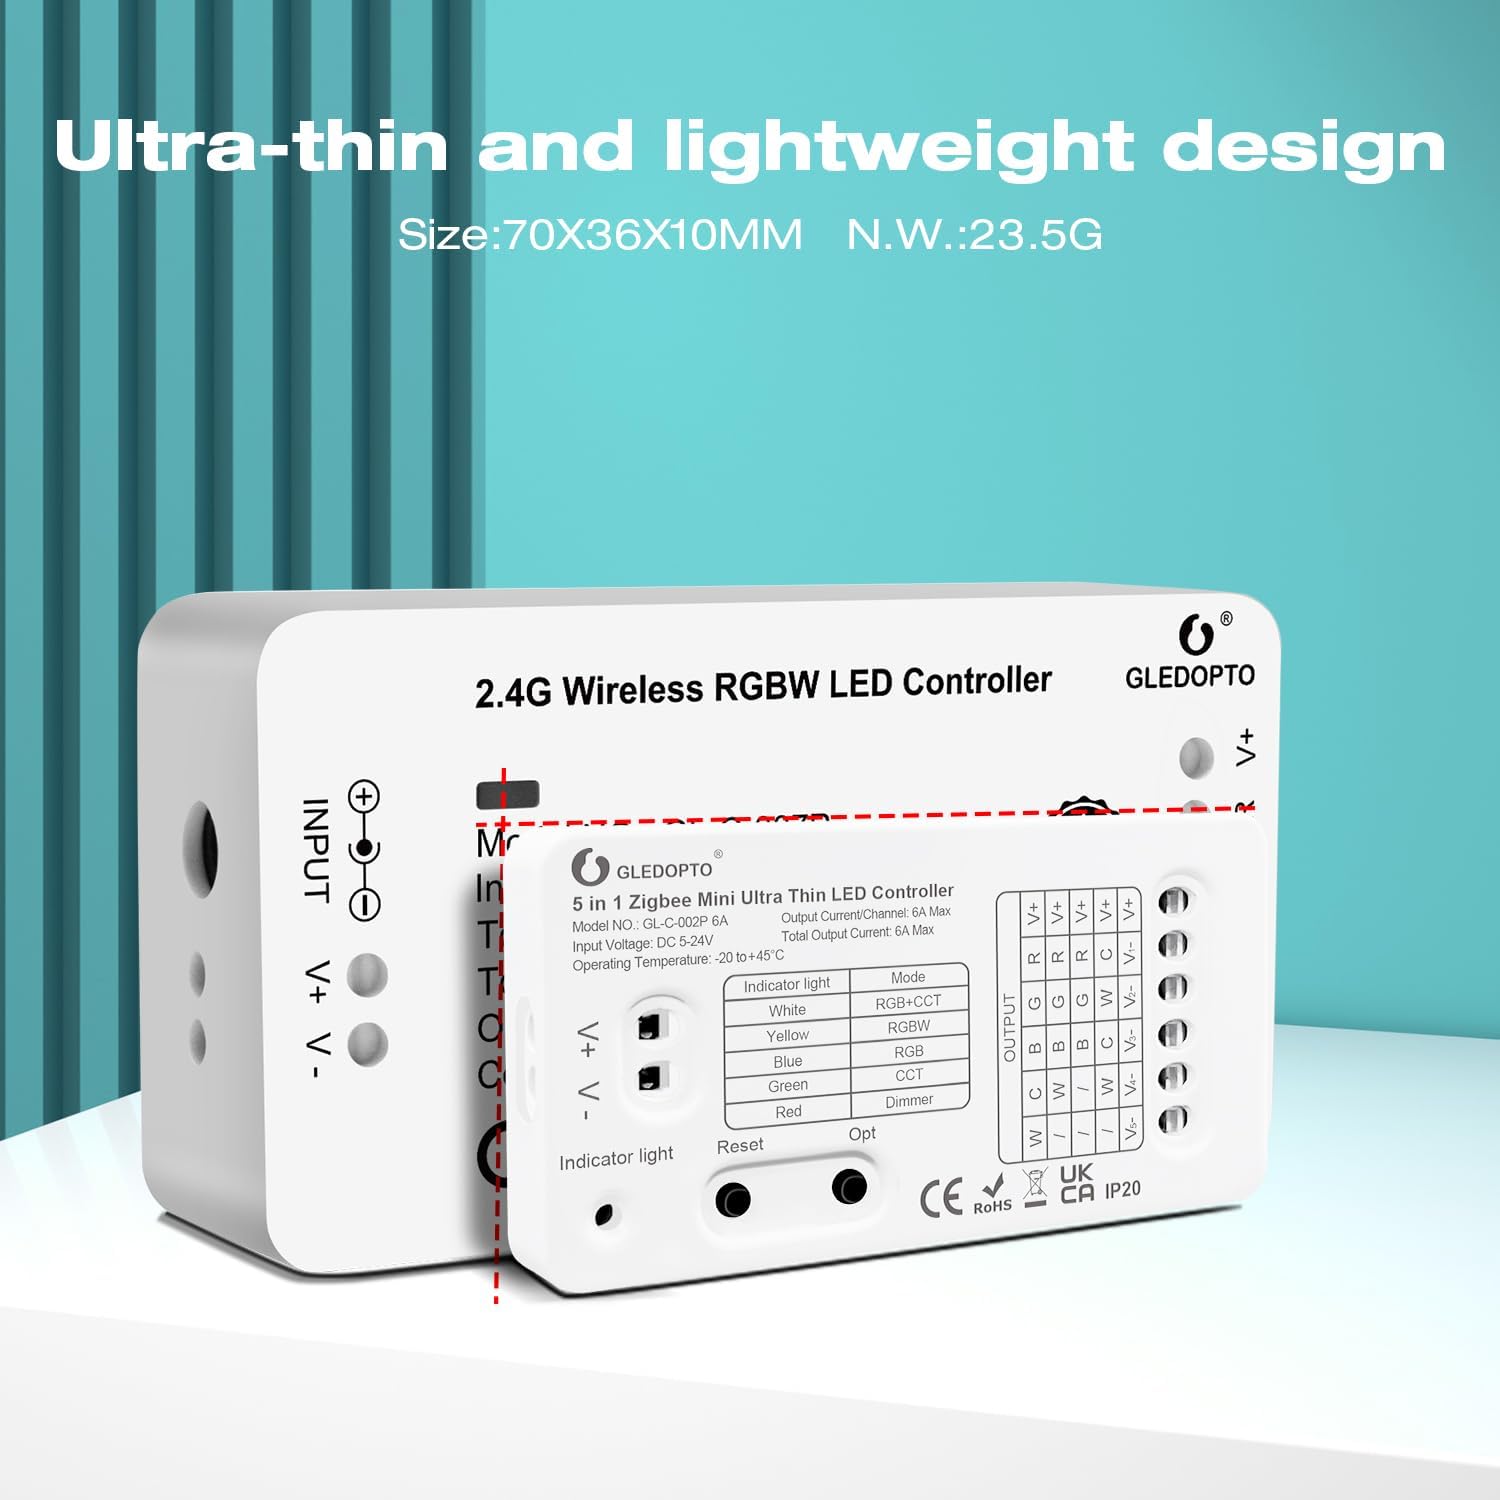
Image: The GLEDOPTO Mini 5-in-1 LED Controller, highlighting its compact size and light weight, ideal for discreet installation.
The controller features an indicator light, reset button, and an "Opt" button for mode switching and power-on status settings.
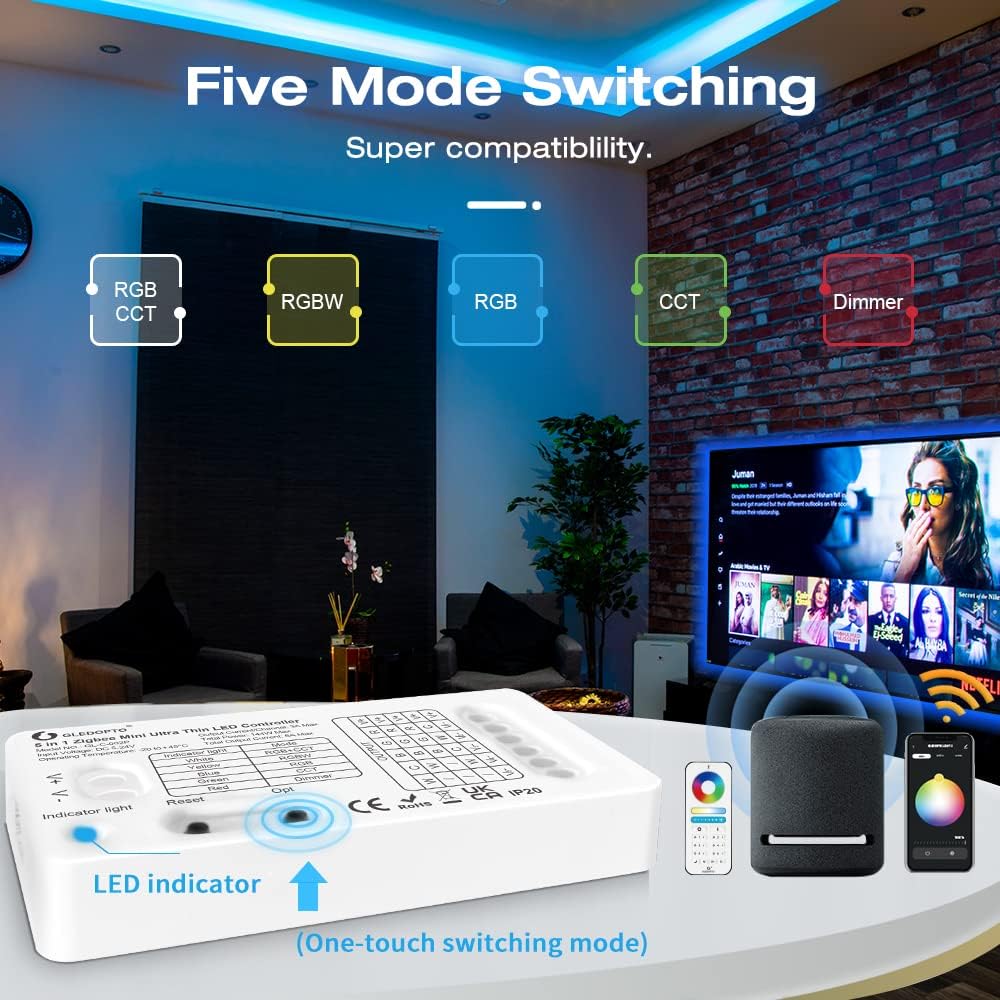
Image: Front view of the controller, detailing the input/output terminals and control buttons.
Setup and Installation
1. Wiring the LED Controller
Before connecting, ensure all power is disconnected. The controller supports various LED strip types. Refer to the wiring diagrams below for correct connections.
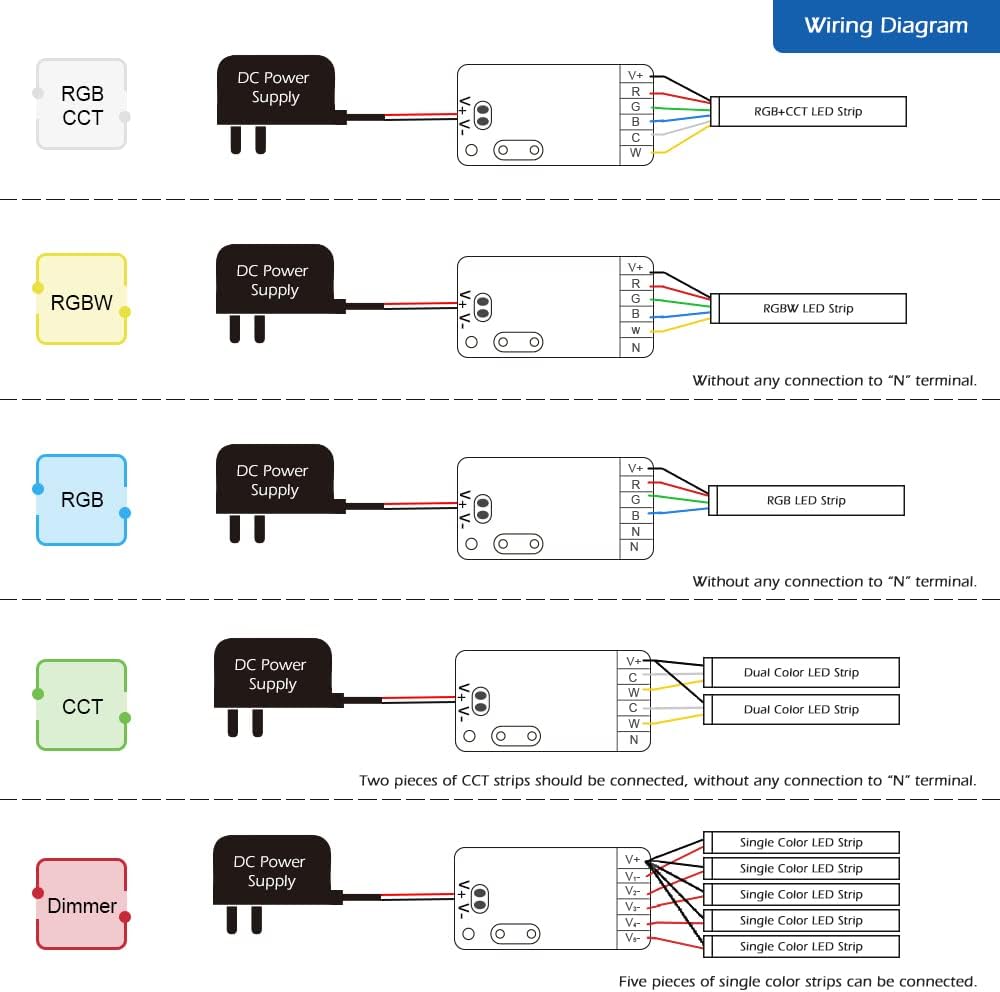
Image: Wiring diagrams illustrating connections for different LED strip types (RGBCCT, RGBW, RGB, CCT, Dimmer) to the controller.
- RGBCCT Strip: Connect V+, R, G, B, C, W terminals.
- RGBW Strip: Connect V+, R, G, B, W terminals. No connection to "N" terminal.
- RGB Strip: Connect V+, R, G, B terminals. No connection to "N" terminal.
- CCT Strip: Connect V+, C, W terminals. Two pieces of CCT strips can be connected. No connection to "N" terminal.
- Dimmer Strip: Connect V+, V- terminals. Five pieces of single color strips can be connected.
2. Power Connection
Connect a DC 5-24V power supply to the controller's input terminals (V+ and V-).
3. ZigBee Hub Pairing
This controller uses the ZigBee 3.0 protocol and requires a compatible ZigBee hub (e.g., Philips Hue, Conbee, Home Assistant) for smart control.
- Power on the LED controller.
- Put your ZigBee hub into pairing mode (refer to your hub's instructions).
- The controller should automatically be discovered by the hub. If not, you may need to initiate a reset on the controller by pressing the "Reset" button.
Attention: Tuya Zigbee hubs currently block third-party devices. This product is unable to connect to Tuya hubs.
Operating Instructions
1. Mode Switching (5-in-1 Functionality)
The controller supports five modes: RGBCCT, RGBW, RGB, CCT, and Dimmer. The indicator light on the device will change color to correspond to the selected mode.
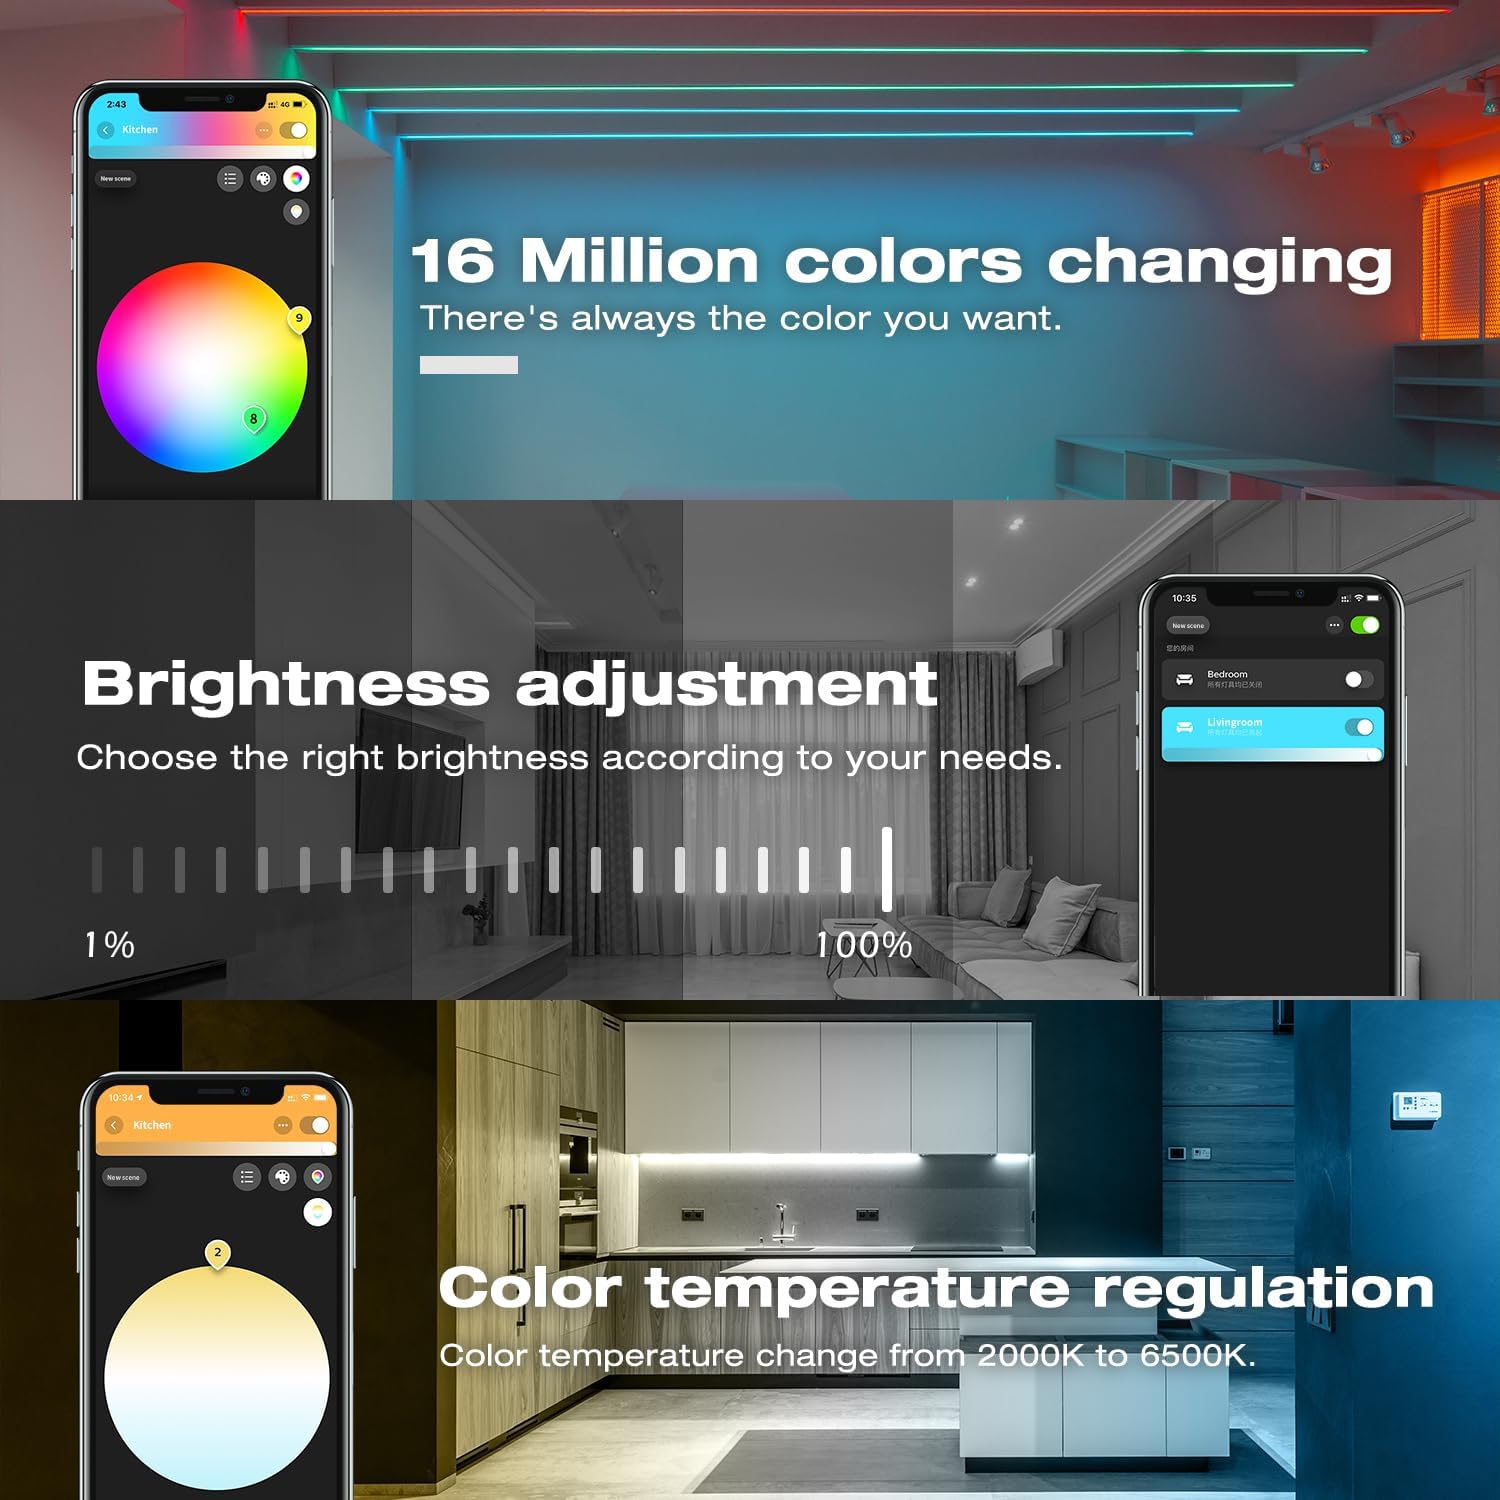
Image: Demonstrates app control for color, brightness, and color temperature adjustments.
To switch between modes, short press the "Opt" key once. The indicator light will change:
- White: RGBCCT
- Yellow: RGBW
- Blue: RGB
- Green: CCT
- Red: Dimmer
2. Smart Control (App & Voice)
Once paired with a compatible ZigBee hub, you can control your LED strips using a smartphone app or voice commands via smart assistants like Amazon Alexa.
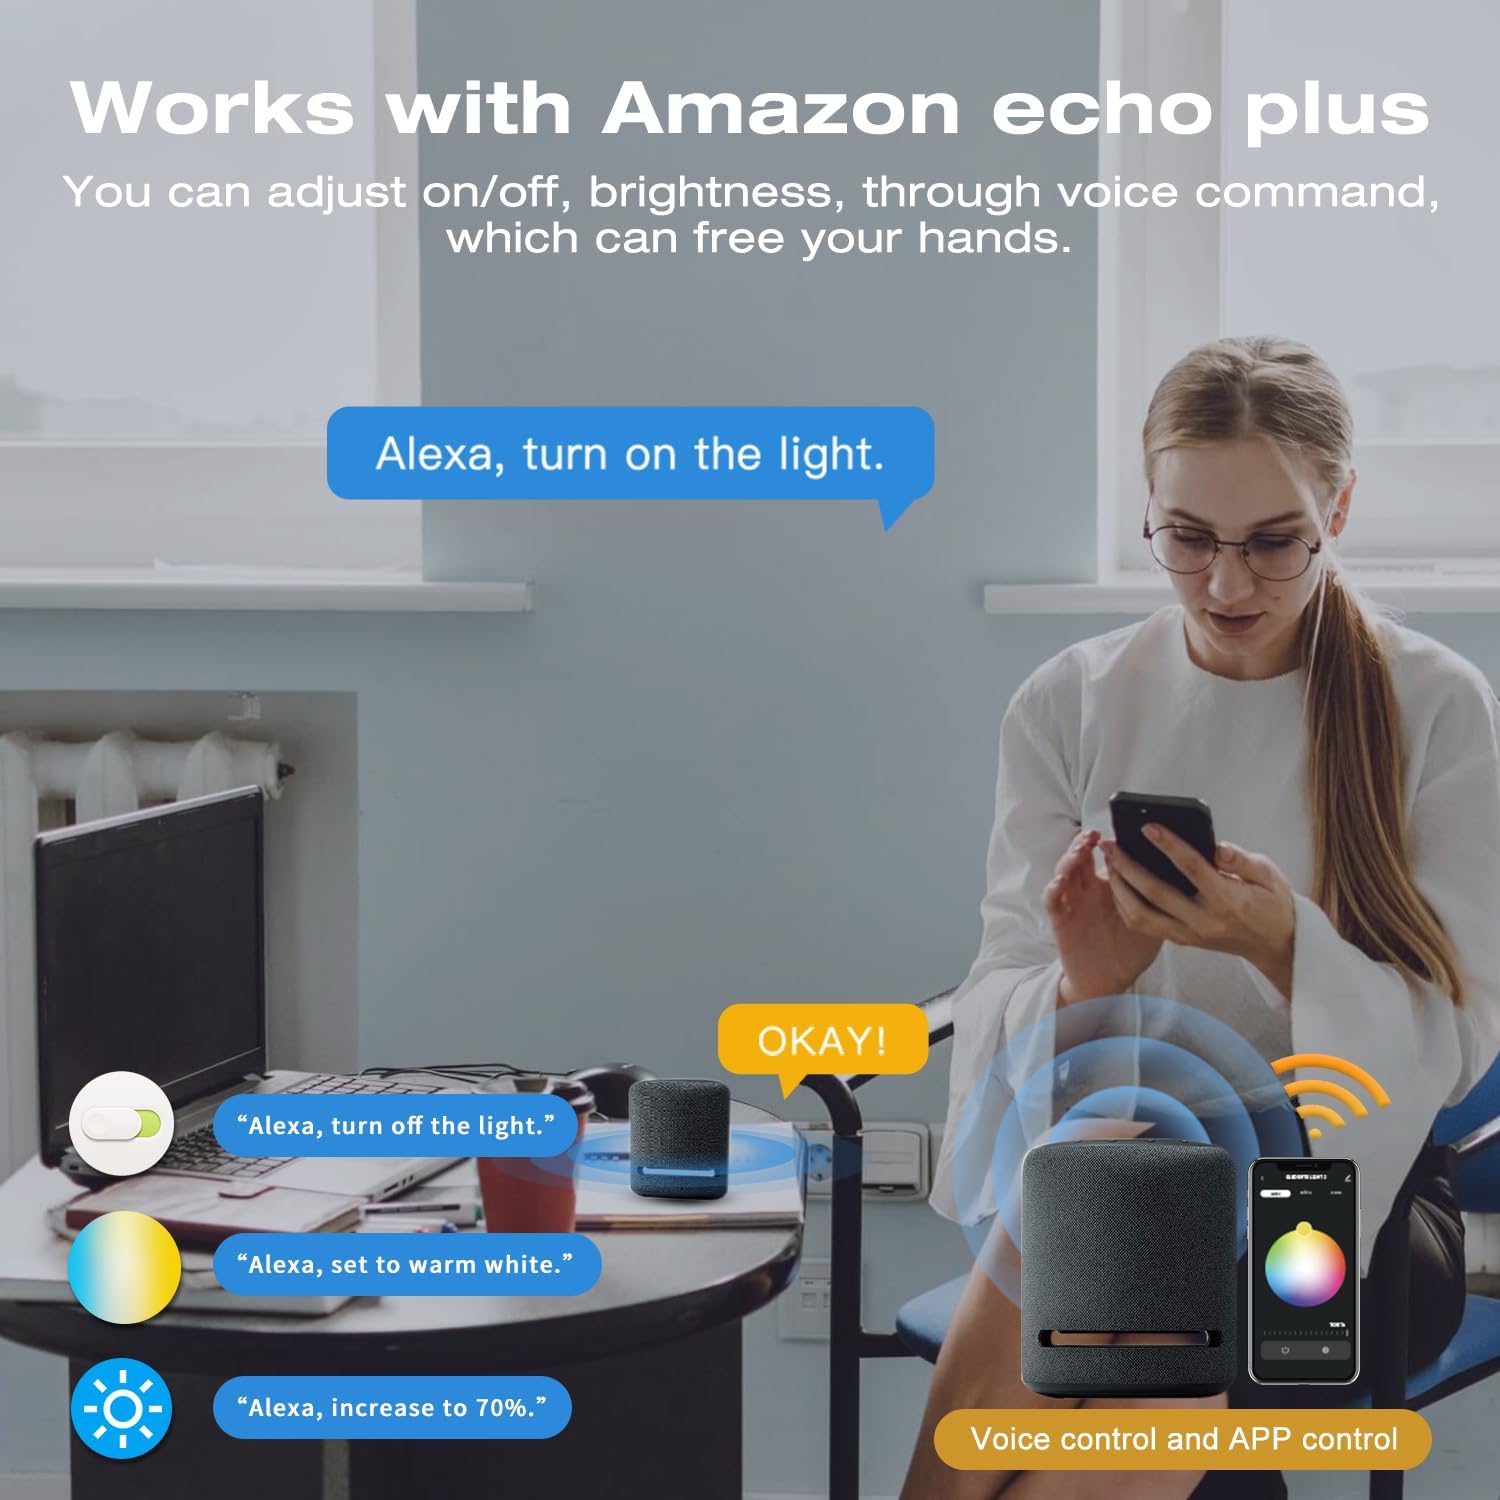
Image: Illustrates voice control functionality with Amazon Echo Plus, showing example commands.
3. Remote Control Pairing (Optional)
If using a GLEDOPTO remote control, power on the device and press the "I" button on the remote to pair. The light strip will flash to indicate successful pairing.
Video: Demonstrates the various features of the GLEDOPTO ZigBee 3.0 Mini 5-in-1 LED Controller, including mode switching, color and brightness adjustment, frequency settings, power-on status, and remote control pairing.
Advanced Settings
1. Power On Status Settings
You can configure the controller to remember its last on/off status or to light up by default when powered on.
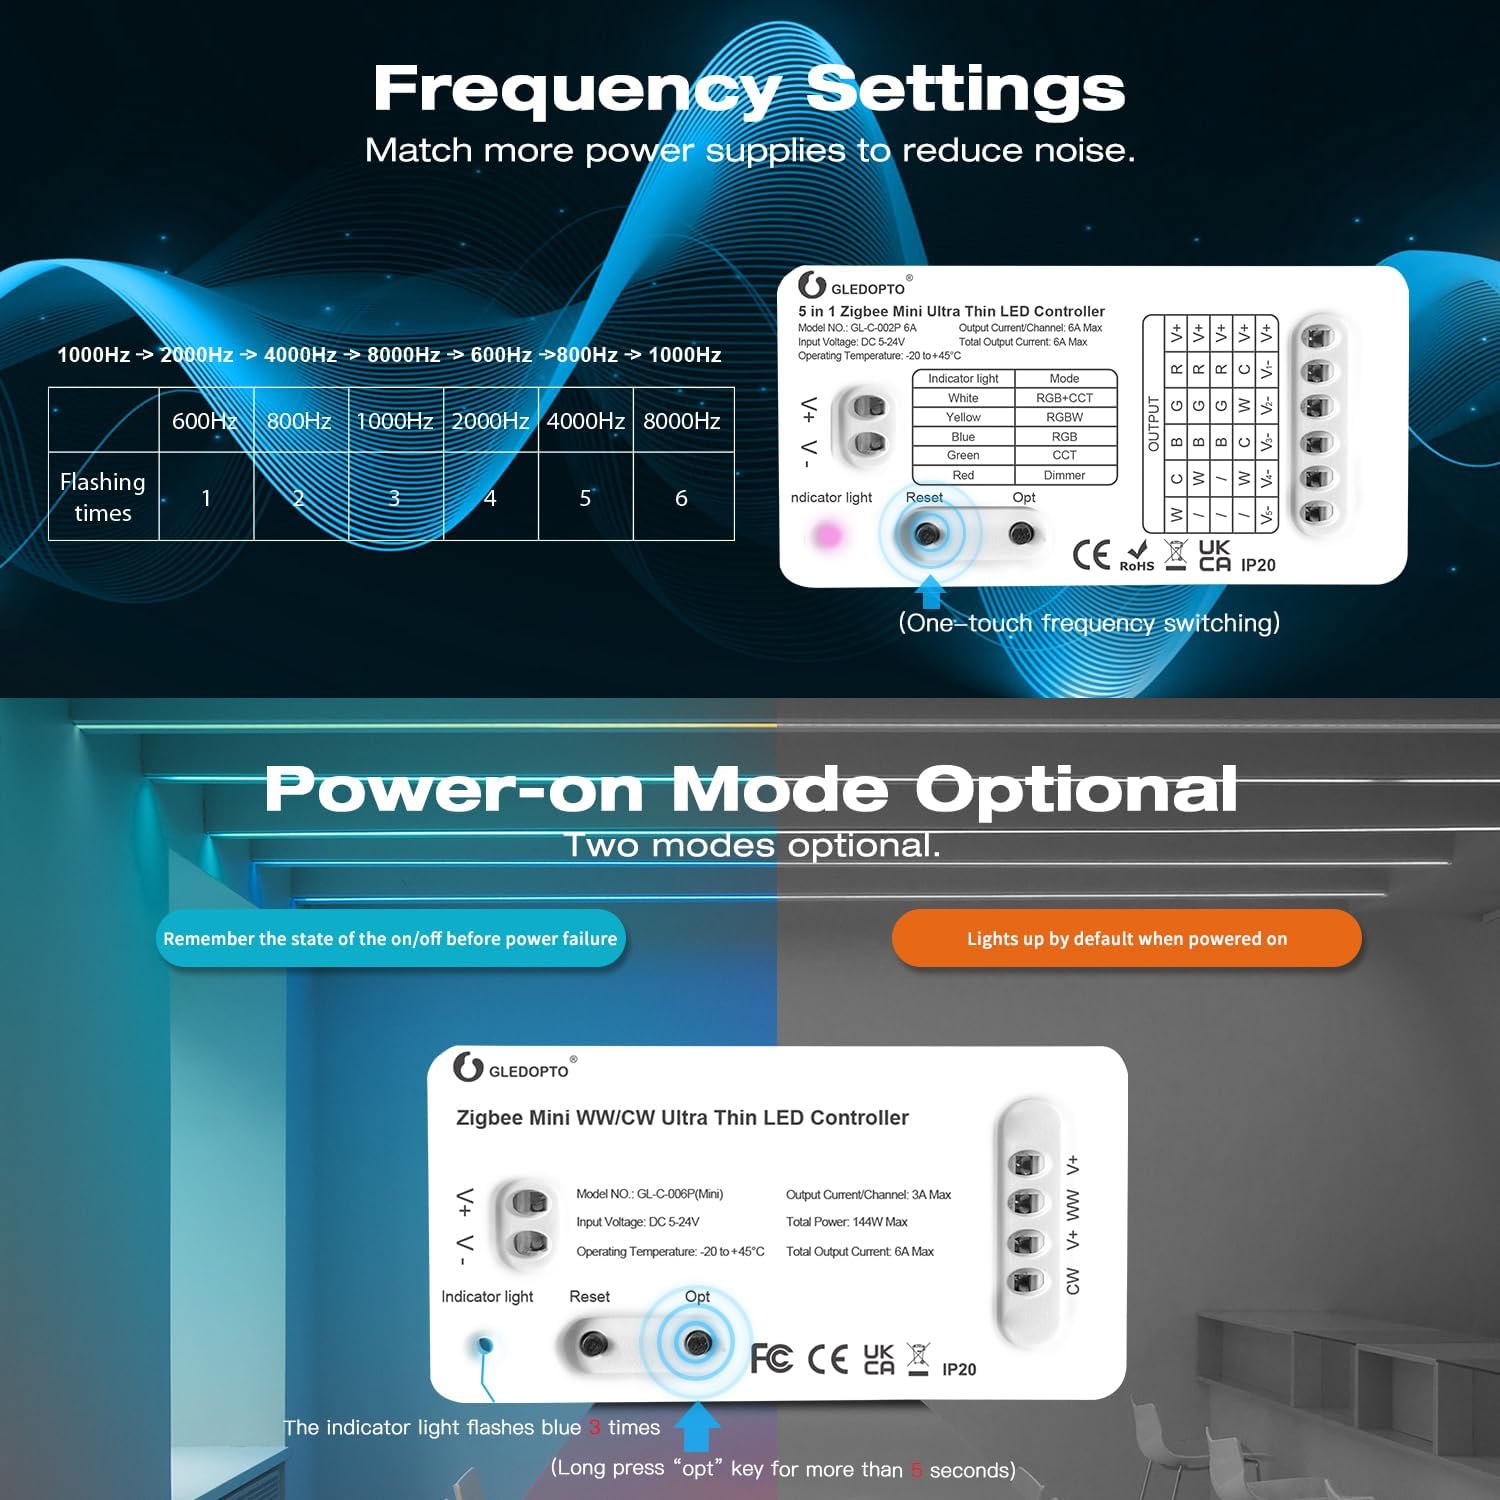
Image: Details on frequency settings and power-on mode options.
- To enter "power on/off status" mode, long press the "Opt" key for 5 seconds.
- The device indicator will flash blue 3 times to confirm the setting is saved. The device will then remember its previous status before power off.
2. Frequency Settings
The device frequency can be adjusted to match different power supplies and reduce noise. Available frequencies are 600Hz, 800Hz, 1000Hz (default), 2000Hz, 4000Hz, and 8000Hz.
To change the frequency, refer to the specific instructions provided with the device or consult the GLEDOPTO support resources.
Maintenance
- Keep the device clean and free from dust.
- Do not use harsh chemicals for cleaning.
- Regularly check connections for security.
Troubleshooting
No Light Output:
- Check power supply connection and voltage.
- Verify LED strip wiring is correct according to the diagrams.
- Ensure the LED strip itself is functional.
Cannot Pair with Hub:
- Confirm your hub is ZigBee 3.0 compatible and in pairing mode.
- Ensure the controller is within range of the hub.
- Try resetting the controller by pressing the "Reset" button.
- Note: Tuya Zigbee hubs are not compatible.
Incorrect Colors/Modes:
- Verify the correct mode is selected using the "Opt" button (check indicator light color).
- Recheck wiring for your specific LED strip type.
Power Supply Noise:
- Adjust the frequency setting as described in the "Advanced Settings" section to match your power supply.
Specifications
| Parameter | Value |
|---|---|
| Product Name | 5 in 1 Zigbee Mini Ultra Thin LED Controller |
| Model No. | GL-C-002P 6A |
| Input Voltage | DC 5-24V |
| Output Current/Channel | 6A Max |
| Total Output Current | 6A Max |
| Protection Rate | IP20 |
| N.W. (Net Weight) | 23.5g |
| G.W. (Gross Weight) | 36.1g |
| Size | 70x36x10mm |
| Operating Temperature | -20°C ~ 45°C |
Image: Product parameters table with dimensions and technical specifications.
Warranty and Support
For warranty information and technical support, please refer to the official Sogledwow website or contact their customer service. Keep your purchase receipt for warranty claims.
