
1. Introduction
This manual provides comprehensive instructions for the installation, operation, and maintenance of your X AUTOHAUX 15-inch 100lb/445N Universal Lift Supports Struts. Please read this manual thoroughly before installation and use to ensure proper function and safety. Keep this manual for future reference.
2. Product Overview
The X AUTOHAUX Universal Lift Supports Struts are designed to provide reliable support for various applications, including car hoods, rear hatches, RV windows, cabinet doors, and storage box covers. Each strut offers a force of 100lb/445N, with an extended length of 15 inches and a compressed length of 9 inches. They are constructed from durable carbon steel for longevity and consistent performance.

Image 2.1: Overview of the X AUTOHAUX 15-inch 100lb/445N Universal Lift Supports Struts, including two gas springs, four mounting brackets, four nuts, and a wrench.

Image 2.2: The complete package showing two lift supports and the 9-piece accessory kit, including mounting brackets and a wrench.
Video 2.1: An official product video demonstrating the X AUTOHAUX Black Lift Supports Struts and their components, including the wrench. This video provides a visual overview of the product's features and parts.

Image 2.3: Product dimensions, illustrating the 15-inch extended length and 9-inch compressed length of the gas strut.

Image 2.4: Detail of the durable sealing and thickened steel cylinder body, ensuring no deformation and reliable performance.
3. Installation Instructions
Proper installation is crucial for the safe and effective operation of your lift supports. Follow these steps carefully:
- Note: Ensure the gas strut rod is installed downwards to maintain proper lubrication of the main seal. This also contributes to better cushioning.
- Caution: The gas strut is delivered in an extended state. DO NOT attempt to compress it by hand before installation.
- Step 1: Mark the Upper Mounting Point. When positioning the gas spring, start by identifying the upper mounting point. This point should be approximately 1/3 of the total length of the lid from its hinge.
- Step 2: Mark the Lower Mounting Point. Open the lid to the desired angle. Mark the lower mounting point. It is not necessary for the strut to be perfectly vertical; the installation angle is important for optimal function.
- Step 3: Secure Mounting Brackets. Attach the provided mounting brackets to the marked upper and lower points using appropriate fasteners (not included, unless specified). Ensure they are securely fastened.
- Step 4: Attach Gas Spring. Press the ends of the new gas spring onto the ball studs of the installed mounting brackets. Ensure a firm connection.
- Step 5: Adjustment (if needed). If the lid does not stay open or is too difficult to close, minor adjustments may be required. If the lid cannot be held up, move the upper mounting point 0.79 inches (2 cm) further from the hinge. Repeat this adjustment if necessary. If the lid cannot be closed, move the upper mounting point 0.79 inches (2 cm) closer to the hinge. Note that the lower mounting point may also need adjustment in conjunction with the upper point.
4. Operation
Once installed, the lift supports will assist in opening and holding open the lid, hood, or cover they are attached to. They provide a controlled lift and a stable open position, reducing the effort required to access the compartment. To close, gently push the lid down; the gas springs will provide resistance for a smooth closing action.

Image 4.1: Application on an RV car storage compartment.
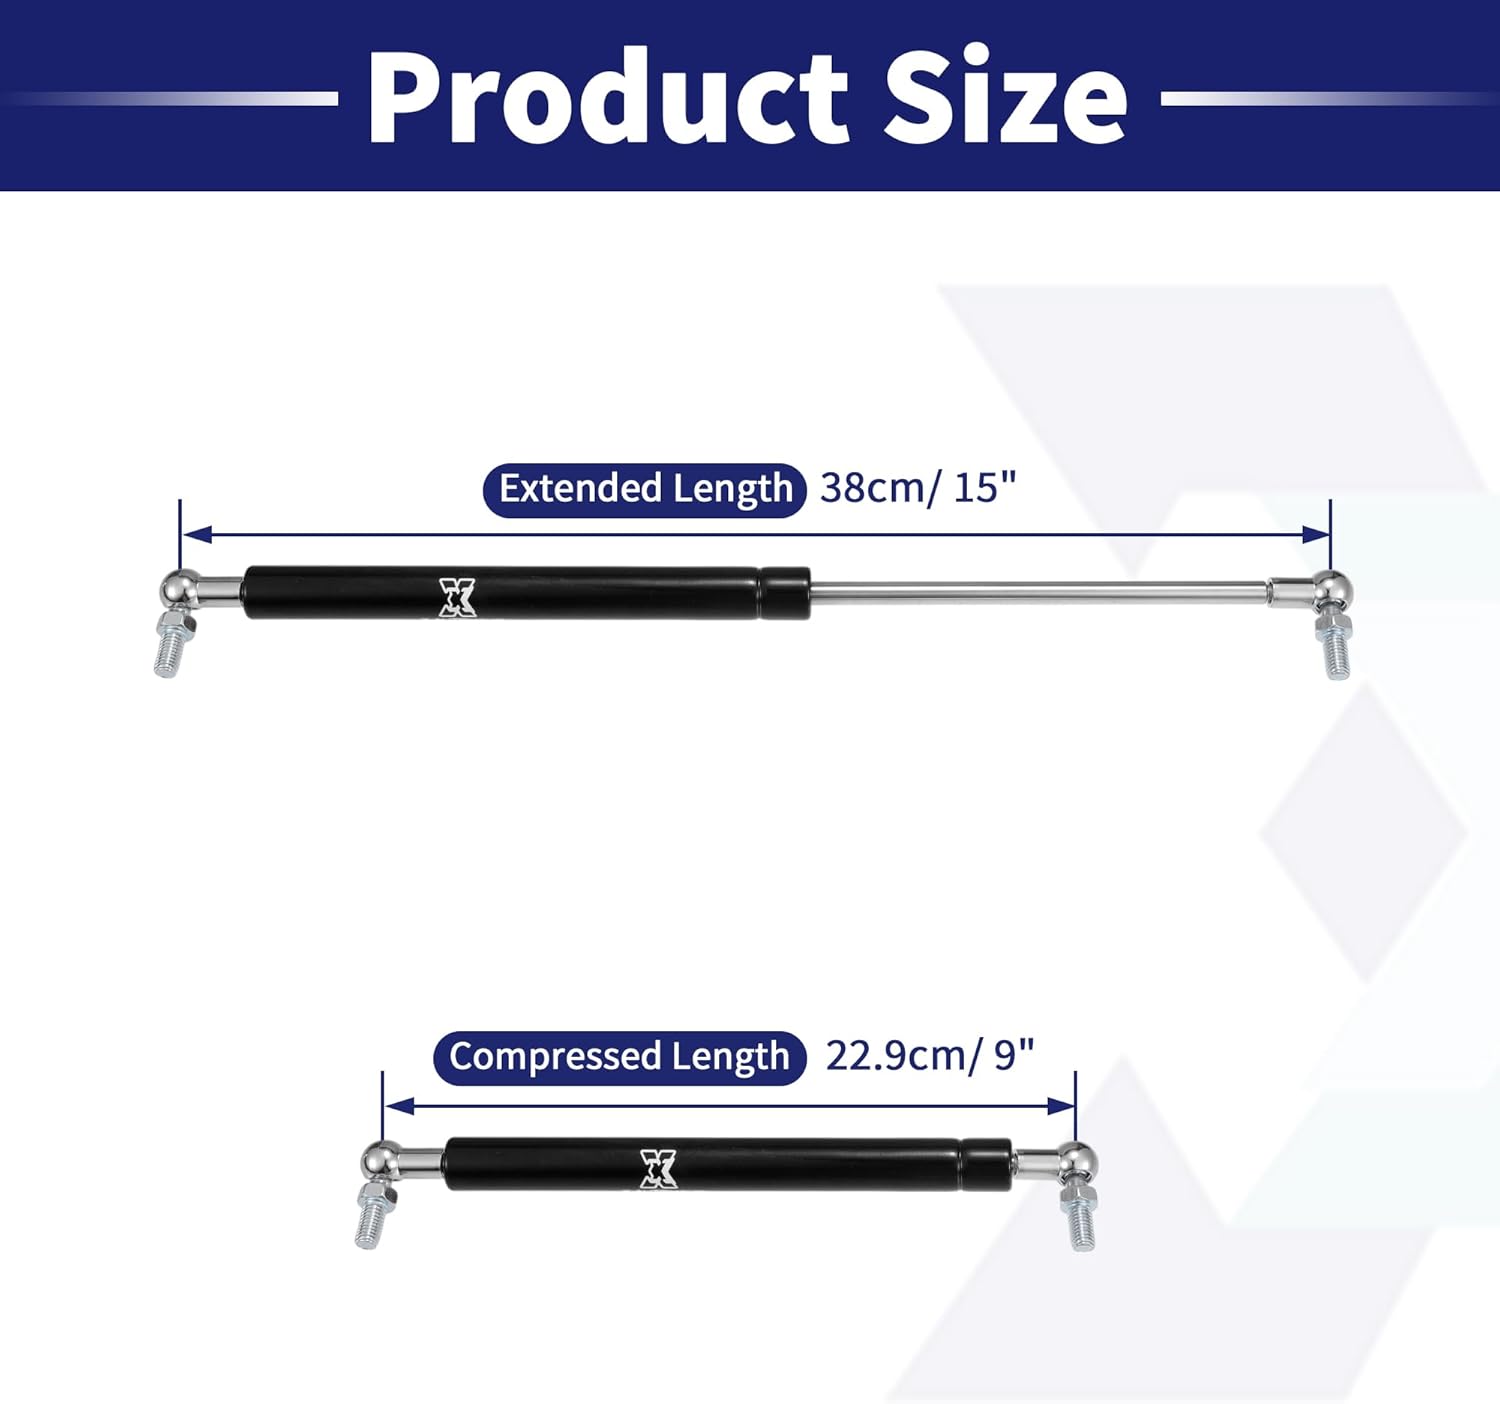
Image 4.2: Application on a car's rear hatch.

Image 4.3: Application on a car's front hood.

Image 4.4: Application on a pickup truck tonneau cover.
5. Maintenance
These lift supports are designed for minimal maintenance. To ensure their longevity and proper function:
- Periodically inspect the mounting points and connections for any signs of wear, looseness, or damage.
- Keep the rod and cylinder body clean from dirt, dust, and debris. Wipe with a clean, damp cloth if necessary.
- Avoid applying excessive force or bending the rod, as this can damage the internal seals and affect performance.
- Do not lubricate the rod with oil or grease, as this can attract dirt and damage the seals.
6. Troubleshooting
If you encounter issues with your lift supports, consider the following common problems and solutions:
- Lid does not stay open: The lift supports may be too weak for the weight of the lid, or the mounting points may be incorrectly positioned. Refer to Step 5 of the Installation Instructions for adjustment guidance. Ensure the correct force rating (100lb/445N) was selected for your application.
- Lid is difficult to close: The lift supports may be too strong for the weight of the lid, or the mounting points may be too far from the hinge. Refer to Step 5 of the Installation Instructions for adjustment guidance.
- Squeaking or grinding noise: Check mounting points for proper alignment and tightness. Ensure no foreign objects are interfering with the strut's movement.
- Strut appears damaged or leaking: If the strut shows signs of physical damage, bending, or fluid leakage, it should be replaced immediately. Do not attempt to repair damaged gas springs.
7. Specifications
| Feature | Specification |
|---|---|
| Brand | X AUTOHAUX |
| Model Number | a24022000ux0098 |
| Quantity | 2 Pieces |
| Force per Strut | 100lb / 445N |
| Extended Length | 15 inches (38 cm) |
| Compressed Length | 9 inches (22.9 cm) |
| Material | Carbon Steel |
| Universal Application | RV Car Hood, Rear Hatch, RV Car Window, RV Car Cabinet Door Cover, Storage Box Cover, etc. |
8. Warranty and Support
For warranty information or technical support regarding your X AUTOHAUX Lift Supports Struts, please refer to the product packaging or contact the seller directly through the platform where the purchase was made. Ensure you have your purchase details and model number (a24022000ux0098) available when contacting support.