1. Introduction
This user manual provides comprehensive instructions for the installation, operation, and maintenance of the Kqcibz M7C-2 Electric Bike LCD Display Meter. This display is designed for electric bikes and scooters, offering essential ride data and control functions. Please read this manual thoroughly before use to ensure proper functionality and safety.
2. Product Overview
The Kqcibz M7C-2 LCD Display Meter is a versatile unit compatible with 24V, 36V, 48V, and 60V electric bike systems. It features a clear LCD screen that provides real-time information about your ride. The display connects via a 5PIN waterproof cable and includes a USB charging port for convenience.
Key Features:
- Display Functions: Battery Indicators, Walk Mode, Pedal Assist System (PAS) Level, Current Speed, Trip Distance, Odometer (ODO), Trip Time, Mile/Kilometer Unit, Error Warning.
- Communication Protocol: UART
- USB Charging: 5V/500mA output
- Waterproof Grade: IP67
- Mounting Options: Supports handlebar diameters of 22.2mm, 25.4mm, 28.6mm, and 31.8mm.

Figure 2.1: Kqcibz M7C-2 LCD Display Meter and its 5PIN connector.

Figure 2.2: Front view of the display, highlighting the 5PIN male connector.

Figure 2.3: Bottom view of the display, showing the integrated USB charging port.
3. Specifications
| Feature | Specification |
|---|---|
| Model Number | M7C-2 (Part Number: 500418157A2) |
| Voltage Compatibility | 24V / 36V / 48V / 60V (Adjustable) |
| Interface | Waterproof cable round port 5PIN |
| Communication Protocol | UART |
| USB Charging Output | 5V / 500mA |
| Waterproof Grade | IP67 |
| Holder Diameter Compatibility | 22.2mm / 25.4mm / 28.6mm / 31.8mm |
| Display Style | LCD |
| Product Dimensions | Approx. 100.0mm x 66.0mm x 24.6mm (5.12 x 3.94 x 3.15 inches) |
| Item Weight | Approx. 9.1 ounces |
| Color | Black |
4. Setup and Installation
Follow these steps to properly install your Kqcibz M7C-2 LCD Display Meter on your electric bike.
4.1 Mounting the Display
- Identify a suitable location on your handlebar. The display supports various handlebar diameters (22.2mm, 25.4mm, 28.6mm, 31.8mm).
- Loosen the screws on the display's mounting bracket.
- Position the display on the handlebar and tighten the screws securely. Ensure the display is oriented for optimal viewing while riding.

Figure 4.1: Angled view of the display mounted on a handlebar.
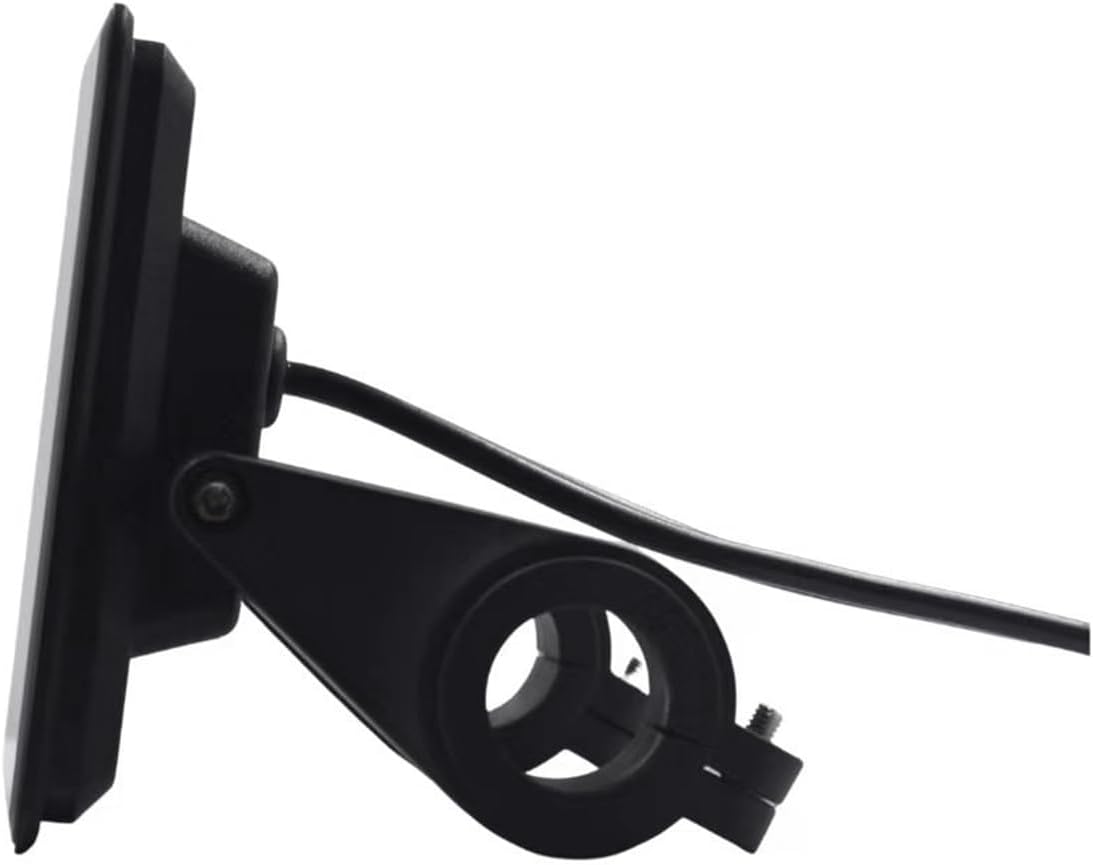
Figure 4.2: Side view illustrating the mounting bracket mechanism.

Figure 4.3: Rear view showing the cable routing from the display.
4.2 Electrical Connection
- Locate the 5PIN waterproof connector on your electric bike's wiring harness.
- Align the 5PIN connector from the M7C-2 display with the corresponding connector on your e-bike.
- Gently push the connectors together until they click into place, ensuring a secure and waterproof seal.
- Verify that your e-bike's voltage (24V, 36V, 48V, or 60V) is compatible with the display. The display is designed to automatically adjust to the detected voltage.
Important: Ensure the e-bike's power is off before making any electrical connections.
5. Operating Instructions
This section details how to use the Kqcibz M7C-2 LCD Display Meter during your ride.
5.1 Power On/Off
- To power on the display, press and hold the power button (usually located on the control pad) for a few seconds.
- To power off the display, press and hold the power button again until the screen turns off.
5.2 Display Information
The display provides various pieces of information:
- Speed: Current riding speed (KM/H or MPH).
- PAS Level: Indicates the current level of pedal assist (e.g., 0-5).
- Battery Indicator: Shows the remaining battery charge.
- ODO: Total accumulated distance.
- TRIP: Distance for the current ride.
- VOL: Battery voltage.
- CUR: Current draw.
- Error Code: Displays numerical codes for system malfunctions.
5.3 Adjusting Settings
Use the control buttons (typically '+' and '-' buttons on the control pad) to navigate through display modes and adjust settings such as PAS level. Consult your e-bike's main controller manual for specific advanced settings accessible through the display.
5.4 USB Charging
The integrated USB port (5V/500mA) can be used to charge small electronic devices like smartphones or GPS units while riding. Simply connect your device's USB cable to the port on the display.
6. Maintenance
Proper maintenance ensures the longevity and optimal performance of your LCD display meter.
- Cleaning: Use a soft, damp cloth to wipe the display screen and body. Avoid abrasive cleaners or solvents that could damage the plastic or screen coating.
- Water Exposure: While the display is IP67 waterproof, avoid submerging it in water for extended periods. Ensure the USB port cover is securely closed when not in use to maintain water resistance.
- Storage: When not in use for extended periods, store the display in a dry, cool place away from direct sunlight.
- Cable Inspection: Periodically check the 5PIN cable and connector for any signs of wear, damage, or corrosion.
7. Troubleshooting
This section addresses common issues you might encounter with your Kqcibz M7C-2 LCD Display Meter.
7.1 Display Not Powering On
- Check Battery: Ensure your e-bike's battery is charged and properly connected.
- Cable Connection: Verify that the 5PIN waterproof cable is securely connected to both the display and the e-bike's controller.
- Power Button: Confirm you are pressing and holding the power button for the required duration.
7.2 Error Codes
The display may show numerical error codes to indicate system issues. Refer to your e-bike's main controller manual for a complete list of error codes and their meanings. Common error codes include:
- Error 00: Typically indicates normal operation or no current error.
- Error 06, 08, 09: These are examples of error codes that may appear, indicating specific issues with the motor, controller, or other components. The exact meaning depends on your e-bike's controller system.
- Error 10: This error often signifies incompatibility between the display and the e-bike's controller. Ensure your controller uses the UART communication protocol and is compatible with the M7C-2 display.

Figure 7.1: Display showing an example error code (Error 09).

Figure 7.2: Display showing Error Code 00, indicating normal operation.
If you encounter persistent error codes or issues, consult your e-bike's manufacturer or a qualified technician.
8. Warranty and Support
For specific warranty information regarding your Kqcibz M7C-2 LCD Display Meter, please refer to the documentation provided at the time of purchase or contact the seller directly. General product support can often be obtained through the retailer or manufacturer's customer service channels.
Optional protection plans may be available for purchase separately, offering extended coverage beyond the standard warranty period. Please review the terms and conditions of any such plans carefully.


