
HGLRC Thor 1S LiPo Charger V2
Contents
HGLRC Thor 1S LiPo Charger V2 Instruction Manual
1. Introduction
Thank you for choosing the HGLRC Thor 1S LiPo Charger V2. This multi-channel charger is designed for efficient and safe charging of 1S LiPo and LiHv batteries commonly used in Tinywhoop, racing models, and FPV drones. Its compact design, multiple interface support, and selectable voltage options make it an essential tool for hobbyists.
2. Product Overview & Features
The HGLRC Thor 1S Charger V2 offers advanced features for convenient battery management:
- Input Interface: Type-C, supporting PD3.0/QC3.0/BC1.2 fast charging protocols.
- Input Voltage: PD3.0 Type-C 12V.
- Input Power: Maximum 65W.
- Battery Type Support: LiPo/LiHv.
- Multi-Channel Charging: Quickly charges up to 6 batteries simultaneously.
- Maximum Single-Channel Charging Current: 800mA-1A.
- Supported Charging Interfaces: PH2.0, MX2.0, A30, and BT2.0 plugs.
- Charging Voltage Switching: Supports ordinary 4.2V lithium batteries and 4.35V LiHv lithium batteries via a switch.
- Cooling System: Built-in heat sink and cooling fan for improved efficiency and safety.

Figure 2.1: HGLRC Thor 1S LiPo Charger V2, showing its compact design and multiple charging ports.

Figure 2.2: Top view of the charger highlighting the voltage selection switch for 4.20V or 4.35V batteries.
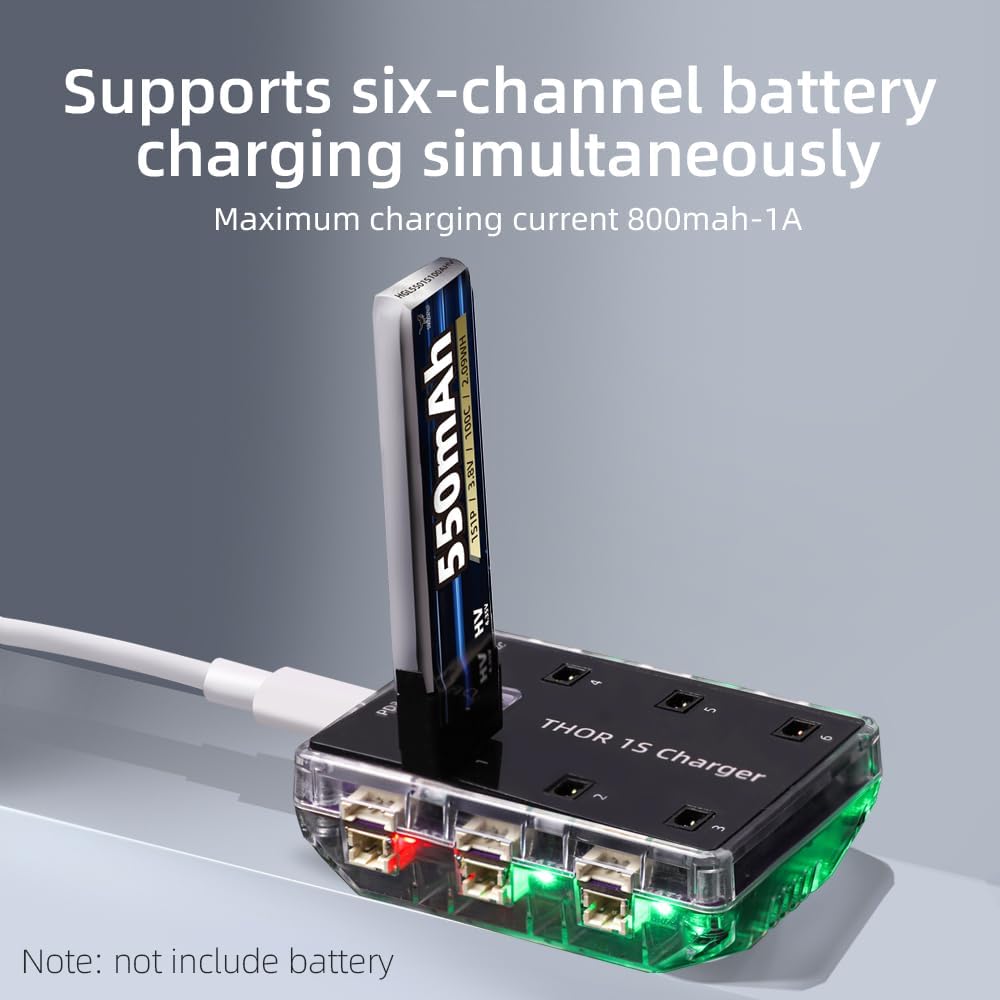
Figure 2.3: The charger in use, demonstrating its capability to charge multiple batteries simultaneously across its six channels.

Figure 2.4: Visual representation of key features including 65W fast charging, multi-type interface support, simultaneous charging, and built-in fan.
3. Setup
- Power Connection: Connect the HGLRC Thor 1S Charger V2 to a compatible PD3.0 Type-C 12V power source using a Type-C cable. Ensure the power source can provide up to 65W for optimal performance.
- Initial Power-On: Once connected, the charger's internal fan will activate, and the indicator lights will illuminate, indicating it is ready for use.
4. Operating Instructions
- Select Charging Voltage: Locate the voltage selection switch on the charger. Slide the switch to select the appropriate voltage for your batteries:
- 4.20V: For standard LiPo batteries.
- 4.35V: For LiHv (High Voltage Lithium) batteries.
Important: Always ensure the correct voltage is selected to prevent damage to your batteries.
- Connect Batteries: Insert your 1S LiPo or LiHv batteries into the available charging ports. The charger supports PH2.0, MX2.0, A30, and BT2.0 connectors. Ensure a secure connection.
- Charging Indication: Each charging channel has an LED indicator. When a battery is connected and charging, the LED will illuminate red. Once the battery is fully charged, the LED will turn green.
- Disconnecting Batteries: Once charging is complete (LED turns green), carefully disconnect the batteries from the charger.
5. Maintenance
- Cleaning: Regularly clean the charger's exterior with a soft, dry cloth. Avoid using liquid cleaners or solvents. Ensure charging ports are free of debris.
- Storage: Store the charger in a cool, dry place away from direct sunlight, moisture, and extreme temperatures.
- Inspection: Periodically inspect the charger and cables for any signs of damage, such as frayed wires or cracked casing. Do not use if damaged.
- Cooling Fan: The built-in cooling fan helps maintain optimal operating temperature. Ensure the fan vents are not obstructed during use.
6. Troubleshooting
| Problem | Possible Cause | Solution |
|---|---|---|
| Charger not powering on. | No power supply, incorrect power adapter, or faulty cable. | Ensure the Type-C cable is securely connected to a PD3.0 12V power source. Verify the power adapter is functioning correctly and meets the 65W requirement. Try a different cable or power source. |
| Battery not charging (LED remains green or off). | Incorrect voltage selected, poor battery connection, or battery already fully charged/damaged. | Check the voltage selection switch matches the battery type (4.20V for LiPo, 4.35V for LiHv). Ensure the battery is securely plugged into the correct port. Test with a different battery to confirm charger functionality. |
| Slow charging. | Insufficient input power from the adapter. | Use a PD3.0 Type-C power adapter capable of delivering the maximum 65W input power. |
| Charger feels hot during operation. | Normal operation, or obstructed cooling vents. | The built-in fan is designed to dissipate heat. Ensure the charger is placed in a well-ventilated area and that the cooling vents are not blocked. If overheating persists, discontinue use and contact support. |
7. Specifications

Figure 7.1: Detailed specifications and dimensions of the HGLRC Thor 1S LiPo Charger V2.
| Specification | Value |
|---|---|
| Input Interface | Type-C |
| Input Voltage | PD3.0 Type-C 12V |
| Input Power | Max 65W |
| Battery Type | LiPo/LiHv |
| Max Single-Channel Charging Current | 800mA-1A |
| Supported Charging Interfaces | PH2.0 & MX2.0 & A30 & BT2.0 |
| Low Voltage LiPo Cut-off Voltage | 4.20V (±0.5V) |
| High Voltage LiHv Cut-off Voltage | 4.35V (±0.5V) |
| Dimensions (L*W*H) | 68mm x 48mm x 22mm (2.67 x 1.88 x 0.86 inches) |
| Weight | 51.14g (1.8 ounces) |
| Manufacturer | HGLRC |
| Country of Origin | China |
8. Warranty & Support
For warranty information and technical support, please refer to the official HGLRC website or the documentation included with your product. The standard version includes an instruction manual card and a logo sticker. Keep your purchase receipt for any warranty claims.
Ask a question about this manual
Ask about setup, troubleshooting, compatibility, parts, safety, or missing instructions. Manuals+ will review the question and use this page’s manual context to help answer it.