
1. Introduction
Thank you for purchasing the Godox Lux Master Retro Camera Flash. This manual provides detailed instructions for the safe and effective use of your new flash unit. The Lux Master combines timeless retro aesthetics with modern flash technology, featuring a classic folding fan-type reflector and an efficient color touchscreen for intuitive control. It supports various advanced flash functions and offers versatile triggering options to enhance your photography experience.
2. Package Contents
Please check to ensure all items are included in your package:
- Flash Body x 1
- Flash Bracket for Camera FB01 x 1
- Triggering Cable x 1
- Charging Cable x 1
- Protection Cover for Flash Tube x 1
- Fan Type Reflector LM-R27 x 1
- Storage Bag x 1

The image above displays the flash body, camera bracket, cables, protection cover, fan-type reflector, and storage bag.
3. Product Overview
Familiarize yourself with the various parts and controls of your Lux Master flash unit.

The diagram highlights key features including the color touchscreen, accessory removal pusher, flash tube release, SYNC hole, USB-C port, lanyard hole, optical sensor, fan-type reflector, flash head angle scale, test button/recycle indicator, SET button, adjust dial, and power switch/MENU button.
4. Setup
4.1. Attaching the Reflector
- Remove the lamp protector from the flash tube.
- Align the Fan Type Reflector LM-R27 with the flash tube and gently push to install.
- Unfold the reflector blades to the desired position.
4.2. Attaching to Camera with Flash Bracket
- Attach the Flash Bracket for Camera FB01 to the bottom of your camera using the screw mount.
- Slide the Lux Master flash unit onto the bracket's cold shoe mount and secure it.

This image illustrates how the flash can be positioned alongside the camera for flexible lighting.
5. Operating Modes
The Lux Master features an intuitive color touchscreen for easy navigation and mode selection. Turn on the flash and swipe the touchscreen to access different modes.
5.1. Manual Mode (M)
In Manual mode, you have full control over the flash output. Adjust the power from 1/256 to 1/1 full power, or from 2.0 to 10 full power, using the touchscreen or adjust dial.
5.2. Multi Mode
Multi mode allows you to adjust the power, number of times the flash fires, and frequency (Hz) for stroboscopic effects.
5.3. Auto Mode
When using Auto mode with an optional Auto Sensor AS-01 (connected via triggering cable), the flash automatically calculates the correct exposure based on the ambient light. The fundamental setting is at F2.8, ISO100.
5.4. TTL Mode
TTL (Through-The-Lens) mode provides automatic flash exposure by communicating with your camera's metering system. This ensures effortless and accurate flash output. The Lux Master also supports stroboscopic flash, front curtain sync, rear curtain sync, and High-Speed Sync (HSS).
5.5. S1/S2 Photocell Mode
The S1/S2 photocell function allows the Lux Master to be triggered as a secondary flash by another flash unit. S1 mode triggers the flash upon sensing the main flash. S2 mode ignores the main flash's pre-flash (TTL pre-flash) and triggers on the actual flash.
This video provides a visual guide to the flash's operational features and settings.
6. Wireless Operation
The Lux Master features a built-in 2.4G wireless receiver, allowing it to work seamlessly with Godox Wireless X system flash triggers such as X3, XproII, and X2T. Pairing is quick and easy via the touchscreen.
6.1. Easy Wireless Sync
To synchronize wirelessly, tap the wireless sync option on your X3 trigger and then tap the sync icon on the Lux Master's touchscreen. They will synchronize instantly.
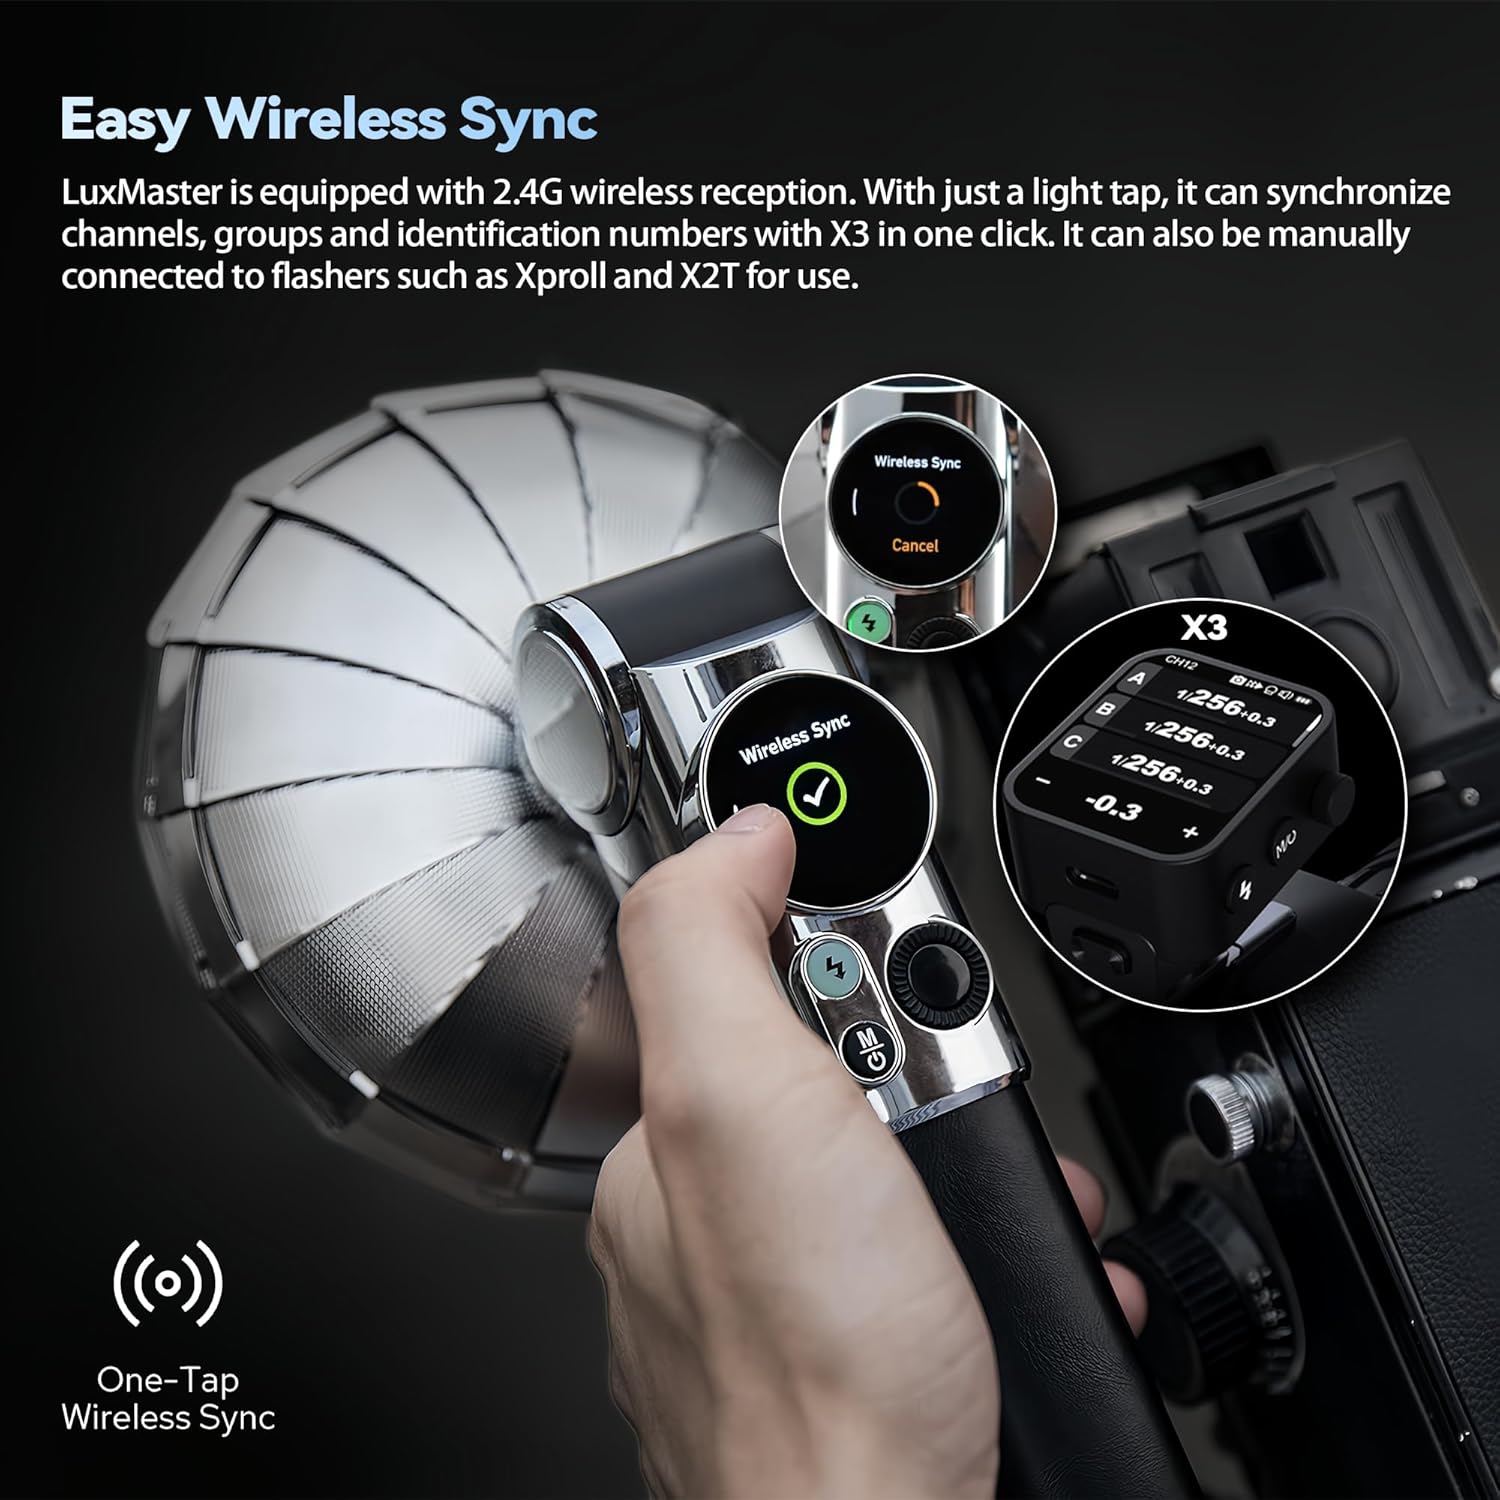
This image demonstrates the one-tap wireless sync process between the Lux Master and a Godox X3 trigger.
6.2. Versatile Triggering Options
Beyond dedicated triggers, the Lux Master can also be triggered by a main flash unit (e.g., Godox V1Pro). For film cameras with a legacy hot shoe, an optional auto sensor can connect your camera and flash seamlessly for accurate exposure.
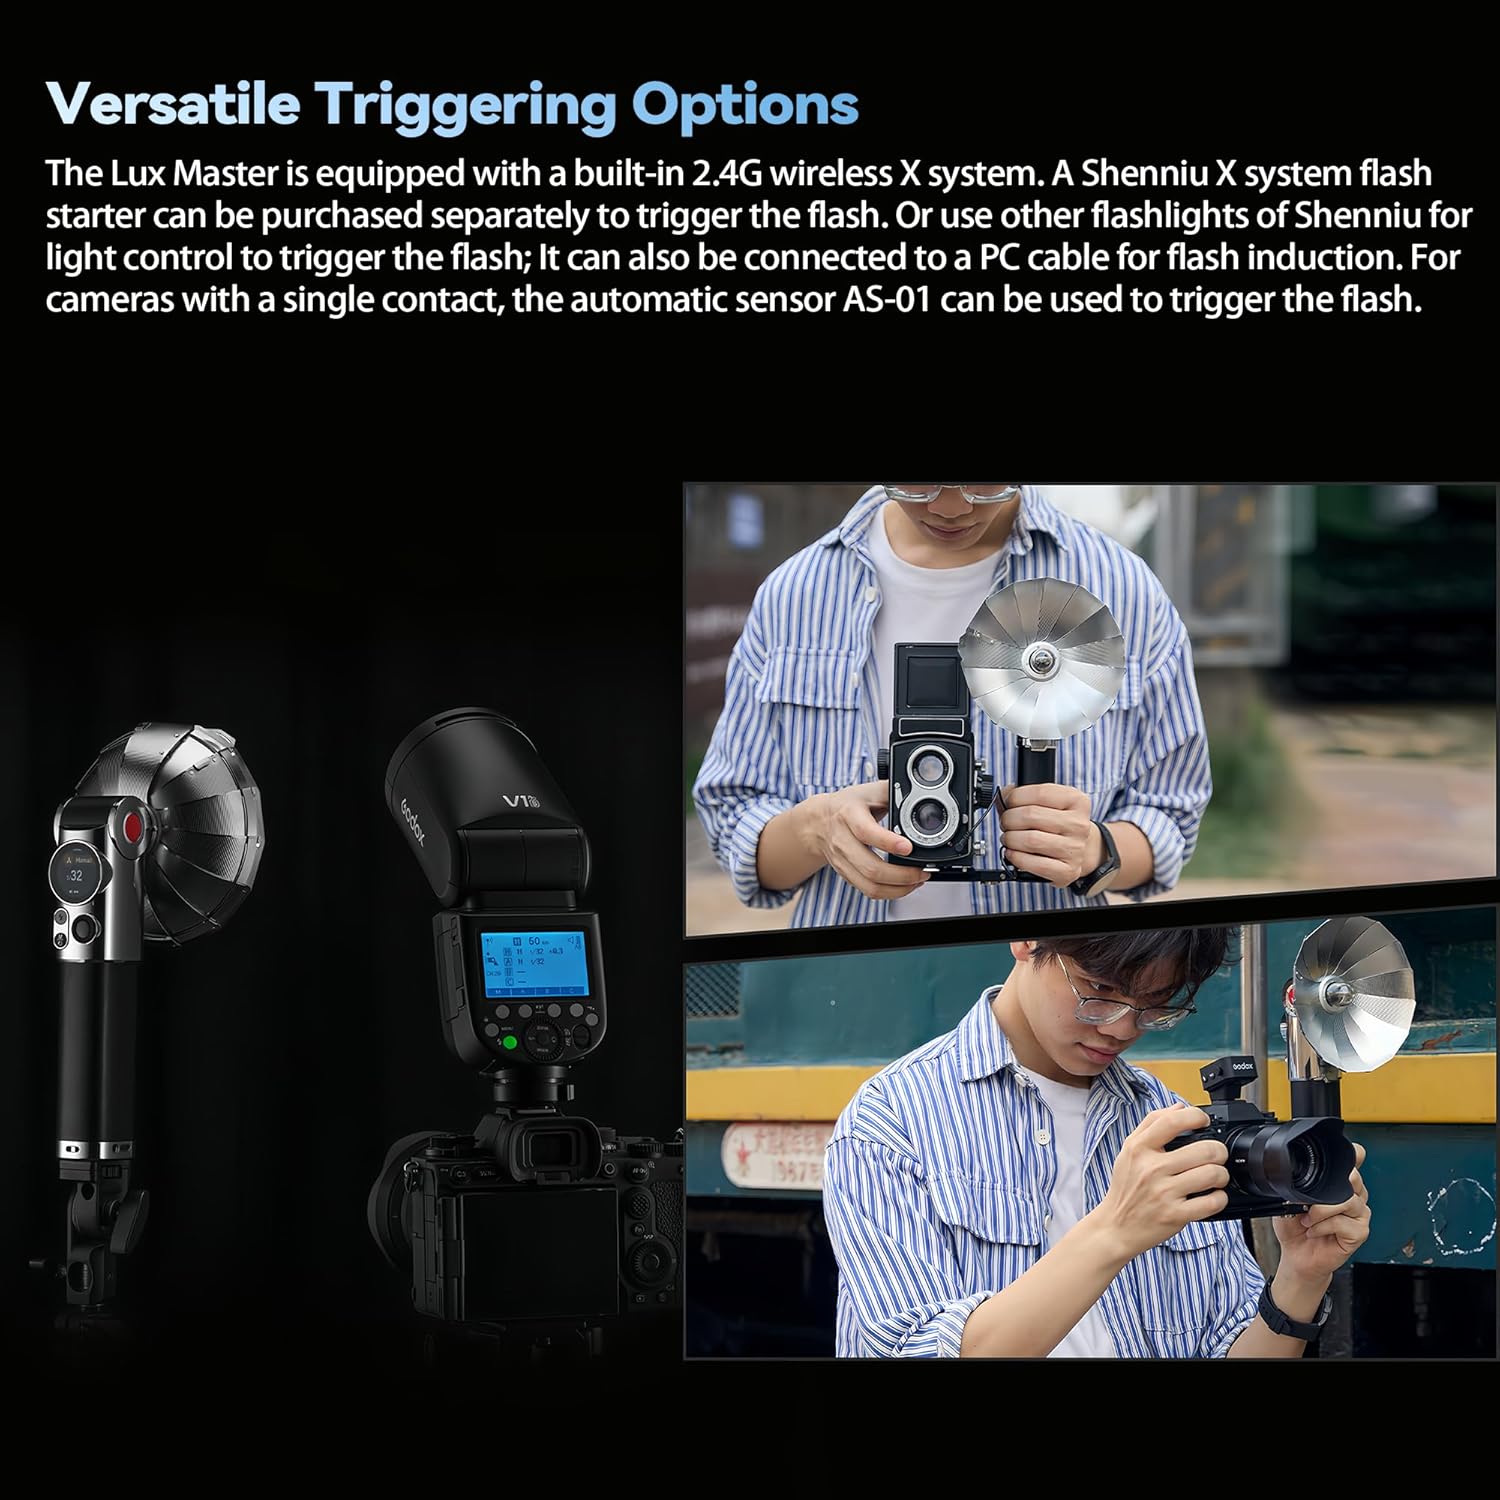
This image illustrates the flexibility of the Lux Master's triggering capabilities with different camera and flash setups.
7. Flash Head Adjustment
The Lux Master features a tiltable flash head, adjustable from 0 to 90 degrees. This allows photographers to achieve various lighting methods, including direct flash and bounce flash effects. The integrated scale identification facilitates precise angle adjustments for natural and professional lighting.

This image demonstrates the adjustable flash head, crucial for controlling light direction and achieving desired photographic effects.
8. Power and Charging
The Lux Master is equipped with a built-in 7.2V 2980mAh lithium battery, providing strong power output for extended use. It delivers up to 460 full-power flashes on a single charge. Recharging is quick and convenient via the USB-C port, with a full charging time of approximately 2 hours.

This image shows the USB-C charging port and the flash's compact design, emphasizing its portability and ease of charging.
9. Optional Accessories
Enhance your lighting versatility with various replaceable reflectors and light modifiers available for the Lux Master. These include:
- Fan Type Reflector LM-R27 (included)
- Reflector LM-R28
- Reflector with Dome LM-R28
- Octa Softbox for Lux Master LM-S25
- Auto Sensor for Lux Master AS-01

These accessories allow for diverse lighting effects, from focused beams to softer, diffused light.
10. Specifications
| Feature | Detail |
|---|---|
| Product Dimensions | 3.9 x 10.24 x 5.51 inches |
| Item Weight | 2.53 pounds |
| Item Model Number | Lux Master |
| Batteries | 1 Lithium Ion battery required (included) |
| Battery Life | Up to 460 full-power flashes |
| Compatible Mountings | Canon, Sony, Nikon, Fujifilm, Panasonic, Olympus |
| Camera Flash Type | Hotshoe |
| Flash Sync Speed | 1/250s (supports HSS) |
11. Troubleshooting
11.1. Flash Not Firing Consistently
- Check Battery Level: Ensure the built-in lithium battery is sufficiently charged. Recharge if necessary.
- Verify Sync Connection: If using a hotshoe, ensure the flash is securely mounted and locked. If using a triggering cable, confirm it is properly connected to both the flash and camera.
- Wireless Sync Issues: If using a wireless trigger, ensure the flash and trigger are on the same channel and ID. Re-sync if needed.
- S1/S2 Mode: If using S1/S2 mode, ensure the optical sensor is unobstructed and correctly detecting the master flash.
11.2. Harsh or Overexposed Light
- Adjust Flash Power: In Manual mode, reduce the flash output power. In TTL mode, use Flash Exposure Compensation (FEC) on your camera or the flash to dial down the exposure.
- Use Diffuser: Attach the included diffuser or an optional softbox to soften the light output.
- Bounce Flash: Utilize the tiltable flash head to bounce light off a ceiling or wall for softer, more natural illumination.
11.3. Shadows from Lens
- Wider Lenses: If using a wide-angle lens, the lens barrel may block part of the flash, causing a shadow. Consider using a longer focal length or an off-camera flash setup with the bracket.
- Flash Bracket: Using the included flash bracket helps position the flash further from the lens axis, reducing lens shadows.
12. Safety Information
- Do not disassemble or modify the flash unit.
- Keep the flash unit dry. Do not expose it to rain or moisture.
- Do not touch the flash tube immediately after firing, as it may be hot.
- Keep out of reach of children.
- Dispose of batteries properly according to local regulations.
13. Warranty and Support
For warranty information and technical support, please refer to the documentation provided with your purchase or visit the official GODOX website. Keep your proof of purchase for any warranty claims.


