
1. Introduction
This manual provides detailed instructions for the Vixic H1100 Portable Label Maker. Please read this manual thoroughly before using the device to ensure proper operation and to maximize its features.

Figure 1: Vixic H1100 Label Maker and accessories.
2. Package Contents
Verify that all items listed below are included in your package. If any items are missing or damaged, please contact customer support.
- 1 x Vixic H1100 Label Maker (Grey)
- 1 x Starter Laminated White Tape (0.47" x 13.1')
- 1 x USB Type-C Cable
- 1 x Quick Start Guide
- 1 x User Manual
- 1 x Replacement Cutter Holder

Figure 2: Contents of the Vixic H1100 package.
3. Setup
3.1 Powering the Device
The Vixic H1100 label maker offers two power supply options:
- USB Type-C Cable: Connect the included USB-C cable to the label maker and a compatible power source (e.g., a 5V-2A USB charger, not included).
- AAA Batteries: Insert 6 AAA batteries (not included) into the battery compartment located on the underside of the device. Ensure correct polarity.
Note: The H1100 label maker is not rechargeable. The USB-C cable provides direct power for operation.
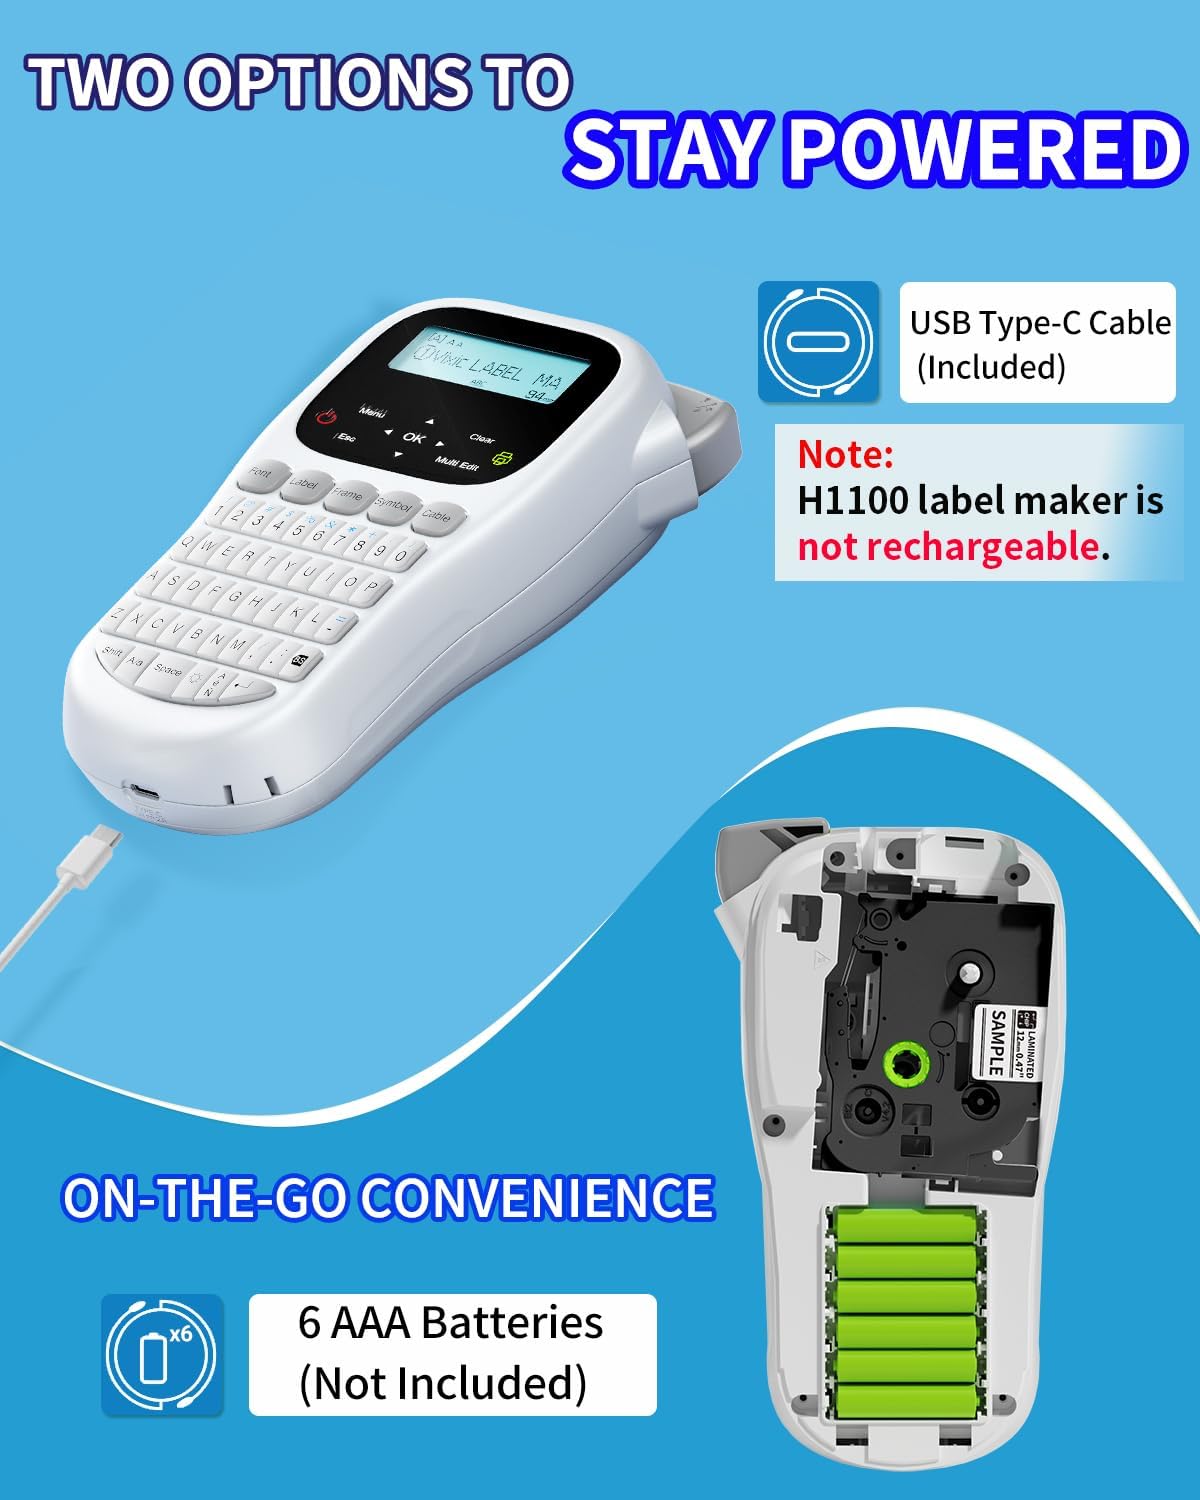
Figure 3: Powering the H1100 label maker.
3.2 Loading Label Tape
- Ensure the label maker is powered off.
- Open the tape compartment cover on the back of the device.
- Insert the label tape cartridge with the tape facing the print head. Ensure it clicks into place.
- Gently feed the end of the tape through the tape guide until it extends slightly past the cutter.
- Close the tape compartment cover.
Figure 4: Label tape cartridge and loading area.
4. Operating Instructions
4.1 Basic Operation and Keyboard
The H1100 features a QWERTY keyboard for familiar and efficient text input. The backlit LCD screen provides clear visibility in various lighting conditions.
- Power On/Off: Press the Power button to turn the device on or off.
- Backlight: The backlight automatically illuminates for improved readability.
- Navigation: Use the arrow keys (Up, Down, Left, Right) to navigate menus and text.
- Confirm: Press the OK button to confirm selections.
- Escape/Cancel: Press the Esc button to go back or cancel an action.
- Clear: Press the Clear button to delete characters or clear the current label text.
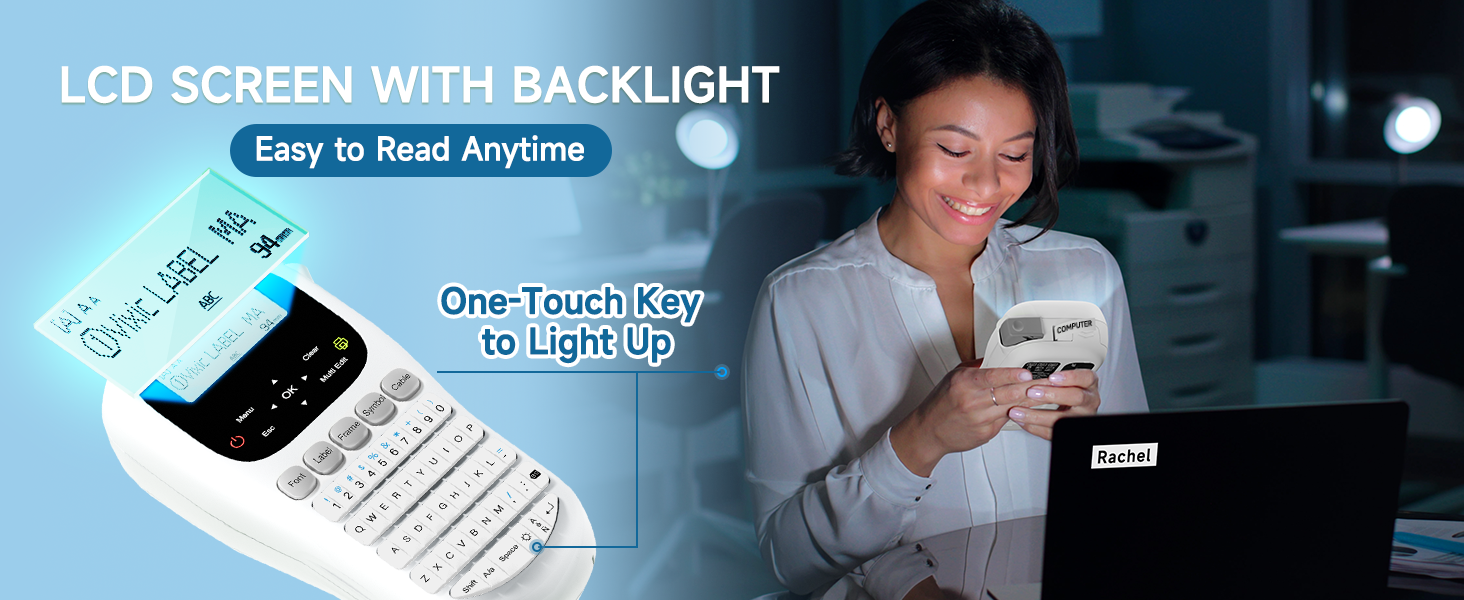
Figure 5: Backlit LCD screen and QWERTY keyboard.
4.2 Customizing Labels
The H1100 offers various customization options for your labels:
- Fonts: Choose from 16 unique fonts. Press the Font button to access font options.
- Font Sizes: Adjust text size to small, medium, or large.
- Frames: Select from over 100 frames to add decorative borders. Press the Frame button.
- Symbols: Access over 800 symbols to enhance your labels. Press the Symbol button.
- Barcode Printing: The device supports barcode printing.
- Multi-line Text: Print up to 4 lines of text on labels up to 12mm wide.
- Languages: The device supports 22 built-in languages.

Figure 6: Label customization options.

Figure 7: Available borders and symbols.
4.3 Printing Functions
- Printing a Label: After entering and customizing your text, press the Print button to print the label.
- Multi-Edit Function: The H1100 allows you to edit and print up to 20 different labels continuously. Use the Multi Edit function to manage multiple label designs.
- Copy Printing: To print multiple copies of the same label, press Shift + Print. You can print up to 9 copies.
- Saving Label Designs: The device has a built-in memory feature to save up to 9 label designs for quick reprinting.
- Controlling Label Waste: Set narrow margins to minimize blank tape at the beginning and end of labels.

Figure 8: Multi-edit feature for continuous label printing.

Figure 9: Copy printing function.

Figure 10: Built-in memory for saving label designs.
4.4 Cable Labeling Modes
The H1100 supports specialized modes for labeling cables and wires:
- Wrap Type: For labels that wrap around a cable.
- Flag Type: For labels that stick out like a flag from a cable.
- Faceplate Type: For flat labels on surfaces like faceplates.

Figure 11: Cable labeling modes.
4.5 Cutting Labels
After printing, use the built-in cutting knife to cleanly separate your labels.
- Locate the cutter button on the side of the device.
- Press the button firmly to cut the label.

Figure 12: Built-in cutting knife.
5. Maintenance
5.1 Cleaning the Device
To ensure optimal performance and longevity of your label maker:
- Turn off the device and disconnect any power sources.
- Use a soft, dry cloth to wipe the exterior of the label maker.
- Gently clean the print head with a cotton swab moistened with isopropyl alcohol if print quality degrades. Allow to dry completely before use.
- Remove any dust or debris from the tape compartment.
5.2 Replacing the Cutter Holder
A replacement cutter holder is included with your device. If the cutter becomes dull or damaged, follow these steps:
- Ensure the label maker is powered off.
- Locate the cutter holder on the side of the device.
- Carefully remove the old cutter holder.
- Insert the new cutter holder until it clicks into place.
6. Troubleshooting
If you encounter issues with your Vixic H1100 label maker, refer to the following common problems and solutions:
| Problem | Possible Cause | Solution |
|---|---|---|
| Device does not power on. |
|
|
| Poor print quality (faint, broken lines). |
|
|
| Tape jams or does not feed. |
|
|
| Excessive blank tape before/after print. |
|
|
7. Specifications
Key technical specifications for the Vixic H1100 Label Maker:
- Model: H1100
- Dimensions: 8"D x 4.4"W x 2.2"H
- Item Weight: 14.1 ounces (0.4 Kilograms)
- Printing Technology: Thermal
- Maximum Media Size: 12mm / 0.47 Inch
- Maximum Print Resolution: 200 dpi (Monochrome)
- Print Speed: 20 ppm (Monochrome)
- Display: Backlit LCD Screen
- Keyboard: QWERTY
- Power Supply: USB Type-C (cable included) or 6 x AAA Batteries (not included)
- Connectivity: USB Type C (for power only)
- Compatible Cartridge: Vixic BZ Tapes (6mm, 9mm, 12mm)
- Special Features: Backlight LCD Screen, Chain Print, Portable, Barcode Printing, Up to 4 Lines Text, Multiple Fonts, Symbols, Frames, Multi-Edit, Save Designs.
8. Warranty and Support
8.1 Limited Warranty
The Vixic H1100 Label Maker comes with a limited warranty. For specific terms and conditions, please refer to the warranty information included in your product packaging or contact Vixic customer support.
8.2 Customer Support
If you require further assistance, have questions about your product, or need to report an issue, please contact Vixic customer support.
You can often find support contact information on the manufacturer's official website or through the retailer where you purchased the product.


