
1. Introduction
This manual provides essential information for the safe and efficient operation of your Y&H NMS-1000W-12V-MPPT40A Hybrid Solar Inverter. This device is a 1000W pure sine wave inverter, converting 12V DC to 220/230/240V AC, with an integrated 40A MPPT solar charge controller. It is designed for off-grid applications and is compatible with 12V lead-acid (SEAL, AGM, Flooded) and lithium batteries. Please read this manual thoroughly before installation and use.
2. Safety Instructions
Important Safety Precautions:
- Read all instructions carefully before installation and operation.
- Installation must be performed by qualified personnel.
- Ensure all wiring is correctly polarized and securely connected to prevent damage or injury.
- Do not disassemble the inverter; refer servicing to qualified personnel.
- Avoid installing the inverter in direct sunlight, high humidity, or dusty environments.
- Ensure adequate ventilation around the inverter to prevent overheating.
- Keep children away from the inverter and its connections.
- Disconnect all power sources (solar, battery, AC input) before performing any maintenance or wiring.
- The inverter produces high voltage AC power; treat all connections with extreme caution.
3. Product Overview
3.1 Key Features
- Pure Sine Wave Inverter: 1000W output, 12V DC to 220/230/240V AC.
- Integrated 40A MPPT Solar Charge Controller.
- Compatible with 12V lead-acid (SEAL, AGM, Flooded) and lithium batteries.
- Max PV input power: 600W; Max PV input voltage: 150V DC.
- Multiple charging modes: Solar, Utility, Solar & Utility, and Hybrid.
- Two output modes: Solar Priority and SBU (Solar-Battery-Utility).
- LCD display and 3 LED indicators for dynamic system data and operational status.
- Comprehensive protection features: Short circuit, over voltage, over current, under voltage, over-load, backfill, over charge, and over-temperature.
3.2 Comprehensive Protection
The Y&H Hybrid Solar Inverter is equipped with a comprehensive 360° protection system to ensure the safety and longevity of both the inverter and connected devices.
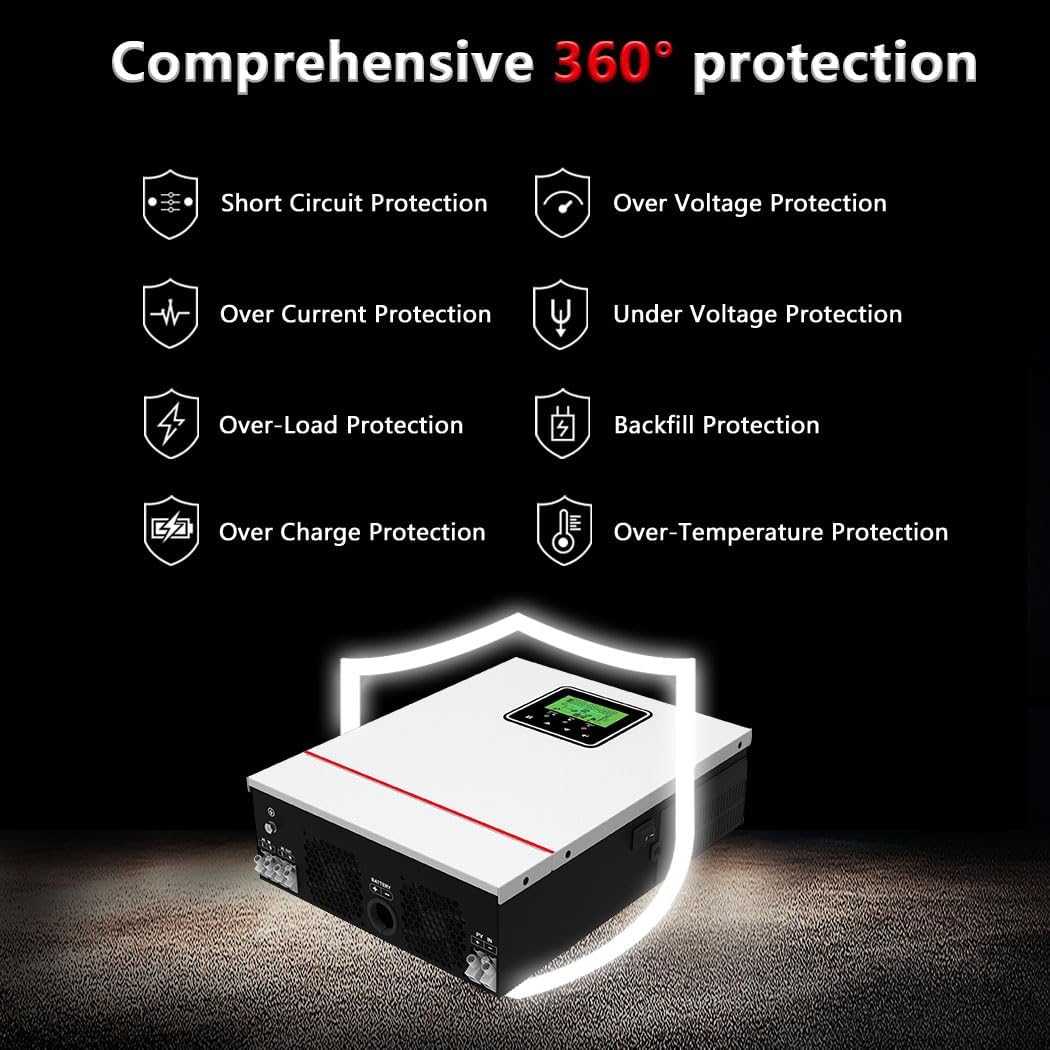
Image: Comprehensive 360° Protection.
- Short Circuit Protection: Prevents damage from short circuits.
- Over Voltage Protection: Safeguards against excessive voltage input.
- Over Current Protection: Protects against current surges.
- Under Voltage Protection: Ensures stable operation by preventing low voltage conditions.
- Over-Load Protection: Prevents damage from exceeding the inverter's power capacity.
- Backfill Protection: Protects against reverse current flow.
- Over Charge Protection: Prevents battery overcharging.
- Over-Temperature Protection: Manages internal temperature to prevent overheating.
3.3 Components and Ports

Image: Front and side view of the inverter with labeled components.
- LCD Display: Shows system status and data.
- Status Indicator: LED for operational status.
- Charging Indicator: LED for charging status.
- Fault Indicator: LED for error conditions.
- Function Buttons: For navigating menus and settings.
- AC Input: Connection for grid power.
- AC Output: Connection for AC loads.
- Battery Input: Connection for battery bank.
- PV Input: Connection for solar panels.
4. Specifications
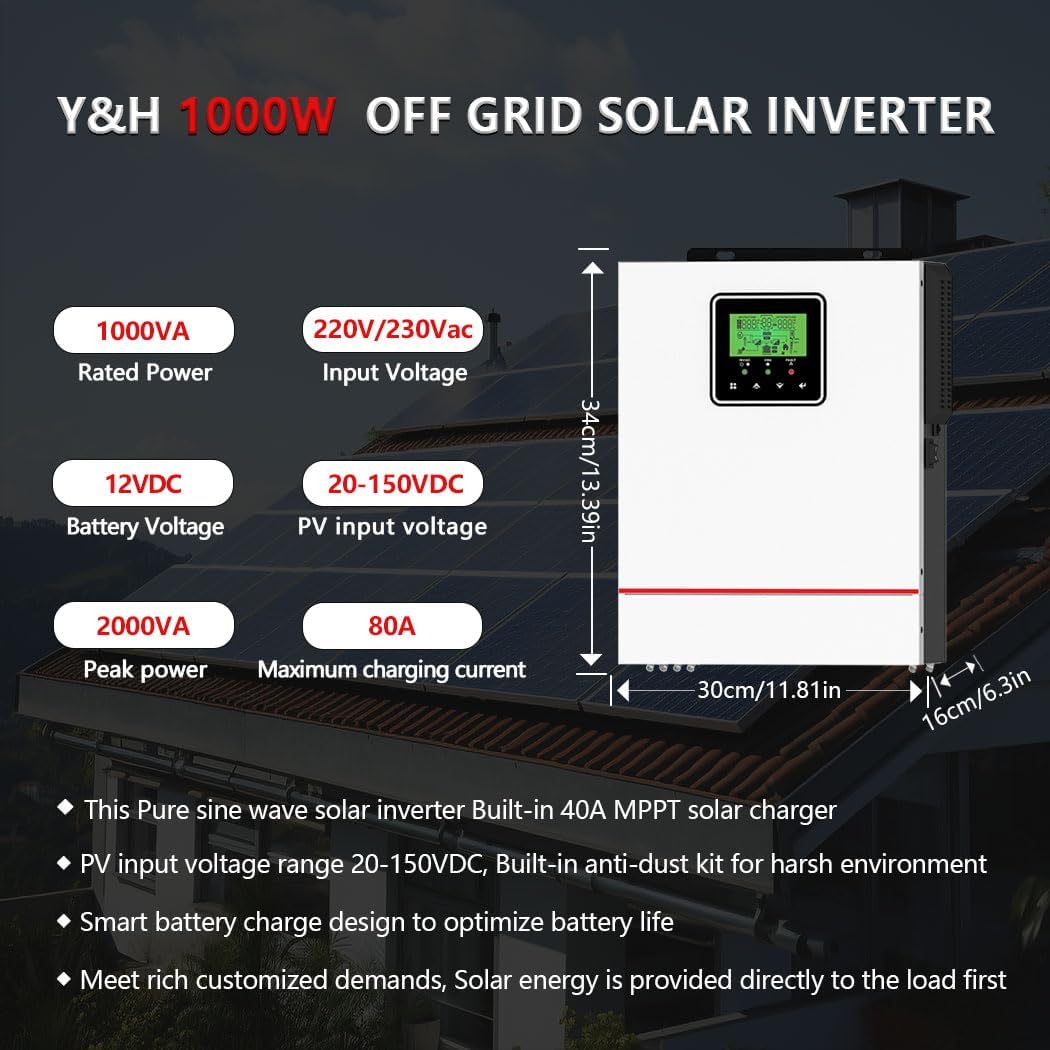
Image: Y&H 1000W Off-Grid Solar Inverter Dimensions and Key Specifications.
| Feature | Specification |
|---|---|
| Rated Power | 1000W |
| Peak Power | 2000W |
| Input Voltage (DC) | 12V DC |
| Output Voltage (AC) | 220V/230V/240V AC (single phase) |
| Output Waveform | Pure Sine Wave |
| Frequency | 50/60Hz |
| MPPT Charge Controller | 40A |
| Max PV Input Power | 600W |
| PV Voltage Range | 20-150V DC |
| Max PV Open Circuit Voltage | 150V DC |
| Start-up Voltage | >30V |
| Recommended PV Cable Size | 12AWG |
| Max Charging Current | 40A |
| Battery Compatibility | 12V Lead-Acid (SEAL, AGM, Flooded), Lithium |
| Display Type | LCD |
| Dimensions (H x W x D) | 34cm x 30cm x 16cm (approx. 13.39in x 11.81in x 6.3in) |
| Weight | 3.75 kg |
5. Setup and Installation
5.1 Wiring Diagram
Refer to the following diagram for proper wiring connections. Ensure all connections are secure and follow local electrical codes.

Image: Wiring and technical specifications overview.
- PV Input: Connect solar panels to the PV input terminals. Recommended maximum PV power is 600W, with a voltage range of 20-150V DC. Connect solar panels in series to achieve the optimal voltage.
- Battery Input: Connect the 12V battery bank to the battery input terminals. Ensure correct polarity. The recommended battery cable size is 6AWG (12mm²).
- AC Input: Connect the grid power or generator to the AC input terminals. Max AC input voltage is 300V.
- AC Output: Connect your AC loads (e.g., household appliances) to the AC output terminals. The output is 230V AC. If 110V AC is required, an external converter (not included) must be used.
- Grounding: Ensure the inverter is properly grounded.
5.2 Battery Compatibility
The inverter is compatible with various 12V battery types. Select the appropriate battery type in the inverter settings for optimal charging and discharge performance.

Image: Compatible 12V Battery Types.
Supported battery types include Flooded (FLD), Lithium (LI), Sealed (SLD), AGM, and GEL. A USER-defined option is also available for custom battery parameters.
6. Operating Instructions
6.1 Charging Modes
The inverter offers four optional charging modes to suit different energy requirements:

Image: Charging and Discharge Modes.
- CSO Solar First: Prioritizes solar power for charging.
- Utility First: Prioritizes grid power for charging.
- SNU Solar and Utility (Default): Uses both solar and utility power for charging.
- OSO Only Solar: Charges exclusively from solar power.
6.2 Output Modes
Two output modes are available for power supply to loads:
- SUB Solar First (Default): Prioritizes solar power, then battery, then utility.
- USB Utility First: Prioritizes utility power, then solar, then battery.
- SBU Priority: Solar -> Battery -> Utility.
- MKS Priority: Utility -> Solar -> Battery (for backup power).
These modes ensure uninterrupted power supply and optimize energy usage based on availability and user preference.
6.3 LCD Display and Indicators
The LCD display provides real-time system data, including battery voltage, PV input, AC output, and charging status. The three LED indicators (Status, Charging, Fault) offer quick visual cues on the inverter's operational state. Use the function buttons to navigate through the display menus and configure settings such as battery charge current, AC/solar charge priority, and load power priority.

Image: LCD Screen and LED Indicators.
7. Maintenance
Regular maintenance ensures the longevity and optimal performance of your inverter.
- Cleaning: Keep the inverter's exterior clean and free from dust. Ensure ventilation openings are not obstructed.
- Connections: Periodically check all electrical connections for tightness and corrosion. Loose connections can cause overheating and damage.
- Battery Inspection: Inspect battery terminals for corrosion and ensure they are clean and tight. Monitor battery voltage and health as per battery manufacturer guidelines.
- Environment: Ensure the installation environment remains within specified temperature and humidity ranges.
- Firmware Updates: Check the manufacturer's website for any available firmware updates.
Always disconnect all power sources before performing any cleaning or inspection.
8. Troubleshooting
If you encounter issues with your inverter, refer to the following common troubleshooting steps:
| Problem | Possible Cause | Solution |
|---|---|---|
| Inverter not turning on | No battery connection, low battery voltage, faulty wiring. | Check battery connections and voltage. Ensure battery is charged. Verify all wiring. |
| No AC output | Overload, short circuit, high/low battery voltage, inverter fault. | Reduce load. Check for short circuits. Verify battery voltage is within operating range. Check fault indicators. |
| Solar charging not working | No PV input, low PV voltage, incorrect PV wiring, MPPT fault. | Check solar panel connections. Ensure sufficient sunlight. Verify PV voltage is within range (20-150V DC). |
| Over-temperature warning | Insufficient ventilation, blocked fan, excessive ambient temperature. | Ensure adequate airflow around the inverter. Clean any dust from fans/vents. Relocate to a cooler environment if necessary. |
| Loud fan noise | Normal operation under heavy load, fan malfunction. | Fan noise is normal during high load or charging. If excessively loud or unusual, contact support. (Note: Expect 50-70 dB as per product description). |
If the problem persists after attempting these solutions, please contact Y&H customer support.
9. Warranty and Support
Y&H is committed to providing reliable solar energy solutions. For warranty information, technical assistance, or any product-related inquiries, please refer to the contact details provided with your purchase or visit the official Y&H website. Keep your purchase receipt as proof of purchase for warranty claims.


