
SCREENARAMA Dell Inspiron 16 5625 P117F P117F005
Instruction Manual
Product: SCREENARAMA New Screen Replacement for Dell Inspiron 16 5625 P117F P117F005
Brand: SCREENARAMA | Model: Dell Inspiron 16 5625 P117F P117F005
Introduction
This manual provides comprehensive instructions for the installation, operation, and maintenance of your new SCREENARAMA screen replacement for Dell Inspiron 16 5625 P117F P117F005 laptops. Please read these instructions carefully before beginning the installation process to ensure proper functionality and to avoid damage to your device.
The replacement screen is an FHD+ 1920x1200 60Hz 30-pin Non-touch IPS LCD LED Display, designed to match the specifications of compatible Dell Inspiron 16 models. It comes with a complimentary set of tools and adhesive tape to assist with the installation.
Setup and Installation
Before proceeding with the installation, it is crucial to verify compatibility and prepare your workspace. Ensure your laptop is powered off and disconnected from any power source.
1. Compatibility Verification
It is essential that the replacement screen matches the original screen's specifications. This screen is specifically for FHD+ 1920x1200 resolution, 60Hz refresh rate, and a 30-pin non-touch connector. It will not function correctly if your original screen has different specifications (e.g., touch functionality, different resolution, or pin count).

Image: This image illustrates a laptop screen with a clear indication that the replacement screen is compatible only with FHD+ 1920x1200 resolution displays. Verify your laptop's original screen specifications before installation.

Image: This image visually distinguishes between an LCD screen and a touchscreen, emphasizing that this product is an LCD screen only and does not support touch functionality. Ensure your original screen is non-touch if you are replacing it with this model.
Carefully inspect the back of your original screen to confirm the video connector type and pin count. This replacement screen features a 30-pin connector.
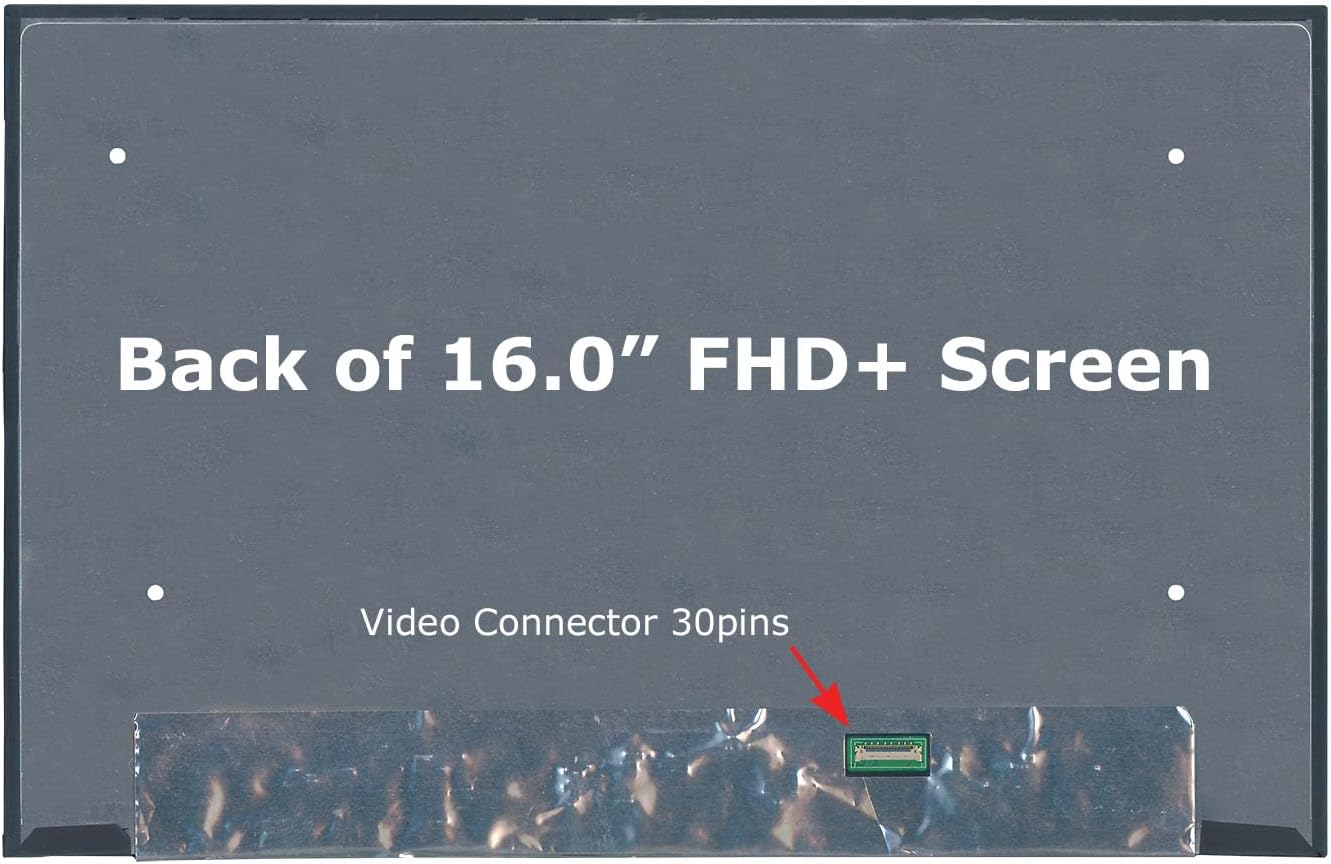
Image: A view of the back of the 16.0-inch FHD+ screen, highlighting the location of the 30-pin video connector. This is a critical component to match with your laptop's existing cable.

Image: A detailed close-up of the 30-pin narrow connector, showing its dimensions (approximately 0.67 inches or 17mm). This helps in verifying the exact connector type required for your laptop.
2. Tools and Preparation
The screen replacement comes with a complimentary set of tools and adhesive tape to facilitate the installation process. Ensure you have a clean, well-lit, and static-free workspace.

Image: This image displays the complete set of tools provided with the screen replacement, including various screwdrivers, prying tools, and adhesive tape, all designed to assist with the installation.

Image: The complete SCREENARAMA screen replacement kit, showing the new screen, the included tools, and adhesive tape, all packaged together for convenience.
3. General Installation Steps (Summary)
While specific steps may vary slightly by laptop model, the general process involves:
- Power Off: Ensure the laptop is completely powered off and the battery is disconnected (if removable).
- Bezel Removal: Carefully remove the front bezel surrounding the screen. This may involve prying tools and removing small screws.
- Screen Removal: Unscrew the old screen from its mounting brackets.
- Cable Disconnection: Gently disconnect the video cable (30-pin) from the back of the old screen. Be extremely careful not to damage the connector or cable.
- New Screen Connection: Connect the video cable to the new SCREENARAMA screen. Ensure it is seated firmly and correctly.
- Testing: Before fully reassembling, temporarily power on the laptop to test the new screen. If it displays correctly, proceed.
- Reassembly: Mount the new screen, reattach the bezel, and reconnect the battery.
For detailed, model-specific instructions, it is highly recommended to search for a disassembly guide or video tutorial for your specific Dell Inspiron 16 5625 model.
Operation
Once the new screen is installed, power on your laptop. The screen should display the operating system's boot sequence and desktop normally. This screen is an IPS (In-Plane Switching) panel, which offers superior visual performance compared to older TN (Twisted Nematic) panels.

Image: This graphic illustrates the advantages of an IPS screen over a TN screen, highlighting better viewing angles and more vivid colors for IPS technology, which enhances the overall visual experience.
If the display appears dim or has color issues, ensure your laptop's display settings are configured correctly. You may need to adjust brightness or color profiles through your operating system's display settings.
Maintenance
To ensure the longevity and optimal performance of your new screen, follow these maintenance guidelines:
- Cleaning: Use a soft, lint-free cloth specifically designed for electronics to clean the screen. For stubborn smudges, lightly dampen the cloth with distilled water or a screen-cleaning solution. Never spray liquid directly onto the screen.
- Avoid Pressure: Do not press on the screen with sharp objects or excessive force, as this can damage the LCD panel.
- Temperature: Avoid exposing the laptop to extreme temperatures or direct sunlight for prolonged periods.
- Handling: When transporting the laptop, ensure the lid is closed and secured to protect the screen from impacts.
Troubleshooting
If you encounter issues after installing your new screen, refer to the following troubleshooting steps:

Image: This image provides a visual summary of common troubleshooting steps for display issues after a screen replacement.
- Blank Screen / No Display:
- External Monitor Test: Connect an external monitor to your laptop. If the external monitor displays an image, it indicates that the laptop's motherboard and graphics card are operational, narrowing the issue to the screen or its connection.
- Check Pin Count: Double-check that the number of pins on the original LCD's connector matches the new screen's 30-pin connector. Mismatched connectors will not work.
- Reconnect Video Cable: Power off the laptop, disconnect the battery, and then carefully reconnect the video cable from both the screen side and the motherboard side. Ensure the connection is secure and use the provided adhesive tape to reinforce it if necessary. Verify that the connector itself is not damaged (bent pins, etc.).
- Isolate Issue: If the issue persists and is identical to the problem with the old LCD, the problem is likely not with the new screen but with another component of the laptop (e.g., motherboard, video card, or cable).
- Dim Image / No Backlight:
- Test Old LCD: If the image is dim or there is no backlight, try reconnecting the old LCD (if it was only physically damaged and the backlight was functional). If both LCDs do not light up, check the backlight fuse, which is usually located near the video connector on the laptop's motherboard. This fuse can blow if there was a short during installation.
Specifications
| Feature | Specification |
|---|---|
| Screen Size | 16.0 inches |
| Resolution | FHD+ 1920x1200 |
| Refresh Rate | 60Hz |
| Connector Type | 30-pin (Non-touch) |
| Panel Type | IPS LCD LED Display |
| Surface Finish | Matte |
| Bezel Type | Narrow bezel |
| Included Accessories | Complimentary set of tools and adhesive tape |
| Product Weight | 1 pound |
| Package Dimensions | 17 x 11 x 1 inches |

Image: This image highlights the quality control process, showing a screen undergoing testing, and also demonstrates the secure packaging in bubble wrap and a firm box to ensure safe delivery.
Warranty
The SCREENARAMA New Screen Replacement for Dell Inspiron 16 5625 P117F P117F005 comes with a 2-year warranty. This warranty covers manufacturing defects and ensures guaranteed compatibility with the specified models. Please retain your proof of purchase for warranty claims.
Support
For further assistance, technical support, or warranty inquiries, please contact SCREENARAMA customer service. Refer to the contact information provided with your purchase or visit the official SCREENARAMA website for support resources.
You can also visit the SCREENARAMA Store on Amazon for additional product information and support.
Ask a question about this manual
Ask about setup, troubleshooting, compatibility, parts, safety, or missing instructions. Manuals+ will review the question and use this page’s manual context to help answer it.