
WASSERMANN 3/4SEP215-SJEC
WASSERMANN 3/4 HP Submersible Sewage Pump Instruction Manual
Model: 3/4SEP215-SJEC
1. Introduction
This manual provides essential information for the safe and efficient operation, installation, and maintenance of your WASSERMANN 3/4 HP Submersible Sewage Pump, Model 3/4SEP215-SJEC. Please read these instructions thoroughly before installation and use to ensure proper function and to prevent injury or damage. Keep this manual for future reference.
2. Safety Information
WARNING: Failure to follow these safety instructions could result in electric shock, fire, serious injury, or death.
- Always disconnect power before servicing the pump.
- Do not lift the pump by its electrical cord. Use the designated lifting ring or ropes.
- Ensure the pump is fully immersed in water during operation to prevent overheating.
- This sewage pump is designed for water. Do not use it for flammable, explosive, or corrosive liquids such as oil, gasoline, kerosene, or ethanol.
- Do not override the float switch to force the pump to work in low water levels, as this can damage the motor and shaft seal.
- When a check valve is used, drill a relief hole (1/8" or 3/16" in diameter) in the discharge pipe to prevent air lock.
- Ensure all electrical connections are properly grounded and protected by a Ground Fault Circuit Interrupter (GFCI).

Image: Important safety warnings for pump operation, including proper handling and liquid compatibility.
3. Product Overview
The WASSERMANN 3/4 HP Submersible Sewage Pump is a robust and efficient solution for handling dirty water in various applications. It features a durable cast iron body, a non-clogging vortex impeller, and an automatic float switch for reliable operation.
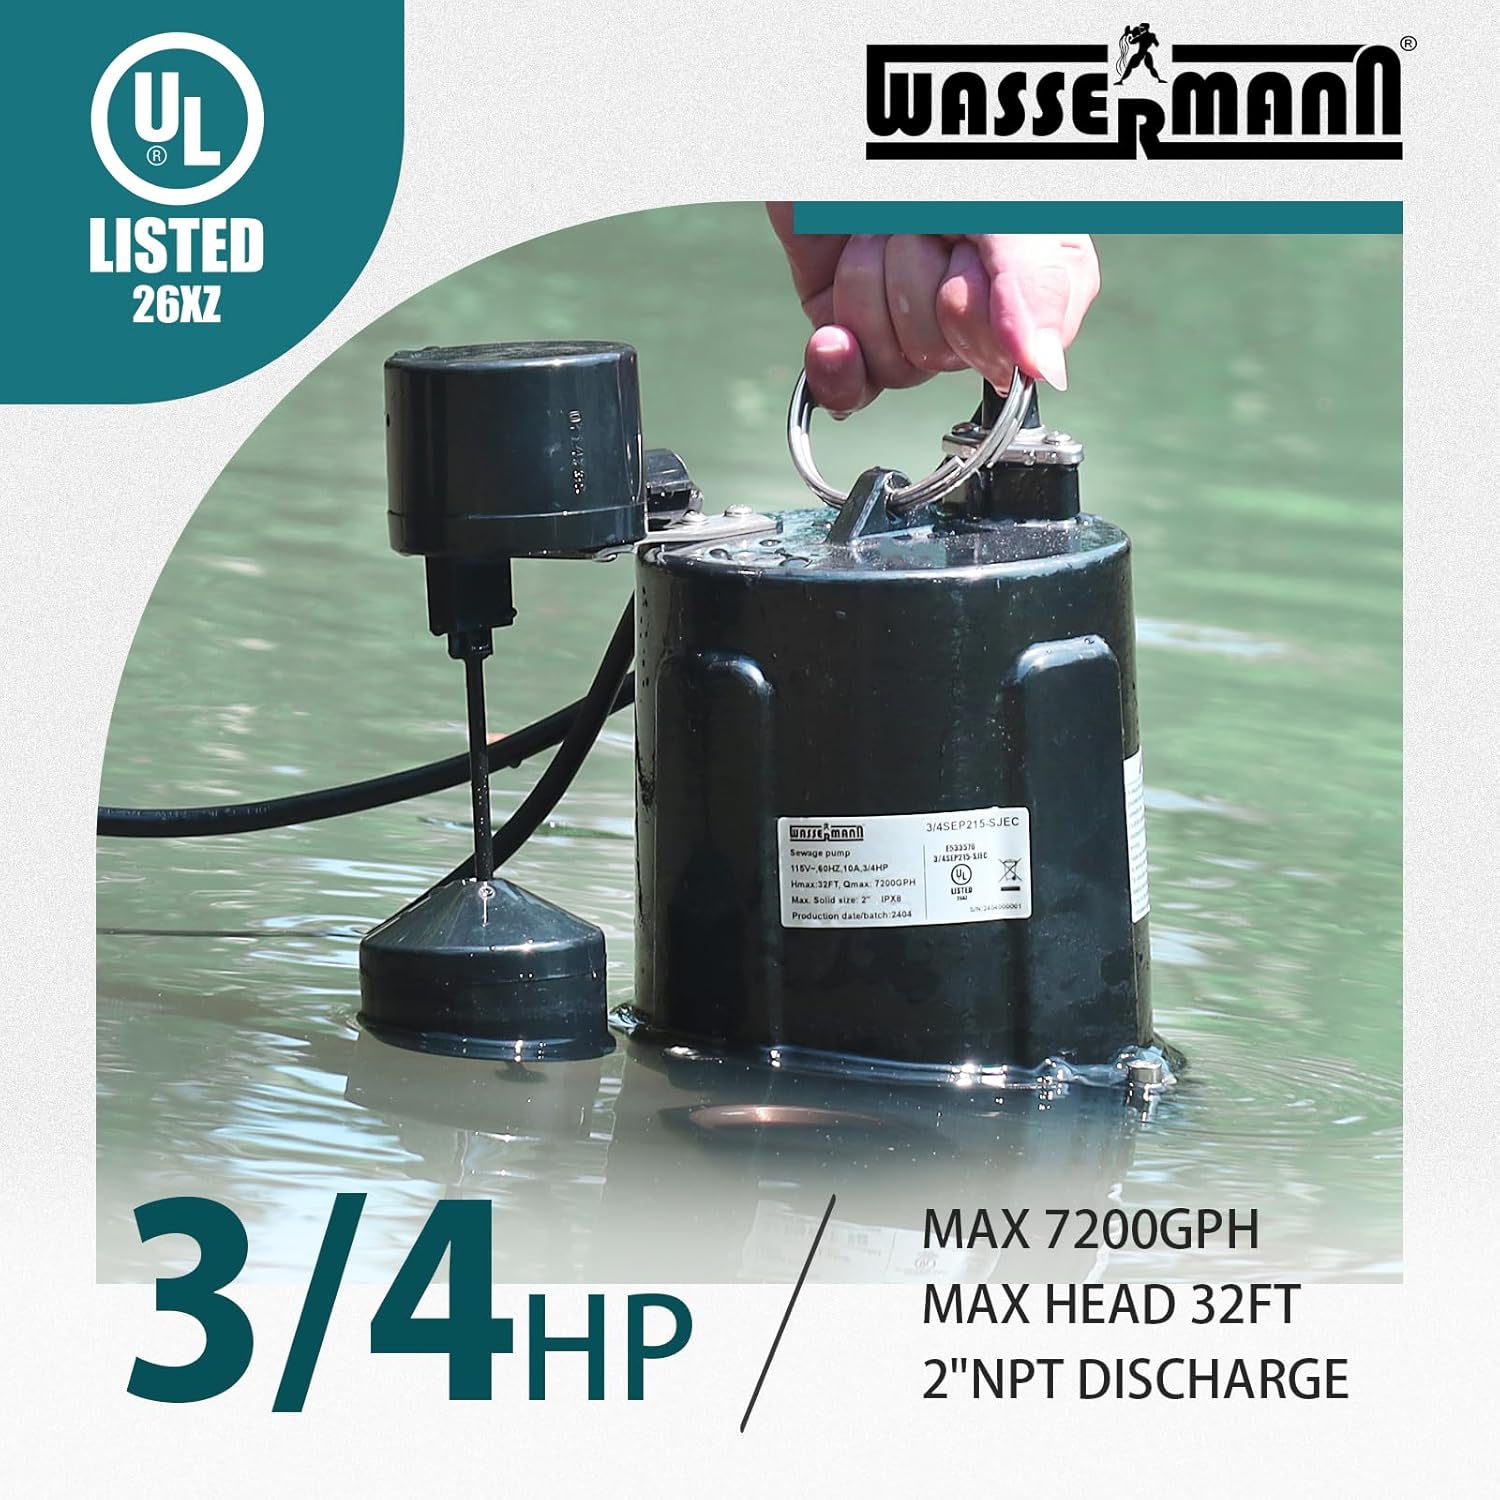
Image: The WASSERMANN 3/4 HP Submersible Sewage Pump, highlighting its robust design and float switch.
Key Features:
- High Performance: 3/4 HP oil-filled split capacitor motor with a maximum flow rate of 7200 GPH and a maximum head of 32 ft.
- Durable Construction: Rugged cast iron casing and reinforced engineered non-clogging vortex impeller.
- Clog-Resistant Design: 2" NPT discharge capable of passing 2" diameter solids.
- Automatic/Manual Control: Equipped with separate plugs for automatic (float-controlled) and continuous manual operation.

Image: Visual representation of the pump's key features, such as automatic operation, cast iron construction, and clog-resistant impeller.
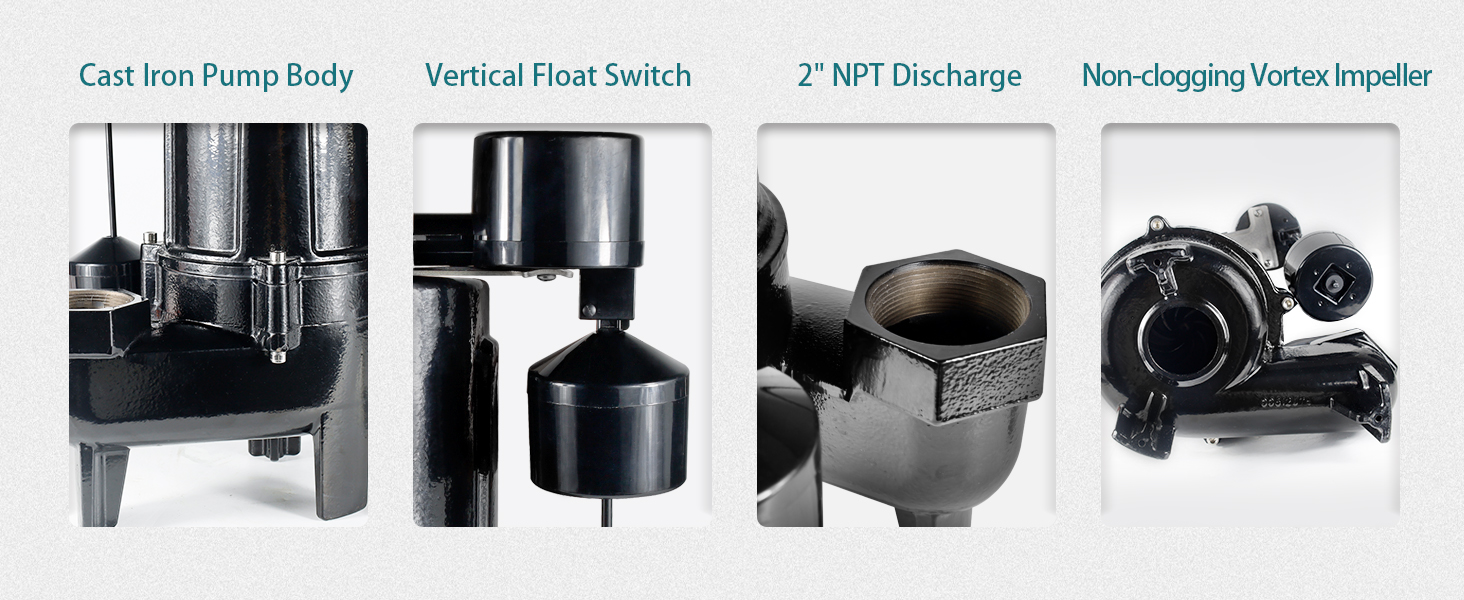
Image: Close-up views of the pump's main components, including the cast iron body, float switch, discharge, and impeller.
4. Setup and Installation
Follow these steps for proper installation of your WASSERMANN sewage pump.
- Prepare the Discharge Pipe: Connect the water hose or PVC pipe to the 2" NPT discharge outlet. Ensure a secure, watertight connection. If using PVC, apply PVC glue as needed.
- Drill Air Lock Relief Hole: If a check valve is used in your system, drill a 1/8" or 3/16" diameter relief hole in the discharge pipe, approximately 6 inches above the pump's discharge outlet. This prevents air lock.
- Seal Threads (if applicable): For threaded connections, wrap Teflon tape around the threads of the discharge pipe to ensure a tight seal.
- Position the Pump: Place the pump in the sump basin or sewage well, ensuring it rests on a stable, level surface. The float switch should have free movement and not be obstructed by the basin walls or other components.
- Electrical Connection:
- For Automatic Function: Connect the pump's plug to the float switch's plug, then plug the float switch's plug into a properly grounded 115V AC outlet protected by a GFCI.
- For Manual Function: Connect only the pump's plug directly into a properly grounded 115V AC outlet protected by a GFCI. The pump will run continuously when powered.

Image: Details of the pump's discharge, float switch, and electrical plugs for automatic and manual operation.

Image: Installation diagram for a sump basin, indicating water levels for automatic pump activation and deactivation.
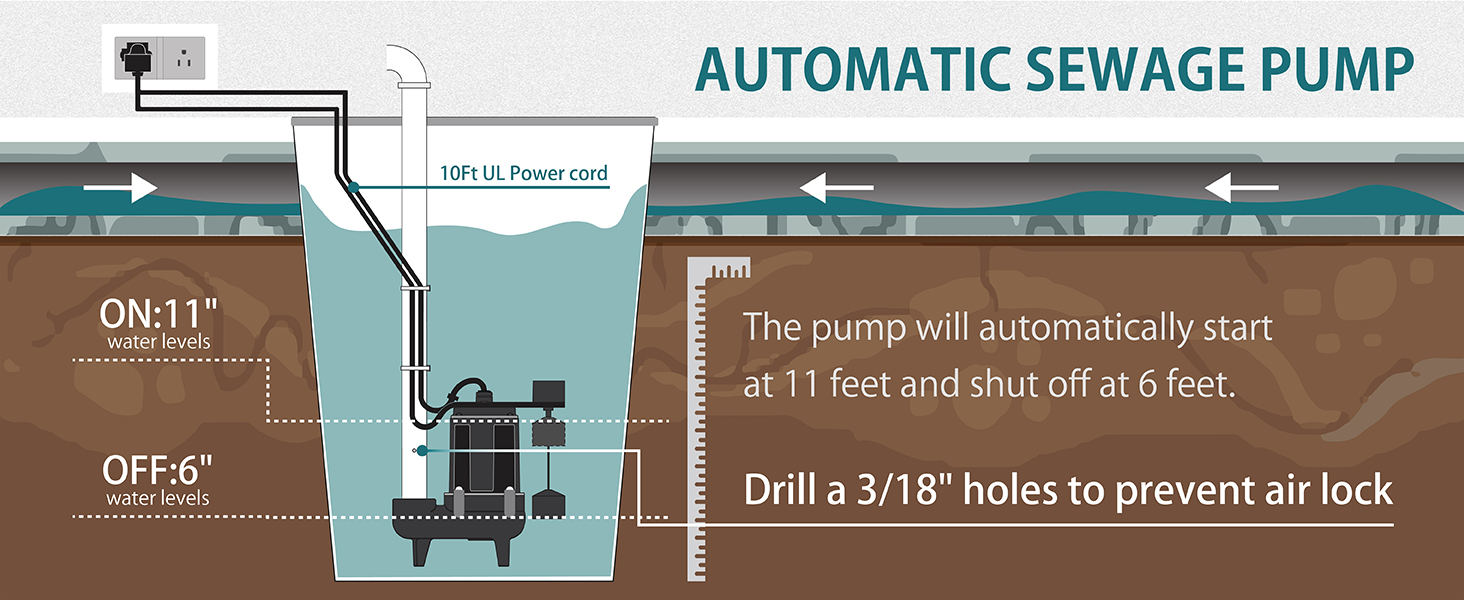
Image: Detailed diagram of automatic pump operation, including water level triggers and airlock prevention.
Installation Video:
Video: A demonstration of the WASSERMANN 3/4 HP Submersible Sewage Pump, showcasing its features and installation process, including connecting PVC pipes and drilling an airlock hole.
5. Operating Instructions
Automatic Operation:
When the pump is connected for automatic function (pump plug connected to float plug, then float plug to outlet), the pump will start and stop based on the water level. The float switch activates the pump when the water reaches a fixed "ON" level (approximately 11 inches) and deactivates it when the water drops to a fixed "OFF" level (approximately 6 inches). Ensure the float switch moves freely and is not obstructed.
Manual Operation:
For continuous operation, connect the pump's power plug directly to a grounded 115V AC outlet. The pump will run continuously as long as it is powered. Monitor the water level to prevent dry running, which can damage the pump.
Image: Visual guide to automatic pump operation, illustrating how the float switch responds to water levels.
6. Maintenance
Regular maintenance ensures the longevity and optimal performance of your pump.
- Monthly Inspection: Check the pump and float switch for any debris, blockages, or damage. Ensure the float switch moves freely.
- Cleaning: Periodically remove the pump from the basin and clean any accumulated sludge or debris from the impeller and pump housing.
- Power Cord Inspection: Inspect the power cord for any cuts, fraying, or damage. Replace if necessary.
- Winterization (if applicable): If the pump is in an area subject to freezing temperatures and will not be used, remove it, clean it thoroughly, and store it in a dry, frost-free location.
7. Troubleshooting
Before attempting any repairs, always disconnect the pump from the power source.
| Problem | Possible Cause | Solution |
|---|---|---|
| Pump does not start. | No power; tripped GFCI; float switch obstructed or faulty; motor overload. | Check power supply and GFCI. Ensure float switch moves freely. Allow motor to cool if overloaded. |
| Pump runs but no water is discharged. | Discharge pipe blocked; air lock; impeller clogged; water level too low. | Clear blockage. Check for air lock relief hole. Clean impeller. Ensure adequate water level. |
| Pump runs continuously. | Float switch stuck in "ON" position; pump connected for manual operation. | Check float switch for obstructions. Verify correct electrical connection for automatic mode. |
| Pump cycles too frequently. | Check valve leaking; small sump basin; float switch setting. | Inspect and repair/replace check valve. Consider a larger sump basin if feasible. Adjust float switch if possible (not applicable for fixed floats). |
8. Specifications
| Feature | Detail |
|---|---|
| Model Number | 3/4SEP215-SJEC |
| Power | 3/4 HP |
| Voltage | 115 Volts / 60 Hz |
| Maximum Flow Rate | 7200 GPH (120 Gallons Per Minute) |
| Maximum Lifting Height (Head) | 32 Feet |
| Discharge Size | 2" NPT |
| Material | Cast Iron |
| Item Weight | 36.3 pounds |
| Product Dimensions (L x W x H) | 15" x 11" x 16.4" |
| Included Components | Float switch |
| Power Cord Length | 10 FT |

Image: A summary of the pump's technical specifications, including power, flow rate, and dimensions.
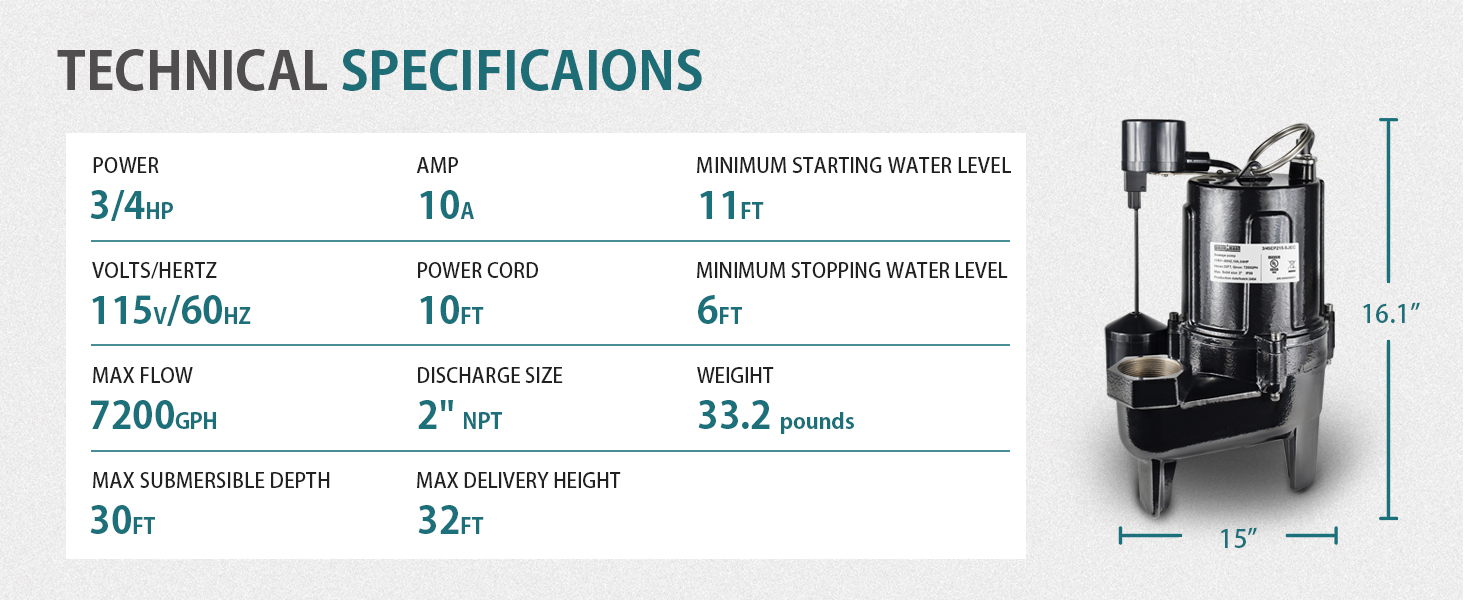
Image: Performance curve illustrating the relationship between pumping head and flow rate for the WASSERMANN sewage pump.
9. Typical Applications
This WASSERMANN submersible sewage pump is suitable for various applications involving dirty water and solids.
- Basement drainage
- Sump basin applications
- Sewage wells
- Dirty pond drainage

Image: Example of a flooded basement, a common application for this pump.

Image: A sump basin, illustrating where the pump can be installed.

Image: A dirty pond, demonstrating another suitable use case for the pump.

Image: A sewage well, indicating the pump's utility in such environments.
10. Warranty and Support
For warranty information or technical support, please refer to the product packaging or contact WASSERMANN customer service. Keep your purchase receipt as proof of purchase.
Additional protection plans may be available for purchase. Please check with your retailer for details.
Ask a question about this manual
Ask about setup, troubleshooting, compatibility, parts, safety, or missing instructions. Manuals+ will review the question and use this page’s manual context to help answer it.