1. Introduction
Welcome to the user manual for your Panasonic Ionity Hair Dryer EH-KE2L-W. This manual provides essential information for the safe and effective operation, maintenance, and care of your new hair dryer. Please read these instructions thoroughly before use and keep them for future reference.
The Panasonic Ionity Hair Dryer EH-KE2L-W is designed to provide smooth, shiny hair with its Minus Ion technology and versatile styling attachments. Enjoy professional-level styling with ease.
2. Product Overview
2.1 Key Features
- Minus Ion Technology: Gently coats the hair surface for smooth, shiny styling, reducing static and frizz.
- Three-Stage Switch: Offers DRY (warm air), SET (moderate warm air), and COLD (cool air) settings for versatile styling and setting.
- Two Versatile Attachments: Includes a Blow Brush and a Thick Roll Brush for various styling needs.
- Efficient Power: 700W for effective drying and styling.
- Flexible Cord: Approximately 1.7m power cord with 360° rotation for ease of use and maneuverability.

Figure 2.1: The Panasonic Ionity Hair Dryer EH-KE2L-W main unit shown with its two included attachments: the blow brush and the thick roll brush.
2.2 Components
- Main Unit: The core device housing the motor, heating element, and control switch.
- Blow Brush: An attachment designed for straightening hair, drying while brushing, and adding subtle nuances to hair ends.
- Thick Roll Brush: An attachment ideal for creating large curls and shaping side hair flow.
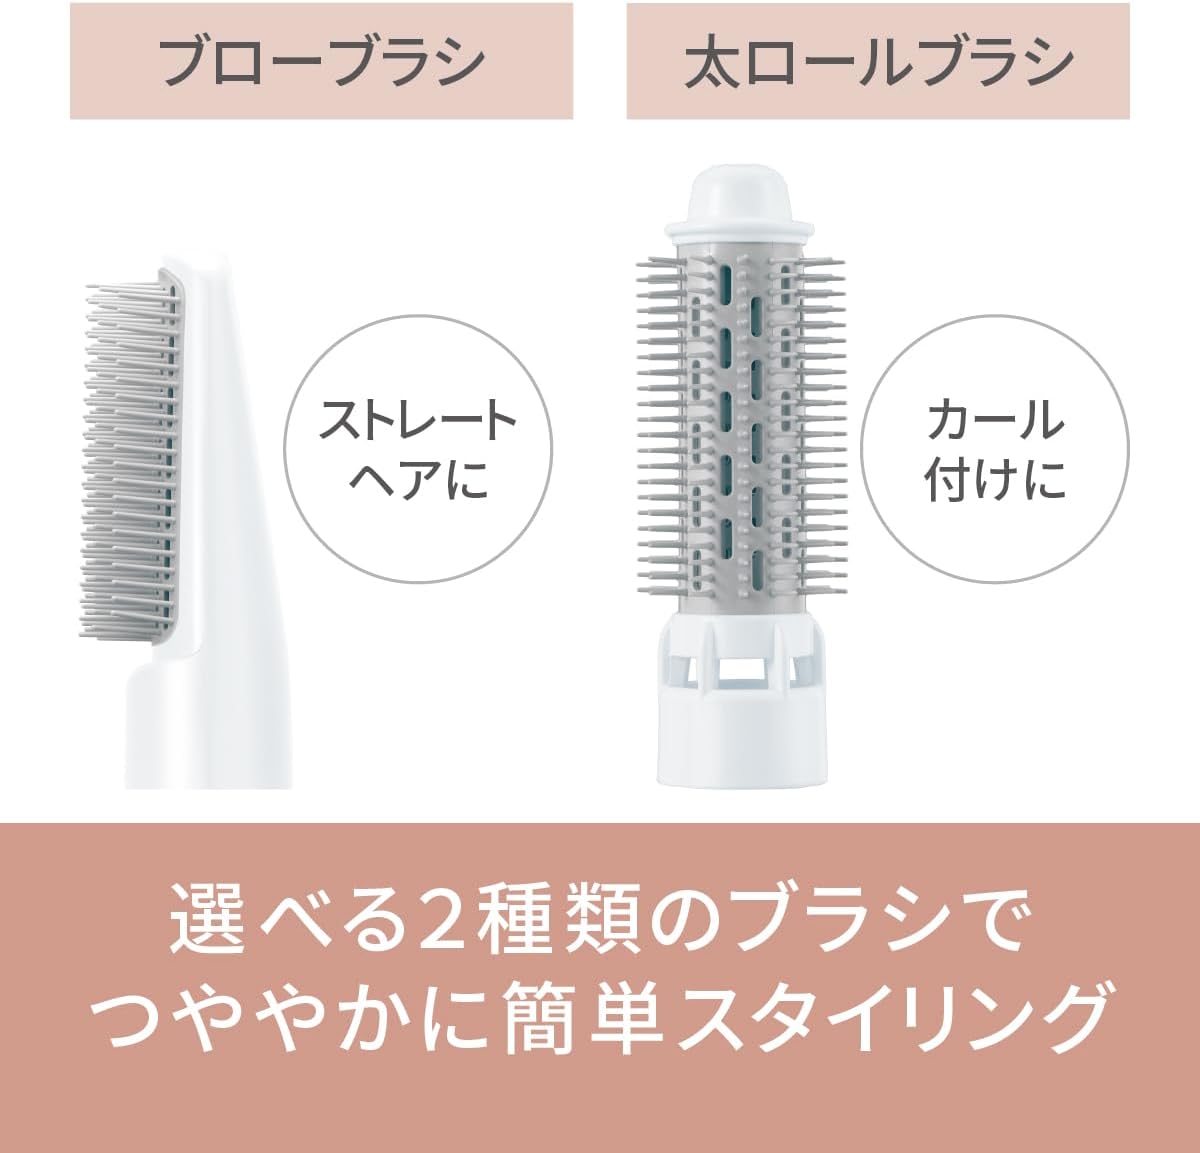
Figure 2.2: The two included brush attachments: the Blow Brush (left) for straightening and the Thick Roll Brush (right) for creating curls. These brushes enable easy styling for shiny hair.
2.3 Minus Ion Technology Explained
The Ionity Hair Dryer utilizes Minus Ion technology to enhance hair health and appearance. Minus Ions are emitted during operation, which gently coat the surface of your hair. This coating helps to reduce static electricity, prevent dryness, and leave your hair feeling smoother and looking shinier.

Figure 2.3: Illustration of Minus Ion technology. When Minus Ions are not emitted, hair can appear dry. When emitted, Minus Ions coat the hair surface, resulting in smooth and shiny hair.
2.4 Three-Stage Temperature Control
The hair dryer features a convenient three-stage switch that allows you to select the optimal temperature for drying and styling. This functionality enables you to set your hair with warm air and then lock the style in place with cool air, a technique often used by professionals.

Figure 2.4: The 3-stage switch on the main unit, offering DRY, SET, and COLD settings. This allows for setting hair with warm air and then using cold air to maintain the style.
3. Setup
- Unpacking: Carefully remove the hair dryer and all accessories from the packaging. Retain the packaging for storage or future transport.
- Attaching Brushes: Align the desired brush attachment (Blow Brush or Thick Roll Brush) with the main unit's nozzle. Push firmly until it clicks into place. Ensure it is securely attached before use to prevent detachment during operation.
- Power Connection: Insert the power plug into a suitable electrical outlet. Ensure the voltage of your outlet matches the product's specifications (refer to Section 7, Specifications).
4. Operating Instructions
- Power On/Off: To turn on the unit, slide the main switch to the desired setting (DRY, SET, or COLD). To turn off, slide the switch to OFF.
- Using the 3-Stage Switch:
- DRY: Provides warm air for quick drying of hair.
- SET: Provides moderate warm air, ideal for styling and shaping hair.
- COLD: Provides cool air to fix styled hair, add shine, and help maintain the style for a longer duration.
- Styling with the Blow Brush:
- For straightening hair: Place the brush under a section of hair and slowly glide it downwards from roots to ends while applying warm air.
- For drying while brushing: Use the DRY setting to dry hair while simultaneously brushing to detangle and smooth.
- For adding nuance to hair ends: Gently curl the hair ends around the brush and apply warm air to create a soft, natural curve.
- Styling with the Thick Roll Brush:
- For creating large curls: Wrap a section of hair around the brush, hold for a few seconds with warm air (SET), then release. Use the COLD setting to set the curl for better hold.
- For shaping side hair flow: Brush hair in the desired direction, gently curving it with the brush, and use warm air to shape, then cold air to set.
- Minus Ion Function: The Minus Ion function is automatically active in all DRY, SET, and COLD modes. No special operation is required to activate it.
5. Maintenance
Regular cleaning and proper storage will ensure the longevity and optimal performance of your hair dryer.
- Cleaning the Main Unit:
- Always unplug the appliance from the power outlet before cleaning.
- Wipe the exterior of the main unit with a soft, dry cloth. Do not use abrasive cleaners, solvents, or harsh chemicals, as these can damage the surface.
- Cleaning the Brushes:
- Remove any hair tangled in the brush bristles using your fingers or a comb.
- The brushes can be gently washed with mild soap and lukewarm water. Rinse thoroughly.
- Ensure the brushes are completely dry before reattaching them to the main unit or storing them.
- Storage:
- Store the hair dryer and its attachments in a cool, dry place, away from direct sunlight and excessive moisture.
- Do not wrap the power cord tightly around the unit, as this can cause damage to the cord over time. Loosely coil the cord.
6. Troubleshooting
If you encounter any issues with your Panasonic Ionity Hair Dryer, please refer to the following common problems and their solutions before contacting customer service.
| Problem | Possible Cause | Solution |
|---|---|---|
| Unit does not turn on. | Power plug not securely inserted. Power switch is in the OFF position. | Ensure the power plug is fully inserted into a working electrical outlet. Slide the power switch to DRY, SET, or COLD. |
| Weak airflow. | Air intake filter is blocked by dust or lint. Attachment is not properly secured or is partially blocking airflow. | Unplug the unit and clean the air intake filter. Re-attach the brush securely, ensuring it does not obstruct the air outlet. |
| Unusual noise or smell. | Internal malfunction or foreign object. | Immediately turn off the unit and unplug it. Do not use. Contact customer support. |
| Hair is not styling as desired. | Incorrect brush attachment used. Incorrect temperature setting. Hair is too wet or too dry. | Ensure you are using the appropriate brush for your desired style (e.g., Blow Brush for straight, Thick Roll Brush for curls). Adjust the temperature setting (DRY/SET/COLD) according to your hair type and styling needs. Ensure hair is towel-dried before styling with brushes. |
7. Specifications
| Feature | Detail |
|---|---|
| Model Number | EH-KE2L-W |
| Brand | Panasonic |
| Power Consumption | 700 W |
| Power Source | Corded |
| Power Cord Length | Approx. 1.7 m (with 360° rotating cord) |
| Hot Air Temperature | Approx. 120°C (at DRY setting, ambient 30°C) |
| Dimensions (Main Unit with Blow Brush) | Length 33.4 cm x Max Diameter 5.35 cm |
| Weight (Main Unit with Blow Brush) | Approx. 335 g |
| Color | White |
| Included Accessories | Blow Brush, Thick Roll Brush |
8. Warranty and Support
For detailed warranty information, please refer to the warranty card or documentation included with your Panasonic Ionity Hair Dryer EH-KE2L-W. You may also visit the official Panasonic website for the most up-to-date warranty terms and conditions.
For technical assistance, troubleshooting beyond what is covered in this manual, or to inquire about service and repairs, please contact Panasonic customer support. Contact details can typically be found on the Panasonic website or in your product documentation.