
Introduction
This manual provides comprehensive instructions for the GLEDOPTO WLED ESP8266 LED Strip Controller. It covers product features, setup, operation, maintenance, and troubleshooting to ensure optimal performance and user experience with your addressable LED light strips.
Safety Information
- Ensure the input voltage (DC 5-24V) matches the power supply and LED strip requirements.
- Do not exceed the total output current of 10A Max.
- Avoid exposing the controller to extreme temperatures outside the operating range of -20 to +45°C.
- Always disconnect power before making any wiring connections or performing maintenance.
- Select the correct WLED firmware (ESP8266) during upgrades to prevent product damage.
- This device is designed for indoor use (IP20 rating).
Package Contents
- 1 x WLED ESP8266 LED Controller
Product Overview
The GLEDOPTO WLED ESP8266 LED Strip Controller is designed for controlling addressable LED light strips. It features an ESP8266 chip, allowing for WLED app control and a wide range of dynamic lighting effects.

Image: Front view of the GLEDOPTO WLED ESP8266 LED Strip Controller, showing input terminals, model number, specifications, and GPIO output pins.
Key Features
- ESP8266 Chip: Pre-installed with WLED firmware, upgradable (ensure correct ESP8266 firmware is selected).
- Control Method: Utilizes the WLED app for wireless control via Wi-Fi.
- Dynamic Modes: Over 100 built-in dynamic modes available through the WLED app.
- DIY Modes: Supports custom mode creation for personalized lighting effects.
- Compatibility: Compatible with various addressable LED strips including WS2812B, WS2811, SK6812, TM1814, WS2813, WS2815, and FCOB LED Light Strips.
- Maximum IC Quantity: Supports up to 800 ICs.
- Input Voltage: DC 5-24V.
- Total Output Current: 10A Max.
- Operating Temperature: -20 to +45°C.
Video: A detailed view of the GLEDOPTO WLED Controller, showcasing its physical appearance and connection points.
Setup
1. Wiring Instructions
Connect your LED strip to the controller's output terminals. The default output is "GPIO2". Ensure correct polarity (V+, D, G) for your LED strip. For wire preparation, strip 9-10mm of insulation from wires with a cross-section of 0.33-2.08mm².
- V+: Connect to the positive power input of the LED strip.
- D (DATA): Connect to the data line of the LED strip.
- G (GND): Connect to the ground line of the LED strip.

Image: Diagram showing wiring connections for the GLEDOPTO WLED controller, highlighting GPIO2 as the default output.
2. Initial App Connection and Configuration
- Connect to Controller's Wi-Fi:
- Open your phone's Wi-Fi settings.
- Search for a hotspot named "WLED-AP" and connect to it. The default password is "wled1234".
- Access WLED Interface:
- After successful connection, your device should automatically open a browser to the WLED interface (or navigate to http://4.3.2.1 in your browser).
- Configure Wi-Fi Settings:
- In the WLED interface, go to "WiFi Setup".
- Scan for your home Wi-Fi network.
- Select your network and enter its password.
- Click "Save & Connect" at the top of the screen. The controller will restart and connect to your home Wi-Fi.
- Add Controller in WLED App:
- Ensure your mobile phone is connected to the same Wi-Fi network as the controller.
- Open the WLED app.
- Click the "+" icon in the upper right corner.
- Select "Discover Lights..." to find the controller. Once found, it will display "Found WLED!".
- Click on the discovered WLED device to connect.

Image: Step-by-step guide for connecting the WLED controller to the app, including Wi-Fi setup and device discovery.
Video: Shows the process of connecting the WLED Controller to the WLED app and controlling the LED strip.
3. LED Preferences Setup
After connecting to the app, it is crucial to configure the LED preferences to match your specific LED strip.
- In the WLED app, navigate to "Config" > "LED Preferences" > "Hardware setup".
- LED Outputs: Select the correct type of LED strip (e.g., WS2812B, SK6812).
- Length: Enter the total number of LED beads on your strip.
- Color Order: Set the correct RGB sequence (e.g., RGB, GRB). This is vital for accurate color display.
- Click "Save" to apply changes.
Video: Demonstrates how to set up the GLEDOPTO WLED Controller, including selecting the LED strip type, setting the number of LEDs, and configuring the RGB sequence.
Operating Instructions
1. Manual Button Control
The controller features a physical button for basic control.
- Short Press: Toggles the LED strip ON/OFF.
- Long Press (1 second): Switches between different colors.

Image: Illustration of the controller's button function, indicating short press for ON/OFF and long press for color switching.
2. WLED App Control
The WLED app provides extensive control over your LED strip, offering a wide array of customization options.
- Color Selection: Use the color wheel or predefined color palettes to choose static colors.
- Dynamic Modes: Access over 100 dynamic lighting modes for various ambiances (e.g., birthday parties, relaxation).
- DIY Modes: Create and save your own custom lighting effects.
- Segmented Control: Personalize individual segments of your LED strip with different colors and effects.
- Synchronization: Synchronize colors and dynamic effects across multiple WLED controllers on the same network.
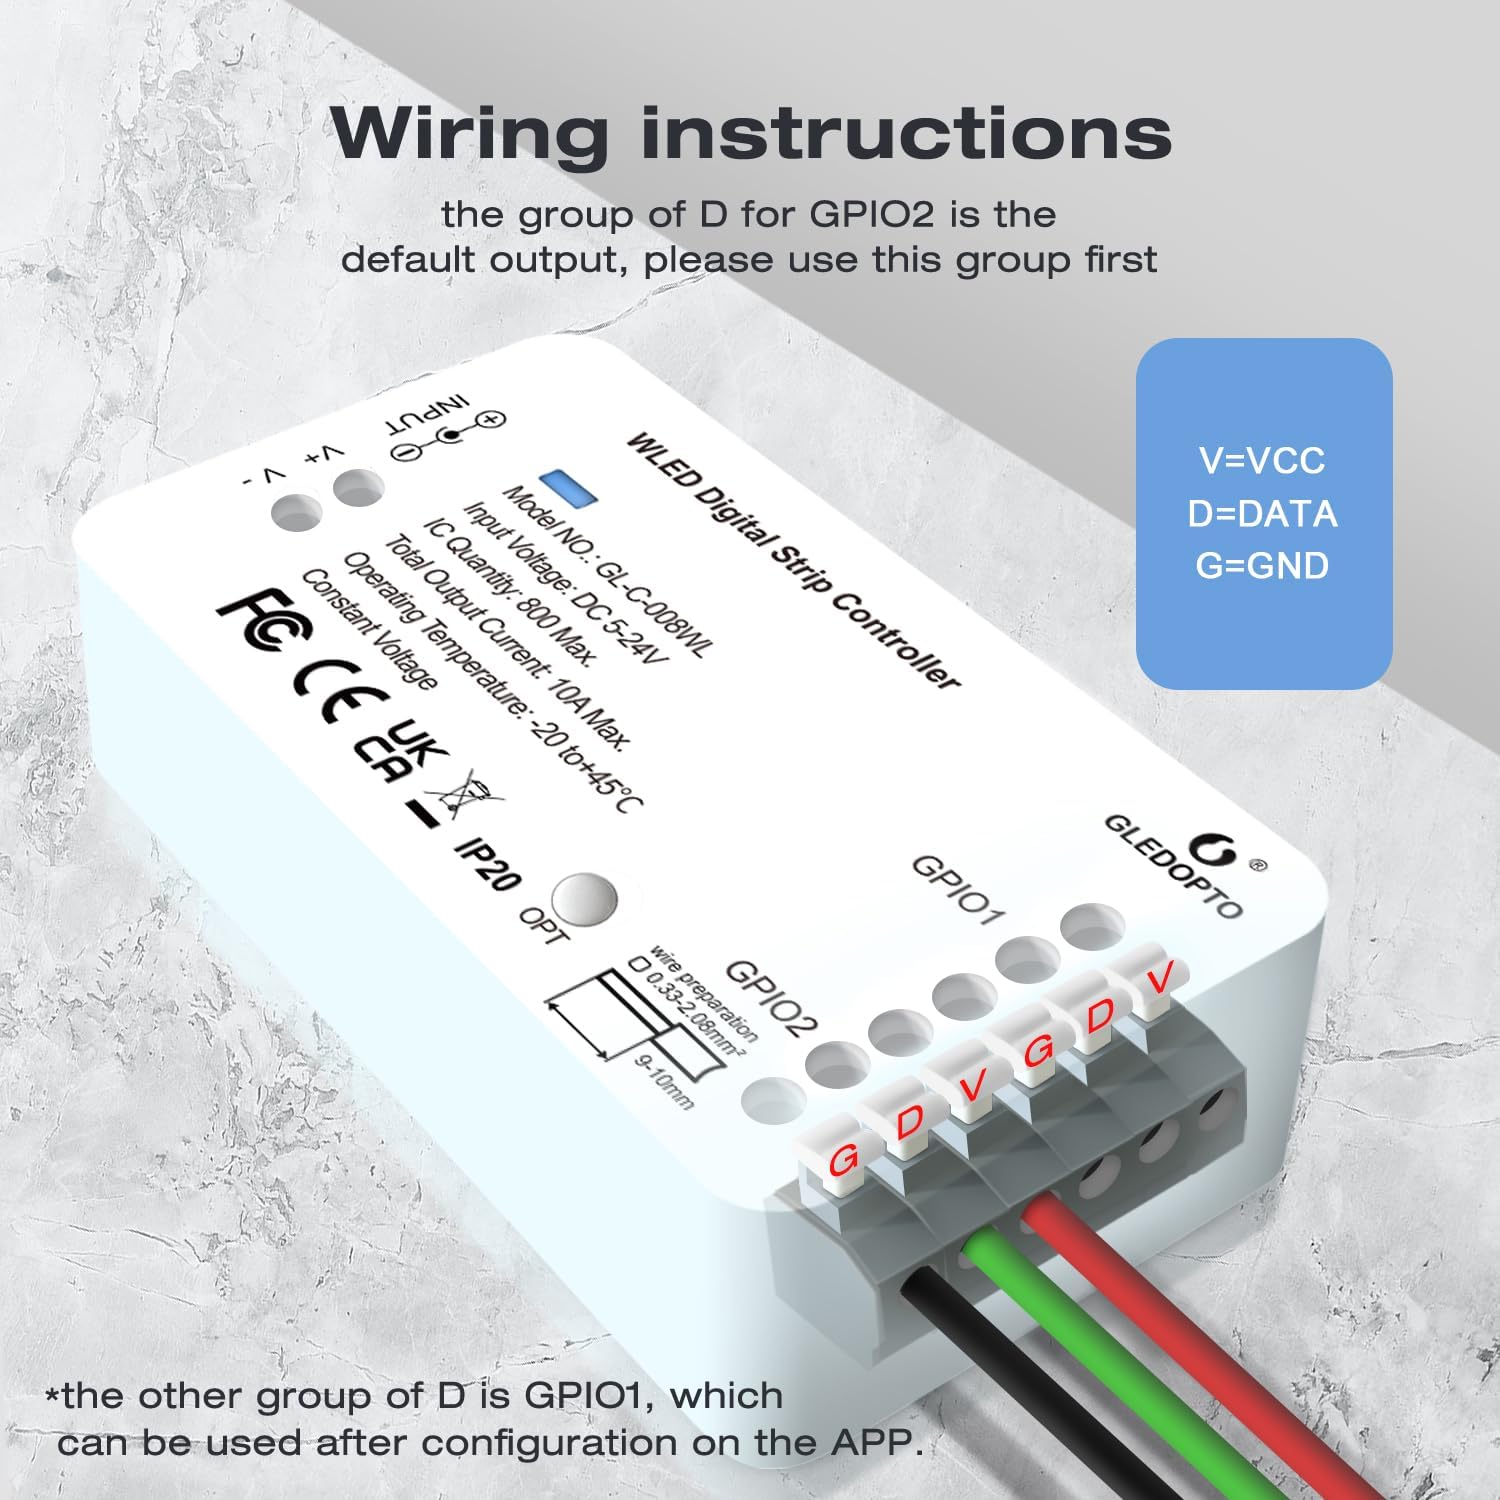
Image: Screenshot of the WLED app interface on a smartphone, showing color selection and device list for smart control.

Image: Screenshot of the WLED app interface demonstrating DIY lighting effect customization.

Image: Screenshot of the WLED app interface displaying a list of over 100 dynamic lighting effects.
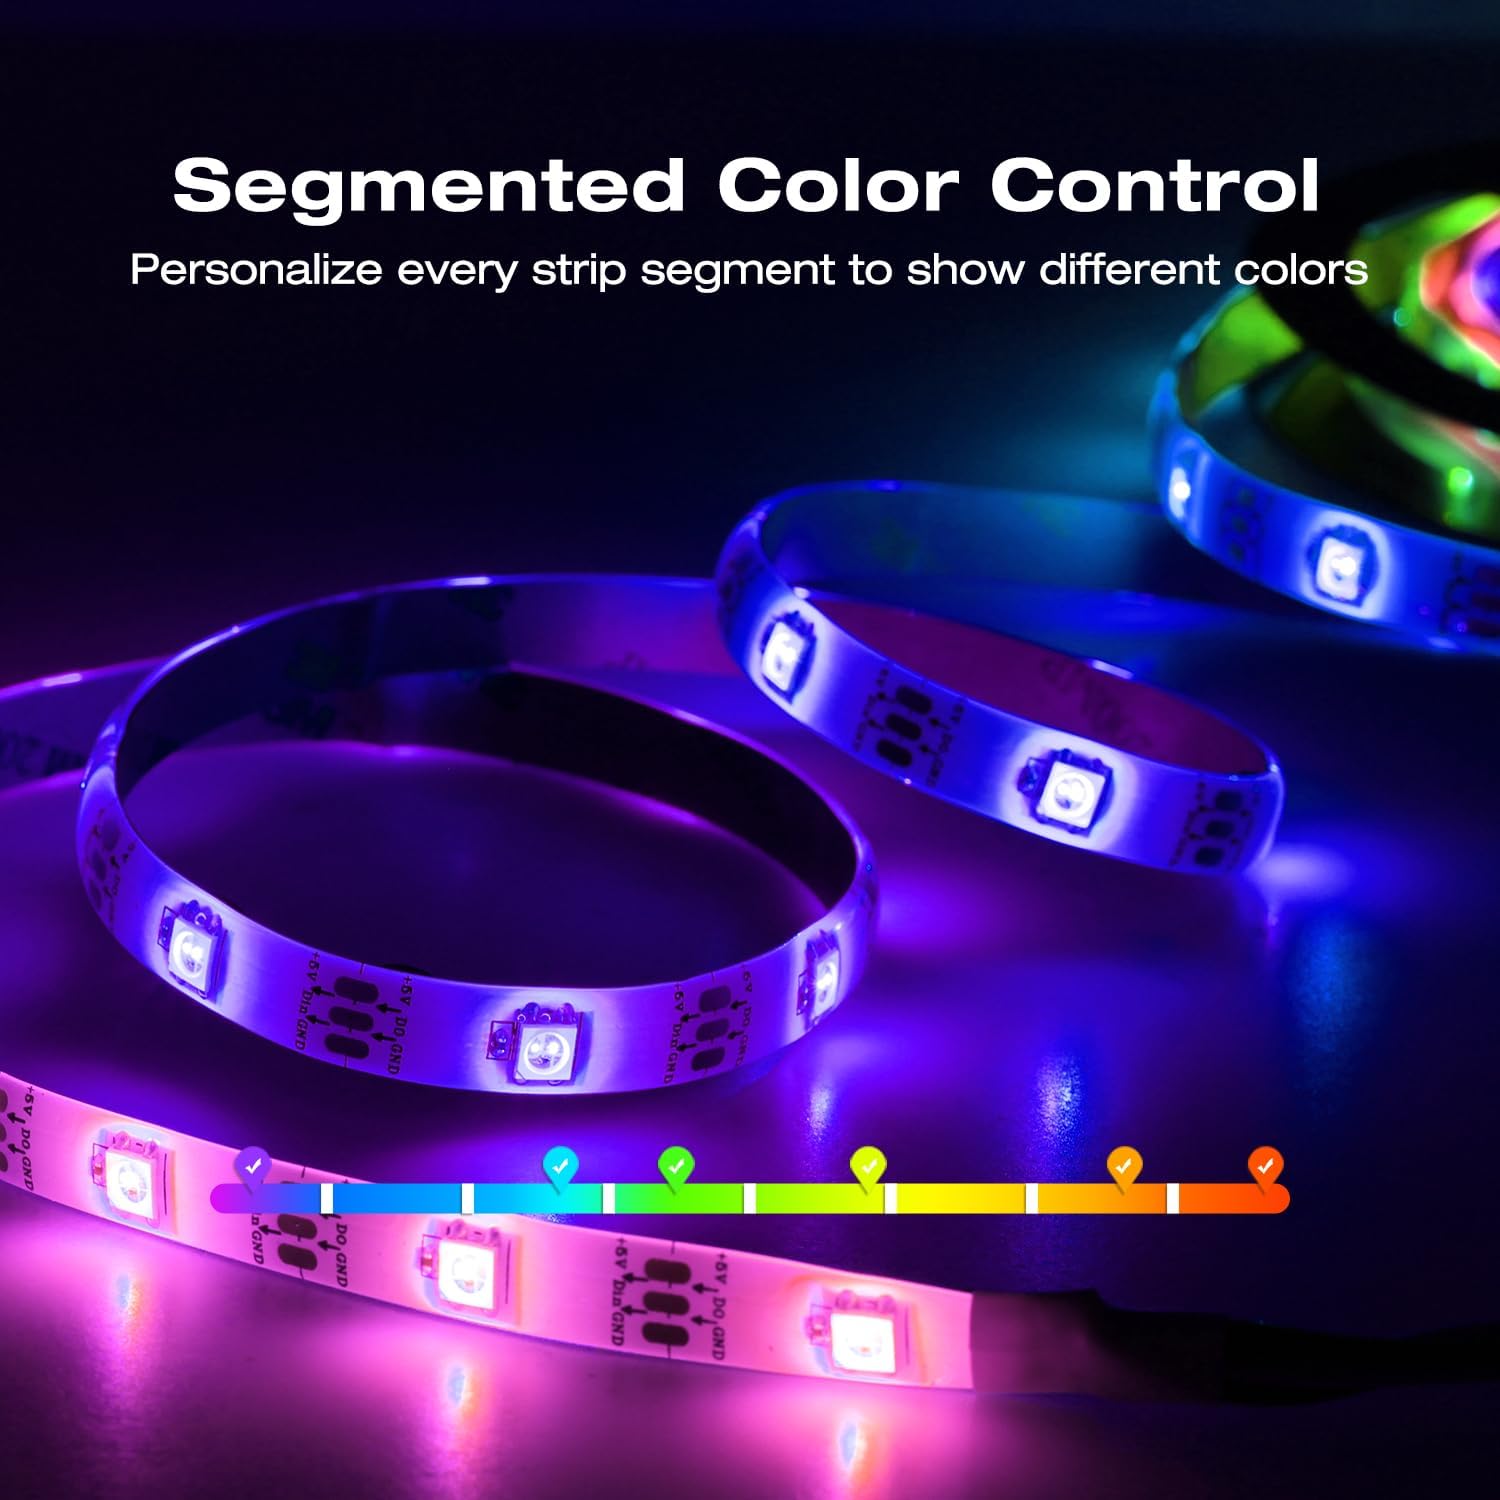
Image: Visual representation of segmented color control on an LED strip, managed through the WLED app.
Video: Demonstrates various dynamic lighting effects and color changes controlled by the WLED app.
Usage Scenarios
The GLEDOPTO WLED ESP8266 LED Strip Controller can be widely used in various indoor settings to create different atmosphere effects.
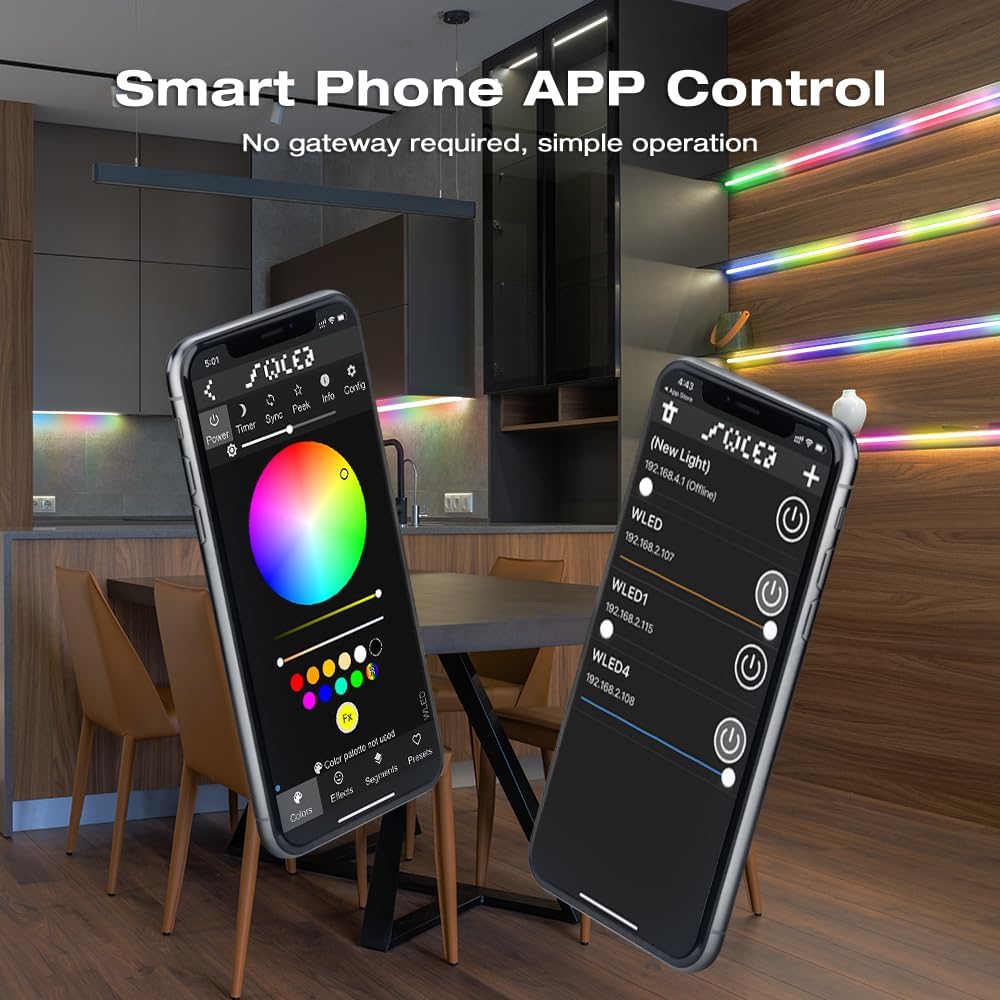
Image: Collage of images showcasing different indoor lighting scenarios, such as bridge lighting and house exterior, using the GLEDOPTO WLED controller.

Image: Images depicting different indoor settings like living rooms and kitchens illuminated with LED strips controlled by the device.
Maintenance
- Keep the controller clean and free from dust. Use a dry, soft cloth for cleaning.
- Avoid exposing the device to moisture or direct sunlight.
- Store the controller in a cool, dry place when not in use for extended periods.
Troubleshooting
Common Issues and Solutions
- Controller Not Connecting to Wi-Fi:
- Ensure your phone is connected to the "WLED-AP" hotspot with the correct password ("wled1234") during initial setup.
- Verify your home Wi-Fi network name and password are entered correctly in the WLED interface.
- Check that the controller is within range of your Wi-Fi router.
- Incorrect Colors or Effects:
- This often indicates incorrect LED preferences. Go to "Config" > "LED Preferences" > "Hardware setup" in the WLED app.
- Verify that the "LED Outputs" type matches your LED strip (e.g., WS2812B).
- Confirm the "Length" (number of LED beads) is accurate.
- Adjust the "Color Order" (e.g., RGB, GRB) until colors display correctly.
- LED Strip Not Lighting Up:
- Check all wiring connections (V+, D, G) for secure contact and correct polarity.
- Ensure the power supply is connected and providing the correct voltage (DC 5-24V).
- Verify the LED strip itself is functional.
- Firmware Upgrade Issues:
- Always select the ESP8266 firmware when upgrading. Using incorrect firmware can damage the product. If the device becomes unresponsive after an update, it may be "bricked" and require advanced recovery methods or replacement.
Specifications
| Feature | Detail |
|---|---|
| Model Number | LT-GL-C-008WL |
| Brand | Sogledwow |
| Input Voltage | DC 5-24 Volts |
| Total Output Current | 10A Max |
| IC Quantity | 800 Max |
| Operating Temperature | -20 to +45°C |
| Control Method | WLED App Control (Wi-Fi) |
| Indoor/Outdoor Usage | Indoor (IP20) |
| Material | Acrylonitrile Butadiene Styrene |
| Item Weight | 2.4 ounces |
Warranty and Support
For warranty information or technical support, please refer to the product packaging or contact the manufacturer directly. Keep your purchase receipt for any warranty claims.


