1. Introduction
The ORICO RAID 9848RU3 is a high-performance 4-bay hard drive enclosure designed for external data storage and management. It supports up to four 3.5-inch SATA HDDs, with a maximum capacity of 22TB per drive, totaling 88TB. This enclosure features a USB 3.0 interface for high-speed data transfer and offers flexible RAID configurations to enhance data security and utilization. Its robust aluminum construction and efficient cooling system ensure stable and reliable operation.
Package Contents:
- ORICO RAID 9848RU3 4-Bay Hard Drive Enclosure
- USB 3.0 Data Cable
- 150W Power Adapter
- User Manual (this document)
- Screws and Screwdriver (for drive installation, if applicable)

Figure 1: Front view of the ORICO RAID 9848RU3 4-Bay Hard Drive Enclosure, showcasing its four drive bays.
2. Safety Information
Please read and follow these safety guidelines to prevent damage to the device or injury to yourself:
- Do not expose the device to water, moisture, or extreme temperatures.
- Use only the provided power adapter. Using an incorrect adapter may damage the device and void the warranty.
- Do not open the enclosure or attempt to repair it yourself. Refer all servicing to qualified personnel.
- Ensure proper ventilation around the enclosure to prevent overheating.
- Handle hard drives with care to avoid damage.
3. Setup
3.1 Hard Drive Installation
The ORICO 9848RU3 features a tool-free design for easy hard drive installation. It supports 3.5-inch SATA HDDs.
- Gently pull the handle of an empty drive bay to unlock and slide out the drive tray.
- Insert your 3.5-inch SATA hard drive into the tray, ensuring the SATA connectors align correctly. The design allows for direct sliding of drives into the guide rail.
- Slide the tray back into the enclosure until it clicks into place. The independent security lock mechanism helps prevent accidental ejection.
- Repeat for all desired hard drives.

Figure 2: Illustrates the process of inserting a 3.5-inch hard drive into one of the enclosure's bays, highlighting the tool-free installation.

Figure 3: Close-up view of the safety lock design on the drive bays, ensuring secure placement of hard drives.
3.2 Connecting to Computer
- Connect one end of the provided USB 3.0 data cable to the USB 3.0 Type-B port on the back of the ORICO enclosure.
- Connect the other end of the USB 3.0 data cable to an available USB 3.0 port on your computer.
3.3 Power Connection
- Connect the 150W power adapter to the power input port on the back of the ORICO enclosure.
- Plug the power adapter into a wall outlet.
- Press the power button on the back of the enclosure to turn it on.
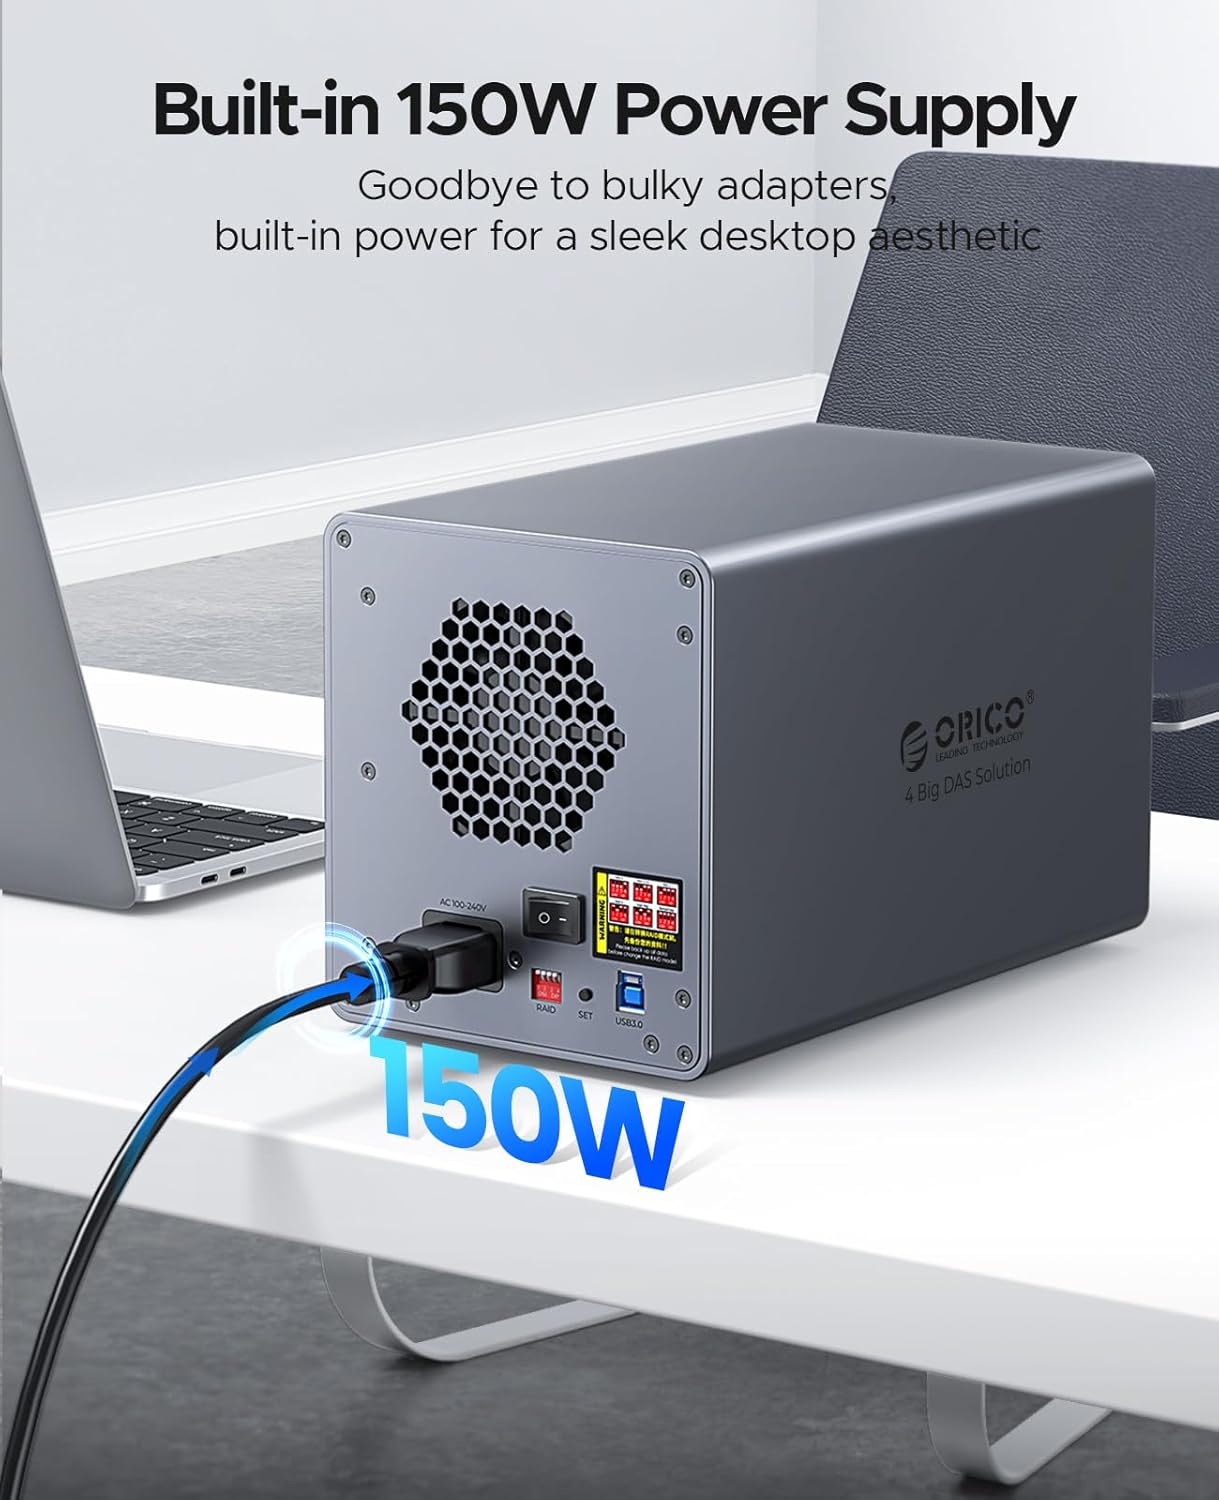
Figure 4: Rear view of the ORICO enclosure showing the integrated 150W power supply connection, ensuring stable power for multiple high-performance drives.
4. Operating
4.1 RAID Mode Configuration
The ORICO 9848RU3 supports various RAID modes to meet different data storage needs. These modes include RAID 0, RAID 1, RAID 3, RAID 5, RAID 10, JBOD, CLONE, and Normal. Refer to the table below for a summary of each mode's characteristics.

Figure 5: A table detailing the 8 supported RAID modes, including minimum number of disks, capacity utilization, and safety levels.
Detailed instructions for configuring RAID modes are typically found in a separate advanced user guide or through the device's management software. Please consult the ORICO website or support for specific RAID setup procedures.
- RAID 0: Data striping for maximum performance and capacity, no redundancy.
- RAID 1: Data mirroring for redundancy, half capacity, good for critical data.
- RAID 3: Striping with dedicated parity, good for large sequential reads.
- RAID 5: Striping with distributed parity, good balance of performance, capacity, and redundancy.
- RAID 10: Striping and mirroring, high performance and redundancy, requires at least 4 drives.
- JBOD (Just a Bunch Of Disks): Combines disks into a single large volume without striping or mirroring.
- CLONE: Creates an exact copy of one disk onto another.
- Normal: Each disk operates independently.
4.2 Data Transfer
The enclosure utilizes a USB 3.0 interface, allowing for high-speed data transfer rates of up to 230 MB/s, ideal for large files and backups.

Figure 6: Depicts the high-speed data transfer capability of the enclosure, showing data being moved to and from a computer at 230 MB/s.
With a total storage capacity of 88TB, the enclosure can accommodate massive amounts of data, including engineering projects, high-resolution videos, and extensive media libraries.

Figure 7: Visual representation of the 88TB massive storage capacity, illustrating its suitability for storing large quantities of photos, videos, music, and files.
4.3 System Compatibility
The ORICO 9848RU3 is compatible with common operating systems, including Windows and Mac OS. It can be connected to various devices such as laptops, desktop computers, and other compatible systems.

Figure 8: Shows the broad compatibility of the enclosure with various operating systems (Windows, Mac OS, Linux, Android) and devices (laptops, desktops, iPads, phones, projectors, NAS, monitoring systems), as well as different types of 3.5" hard drives.
5. Maintenance
To ensure the longevity and optimal performance of your ORICO RAID enclosure, follow these maintenance tips:
- Keep the device clean by wiping it with a soft, dry cloth. Avoid using liquid cleaners.
- Ensure the ventilation slots are clear of dust and obstructions to maintain efficient heat dissipation. The enclosure features front and rear ventilation slots and an 80mm silent cooling fan.
- Store the enclosure in a cool, dry place away from direct sunlight and heat sources.
- Regularly back up your data, especially before making any changes to RAID configurations.
6. Troubleshooting
If you encounter issues with your ORICO RAID enclosure, refer to the following common problems and solutions:
- Device not recognized by computer:
- Ensure the USB cable is securely connected to both the enclosure and the computer.
- Try a different USB port on your computer.
- Verify the enclosure is powered on.
- Check if the hard drives are properly installed in their bays.
- Restart your computer.
- Slow data transfer speed:
- Ensure you are connected to a USB 3.0 port on your computer.
- Check the health of your hard drives.
- Verify that the enclosure's cooling system is functioning correctly to prevent thermal throttling.
- Hard drive not detected in a specific bay:
- Remove and reinsert the hard drive.
- Try the hard drive in a different bay to rule out a faulty bay.
- Test the hard drive in another device if possible.
- RAID configuration issues:
- Refer to the detailed RAID setup guide provided by ORICO or contact their support.
- Ensure all drives are of the same type and capacity for optimal RAID performance.
7. Specifications
| Feature | Detail |
|---|---|
| Brand | ORICO |
| Model Number | 4 Bay, RAID (9848RU3) |
| Hard Drive Form Factor | 3.5 Inches SATA HDD |
| Maximum Single Disk Capacity | Up to 22 TB |
| Total Storage Capacity | Up to 88 TB (with four 22TB drives) |
| Data Transfer Rate | Up to 230 MB/s (USB 3.0) |
| Hardware Interface | USB 3.0 Type-B, SATA 3.0 Gb/s |
| Supported RAID Modes | RAID 0, 1, 3, 5, 10, JBOD, CLONE, Normal |
| Power Supply | Built-in 150W |
| Material | Aluminum Alloy, ABS |
| Color | Grey |
| Dimensions (L x W x H) | 25.8 cm x 14.6 cm x 16.1 cm |
| Compatible Devices | Computer, Laptop |
| Operating Systems | Windows, Mac OS (and others like Linux, Android) |
| Cooling System | Front/Rear Ventilation Slots, 80mm Silent Cooling Fan |
8. Warranty and Support
ORICO provides reliable products and customer support. For warranty information, technical assistance, or further inquiries, please contact the ORICO Official Store or visit the official ORICO website. Keep your purchase receipt for warranty claims.
For the latest drivers, firmware updates, and detailed product information, please visit: www.oricotech.com


