
1. Product Overview
The LILYGO T4-S3 is a compact and powerful development board featuring an ESP32-S3R8 dual-core LX7 microprocessor, a 2.41-inch AMOLED touch display, and integrated Wi-Fi and Bluetooth 5 (LE) connectivity. Designed for various embedded applications, it supports development environments such as Arduino, PlatformIO-IDE, and Micropython. This manual provides essential information for setting up, operating, and maintaining your T4-S3 development board.

Figure 1.1: Front and back view of the LILYGO T4-S3 development board with its black shell.

Figure 1.2: Overview of the LILYGO T4-S3 key features and display specifications.
2. Package Contents
Verify that all items are present in your package:
- 1 x LILYGO T4-S3-2.41 Development Board (with black shell)
- 1 x Power cable [JST 2pin 1.25]
- 1 x Female Pin [double row]
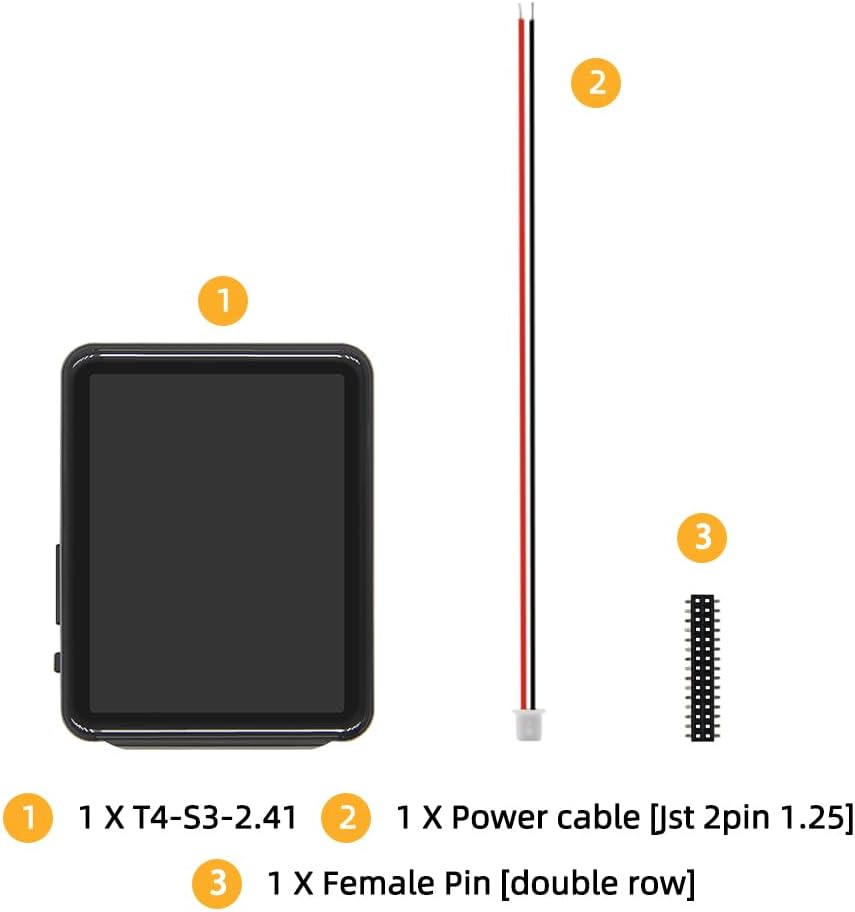
Figure 2.1: Diagram illustrating the components included in the LILYGO T4-S3 package.
3. Setup
3.1. Initial Inspection
Before connecting the board, visually inspect it for any signs of damage or missing components. Ensure the black shell is securely attached.
3.2. Power Connection
The LILYGO T4-S3 can be powered via the USB Type-C port or through the JST 2pin 1.25 connector for battery power. When using battery power, ensure the battery switch is in the ON position.
- USB Power: Connect a USB Type-C cable to the board's USB port and to a computer or a 5V power adapter.
- Battery Power: Connect a compatible battery (not included) to the JST 2pin 1.25 connector using the provided power cable. Ensure correct polarity.

Figure 3.1: Detailed pinmap and component layout of the LILYGO T4-S3, highlighting power input options.
3.3. Development Environment Setup
To program the LILYGO T4-S3, you will need to set up a development environment. The board supports Arduino IDE, PlatformIO-IDE, and Micropython.
- Arduino IDE: Install the ESP32 board package in your Arduino IDE. Refer to the official ESP32 documentation for detailed instructions.
- PlatformIO-IDE: Install PlatformIO extension in VS Code and configure it for ESP32-S3 development.
- Micropython: Flash the Micropython firmware to the board using esptool.py.
For detailed programming guides and examples, visit the official LILYGO GitHub repository: github.com/Xinyuan-LilyGO/LilyGo-AMOLED-Series.
4. Operating Instructions
4.1. First Boot
Once powered, the board will typically boot into its pre-loaded firmware or a default example. The 2.41-inch AMOLED display will activate, showing information based on the loaded program.

Figure 4.1: The LILYGO T4-S3 display showing an active interface.
4.2. Using the Touch Display
The 2.41-inch AMOLED display is a touch-sensitive screen. Interactions depend on the application running on the board. Common touch gestures include taps, swipes, and presses.
4.3. Buttons and Connectivity
- Boot Button: Used for entering bootloader mode for flashing new firmware.
- Reset Button: Resets the ESP32-S3 microprocessor, restarting the current program.
- MicroSD Card Slot: Insert a microSD card for data storage or loading applications.
- Qwiic/JST-SH 1.0mm Connectors: For connecting I2C peripherals.
- JST-GH 1.25mm Connector: For additional peripheral connections.
- GPIO Pins: Utilize the exposed GPIO pins for custom circuit connections and sensor integration. Refer to the pinmap for specific pin functions.
5. Maintenance
5.1. Cleaning
Gently wipe the display and the board's exterior with a soft, dry, lint-free cloth. Avoid using abrasive cleaners or solvents that could damage the screen or components.
5.2. Storage
Store the LILYGO T4-S3 in a cool, dry environment, away from direct sunlight and extreme temperatures. If storing for extended periods, disconnect any power sources and remove the microSD card.
5.3. Firmware Updates
Periodically check the official LILYGO GitHub repository for firmware updates. Keeping the firmware updated ensures optimal performance and access to new features or bug fixes.
6. Troubleshooting
- Board not powering on:
- Ensure the USB Type-C cable is securely connected and the power source is active.
- If using battery, check battery charge and ensure the battery switch is in the ON position.
- Display not showing anything:
- Verify the board is powered.
- Try pressing the Reset button.
- Ensure your uploaded code initializes the display correctly.
- Cannot upload code:
- Check USB cable connection and ensure correct drivers are installed on your computer.
- Verify the correct COM port is selected in your IDE.
- Ensure the board is in bootloader mode if required by your flashing method (usually by holding the Boot button while pressing and releasing Reset).
- Wi-Fi/Bluetooth connectivity issues:
- Check your code for correct Wi-Fi/Bluetooth initialization and credentials.
- Ensure there are no strong interference sources nearby.
For further assistance, refer to the LILYGO GitHub repository or contact LILYGO product support.
7. Specifications
| Feature | Detail |
|---|---|
| MCU | ESP32-S3R8 Dual-core LX7 microprocessor |
| Wireless Connectivity | 2.4 GHz Wi-Fi & Bluetooth 5 (LE) |
| Flash Memory | 16MB |
| PSRAM | 8MB |
| Display Type | 2.41-inch SPI RGB AMOLED Touch Display |
| Display Resolution | 450(W) x RGB 600(H) |
| Display Interface | QSPI |
| Active Area | 36.2 x 48.96 mm |
| Brightness | 800 cd/m² |
| Development Platforms | Arduino, PlatformIO-IDE, Micropython |
| Onboard Functions | Boot Button, Reset Button, Micro SD Card Slot, USB Type-C, JST-GH 1.25mm, Qwiic JST-SH 1.0mm |
| Dimensions (Board with Shell) | L: 59mm, W: 46mm, H: 14mm |

Figure 7.1: Physical dimensions of the LILYGO T4-S3 development board with its black shell.
8. Warranty and Support
LILYGO products typically come with a manufacturer's warranty. For specific warranty terms and conditions, please refer to the documentation provided with your purchase or visit the official LILYGO website.
For technical support, product inquiries, or assistance with development, please utilize the following resources:
- Official GitHub Repository: github.com/Xinyuan-LilyGO/LilyGo-AMOLED-Series (for code examples, documentation, and community support)
- Product Service: If you have any questions or suggestions about the product, please feel free to contact LILYGO customer service.