1. Introduction
This manual provides comprehensive instructions for the safe and effective operation of your SYMA X990 Remote Control Helicopter. Please read this manual thoroughly before operating the aircraft to ensure proper setup, flight, and maintenance. Retain this manual for future reference.

Image: The SYMA X990 Remote Control Helicopter, showcasing its hybrid drone-helicopter design in blue.
2. Safety Precautions
Adherence to these safety guidelines is crucial for preventing accidents and ensuring a safe operating environment.
- Keep all small parts of the aircraft out of reach of children to prevent accidents.
- The aircraft is powerful; gently push up the left joystick on the remote control during the first flight to avoid rapid ascent and collisions.
- After the flight, turn off the remote control first, then approach the aircraft to turn off its power. Do not place the battery in high-temperature or heated areas (such as fire or near heating devices).
- Maintain a distance of 2-3 meters between the aircraft during flight and users or other people to avoid collisions during takeoff and landing.
- Children operating the aircraft should be guided by an adult, ensuring the aircraft remains within the operator's (or supervisor's) line of sight for easy control.
- Non-rechargeable batteries should not be charged, and attention should be paid to the polarity when installing or replacing batteries. Do not mix new and old or different types of batteries.
- Power terminals must not be short-circuited.
- If the battery is not used for more than 10 days, store it at 40%-50% capacity (i.e., fly to half of the total flight time after fully charging) to extend the battery's lifespan.
- Maintain a safe distance from rapidly rotating propellers to avoid the risk of injury.
- To meet the electromagnetic environment requirements of aviation radio stations, the use of all types of model remote controllers is prohibited within a radius of 5000m centered on the airport runway.
- During the period and in areas where relevant authorities issue radio control orders, model remote control use should be stopped as required.
- Only use recommended transformers for the model; transformers are not models. Disconnect the model from the transformer or charger before cleaning with a liquid. Regularly check the transformer's wires, plugs, casing, and other parts for damage. If damage is found, stop using it until it is repaired.
- Turn off the remote control and aircraft power when not in use, and remove the batteries from the remote control.
- Important information is included in the packaging or manual and should be retained.
- Avoid direct exposure to laser radiation beams.
3. Package Contents
Verify that all items are present in the package:
- Helicopter (with included battery) x 1
- Remote control x 1
- Charging cable x 1
- Screwdriver x 1
- User manual x 1
- Packing box x 1
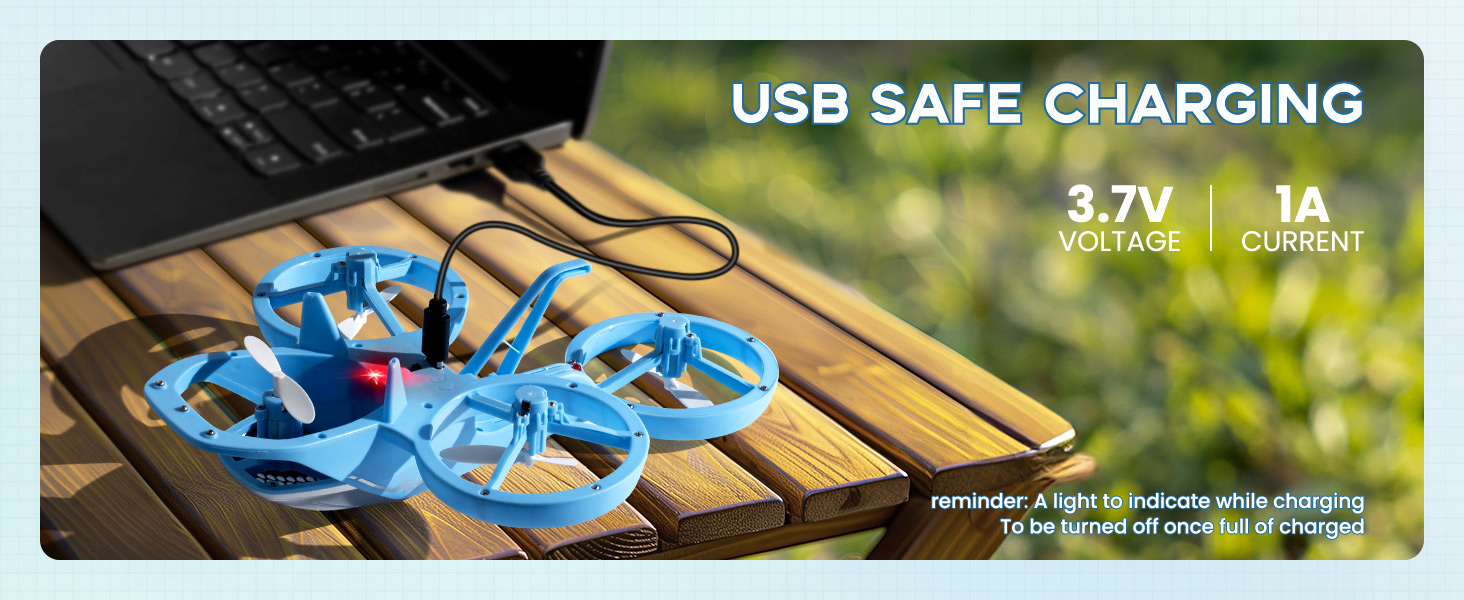
Image: The SYMA X990 package contents, illustrating the helicopter, remote control, and accessories.
4. Setup
4.1. Charging the Aircraft Battery
Ensure the aircraft battery is fully charged before first use. Connect the charging cable to the aircraft and a suitable USB power source. The red indicator light on the charging cable will turn on during charging and turn off when fully charged.
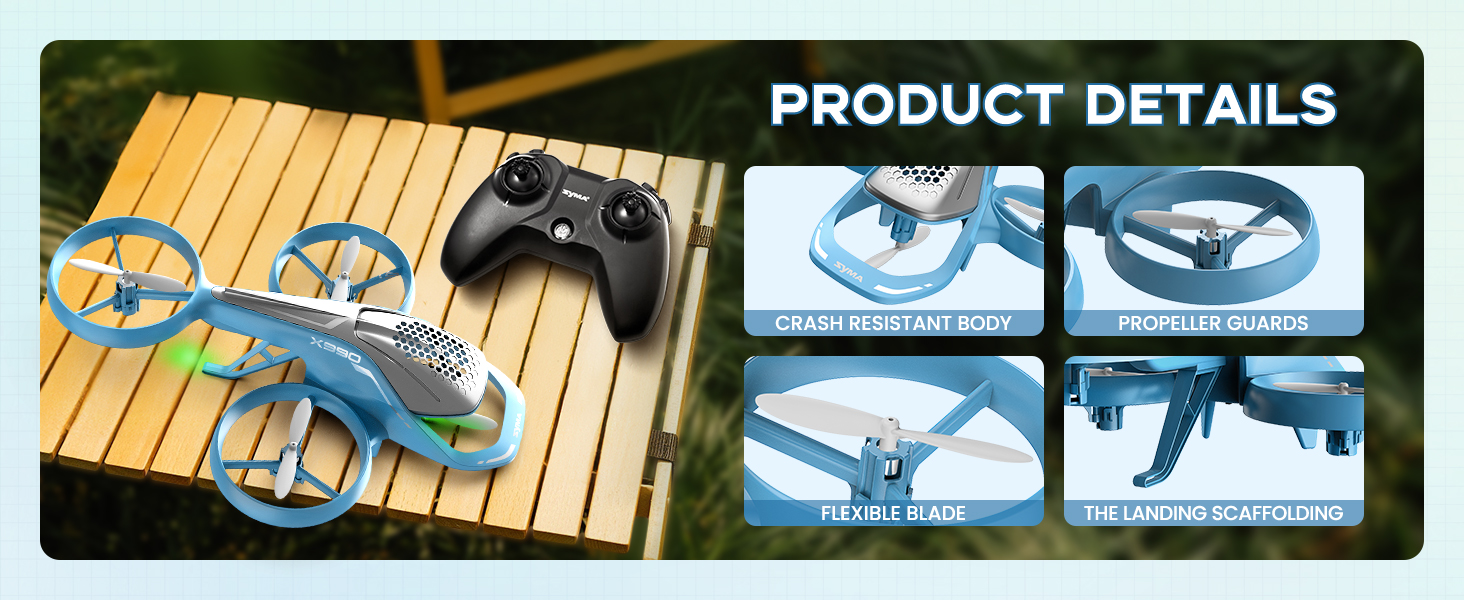
Image: The SYMA X990 helicopter being charged via USB, showing the charging cable and power specifications.
4.2. Remote Controller Battery Installation
Open the battery cover on the back of the remote controller using the provided screwdriver. Insert four AA alkaline batteries, observing the correct polarity markings. Close the battery cover securely.
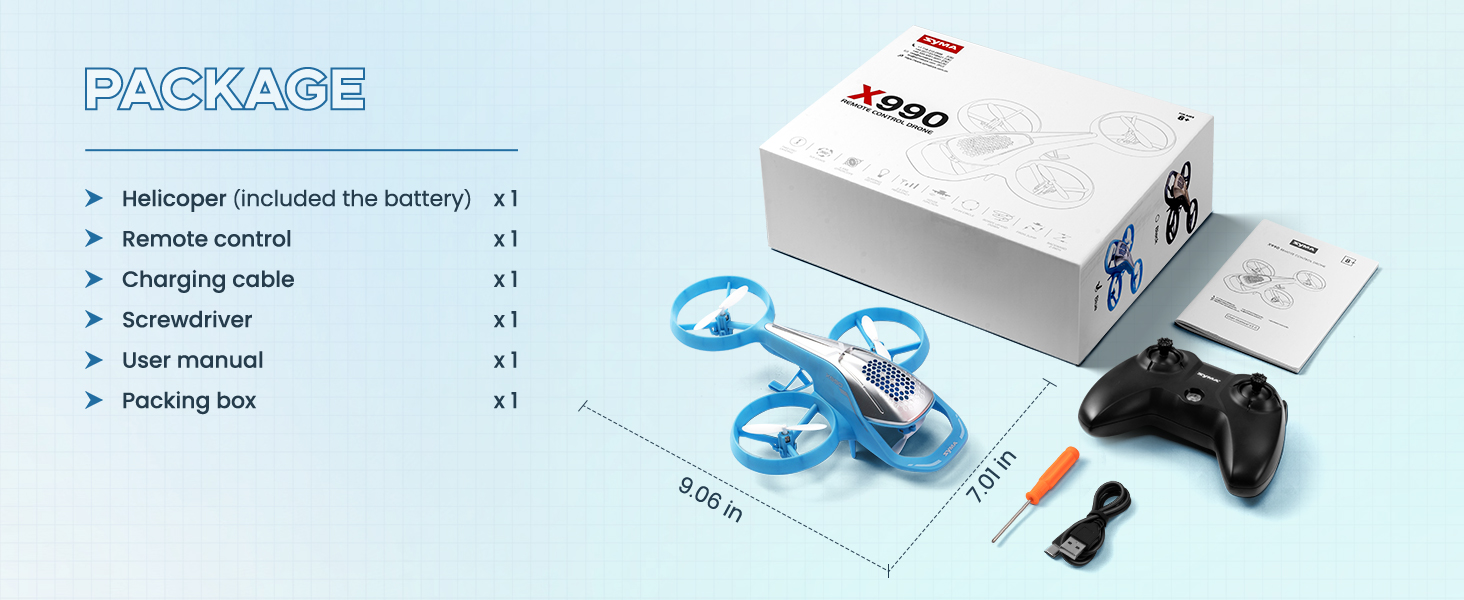
Image: The remote control for the SYMA X990, highlighting its various control functions.
4.3. Pairing and Calibration
- Push the aircraft's power switch to the ON position. The body indicator light will flash quickly, then slowly.
- Turn on the remote controller's power switch.
- Place the aircraft on a flat surface.
- Push both the left and right joysticks to the bottom right corner simultaneously for about 3 seconds. The indicator light on the aircraft will flash quickly and then turn solid, indicating successful horizontal calibration.
- Push the throttle stick (left joystick) all the way up to the maximum, then push it all the way down. The aircraft's indicator light will stop flashing and remain solid, indicating a successful pairing.
For a visual guide on setup, please refer to the official setup video:
Video: SYMA X990 RC Helicopter Set-up Instructions. This video demonstrates the pre-flight preparation, remote controller flight controls, stunt flight operation, speed mode switch, aircraft trim adjustment, and shutting down the aircraft.
5. Operating Instructions
5.1. Basic Flight Controls
- Ascend: Push the left joystick up.
- Descend: Push the left joystick down.
- Rotate Left: Push the left joystick to the left.
- Rotate Right: Push the left joystick to the right.
- Move Forward: Push the right joystick up.
- Move Backward: Push the right joystick down.
- Fly Left: Push the right joystick to the left.
- Fly Right: Push the right joystick to the right.
5.2. Speed Modes
The SYMA X990 features switchable high and low speed settings. Press the right joystick vertically downward to switch between fast and slow speed modes. The remote controller emits one "beep" for slow mode and two "beeps" for fast mode. It is recommended to use slow mode indoors and fast mode outdoors.
5.3. Stunt Flight Operations
The SYMA X990 RC Helicopter is equipped with multiple stunt modes for dynamic flight.
- 360° Flips: Press and hold the roll button on the remote controller, then push the right joystick forward, backward, left, or right. The aircraft will roll in the corresponding direction.
- Rotating Ascent: Press and hold the rotate button on the remote control while pushing the right joystick up or down. The aircraft will rotate left or right while ascending and then descend after reaching a certain height.
- Circle Flight: Press and hold the circle button on the remote controller, then push the right joystick left or right. The aircraft will fly in a circle in the corresponding direction.
- Forward Frog Leap: Press and hold the circle button on the remote controller, then push the right joystick upward. The aircraft will move forward and perform six upward and downward jumps during flight.
- "Z" Shape Reverse: Press and hold the circle button on the remote controller, then push the right joystick downward. The aircraft will fly backward while moving left and right in a "Z" pattern for six steps.

Image: Visual representation of the six major flying stunts achievable with the SYMA X990.
5.4. Altitude Hold
The Altitude Hold function automatically maintains the helicopter's height, making it easier to control and providing a more stable flight experience, especially for beginners.
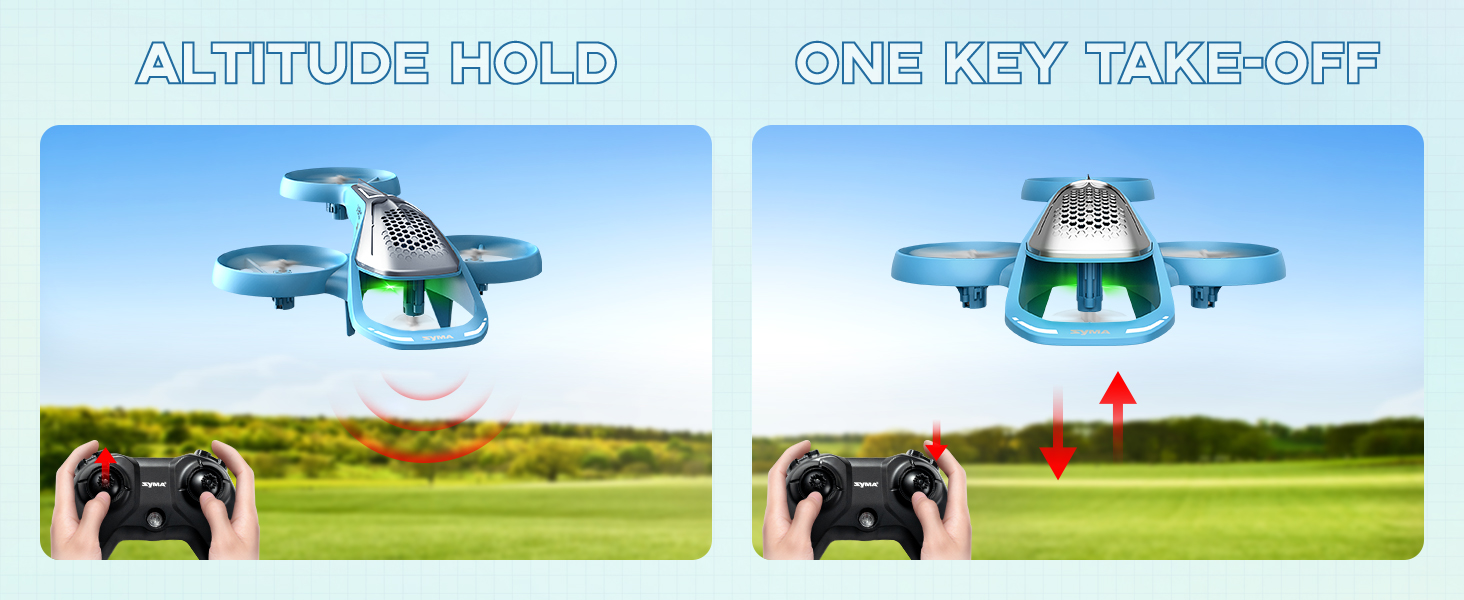
Image: Demonstrating the Altitude Hold and One Key Take-Off features for simplified flight.
6. Aircraft Trim Adjustment
If the aircraft drifts automatically while hovering, use the trim controls to stabilize its flight.
- Forward/Backward Trim: If the aircraft drifts forward or backward, press down on the left joystick while pushing the right joystick forward or backward to adjust. Release the left joystick once the aircraft stabilizes.
- Left/Right Trim: If the aircraft drifts to the left or right, press down on the left joystick while pushing the right joystick to the left or right to adjust. Release the left joystick once the aircraft stabilizes.
7. Shutting Down the Aircraft
There are several methods to safely shut down the aircraft:
- Method 1: Keep pushing the left joystick to the lowest point until the aircraft slowly descends to the ground and the propellers stop. Then, return the joystick to the center position.
- Method 2: Control the aircraft to fly to a lower altitude, then push both joysticks inward in a "V" shape for about 2 seconds. The aircraft will slowly descend to the ground.
- Method 3: Press the one-key takeoff/landing button on the remote controller, and the aircraft will slowly descend to the ground.
8. Maintenance
Regular maintenance ensures the longevity and optimal performance of your SYMA X990 helicopter.
- Cleaning: Use a soft, dry cloth to clean the aircraft. Avoid using water or chemical cleaners.
- Storage: Store the aircraft and remote control in a cool, dry place away from direct sunlight and extreme temperatures. Remove batteries from the remote control if not in use for extended periods.
- Propeller Check: Periodically inspect propellers for any damage or cracks. Replace damaged propellers immediately to ensure safe flight.
- Battery Care: Do not overcharge or over-discharge the battery. Follow charging instructions carefully.
9. Troubleshooting
Refer to the table below for common issues and their solutions:
| Problem | Possible Cause | Solution |
|---|---|---|
| Aircraft does not respond to remote control. | Not paired correctly; low battery in remote or aircraft. | Re-pair the aircraft and remote control. Charge aircraft battery or replace remote control batteries. |
| Aircraft drifts during flight. | Needs trim adjustment; uneven surface during calibration. | Perform trim adjustment as described in Section 6. Ensure aircraft is on a flat surface for calibration. |
| Propellers do not spin. | Obstruction; damaged motor/propeller; low battery. | Check for obstructions. Inspect propellers for damage. Charge aircraft battery. |
| Short flight time. | Battery not fully charged; old battery. | Ensure battery is fully charged. Consider replacing the battery if it's old. |
10. Specifications
| Feature | Detail |
|---|---|
| Product Dimensions | 9.06 x 7.01 x 2.56 inches |
| Item Weight | 13.4 ounces |
| Item Model Number | EX990-B |
| Batteries | 1 Lithium Ion battery required (included) |
| Manufacturer Recommended Age | 0 - 2 years (Note: Always supervise young children during operation) |
| Manufacturer | Syma |
11. Warranty and Support
For warranty information, technical support, or any inquiries regarding your SYMA X990 Remote Control Helicopter, please contact SYMA customer service. Refer to the product packaging or the official SYMA website for the most up-to-date contact details.
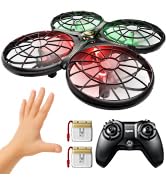
Image: SYMA customer support team ready to assist with product inquiries.


