1. Introduction
Thank you for choosing the Midea MDG09EH80/1 Heat Pump Tumble Dryer. This manual provides essential information for the safe and efficient operation, installation, and maintenance of your appliance. Please read it thoroughly before use and keep it for future reference.
This heat pump tumble dryer is designed for domestic use to dry laundry after it has been washed and spun. It features an 8 kg capacity, 16 drying programs, automatic drying, anti-crease function, and a delayed start option.
2. Safety Information
For your safety and to ensure correct usage, please observe the following precautions:
- Ensure the appliance is properly earthed.
- Do not install the dryer in a damp environment or where it may be exposed to water.
- Keep children and pets away from the appliance during operation.
- Do not dry unwashed items in the tumble dryer.
- Items soiled with oil, acetone, alcohol, petrol, kerosene, spot removers, turpentine, waxes, or wax removers should be washed thoroughly in hot water with an extra amount of detergent before being dried in the tumble dryer.
- Always clean the lint filter after each use.
- Do not block the ventilation openings.
- Unplug the appliance before cleaning or maintenance.
3. Product Overview
Familiarize yourself with the main components of your Midea tumble dryer.

Image 3.1: Front view of the Midea MDG09EH80/1 Heat Pump Tumble Dryer, showing the control panel, drum door, and Midea branding.
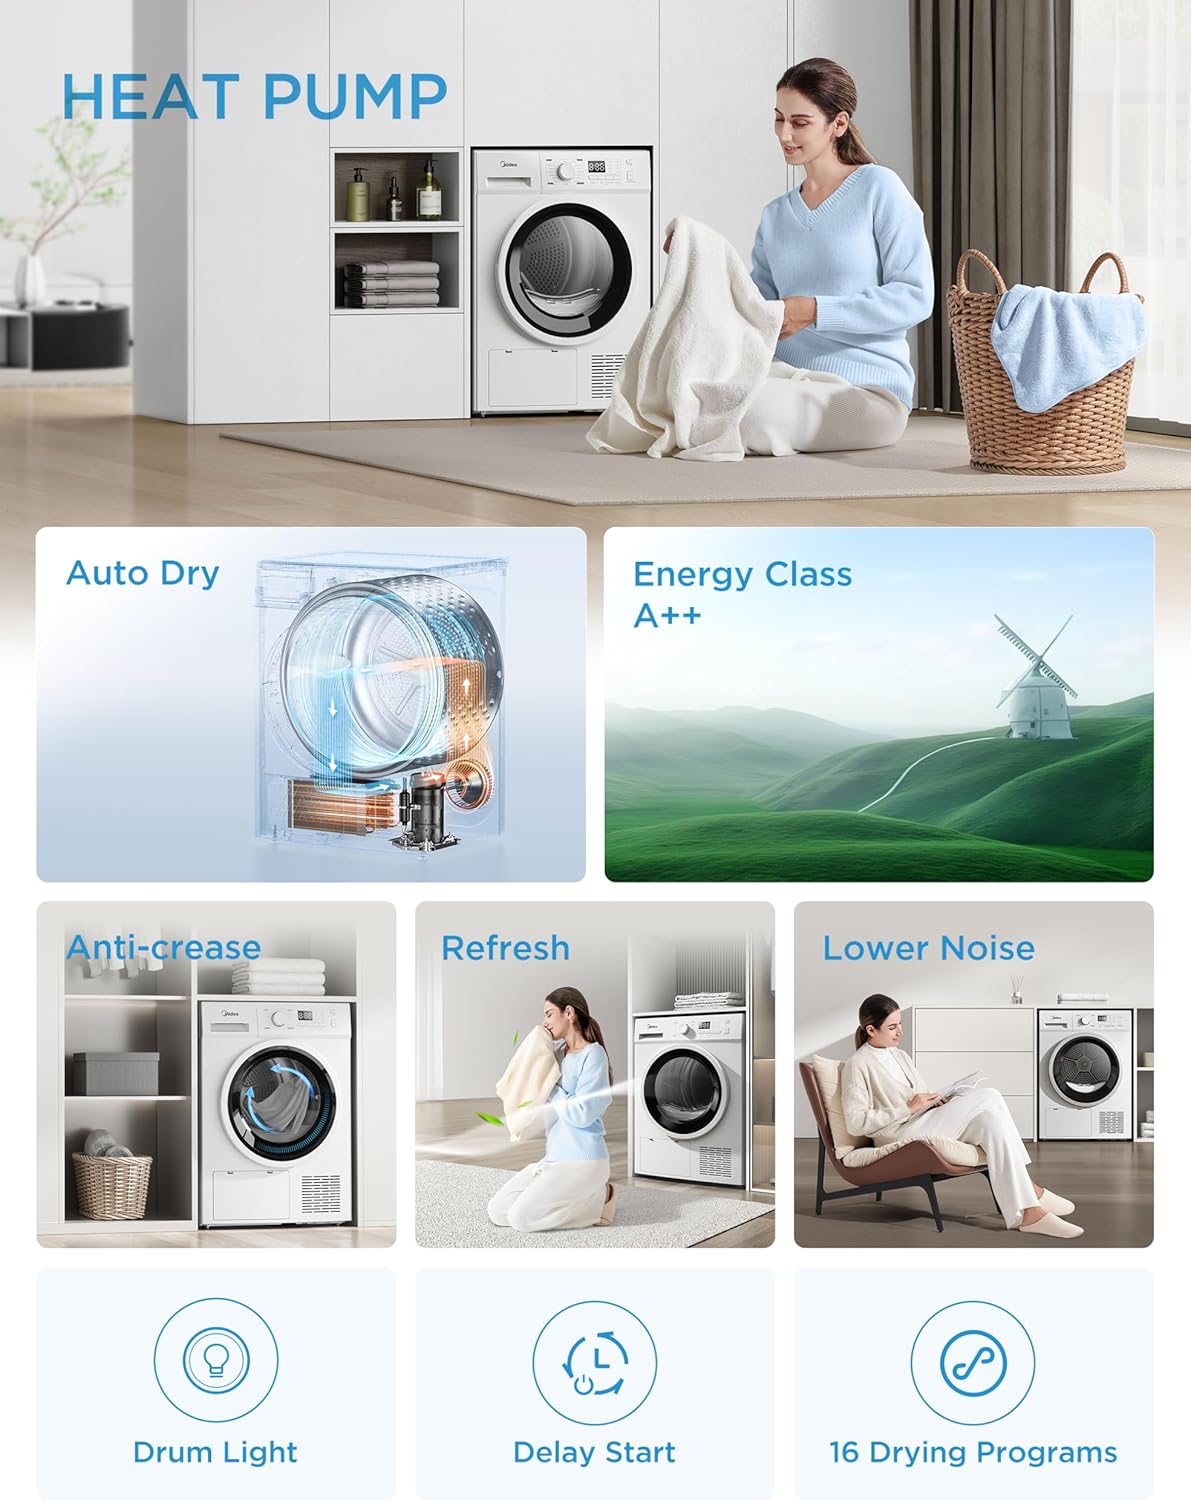
Image 3.2: Close-up of the control panel, featuring the program selection dial, digital display, and touch buttons for various functions like Delay, Time, Anti-Crease, Intensity, and Start/Pause.
Control Panel Features:
- Program Dial: Selects the desired drying program.
- Display: Shows remaining time, error codes, and selected options.
- Delay Button: Sets a delayed start time.
- Time Button: Adjusts drying time for certain programs.
- Anti-Crease Button: Activates or deactivates the anti-crease function.
- Intensity Button: Adjusts drying intensity (e.g., standard, extra dry).
- Start/Pause Button: Starts or pauses the drying cycle.
4. Setup and Installation
Proper installation is crucial for the performance and longevity of your dryer.
4.1 Unpacking
Carefully remove all packaging materials. Check for any damage during transit. Report any damage to your retailer immediately.
4.2 Placement
- Place the dryer on a firm, level floor.
- Ensure adequate ventilation around the appliance. Do not block the air intake at the front or the exhaust at the rear.
- Avoid placing the dryer near heat sources or in direct sunlight.
- The dimensions of the dryer are approximately 59.5 cm (width) x 60 cm (depth) x 84.5 cm (height). Ensure sufficient space for installation and door opening.

Image 4.1: Side view of the Midea MDG09EH80/1 dryer, illustrating its dimensions (845mm height, 600mm depth, 595mm width).
4.3 Leveling
Adjust the feet at the bottom of the dryer to ensure it is perfectly level. A level appliance reduces vibration and noise during operation.
4.4 Electrical Connection
Connect the power cord to a properly earthed electrical outlet. Ensure the voltage and frequency match the specifications on the rating plate of the appliance.
4.5 Drain Hose Installation (Optional)
The dryer collects condensed water in a tank. For continuous drainage, you can connect a drain hose to an external drain. Refer to the detailed instructions in the full user manual for this procedure.
5. Operating Instructions
Follow these steps for effective and safe drying.
5.1 Preparing Laundry
- Sort laundry by fabric type and drying requirements.
- Close zippers, hooks, and fastenings.
- Empty pockets.
- Ensure laundry is thoroughly spun to reduce drying time and energy consumption.
5.2 Loading the Dryer
Open the dryer door and load the laundry into the drum. Do not overload the dryer; ensure there is enough space for clothes to tumble freely. The maximum load capacity is 8 kg.
5.3 Selecting a Program
Turn the program dial to select one of the 16 available drying programs. The display will show the default settings for the chosen program. Examples of programs include:
- Cotton: For cotton items like towels, sheets, and underwear.
- Synthetics: For synthetic fabrics like shirts, blouses, and sportswear.
- Delicate: For delicate items requiring gentle drying.
- Wool: Specific program for wool items (check garment care labels).
- Refresh: To air out clothes and remove odors without heat.
- Jeans: For denim items.
- Bed Linen: For larger items like duvet covers and sheets.
5.4 Adjusting Drying Levels and Options
The dryer features an automatic drying system that detects the drying state of your clothes, preventing over-drying and protecting fabrics.

Image 5.1: Visual representation of the three drying levels: Low (lightly damp for easy ironing), Medium (fully dry for immediate wear), and High (moisture-proof storage).
You can select from 3 drying levels:
- Standard Dry: For general drying, suitable for most items.
- Iron Dry: Leaves clothes slightly damp for easier ironing.
- Extra Dry: For items requiring complete dryness, such as towels or thick fabrics.
Additional functions can be selected using the touch buttons:
- Anti-Crease: This function periodically rotates the drum after the drying cycle to prevent wrinkles from setting in, especially if you cannot remove clothes immediately.
- Delay Start: Set a time for the drying cycle to begin, up to 24 hours.
- Drum Light: The interior light illuminates when the door is opened, ensuring no items are left behind.

Image 5.2: Depiction of the Smart Continuous Rotation feature, which rotates the drum periodically after drying to prevent wrinkles.

Image 5.3: Visual showing the Refresh function, which uses low-temperature air wash to remove musty odors and refresh fabrics.
5.5 Starting the Cycle
Press the Start/Pause button to begin the drying cycle. The display will show the estimated remaining time.
5.6 End of Cycle
Once the cycle is complete, the dryer will beep, and the display will indicate 'End'. Open the door and remove your laundry. Remember to clean the lint filter and empty the water tank after each use.
6. Maintenance
Regular maintenance ensures optimal performance and extends the lifespan of your dryer.
6.1 Cleaning the Lint Filter
The lint filter is located inside the door opening. It must be cleaned after every drying cycle to maintain drying efficiency and prevent fire hazards.
- Open the dryer door.
- Pull the lint filter upwards to remove it.
- Open the filter and remove all accumulated lint by hand or with a soft brush.
- Rinse the filter under running water if necessary, and ensure it is completely dry before reinserting.
- Place the clean filter back into its housing until it clicks into place.
6.2 Emptying the Water Tank
The condensed water is collected in a tank, usually located at the top left of the control panel. This tank must be emptied after each drying cycle.
- Gently pull out the water tank.
- Pour the collected water into a sink.
- Push the water tank back into its position until it is securely seated.
6.3 Cleaning the Heat Exchanger/Condenser
The heat exchanger (condenser) should be cleaned periodically (e.g., every few months or as indicated by the appliance) to ensure efficient operation. Refer to the full manual for detailed instructions on accessing and cleaning this component, typically located behind a lower access panel.
6.4 General Cleaning
- Wipe the exterior of the dryer with a soft, damp cloth. Do not use abrasive cleaners or solvents.
- Clean the interior of the drum with a damp cloth if necessary.
7. Troubleshooting
Before contacting customer service, please check the following common issues and solutions:
| Problem | Possible Cause | Solution |
|---|---|---|
| Dryer does not start | No power supply; Door not closed properly; Start/Pause button not pressed. | Check power plug and fuse; Close the door firmly; Press Start/Pause. |
| Clothes are not dry | Lint filter blocked; Water tank full; Incorrect program selected; Overloaded dryer. | Clean lint filter; Empty water tank; Select appropriate program; Reduce load size. |
| Excessive noise/vibration | Dryer not level; Foreign objects in drum. | Adjust leveling feet; Check drum for loose items. |
| Water leaking | Water tank not properly inserted; Drain hose (if connected) loose or blocked. | Reinsert water tank correctly; Check drain hose connection and clear any blockages. |
If the problem persists after checking these points, please refer to the complete troubleshooting guide in the full user manual or contact Midea customer support.
8. Specifications
Technical data for the Midea MDG09EH80/1 Heat Pump Tumble Dryer.

Image 8.1: Energy label for the Midea MDG09EH80/1, showing A++ energy efficiency, 235 kWh/annum consumption, 8.0 kg capacity, and 65 dB noise level.
| Feature | Specification |
|---|---|
| Brand | Midea |
| Model Number | MDG09EH80/1 |
| Type | Heat Pump Tumble Dryer |
| Loading Type | Front Load |
| Capacity | 8 Kilograms |
| Energy Efficiency Class | A++ |
| Annual Energy Consumption | 235 Kilowatt-hours |
| Noise Level | 65 Decibels |
| Dimensions (W x D x H) | 59.5 x 60 x 84.5 cm |
| Weight | 41 Kilograms |
| Material | Stainless Steel, ABS Plastic |
| Voltage | 240 Volts |
| Number of Programs | 16 |
9. Warranty and Support
Your Midea MDG09EH80/1 Heat Pump Tumble Dryer comes with a standard manufacturer's warranty. Please refer to the warranty card included with your purchase for specific terms and conditions, including the duration and coverage.
For technical assistance, spare parts, or warranty claims, please contact Midea customer support. You can find contact information on the Midea official website or in the documentation provided with your appliance.
Please have your model number (MDG09EH80/1) and purchase date ready when contacting support.


