
Introduction
Thank you for choosing the ChooChoo Farmhouse XXL End Table with Charging Station. This versatile piece of furniture is designed to enhance your living space with its rustic farmhouse style, convenient charging capabilities, and multi-functional storage. This manual provides essential information for safe assembly, operation, and maintenance of your new end table.

Image: The ChooChoo Farmhouse XXL End Table positioned next to a sofa, showcasing its design and utility in a home environment.
Safety Information
- Assembly: Ensure all parts are correctly assembled and tightened according to the instructions. Improper assembly can lead to instability and potential injury.
- Weight Capacity: Do not overload the table, shelves, or drawer. Refer to the specifications for maximum weight limits.
- Electrical Safety: The integrated charging station contains electrical components. Do not expose it to water or excessive moisture. Ensure the power cord is not pinched or damaged. Unplug the unit before cleaning or if not in use for extended periods.
- Stability: Place the table on a flat, stable surface. Avoid climbing or standing on the table.
- Children and Pets: Keep small parts and packaging materials away from children and pets during assembly.
Package Contents
Before beginning assembly, please verify that all components listed below are present and undamaged. If any parts are missing or damaged, please contact customer support.
- All wooden panels (numbered)
- Hardware kit (screws, dowels, cam locks, etc., labeled)
- Charging station unit
- Assembly Guide
Setup and Assembly Instructions
The ChooChoo Farmhouse XXL End Table is designed for easy assembly. Each piece of wood and part is numbered, and all accessories are labeled to simplify the process. A Phillips head screwdriver is typically required (not included).
- Unpack: Carefully remove all components from the packaging. Lay them out on a clean, soft surface to prevent scratches.
- Identify Parts: Match each wooden panel and hardware piece to the corresponding numbers and labels in the included Assembly Guide.
- Follow Guide: Refer to the detailed, step-by-step illustrations in the Assembly Guide. Ensure all connections are secure but do not overtighten screws to avoid damaging the engineered wood.
- Install Charging Station: Integrate the charging station unit as instructed in the guide, ensuring proper cable routing through the designated cutouts.
- Final Check: Once assembled, gently shake the table to ensure stability. Tighten any loose connections if necessary.
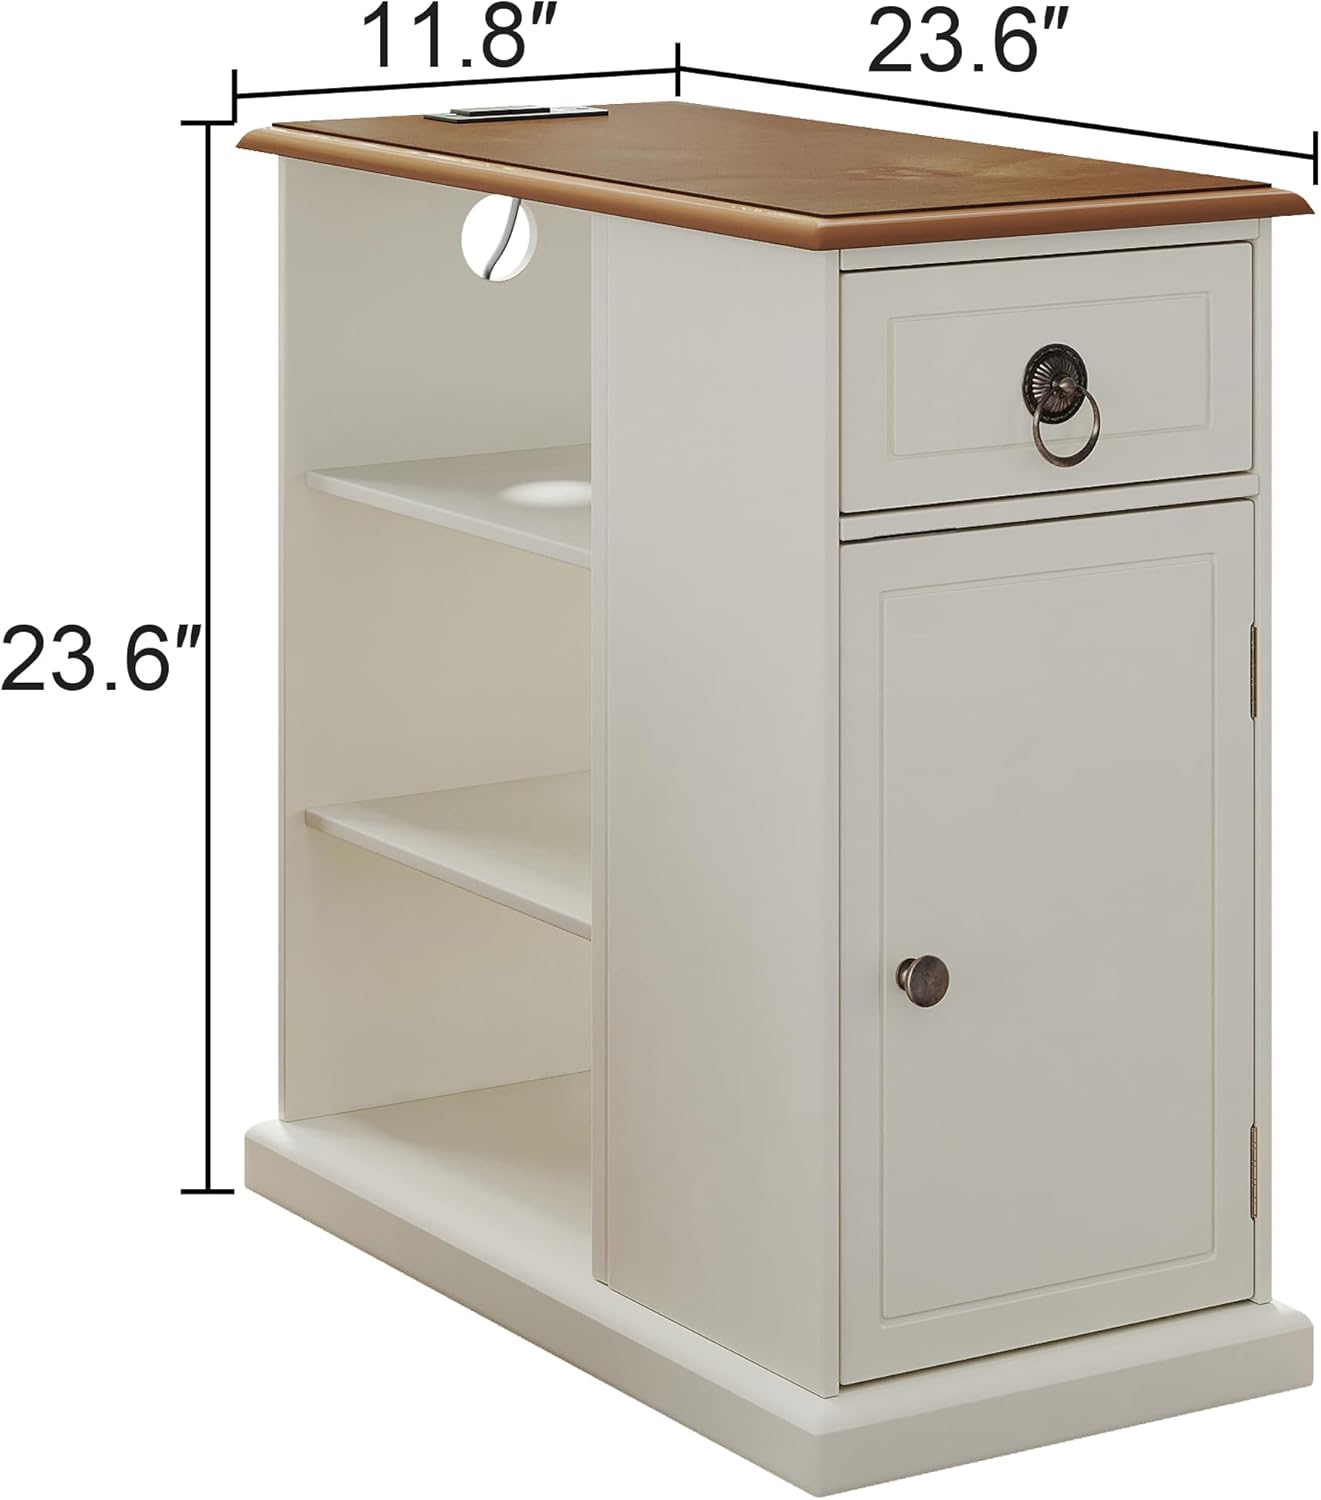
Image: Dimensional diagram of the end table, indicating its height, length, and width for reference during setup.
Operating Instructions
Charging Station
The integrated charging station provides convenient power access for your devices.
- Power Connection: Plug the charging station's power cord into a standard wall outlet.
- AC Outlets: Use the two standard AC sockets for devices requiring wall power.
- USB Ports: Use the two USB ports to charge compatible USB-powered devices such as smartphones, tablets, or e-readers.
- Cable Management: Utilize the thoughtful design of the back panel to organize wires, keeping the desktop clean and tidy.
Adjustable Shelf
The cabinet door conceals an adjustable shelf, allowing for flexible storage options.
- Access: Open the magnetic cabinet door to access the interior.
- Adjustment: The shelf rests on pins that can be moved to different pre-drilled holes within the cabinet. To adjust, remove the shelf, reposition the pins to your desired height, and then place the shelf back on the pins.
- Storage: Accommodate items of various heights, from books to decorative pieces.

Image: Visual guide demonstrating the adjustable shelf feature within the table's cabinet.
Drawer
The top drawer provides enclosed storage for smaller items.
- Usage: Pull the vintage handle to open the drawer. It is ideal for storing remote controls, pens, notebooks, or other small personal items to keep the desktop clutter-free.

Image: Detail of the vintage handle and the sturdy thick feet of the end table.
Maintenance
Proper care will ensure the longevity and appearance of your end table.
- Cleaning: Wipe surfaces with a soft, slightly damp cloth. Avoid using harsh chemicals, abrasive cleaners, or polishes that may damage the finish.
- Spills: Immediately wipe up any spills to prevent staining or damage to the engineered wood veneer. Use coasters for drinks to protect the top surface from water marks.
- Heat: Avoid placing hot items directly on the surface. Use heat-resistant pads if necessary.
- Sunlight: Prolonged exposure to direct sunlight may cause fading or discoloration.
- Hardware: Periodically check and tighten all hardware connections to maintain stability.
Troubleshooting
- Table is Wobbly:
Solution: Ensure all screws and fasteners are securely tightened. Check that the table is placed on an even surface. - Charging Station Not Working:
Solution: Verify that the charging station's power cord is fully plugged into a functional wall outlet. Check if the outlet itself is receiving power. Ensure devices are properly connected to the AC sockets or USB ports. - Drawer Sticks or Does Not Close Properly:
Solution: Check for any obstructions in the drawer slides. Ensure the drawer slides are correctly aligned and installed. - Adjustable Shelf Does Not Stay in Place:
Solution: Confirm that the shelf support pins are fully inserted into the desired holes and that the shelf is resting evenly on all pins.
Specifications
| Feature | Detail |
|---|---|
| Brand | ChooChoo |
| Model Number | ET2301-WH-E-NEW-1 |
| Material Type | Engineered Wood |
| Product Dimensions (L x W x H) | 59.28 x 29.46 x 59.28 cm (23.34 x 11.60 x 23.34 inches) |
| Item Weight | 14.75 kg (32.52 Pounds) |
| Charging Station | 2 Standard AC Sockets, 2 USB Ports |
| Storage Features | Drawer, Cabinet with Adjustable Shelf, Open Shelves |
| Style | Farmhouse |
| Color | Light Brown & White |
Warranty and Support
For warranty information or technical support, please refer to the documentation included with your purchase or contact the manufacturer directly. Keep your purchase receipt for warranty claims.