
1. Introduction
This manual provides essential instructions for the safe and efficient operation, setup, and maintenance of your OlarHike TIC3V311 Portable Tire Inflator. Please read this manual thoroughly before first use and retain it for future reference.
2. Package Contents
Verify that all items listed below are included in your package. If any items are missing or damaged, please contact customer support.
- 1 x OlarHike TIC3V311 Portable Tire Inflator
- 1 x Long Inflation Cable (primarily for cars)
- 1 x DC Power Cord (for wired operation)
- 1 x Type-C Charging Cable
- 1 x Long Nozzle
- 1 x Ball Needle
- 1 x Presta Valve Adapter
- 1 x Storage Bag
- 1 x Spare 12V Outlet Fuse

Image: The OlarHike TIC3V311 portable tire inflator shown with all its included accessories, such as various nozzles, cables, and a storage bag.
3. Product Features
- Fast and Efficient Inflation: Rapid airflow for quick inflation of car, motorcycle, and bicycle tires, as well as sports balls.
- Dual Mode Operation: Can be used wirelessly with the embedded battery or wired via the included 12V outlet power cord.
- High-Capacity Battery: 5400mAh battery capable of inflating multiple car tires on a single charge.
- Precision Digital Display: LED display for clear pressure monitoring and operation.
- Automatic Shut-Off: Prevents over-inflation by stopping automatically when the preset pressure is reached.
- User-Friendly Preset Modes: Four preset modes for different inflation needs (car, bicycle, motorcycle, sports equipment).
- Unit Switching: Easily switch between PSI, BAR, KPA, and kg/cm².
- Pressure Memory Function: Remembers the last set pressure for convenience.
- Portable Design: Compact and wireless for easy transport and storage.
- LED Emergency Light: Provides illumination for use in dark conditions.
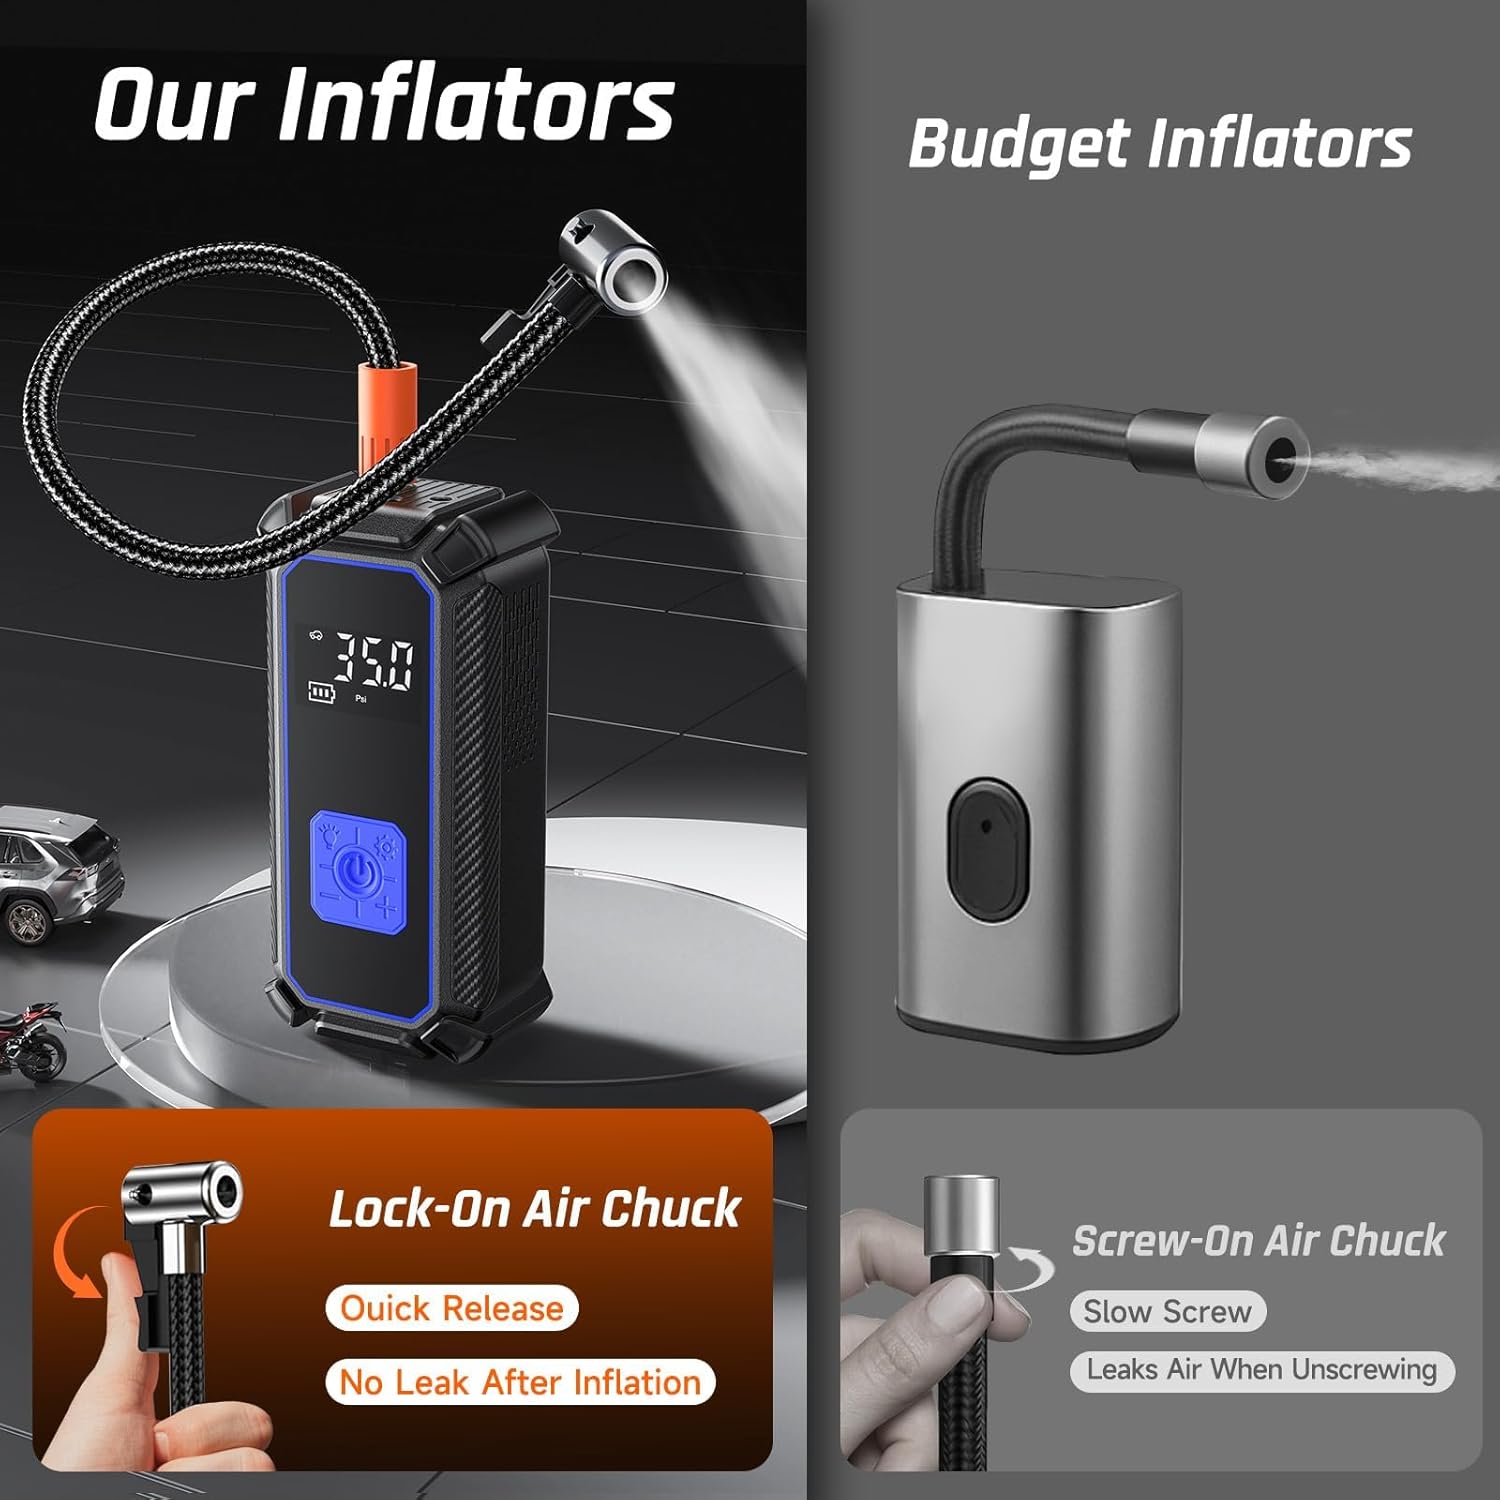
Image: The inflator's digital display showing a set pressure of 35.0 PSI, highlighting its precision and automatic shut-off capability.
4. Setup
4.1 Charging the Device
- Connect the Type-C charging cable to the charging port on the inflator.
- Plug the other end of the cable into a suitable USB power adapter (not included) or a USB port.
- The battery indicator on the display will show charging status. Ensure the device is fully charged before first use for optimal performance.
4.2 Attaching the Air Hose
- Screw the air hose securely onto the air outlet port of the inflator.
- Select the appropriate nozzle adapter for your item (e.g., Presta valve adapter for bicycles, ball needle for sports balls).
- Attach the selected nozzle adapter to the end of the air hose.
5. Operating Instructions
5.1 Powering On and Off
- Press and hold the power button to turn the inflator on.
- Press and hold the power button again to turn the inflator off.
5.2 Selecting Mode and Pressure Units
- After powering on, press the 'M' button to cycle through the four preset modes: Car, Motorcycle, Bicycle, and Ball.
- Each mode has a default pressure setting, which can be adjusted.
- To change pressure units (PSI, BAR, KPA, kg/cm²), press the 'U' button.
5.3 Setting Desired Pressure
- Use the '+' and '-' buttons to increase or decrease the target pressure value.
- The inflator features a pressure memory function, retaining your last setting for convenience.
5.4 Inflation Process
- Connect the air hose with the appropriate nozzle to the valve stem of the item you wish to inflate. Ensure a secure connection to prevent air leakage.
- Once connected, the digital display will show the current pressure of the item.
- Set your desired target pressure using the '+' and '-' buttons.
- Press the start button (usually the power button or a dedicated inflate button) to begin inflation.
- The inflator will automatically stop once the preset pressure is reached.
- Carefully disconnect the air hose from the valve stem.

Image: A visual guide demonstrating the four simple steps for operating the inflator: Power on, set mode and pressure, connect valve and start, and the pressure memory function for next use.
5.5 Using the LED Light
- Press the light button (often integrated with the mode button or a separate icon) to turn on the LED light for illumination in dark environments.
- Press again to cycle through light modes (e.g., steady, flashing, SOS) or to turn off.
5.6 Wired Operation
- If the battery is depleted or for extended use, connect the DC power cord to the inflator and plug the other end into your vehicle's 12V outlet.
- The inflator will operate directly from the vehicle's power supply.

Image: The portable tire inflator connected to a car tire and powered via the vehicle's 12V outlet, demonstrating its wired operation capability.
6. Maintenance
6.1 Cleaning
- Wipe the exterior of the inflator with a soft, damp cloth. Do not use harsh chemicals or abrasive cleaners.
- Ensure the device is completely dry before storing or recharging.
6.2 Storage
- Store the inflator and its accessories in the provided storage bag in a cool, dry place, away from direct sunlight and extreme temperatures.
- For prolonged storage, charge the battery every 3-6 months to maintain its lifespan.
6.3 Fuse Replacement
- If the 12V DC power cord stops working, the fuse may need replacement. Refer to the spare 12V outlet fuse included in the package.
- Consult a qualified technician if you are unsure how to replace the fuse.
7. Troubleshooting
If you encounter issues with your OlarHike TIC3V311, please refer to the following common problems and solutions:
| Problem | Possible Cause | Solution |
|---|---|---|
| Inflator does not turn on. | Low battery or no power. | Charge the battery using the Type-C cable or connect via the 12V DC power cord. |
| No air is being pumped. | Hose not securely connected, wrong mode selected, or target pressure not set. | Ensure the air hose is tightly screwed on. Verify the correct mode is selected and a target pressure is set above the current pressure. |
| Inflator stops prematurely. | Target pressure reached, or device overheating. | Check the set pressure. If the device is hot, allow it to cool down before resuming operation. |
| Inaccurate pressure reading. | Loose connection or sensor issue. | Ensure the hose is securely connected to the valve stem. If issues persist, compare with a known accurate pressure gauge. |
| Device gets hot during use. | Normal operation during extended use. | This is normal. Allow the device to cool down between prolonged inflation tasks. Avoid touching metal parts immediately after use. |
If the problem persists after attempting these solutions, please contact OlarHike customer support.
8. Specifications
| Feature | Detail |
|---|---|
| Brand | OlarHike |
| Model Name | TIC3V311 |
| Voltage | 12 Volts |
| Power Source | Battery Powered / 12V DC |
| Maximum Operating Pressure | 8.27 Bars (approx. 120 PSI) |
| Air Flow Capacity | 24 Liters Per Minute |
| Noise Level | 80 dB |
| Product Dimensions | 6.5"L x 2.8"W x 2.2"H |
| Item Weight | 1.96 pounds |
| Battery Type | Lithium Ion (3 included) |
| Special Features | Automatic Shut-Off, Digital Display, Portable, Quick Inflation, LED Light |
| UPC | 810080922693 |
9. Warranty and Support
For any questions, concerns, or support needs regarding your OlarHike TIC3V311 Portable Tire Inflator, please contact OlarHike customer service. While specific warranty details are not provided in this manual, please retain your proof of purchase for any warranty claims.
Contact Information: Refer to the contact details provided with your product packaging or visit the official OlarHike website for support.


