1. Introduction
This user manual provides comprehensive instructions for the installation, operation, maintenance, and troubleshooting of your HYGIENISK integrated dishwasher. Please read this manual carefully before using the appliance to ensure safe and efficient operation. Keep this manual for future reference.
2. Safety Information
Always adhere to the following safety precautions to prevent injury or damage to the appliance.
- Ensure the dishwasher is properly grounded before use.
- Do not allow children to play with or operate the dishwasher.
- Use only detergents and rinse aids specifically designed for automatic dishwashers.
- Never open the dishwasher door during operation, especially during the hot wash or drying cycle, as hot water or steam may escape.
- Sharp items should be loaded with handles up to reduce the risk of cuts.
- Disconnect the appliance from the power supply before performing any cleaning or maintenance.
- In case of malfunction, do not attempt to repair the appliance yourself. Contact qualified service personnel.
3. Product Overview
The HYGIENISK integrated dishwasher is designed for efficient and thorough cleaning of your dishes. It features multiple wash programs and adjustable racks to accommodate various types of dinnerware.

Figure 3.1: Front view of the HYGIENISK integrated dishwasher with the door slightly ajar, revealing the interior racks.

Figure 3.2: Detailed interior view of the dishwasher, showcasing the upper and lower racks, spray arms, and detergent dispenser.
Key Features:
- Integrated design for seamless kitchen aesthetics.
- Multiple wash programs for various cleaning needs.
- Adjustable racks for flexible loading.
- Efficient water and energy consumption.
4. Setup and Installation
Proper installation is crucial for the performance and longevity of your dishwasher. It is recommended that installation be performed by a qualified technician.
Dimensions and Clearance:
- Width: 59.6 cm
- Depth: 55.0 cm
- Height: 81.8 cm
- Max. installation height: 90.0 cm
- Min. installation height: 82.0 cm
- Cord length: 140.0 cm
- Weight: 38.00 kg
Ensure adequate space and access to water supply, drainage, and electrical outlets.
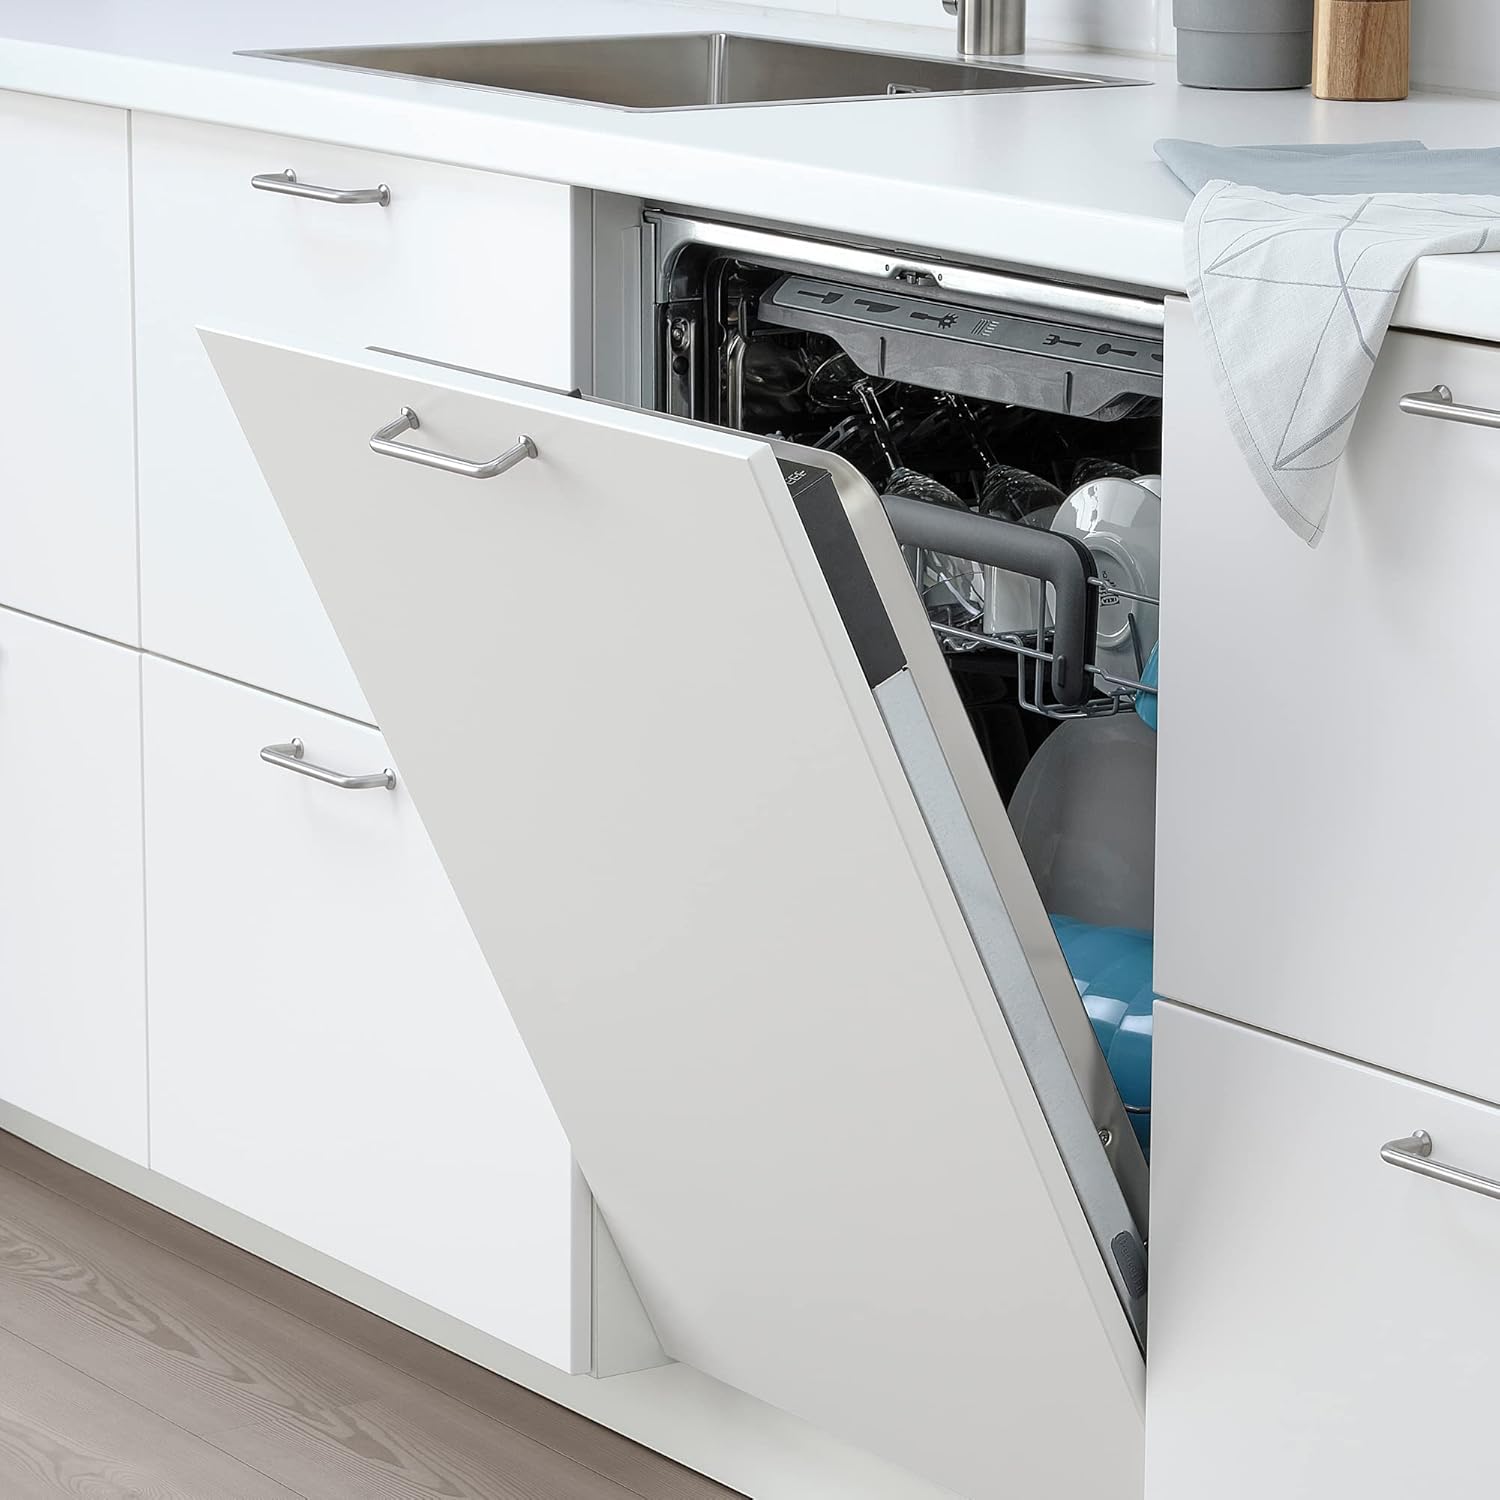
Figure 4.1: The HYGIENISK dishwasher seamlessly integrated into a standard kitchen cabinet, demonstrating its flush fit and design.
Connection Requirements:
- Water Supply: Connect to a cold water supply with appropriate pressure.
- Drainage: Ensure the drain hose is properly connected to a waste pipe or sink trap, preventing kinks.
- Electrical Connection: Connect to a grounded electrical outlet. Refer to local electrical codes.
5. Operating Instructions
Loading the Dishwasher:
Proper loading ensures optimal cleaning results and prevents damage to dishes.
- Scrape off large food particles before loading.
- Place larger items in the lower rack and smaller items, glasses, and cups in the upper rack.
- Ensure items do not block the spray arms.

Figure 5.1: Example of a properly loaded dishwasher, showing plates, bowls, and glasses arranged for effective cleaning.

Figure 5.2: Close-up of the dedicated cutlery tray, designed to hold forks, knives, and spoons securely for thorough washing.

Figure 5.3: Specialized holders for wine glasses, ensuring delicate stemware is held securely during the wash cycle.
Adding Detergent and Rinse Aid:
Use appropriate amounts of dishwasher detergent and rinse aid according to the manufacturer's instructions and water hardness.
Selecting a Wash Program:
The control panel allows you to select various wash programs. Refer to the table below for common programs.

Figure 5.4: The control panel of the dishwasher, featuring program selection buttons, indicators, and a digital display showing "4:00".
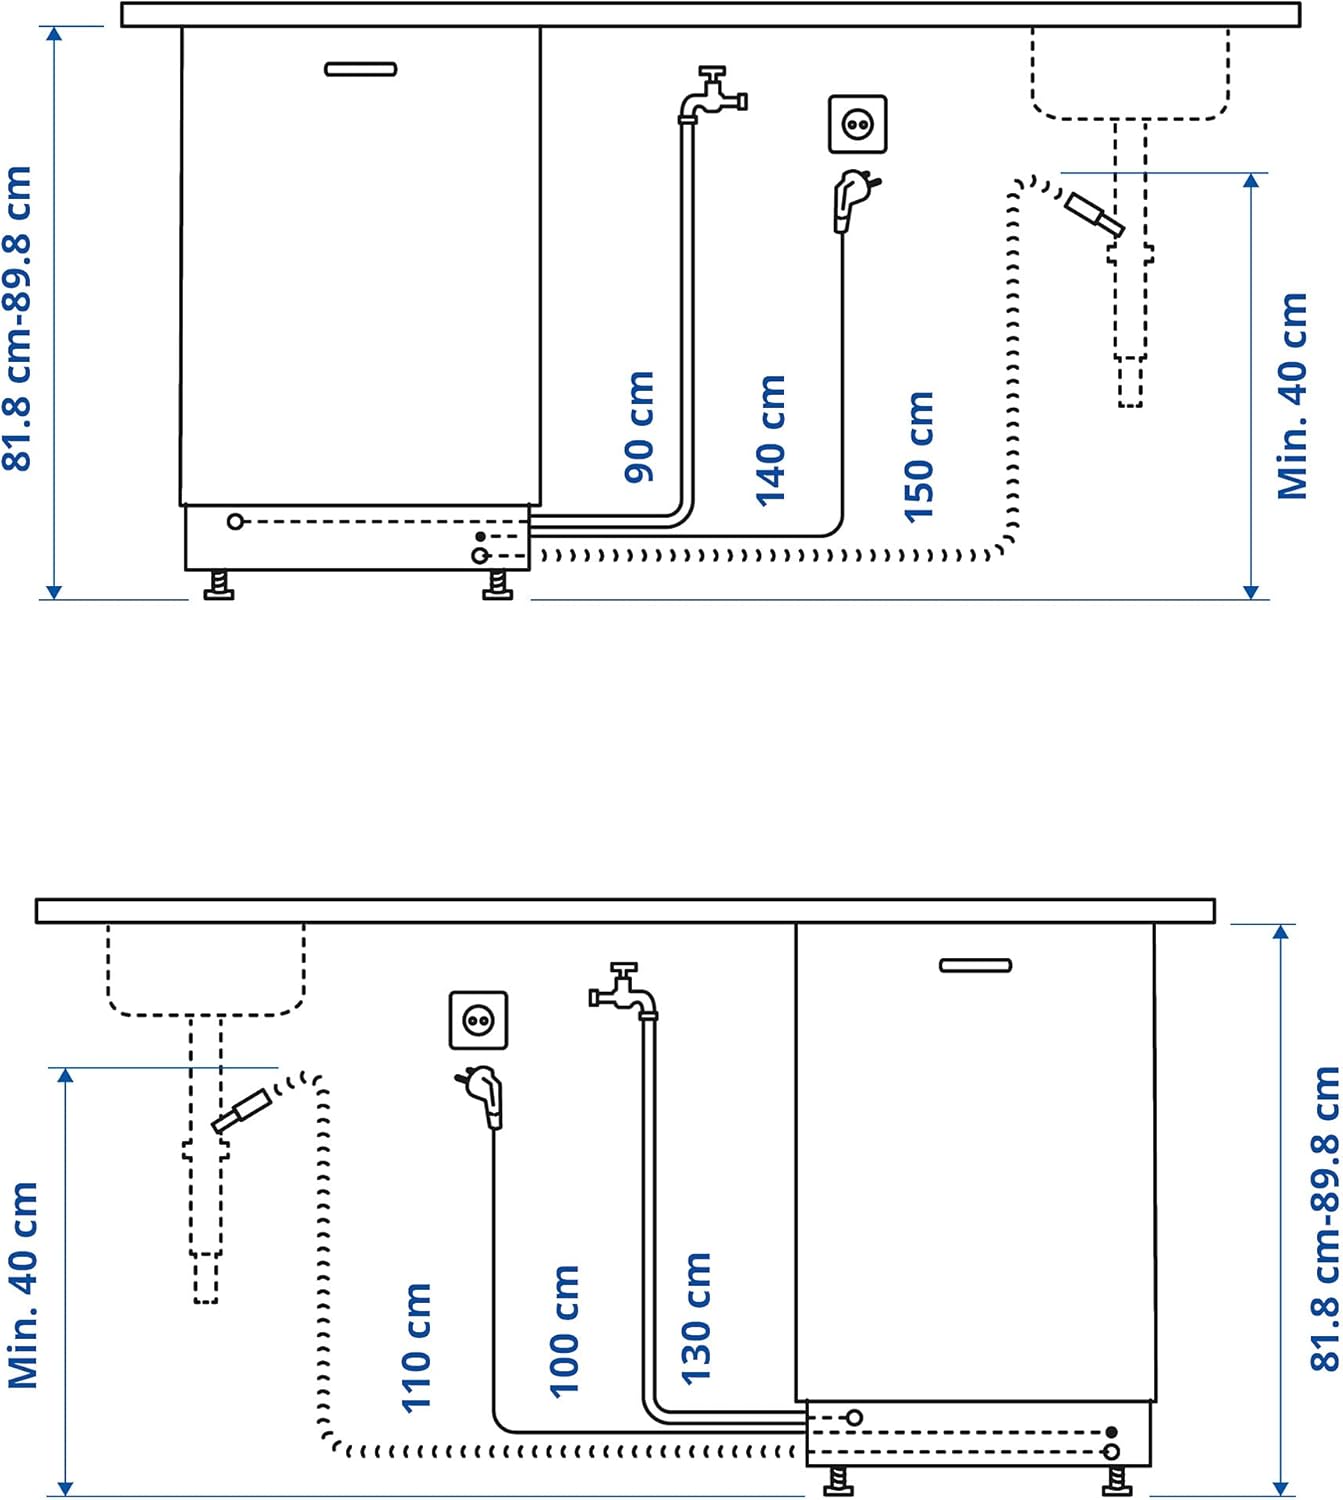
Figure 5.5: The innovative time projection feature, displaying the remaining cycle time "4:00" directly onto the kitchen floor.
| Program | Description | Typical Use |
|---|---|---|
| Auto | Automatically adjusts wash cycle based on soil level. | Mixed loads, everyday use. |
| Eco | Energy-efficient program for normal soiled dishes. | Normal soiled dishes, energy saving. |
| Intensive | High-temperature wash for heavily soiled items. | Pots, pans, heavily soiled dishes. |
| Quick Wash | Short cycle for lightly soiled dishes. | Lightly soiled dishes, quick cleaning. |
Starting a Cycle:
Close the door firmly. Press the power button, select your desired program, and press the start button. The dishwasher will begin operation.
6. Maintenance
Regular maintenance ensures optimal performance and extends the lifespan of your dishwasher.
Cleaning the Filters:
The dishwasher filters should be cleaned regularly to prevent blockages and ensure efficient washing. Remove the filter assembly, rinse under running water, and reassemble.
Cleaning the Spray Arms:
Check the spray arm nozzles for blockages. If necessary, remove the spray arms and clear any debris from the holes.
Exterior and Interior Cleaning:
Wipe the exterior with a damp cloth. For the interior, periodically run a dishwasher cleaning cycle with a specialized cleaner or a cup of white vinegar.
7. Troubleshooting
Before contacting service, refer to the following common issues and their solutions.
| Problem | Possible Cause | Solution |
|---|---|---|
| Dishwasher does not start. | Power supply issue, door not closed properly, program not selected. | Check power connection, ensure door is latched, select a program and press start. |
| Dishes are not clean. | Improper loading, clogged spray arms, insufficient detergent, dirty filters. | Reload dishes correctly, clean spray arms, add more detergent, clean filters. |
| Water not draining. | Clogged drain hose or filter, drain pump issue. | Check and clear drain hose/filter. If problem persists, contact service. |
| Dishwasher is noisy. | Items obstructing spray arms, foreign object in pump, improper installation. | Ensure nothing is hitting spray arms. Check for foreign objects. Verify installation. |
If the problem persists after attempting these solutions, please contact customer support.
8. Specifications
| Attribute | Value |
|---|---|
| Brand | Generic |
| Model Number | IK.204.756.10 |
| Width | 59.6 cm |
| Depth | 55.0 cm |
| Height | 81.8 cm |
| Max. Installation Height | 90.0 cm |
| Min. Installation Height | 82.0 cm |
| Cord Length | 140.0 cm |
| Weight | 38.00 kg |
| Manufacturer | ProTuning |
| Country of Origin | Latvia |
9. Warranty and Support
Warranty Information:
This HYGIENISK integrated dishwasher comes with a 5-year guarantee. Please refer to the separate guarantee brochure for detailed terms and conditions, including coverage and exclusions.
Customer Support:
For technical assistance, spare parts, or service requests, please contact your retailer or the manufacturer's authorized service center. Have your model number (IK.204.756.10) and purchase date ready when contacting support.
Important Note for International Customers: For customers ordering from outside of the EU, please be aware that you may be subject to import duty and tax. It is advisable to check with your local postal or tax office regarding your import regulations before purchase.


