
Introduction
This manual provides essential information for the proper use and maintenance of the REES52 709AD Double Head Welding Pin Pair. Please read these instructions carefully before use to ensure optimal performance and safety.
Product Overview
The REES52 709AD Double Head Welding Pin Pair is designed for use with spot welding machines, specifically for welding batteries. These pins are constructed from a high-quality CuA12O3 composite material, ensuring durability and efficient power transfer.
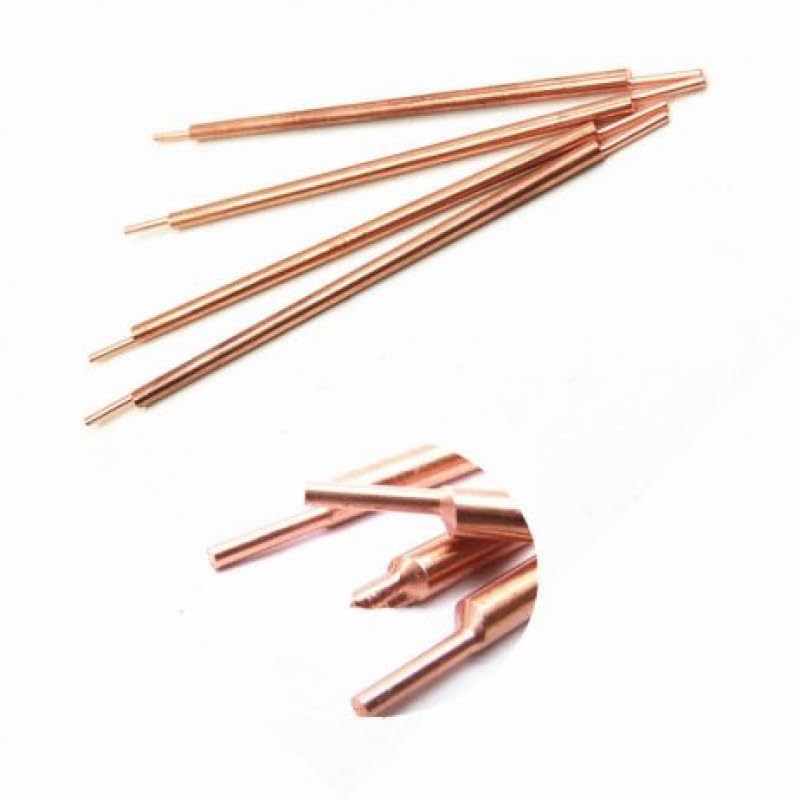
Figure 1: REES52 709AD Double Head Welding Pin Pair. This image displays multiple copper-colored welding pins, arranged horizontally, highlighting their double-headed design and uniform length.
Key Features:
- High-quality CuA12O3 composite material construction.
- Suitable for spot welding various types of batteries.
- Capable of handling power up to 1900W.
- Designed with a double-head configuration for efficient welding.
- Length of 81 mm, compatible with most battery spot welders.
Specifications
| Model Number | 709AD |
| Material | CuA12O3 Composite |
| Length | 81 mm |
| Power Handling | Up to 1900W |
| Melting Point | >900°C |
| Hardness | >83HRB |
| Electrical Conductivity | >85% IACS |
| Head Type | Double Head |
| Item Weight | 100 g |
| Package Dimensions | 5 x 4 x 3 cm |
Setup
The REES52 709AD welding pins are designed for direct replacement or installation into compatible spot welding machines. Ensure your spot welder is powered off and disconnected from the power source before proceeding with installation.
- Safety First: Always wear appropriate personal protective equipment (PPE), including safety glasses and gloves, when handling welding equipment.
- Identify Pin Holders: Locate the pin holders on your spot welding machine. These are typically designed to securely hold the welding electrodes.
- Insert Pins: Carefully insert the REES52 709AD welding pins into the designated holders. Ensure they are fully seated and properly aligned.
- Secure Pins: Tighten any retaining screws or mechanisms on your spot welder's pin holders to firmly secure the welding pins in place.
- Check Alignment: Verify that the double heads of the pins are correctly aligned and make proper contact when the welding arms are brought together.
Operating Instructions
Once the welding pins are securely installed, you can proceed with spot welding operations according to your spot welding machine's specific instructions.
- Power On: Connect your spot welding machine to the power source and turn it on.
- Adjust Settings: Set the appropriate welding parameters (e.g., pulse time, current) on your spot welder based on the battery type and thickness you are welding. Refer to your spot welder's manual for guidance.
- Position Workpiece: Place the battery or workpiece between the welding pins, ensuring good contact.
- Initiate Weld: Activate the spot welding process as per your machine's operation. The double-head design facilitates efficient heat distribution and strong welds.
- Inspect Weld: After each weld, visually inspect the joint for proper formation and strength.
Note: The high melting point and conductivity of the CuA12O3 composite material ensure consistent performance during repeated welding cycles.
Maintenance
Proper maintenance extends the lifespan of your welding pins and ensures consistent welding quality.
- Regular Inspection: Periodically inspect the welding pin tips for wear, pitting, or deformation. Worn tips can lead to poor weld quality.
- Cleaning: Clean the welding pin tips regularly to remove any accumulated residue or oxidation. A fine-grit abrasive or specialized tip cleaner can be used.
- Replacement: Replace welding pins when they show significant wear, are severely pitted, or can no longer produce consistent welds.
- Storage: Store unused or spare welding pins in a dry, clean environment to prevent corrosion.
Troubleshooting
If you encounter issues during spot welding, consider the following common problems and solutions:
- Poor Weld Quality / Inconsistent Welds:
- Check if welding pin tips are clean and free from oxidation or pitting. Clean or replace if necessary.
- Ensure pins are securely installed and making proper contact with the workpiece.
- Verify that the spot welder's power settings are appropriate for the material being welded.
- Pins Sticking to Workpiece:
- Reduce welding current or pulse duration on your spot welder.
- Ensure pins are clean and not overheated. Allow for cooling if necessary.
- Excessive Sparking:
- Check for loose connections in the spot welder or between the pins and holders.
- Ensure the workpiece surface is clean and free of contaminants.
Warranty and Support
For warranty information or technical support regarding your REES52 709AD Double Head Welding Pin Pair, please refer to the documentation provided with your original purchase or contact REES52 customer service directly. Keep your purchase receipt as proof of purchase.
Manufacturer: REES52
Importer: REES52