
Dewenwils HODT01E
Contents
DEWENWILS Pool Timer Instruction Manual
Model: HODT01E
Introduction
This manual provides detailed instructions for the installation, operation, and maintenance of your DEWENWILS HODT01E Outdoor Digital Timer Box. This heavy-duty programmable timer is designed for controlling various outdoor electrical devices such as pool pumps, water heaters, pool filters, and landscape lights. Please read this manual thoroughly before installation and operation to ensure safe and efficient use of the product.

Image: The DEWENWILS Pool Timer, a digital timer box, shown installed outdoors near a swimming pool, illustrating its intended use for automating pool equipment.
Safety Information
WARNING: Risk of Electric Shock. Serious injury or death may occur.
- Always turn off power at the main circuit breaker before installing or servicing the timer or the connected equipment.
- Installation should be performed by a qualified electrician in accordance with all local and national electrical codes.
- This timer is designed for outdoor use and is IP44 waterproof rated, but it is NOT for water immersion.
- Use copper conductors only.
- Ensure all connections are secure and properly insulated.
- Always close the door after use to maintain the IP44 rating.

Image: The DEWENWILS Pool Timer with its front cover open, revealing the internal components and a label detailing electrical specifications and safety warnings, including the caution against water immersion.
Product Features
- Multiple Setting & 5 Modes: Up to 12 ON/OFF schedules for 7-day repeat cycles or single-day settings. Includes Always ON/OFF, AUTO ON/OFF modes.
- Daylight Saving Time (DST) Support: Automatically adjusts for DST.
- Easy Wiring: Innovative design simplifies installation by eliminating complex jumper steps.
- Built-in Battery Backup: Maintains clock and settings for up to 6 months during power outages, no reset required.
- Heavy-Duty & Durable: 40 AMP, 2HP capacity, supports 120V single or dual devices. Corrosion-resistant metal housing with IP44 waterproof rating. Operates from -40°F to 140°F.
- Wide Compatibility: Ideal for pool pumps, water heaters, pool filters, spas, irrigation systems, and landscape lighting.
- ETL Certified: Ensures product safety and quality standards.

Image: The DEWENWILS Pool Timer mounted on a wall, with an overlay highlighting its high power specifications: 40 Amps, 2 Horsepower, and 120 Volts AC, indicating its suitability for heavy-duty appliances.

Image: The DEWENWILS Pool Timer box depicted in both snowy and sunny outdoor environments, emphasizing its weatherproof design and operational temperature range from -40°F to 140°F, along with IP44 waterproof rating and ETL certification.
Specifications
| Attribute | Value |
|---|---|
| Brand | Dewenwils |
| Model Number | HODT01E |
| Input Voltage | 120VAC 60Hz |
| Output Capacity | 40A Resistive, 2HP 120VAC |
| Color | Grey |
| Material | Metal |
| Product Dimensions | 11.99 x 16.99 x 19.99 cm (approx. 4.72 x 6.69 x 7.87 inches) |
| Item Weight | 1.32 kg (approx. 2.91 lbs) |
| Number of Settings | Up to 12 ON/OFF programs |
| Operating Temperature | -40°F to 140°F (-40°C to 60°C) |
| Waterproof Rating | IP44 |
| Certifications | ETL Listed |
Installation
Before beginning installation, ensure all power is disconnected at the main circuit breaker. This device is designed for permanent installation and requires proper wiring.
Components Overview

Image: A detailed diagram of the DEWENWILS Pool Timer, with various parts labeled, including the Setting Knob, Display Screen, Reset Button, Adjustment Knob, Power Indicator, Load Indicator, IP44 Weatherproof Rating, Knockouts, and Terminal Blocks.
Wiring Instructions
The DEWENWILS HODT01E timer supports controlling one or two 120VAC loads. Use copper wire AWG 9-18 suitable for 90°C (194°F) for supply connections.
Control One 120VAC Load
For a single 120VAC load, connect the Line (L) and Neutral (N) wires from your power source to the corresponding terminals on the timer. Connect the load's Line (L) and Neutral (N) wires to the timer's Load L and Load N terminals respectively.

Image: A simplified wiring diagram illustrating how to connect the DEWENWILS timer to control a single 120VAC load, showing connections for Power L, Power N, Load L, and Load N terminals.
Control Two 120VAC Loads
For two separate 120VAC loads, connect the main Line (L) and Neutral (N) wires from your power source to the timer. Connect the first load's Line (L) and Neutral (N) wires to the timer's Load L1 and Load N terminals. Connect the second load's Line (L) and Neutral (N) wires to the timer's Load L2 and Load N terminals. Both loads will share the common Neutral (N) connection.

Image: A simplified wiring diagram illustrating how to connect the DEWENWILS timer to control two separate 120VAC loads, showing connections for Load1 L, Load2 L, and shared Load N terminals.
Refer to the detailed wiring diagram inside the timer's cover for precise terminal identification and connections.
Operation
The timer features an intuitive knob interface for setting time and programming schedules.
Setting Current Time and Day
- Press the CLOCK button.
- Use the HOUR and MIN buttons to set the current hour and minute.
- Use the DAY button to set the current day of the week.
- Press CLOCK again to confirm and exit.
Programming ON/OFF Schedules
The timer allows up to 12 ON/OFF programs. Each program can be set for specific days or a 7-day repeat cycle.
- Press the PROG button. The display will show "1 ON".
- Use the HOUR, MIN, and DAY buttons to set the desired ON time and day(s) for Program 1.
- Press PROG again. The display will show "1 OFF".
- Use the HOUR, MIN, and DAY buttons to set the desired OFF time and day(s) for Program 1.
- Repeat steps 1-4 for additional programs (2 ON/OFF through 12 ON/OFF).
- After setting all desired programs, press the CLOCK button to return to the current time display.

Image: A close-up of the DEWENWILS Pool Timer's digital display, illustrating various timer modes (Always ON, Always OFF, AUTO ON, AUTO OFF), setting repeat times (Once a week), timer schedule days (Daily, Weekdays, Weekends), and battery runtime (6 Months).
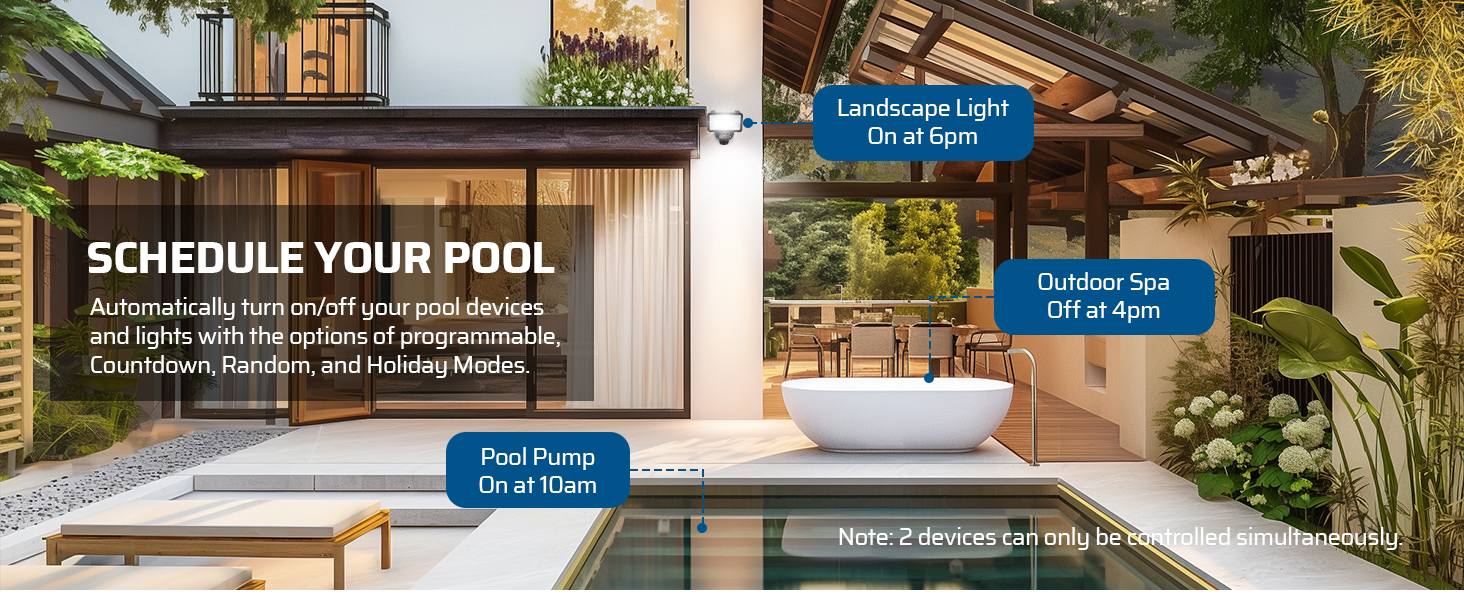
Image: An illustration showing the DEWENWILS Pool Timer automating various outdoor devices, with examples like a pool pump turning on at 10 AM, an outdoor spa turning off at 4 PM, and landscape lights turning on at 6 PM, demonstrating its scheduling capabilities.
Operating Modes
The timer has several operating modes, selectable using the MODE button:
- ON: The connected device is continuously ON, overriding all programmed schedules.
- OFF: The connected device is continuously OFF, overriding all programmed schedules.
- AUTO ON: The timer will follow programmed schedules, and the device is currently ON according to the schedule.
- AUTO OFF: The timer will follow programmed schedules, and the device is currently OFF according to the schedule.
To activate programmed schedules, ensure the timer is set to either AUTO ON or AUTO OFF mode.

Image: A visual representation of the DEWENWILS Pool Timer's manual override settings, showing icons for "ON = Always ON", "OFF = Always OFF", "AUTO ON = Power is ON currently and timer programming is activated", and "AUTO OFF = Power is OFF currently and timer programming is activated".
Daylight Saving Time (DST) Adjustment
To enable or disable DST, press and hold the DST button for 3 seconds. The display will show "DST" when enabled, and the time will adjust automatically.
Maintenance
- Cleaning: Wipe the exterior of the timer with a damp cloth. Do not use abrasive cleaners or immerse the unit in water.
- Inspection: Periodically inspect the wiring connections for tightness and signs of corrosion or damage. Ensure the timer's door is securely latched to maintain its waterproof rating.
- Battery: The built-in backup battery is designed to maintain settings during power outages. No user maintenance is required for the battery.

Image: A close-up view of the DEWENWILS Pool Timer's robust metal casing, highlighting its durable construction designed for outdoor environments.

Image: A close-up view of the DEWENWILS Pool Timer's sealing mechanism, demonstrating its well-sealed design for protection against water and dust ingress, contributing to its IP44 rating.
Troubleshooting
| Problem | Possible Cause | Solution |
|---|---|---|
| Timer display is blank. | No power to the timer; internal battery depleted. | Check circuit breaker. If power is present, allow time for the internal battery to recharge (up to 24 hours). |
| Device does not turn ON/OFF at programmed times. | Timer is not in AUTO mode; incorrect programming; power outage. | Ensure timer is set to AUTO ON/OFF mode. Verify programmed ON/OFF times and days. Check for power outages; the internal battery retains settings but the timer needs power to operate the load. |
| Timer is stuck ON or OFF. | Timer is in ON or OFF override mode. | Press the MODE button until AUTO ON or AUTO OFF is displayed. |
| Time is incorrect after a power outage. | Internal battery is low or depleted. | The internal battery should maintain time for up to 6 months. If not, allow the timer to be powered for 24 hours to fully charge the battery, then reset the time. |
| Timer makes clicking sound but device doesn't turn on. | Wiring issue; overloaded circuit; faulty device. | Verify all wiring connections are secure. Ensure the connected device's power requirements do not exceed the timer's specifications (40A, 2HP). Test the device directly to confirm it is functional. |
Warranty and Support
DEWENWILS products are designed for reliability and performance. For specific warranty information, please refer to the warranty card included with your product or visit the official DEWENWILS website. If you encounter any issues or require technical assistance, please contact DEWENWILS customer support through their official channels.
Contact Information:
- Website: www.dewenwils.com (Please check for the most current contact details)
- Email: Refer to product packaging or website for support email.
Please have your model number (HODT01E) and purchase information ready when contacting support.
Ask a question about this manual
Ask about setup, troubleshooting, compatibility, parts, safety, or missing instructions. Manuals+ will review the question and use this page’s manual context to help answer it.