
1. Introduction
This manual provides detailed instructions for the installation, operation, and maintenance of your TiFFCOFiO WM1006 Digital Programmable Sprinkler Timer. Please read this manual thoroughly before using the device to ensure proper function and longevity. This timer is designed to automate your garden watering, offering convenience and efficient water management.
2. Product Overview
The TiFFCOFiO WM1006 Sprinkler Timer features a large LCD screen and an intuitive dial for easy programming. It includes multiple buttons for fine-tuning settings and a dedicated rain delay function.
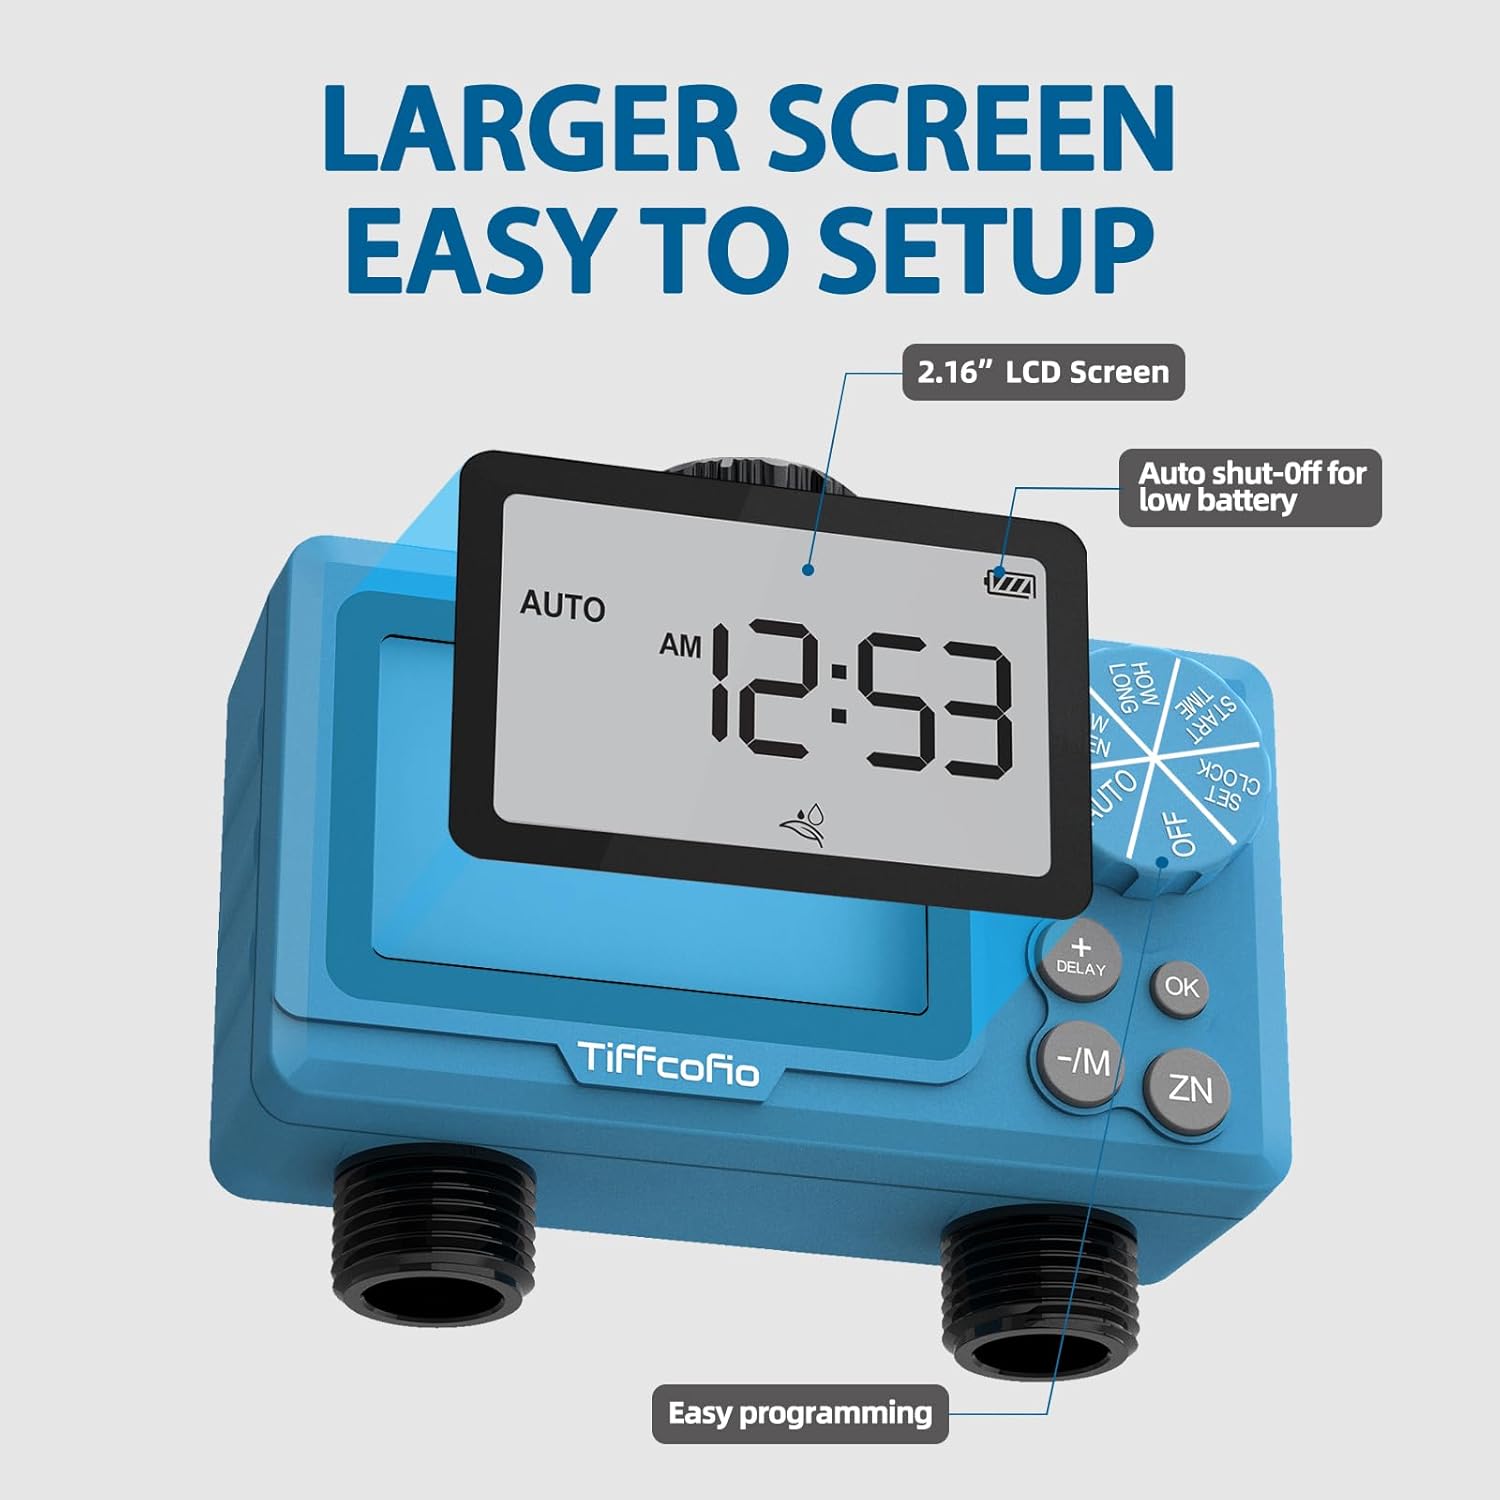
Image 2.1: Front view of the TiFFCOFiO WM1006 Sprinkler Timer, highlighting the 2.16-inch LCD screen, control dial, and various buttons for setting time, start time, watering duration, and frequency. The screen also indicates an auto shut-off feature for low battery.
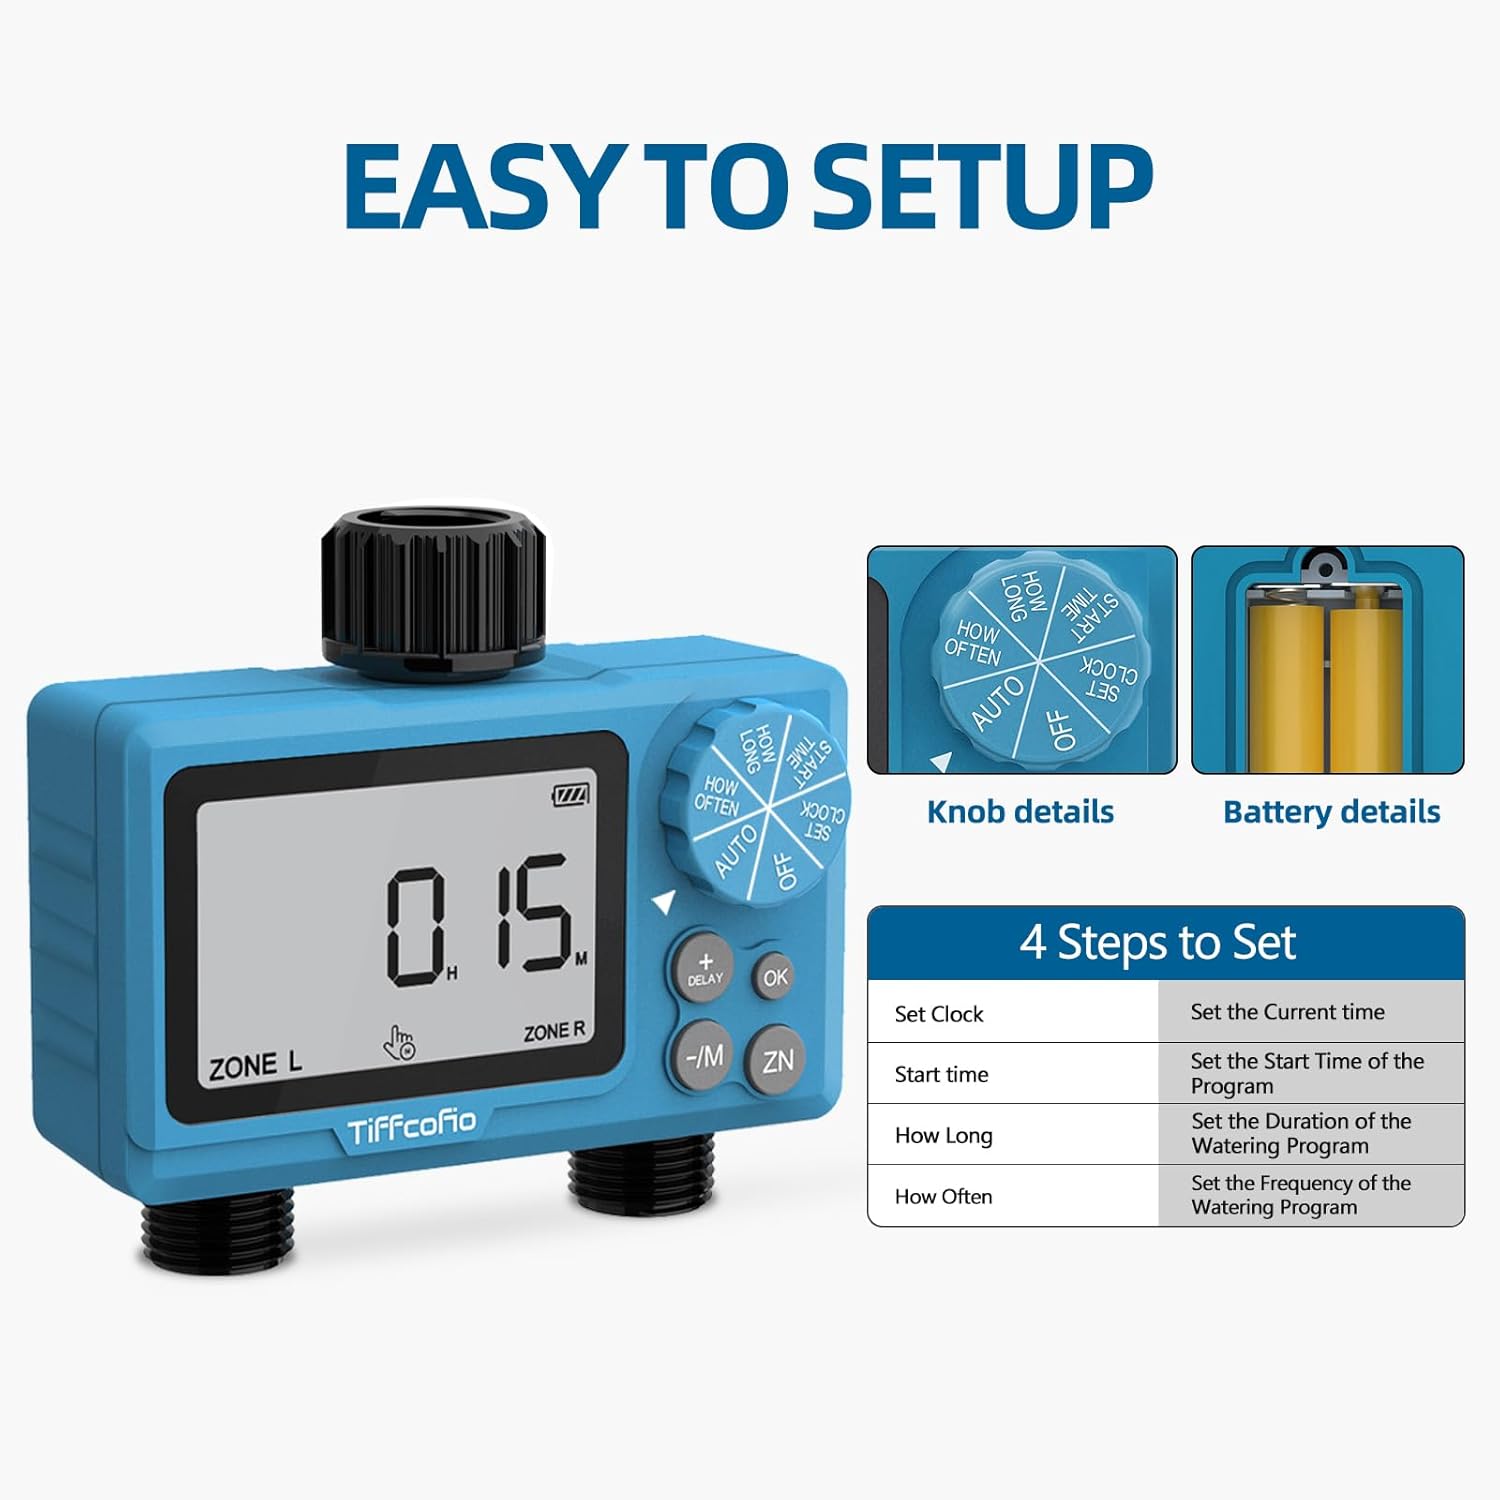
Image 2.2: Close-up showing the details of the control knob with settings like OFF, AUTO, SET CLOCK, START TIME, HOW LONG, and HOW OFTEN. Also visible is the battery compartment, which requires two AA batteries (not included).
3. Setup
3.1 Battery Installation
- Locate the battery compartment on the back of the timer.
- Open the battery cover.
- Insert two new AA alkaline batteries, ensuring correct polarity (+/-).
- Close the battery cover securely.
The timer will display a low battery indicator when batteries need replacement. Replace batteries promptly to avoid interruption of watering schedules.
3.2 Connecting the Timer
- Thread the timer onto your outdoor faucet or spigot. Ensure a tight connection to prevent leaks.
- Connect your garden hose or irrigation system to the outlet(s) at the bottom of the timer.
- Ensure all connections are secure.
4. Operating Modes
The TiFFCOFiO WM1006 offers three primary operating modes: Auto, Manual, and Rain Delay.

Image 4.1: Visual representation of the three available modes: Auto Mode for scheduled watering, Manual Mode for immediate watering, and Delay Mode for pausing schedules due to rain.
4.1 Auto Mode
In Auto Mode, the timer operates according to your programmed schedule (start time, duration, frequency). This is the default mode for automated watering.
4.2 Manual Mode
Manual Mode allows for immediate, unscheduled watering. To activate manual watering:
- Turn the dial to 'OFF'.
- Press the '-/M' button to initiate manual watering.
- Use the '+' and '-' buttons to adjust the manual watering duration.
- Press 'OK' to confirm.
- To stop manual watering, turn the dial back to 'AUTO' or 'OFF'.
4.3 Rain Delay Function
The Rain Delay function allows you to temporarily pause your watering schedule to prevent overwatering after rainfall. This feature helps conserve water.
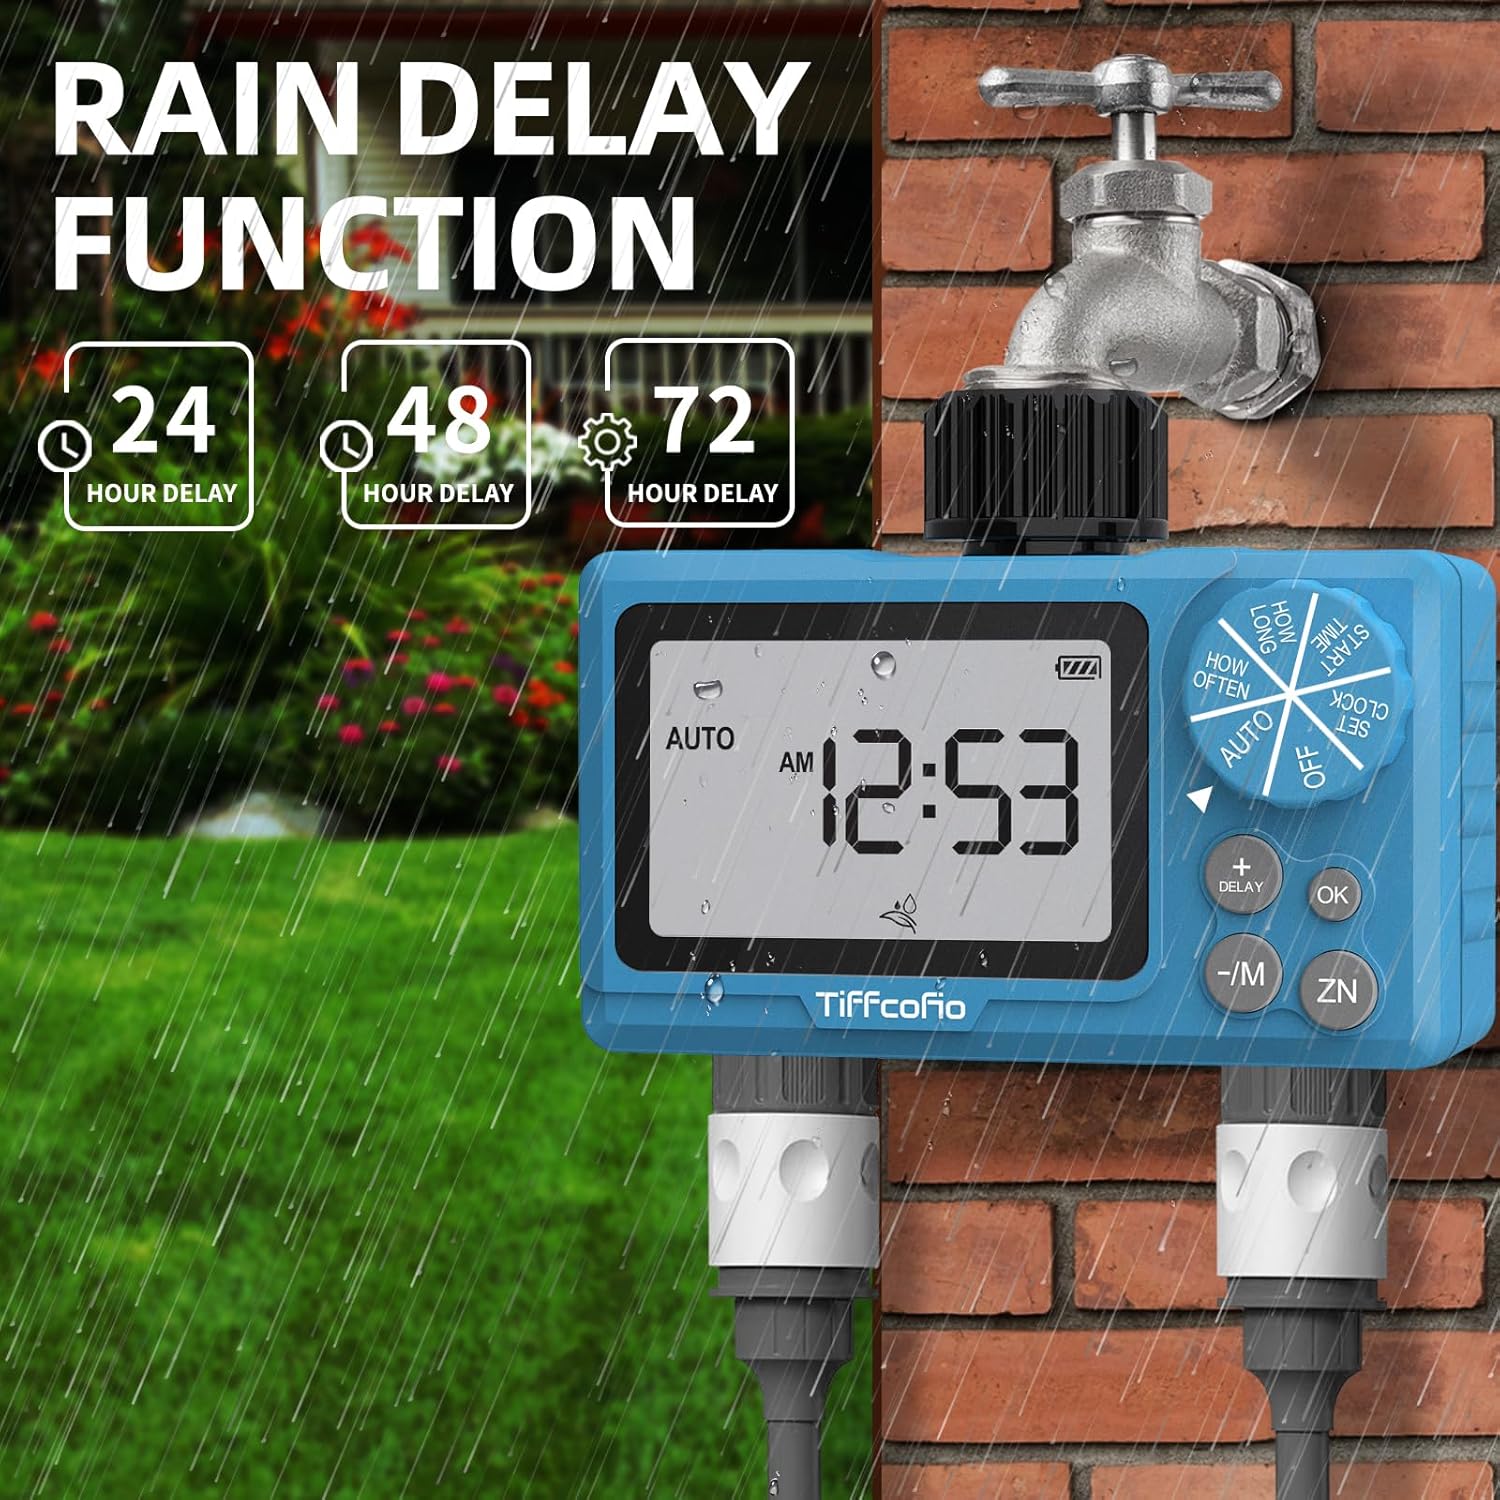
Image 4.2: The sprinkler timer shown in an outdoor setting, illustrating the Rain Delay function with options for 24, 48, and 72-hour delays. This feature helps prevent overwatering after natural rainfall.
To set a Rain Delay:
- Ensure the dial is in 'AUTO' mode.
- Press the '+ DELAY' button.
- Use the '+' or '-' buttons to select a delay period of 24h, 48h, or 72h.
- Press 'OK' to confirm the delay. The timer will resume its schedule automatically after the delay period ends.
5. Programming the Timer
Follow these steps to set up your automatic watering schedule.
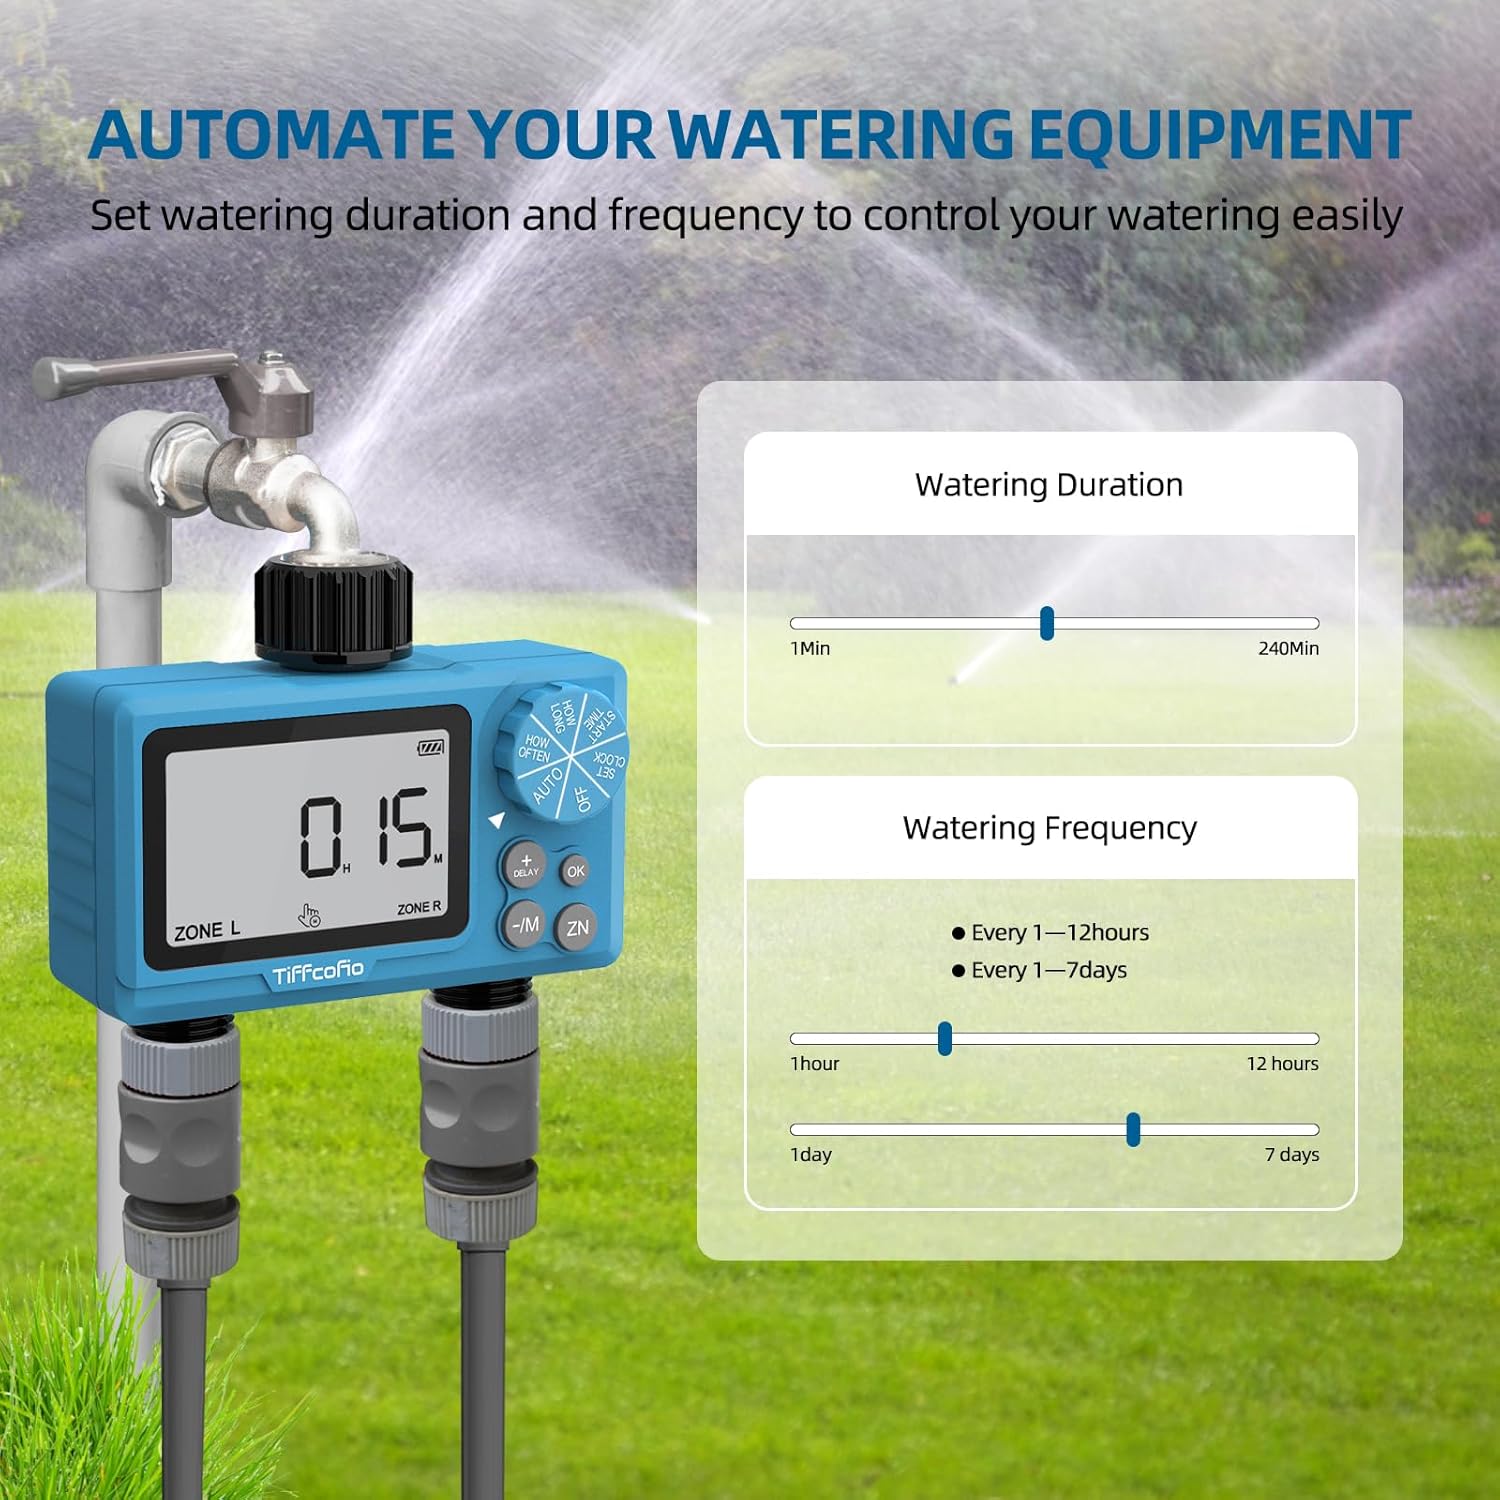
Image 5.1: The timer screen showing options for setting watering duration from 1 minute to 240 minutes, and watering frequency from every 1-12 hours or every 1-7 days. This allows for precise control over irrigation.
5.1 Set Clock
- Turn the dial to 'SET CLOCK'.
- Use the '+' and '-' buttons to adjust the current time.
- Press 'OK' to confirm and move to the next setting.
5.2 Set Start Time
- Turn the dial to 'START TIME'.
- Use the '+' and '-' buttons to set your desired watering start time.
- Press 'OK' to confirm.
5.3 Set Watering Duration ('HOW LONG')
- Turn the dial to 'HOW LONG'.
- Use the '+' and '-' buttons to set the duration of each watering cycle (e.g., 10 minutes, 30 minutes).
- Press 'OK' to confirm.
5.4 Set Watering Frequency ('HOW OFTEN')
- Turn the dial to 'HOW OFTEN'.
- Use the '+' and '-' buttons to select how frequently watering occurs (e.g., every 12 hours, every 2 days).
- Press 'OK' to confirm.
After setting all parameters, turn the dial to 'AUTO' to activate your programmed watering schedule.
6. Maintenance
Proper maintenance ensures the longevity and optimal performance of your sprinkler timer.
6.1 Weatherproof Structure
The timer is designed with a weatherproof structure, making it suitable for outdoor use. It is resistant to wind, water, and sun exposure.
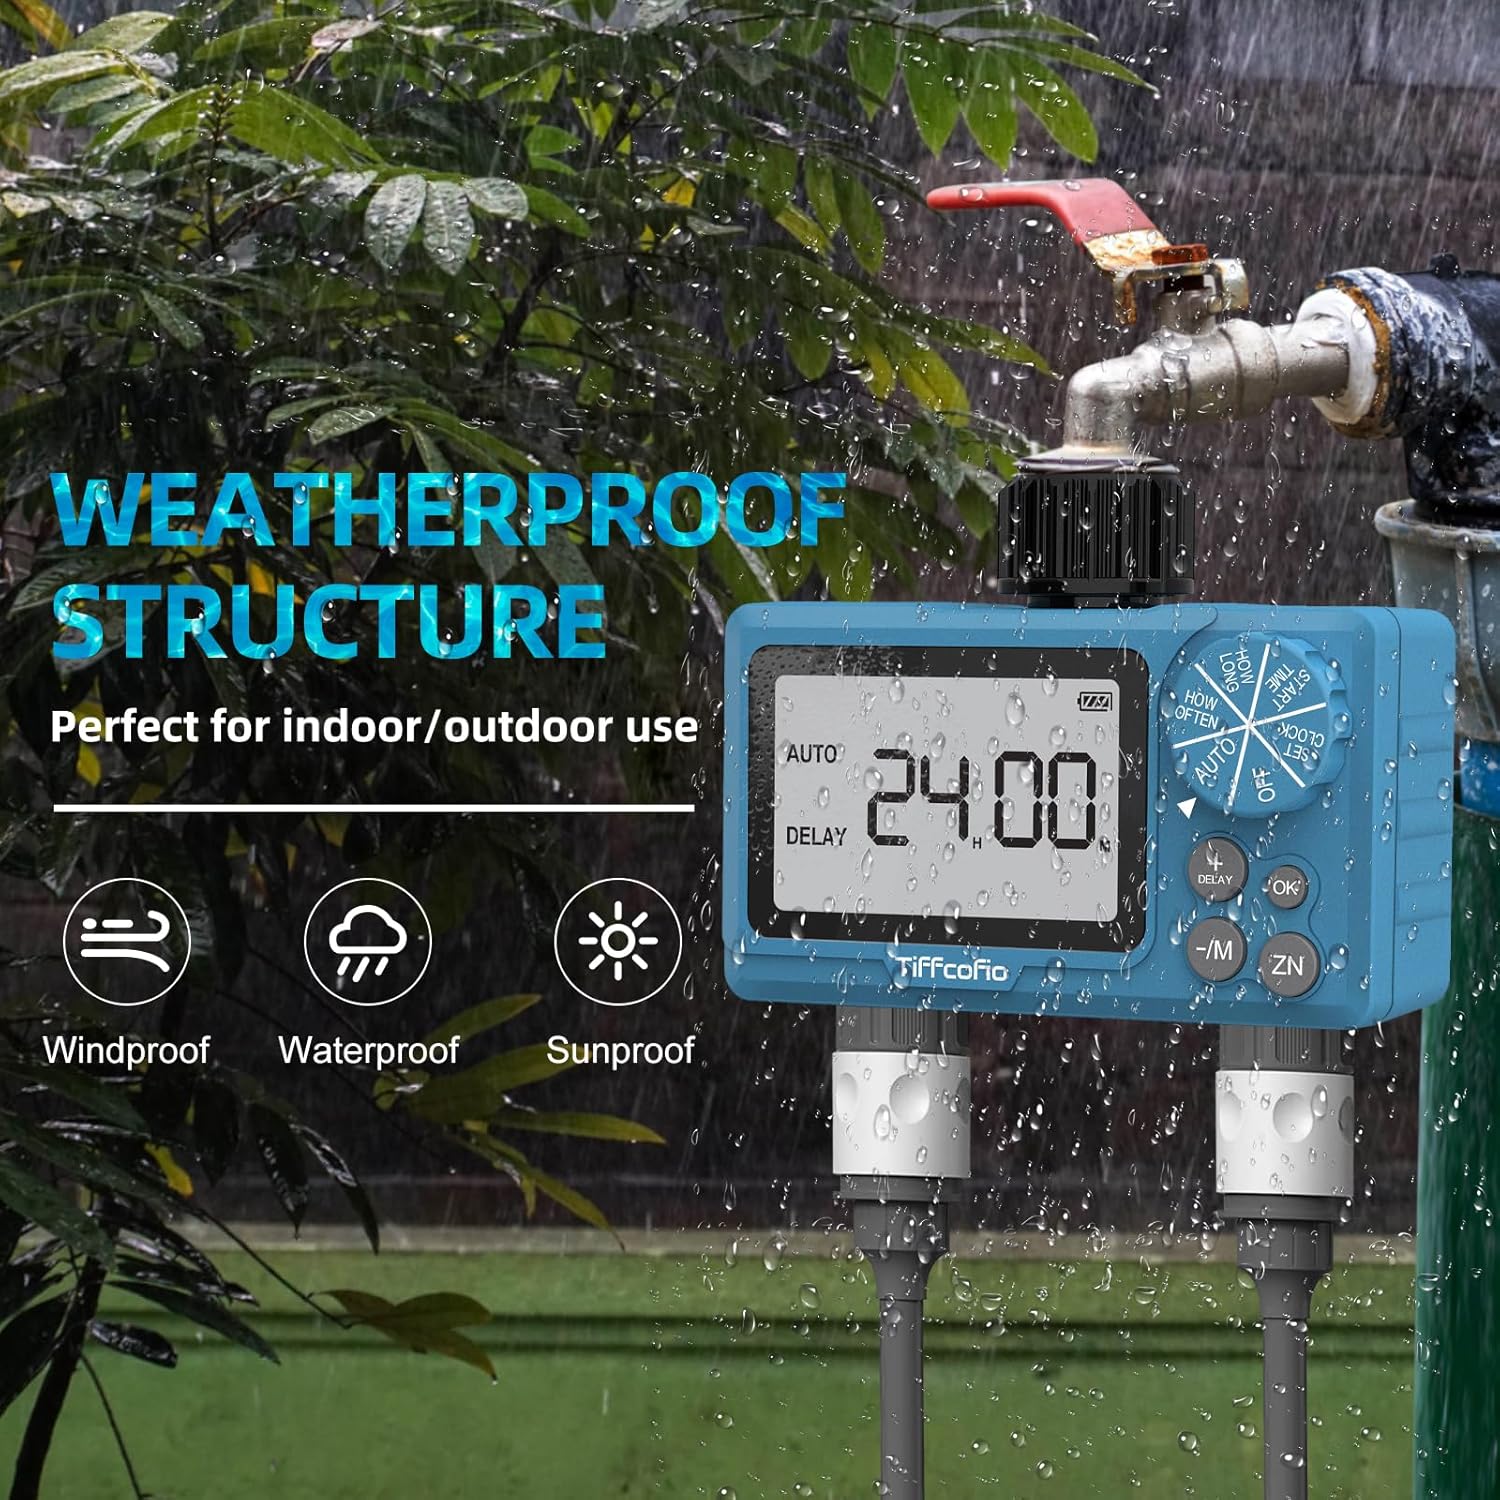
Image 6.1: The sprinkler timer installed outdoors, demonstrating its windproof, waterproof, and sunproof capabilities, making it ideal for various weather conditions.
6.2 Battery Replacement
Replace batteries when the low battery indicator appears on the screen. Always use new AA alkaline batteries for best performance.
6.3 Winterization
Before the first frost, disconnect the timer from the faucet and hose. Remove the batteries. Store the timer indoors in a dry, frost-free location to prevent damage from freezing water.
7. Troubleshooting
| Problem | Possible Cause | Solution |
|---|---|---|
| Timer not watering | Incorrect programming, low battery, faucet off, rain delay active | Check program settings, replace batteries, ensure faucet is open, check rain delay status |
| Water leakage | Loose connection, worn washer | Tighten connections, replace rubber washer |
| Display not working | Dead batteries, incorrect battery installation | Replace batteries, check battery polarity |
| Timer not responding to buttons | Low battery, internal error | Replace batteries, try resetting by removing and reinserting batteries |
8. Specifications
- Brand: Tiffcofio
- Model Number: WM1006
- Color: Blue
- Product Dimensions: 2.2"D x 5.4"W x 4.9"H
- Item Weight: 0.53 Kilograms
- Number of Settings: 5 (Clock, Start Time, How Long, How Often, Auto/Off)
- Power Source: 2 x AA Batteries (not included)
- UPC: 797442686656
9. Warranty and Support
TiFFCOFiO is committed to providing reliable products and customer satisfaction. If you encounter any questions or issues with your sprinkler timer, please contact our professional and reliable after-sales service. We aim to assist you within 6 hours of your inquiry.