
PowMr POW-RELAB 5KU
Contents
PowMr 5000W Solar Inverter User Manual
Model: POW-RELAB 5KU
1. Introduction
This manual provides essential information for the safe and efficient operation of your PowMr 5000W Solar Inverter. Please read this manual thoroughly before installation and use, and keep it for future reference.
The PowMr 5000W Solar Inverter is an advanced off-grid hybrid inverter designed to provide reliable power for various applications. It integrates a 5000W pure sine wave inverter, a 120A MPPT solar charge controller, and a battery charger into one compact unit. It is compatible with 48V lead-acid and lithium battery systems and can handle peak loads up to 15000W.
2. Safety Information
Always adhere to the following safety precautions to prevent injury and damage to the inverter or connected equipment.
- Installation must be performed by qualified personnel.
- Ensure all wiring is correctly sized and properly insulated.
- Do not expose the inverter to rain, snow, spray, or any liquids.
- Ensure adequate ventilation around the inverter to prevent overheating.
- Disconnect all power sources (solar, battery, AC input) before performing any maintenance or wiring.
- Do not attempt to disassemble or repair the inverter yourself. Contact qualified service personnel.
- Wear appropriate personal protective equipment (PPE) during installation and maintenance.
3. Product Overview
The PowMr 5000W Solar Inverter is a robust solution for off-grid power needs. Its design emphasizes high load handling, efficient heat dissipation, and comprehensive protection features.
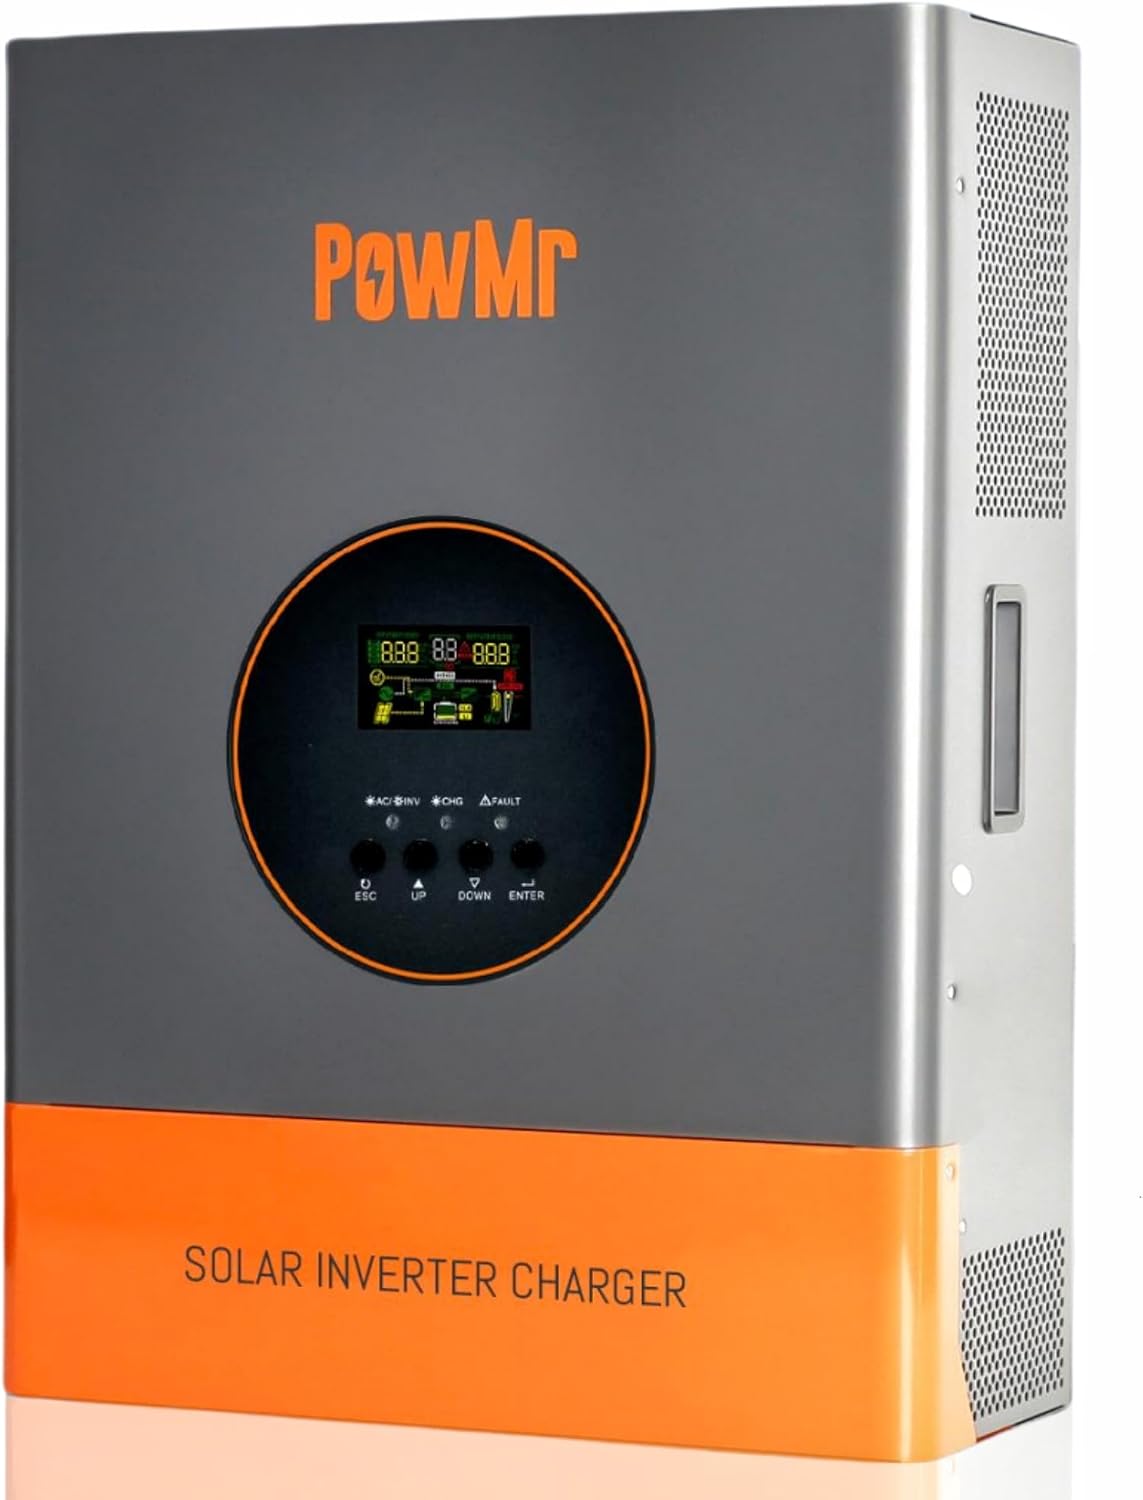
Figure 3.1: Front view of the PowMr 5000W Solar Inverter, showing the display and control buttons.
3.1 Key Features
- High Peak Power: Capable of handling peak power up to 15000W, suitable for demanding loads.
- Integrated MPPT Charge Controller: Built-in 120A MPPT charge controller for efficient solar charging.
- Pure Sine Wave Output: Provides clean and stable power, safe for sensitive electronics.
- Wide Battery Compatibility: Supports various 48V battery types including Flooded, LiCoMnNiO2, LiFePO4, AGM, Gel, and user-defined settings.
- Multiple Protection Functions: Includes short circuit, over voltage, under voltage, overload, reverse polarity, and over-temperature protection.
- Dual Cooling Fans: Ensures efficient heat dissipation for prolonged lifespan.
- LCD Display and LED Indicators: Provides dynamic display of system data and operating status.

Figure 3.2: Overview of the inverter highlighting key specifications such as rated output power, DC input voltage, AC output voltage, max PV charging current, and peak output power.

Figure 3.3: Promotional banner illustrating the inverter's core capabilities and features.
4. Installation and Setup
Proper installation is crucial for the safe and optimal performance of your inverter. Follow these steps carefully.
4.1 Unpacking and Inspection
Upon receiving the inverter, carefully unpack it and inspect for any shipping damage. Ensure all components are present:
- PowMr 5000W Solar Inverter Unit
- User Manual (this document)
- Mounting hardware (if included)
4.2 Mounting the Inverter
Choose a suitable mounting location that is:
- Well-ventilated and free from direct sunlight.
- Protected from moisture, dust, and corrosive gases.
- Capable of supporting the inverter's weight (approximately 66.9 pounds).
- Accessible for wiring and maintenance.
Mount the inverter vertically on a sturdy wall or surface using appropriate mounting hardware.
4.3 Wiring Connections
Before making any electrical connections, ensure all power sources are disconnected. Refer to the connection diagram below for proper wiring sequence.

Figure 4.1: Identification of inverter ports: 1. Toggle switch, 2. AC input, 3. AC output, 4. Communication port, 5. PV input, 6. Battery input.

Figure 4.2: Detailed inverter connection diagram showing AC input (utility/generator), PV array, battery input, and AC output connections.

Figure 4.3: Comprehensive wiring diagram including wire gauges and connection points for AC input, PV input, battery, and AC output.
- Battery Connection: Connect the 48V battery bank to the battery input terminals. Ensure correct polarity (+ to + and - to -). Recommended battery capacity: 200Ah.
- PV Array Connection: Connect the solar PV array to the PV input terminals. Ensure the PV input voltage (60-150VDC MPPT range, max 150VDC open circuit) and power (max 6400W) are within specifications.
- AC Input Connection: Connect the AC utility grid or generator to the AC input terminals. Rated input voltage: 110/120Vac.
- AC Output Connection: Connect your AC loads (appliances) to the AC output terminals. Rated output power: 5000W.
- Grounding: Ensure the inverter is properly grounded to a reliable earth ground.
Important: Always connect the battery first, then the solar array, and finally the AC input/output. Disconnect in reverse order.
5. Operating the Inverter
Once installed, the inverter can be configured and operated using its LCD display and control buttons.
5.1 Initial Power-Up
After all connections are secure, switch on the battery breaker, then the solar array breaker, and finally the AC input breaker (if connected). The inverter will power on and display system information on the LCD screen.
5.2 LCD Display and Indicators
The LCD screen provides real-time data on the inverter's status, input/output voltages, battery status, and charging information. Three LED indicators provide quick status updates:
- AC IN/INV: Indicates AC input status or inverter operation.
- CHG: Indicates charging status.
- FAULT: Indicates a system fault or error.
5.3 Charging Modes
The inverter supports three charging modes to optimize power usage based on your preferences:

Figure 5.1: Illustration of the three available charging modes.
- Solar-Only Charging: Prioritizes solar power for battery charging.
- Utility Priority Charging: Prioritizes utility grid power for battery charging.
- Solar Priority Charging: Uses solar power first, then utility power if solar is insufficient.
5.4 Discharge Modes
The inverter offers three discharge modes to manage power output to your loads:

Figure 5.2: Illustration of the three available output (discharge) modes.
- PV Priority: Loads are powered by solar energy first, then battery, then utility.
- Utility Priority: Loads are powered by utility grid first, then solar, then battery.
- SBU Priority (Solar-Battery-Utility): Loads are powered by solar, then battery, then utility as a last resort.
5.5 Battery Type Settings
The inverter is compatible with various 48V battery types. Ensure the correct battery type is selected in the inverter settings for optimal charging and discharge performance. Supported types include:
- Flooded
- LiCoMnNiO2
- LiFePO4
- AGM
- Gel
- USER (customizable settings)

Figure 5.3: Visual representation of compatible 48V battery types: GEL, FLD (Flooded), LI (Lithium), and USE (User-defined).
6. Maintenance
Regular maintenance ensures the longevity and reliable operation of your PowMr solar inverter.
- Cleaning: Periodically clean the exterior of the inverter with a dry, soft cloth. Do not use liquid cleaners. Ensure ventilation openings are free from dust and debris.
- Connections: Annually check all electrical connections for tightness and signs of corrosion. Loose connections can cause overheating and poor performance.
- Ventilation: Ensure the area around the inverter remains clear to allow for proper airflow and heat dissipation.
- Battery Health: Monitor your battery bank's health according to the battery manufacturer's guidelines.
Warning: Disconnect all power sources before performing any maintenance.
7. Troubleshooting
This section provides solutions to common issues you might encounter. For problems not listed here, contact customer support.
| Problem | Possible Cause | Solution |
|---|---|---|
| Inverter not turning on | No battery connection or low battery voltage. | Check battery connections and ensure battery voltage is above the minimum starting voltage (29V for 48V system). |
| No AC output | Overload, short circuit, or inverter fault. | Reduce load, check for short circuits in wiring, check fault indicators on LCD. Restart inverter. |
| Battery not charging from solar | PV input voltage too low/high, solar panels not connected, or MPPT fault. | Check PV array connections, ensure PV voltage is within 60-150VDC MPPT range. Check for shading on panels. |
| Overload protection triggered | Connected load exceeds inverter's rated power (5000W). | Reduce the total load connected to the inverter. Ensure peak power requirements do not exceed 15000W. |
| Over-temperature warning | Insufficient ventilation or high ambient temperature. | Ensure adequate clearance around the inverter. Clean ventilation openings. Move to a cooler environment if possible. |

Figure 7.1: Visual representation of the inverter's comprehensive protection features, including short circuit, overload, over current, over voltage, under voltage, backfill, over-temperature, and over charge protection.
8. Specifications
Detailed technical specifications for the PowMr 5000W Solar Inverter (Model: POW-RELAB 5KU).
| Parameter | Value |
|---|---|
| Rated Output Power | 5000W |
| Peak Power | 15000W |
| DC Input Voltage | 48VDC |
| AC Output Voltage | 110Vac ±10% |
| Output Frequency | 50Hz/60Hz (Auto Sensing) |
| Max PV Input Power | 6400W |
| Max PV Input Current | 120A |
| MPPT Input Voltage Range | 60-150VDC |
| Max AC Input Current | 29A |
| Product Dimensions (L*W*H) | 21.3 x 15.6 x 7.8 inches |
| Item Weight | 66.9 pounds |
| Recommended Uses | Home, Office, Vehicle |
9. Warranty and Support
For warranty information and technical support, please refer to the warranty card included with your product or visit the official PowMr website. Keep your purchase receipt as proof of purchase.
For further assistance, you may contact PowMr customer service through their official channels.
Ask a question about this manual
Ask about setup, troubleshooting, compatibility, parts, safety, or missing instructions. Manuals+ will review the question and use this page’s manual context to help answer it.