
1. Introduction
This user manual provides essential information for the safe and efficient operation of your PowMr 1500W Solar Inverter. This all-in-one hybrid solar charge inverter integrates solar energy storage, mains charging, and AC sine wave output, designed for reliable power solutions in various applications.
Please read this manual thoroughly before installation and operation, and keep it for future reference.
2. Safety Instructions
WARNING: Failure to follow these safety instructions may result in serious injury or death, and damage to the inverter or other equipment.
- Ensure all wiring is performed by qualified personnel in accordance with local electrical codes.
- Do not attempt to disassemble or repair the inverter. There are no user-serviceable parts inside.
- Install the inverter in a well-ventilated area, away from flammable materials, moisture, and direct sunlight.
- Ensure proper grounding of the inverter.
- Before connecting or disconnecting any wiring, ensure all power sources (PV, battery, AC input) are disconnected.
- Wear appropriate personal protective equipment (PPE) when working with electrical systems.
- Verify battery voltage and polarity before connecting to the inverter.
3. Product Overview
The PowMr 1500W Solar Inverter is a versatile device designed to manage power from solar panels, batteries, and the utility grid to provide stable AC output. It features a pure sine wave output, ensuring compatibility with sensitive electronics.
Key Features:
- 1500W Pure Sine Wave Inverter.
- Integrated 40A MPPT Solar Charge Controller with up to 98% efficiency.
- LCD display for real-time system data and operational status.
- LED indicators for quick status checks.
- Compatible with various 24V battery types: AGM, Gel, Lead-acid, Lithium-ion, LiFePO4.
- Built-in lithium activation function.
- Comprehensive battery protection features: short circuit, over/under voltage.
- Four charging modes: Only Solar, Mains Priority, Solar Priority, Mains & Solar hybrid.
- Two output modes: Mains bypass and Inverter output.
Product Components and Dimensions:

Figure 3.1: Front view of the PowMr 1500W Solar Inverter, showing the LCD display, control buttons, and branding.

Figure 3.2: Side view illustrating the dimensions (286mm/11.26in height, 240mm/9.45in width, 91mm/3.58in depth) and key specifications including 1500W power, 40A MPPT, 24VDC input, and 230VAC output.

Figure 3.3: Diagram showing the multi-protection functions of the inverter, including CE certification, overload protection, surge protection, battery temperature monitoring, low voltage protection, high voltage protection, and MPPT controller functionality.
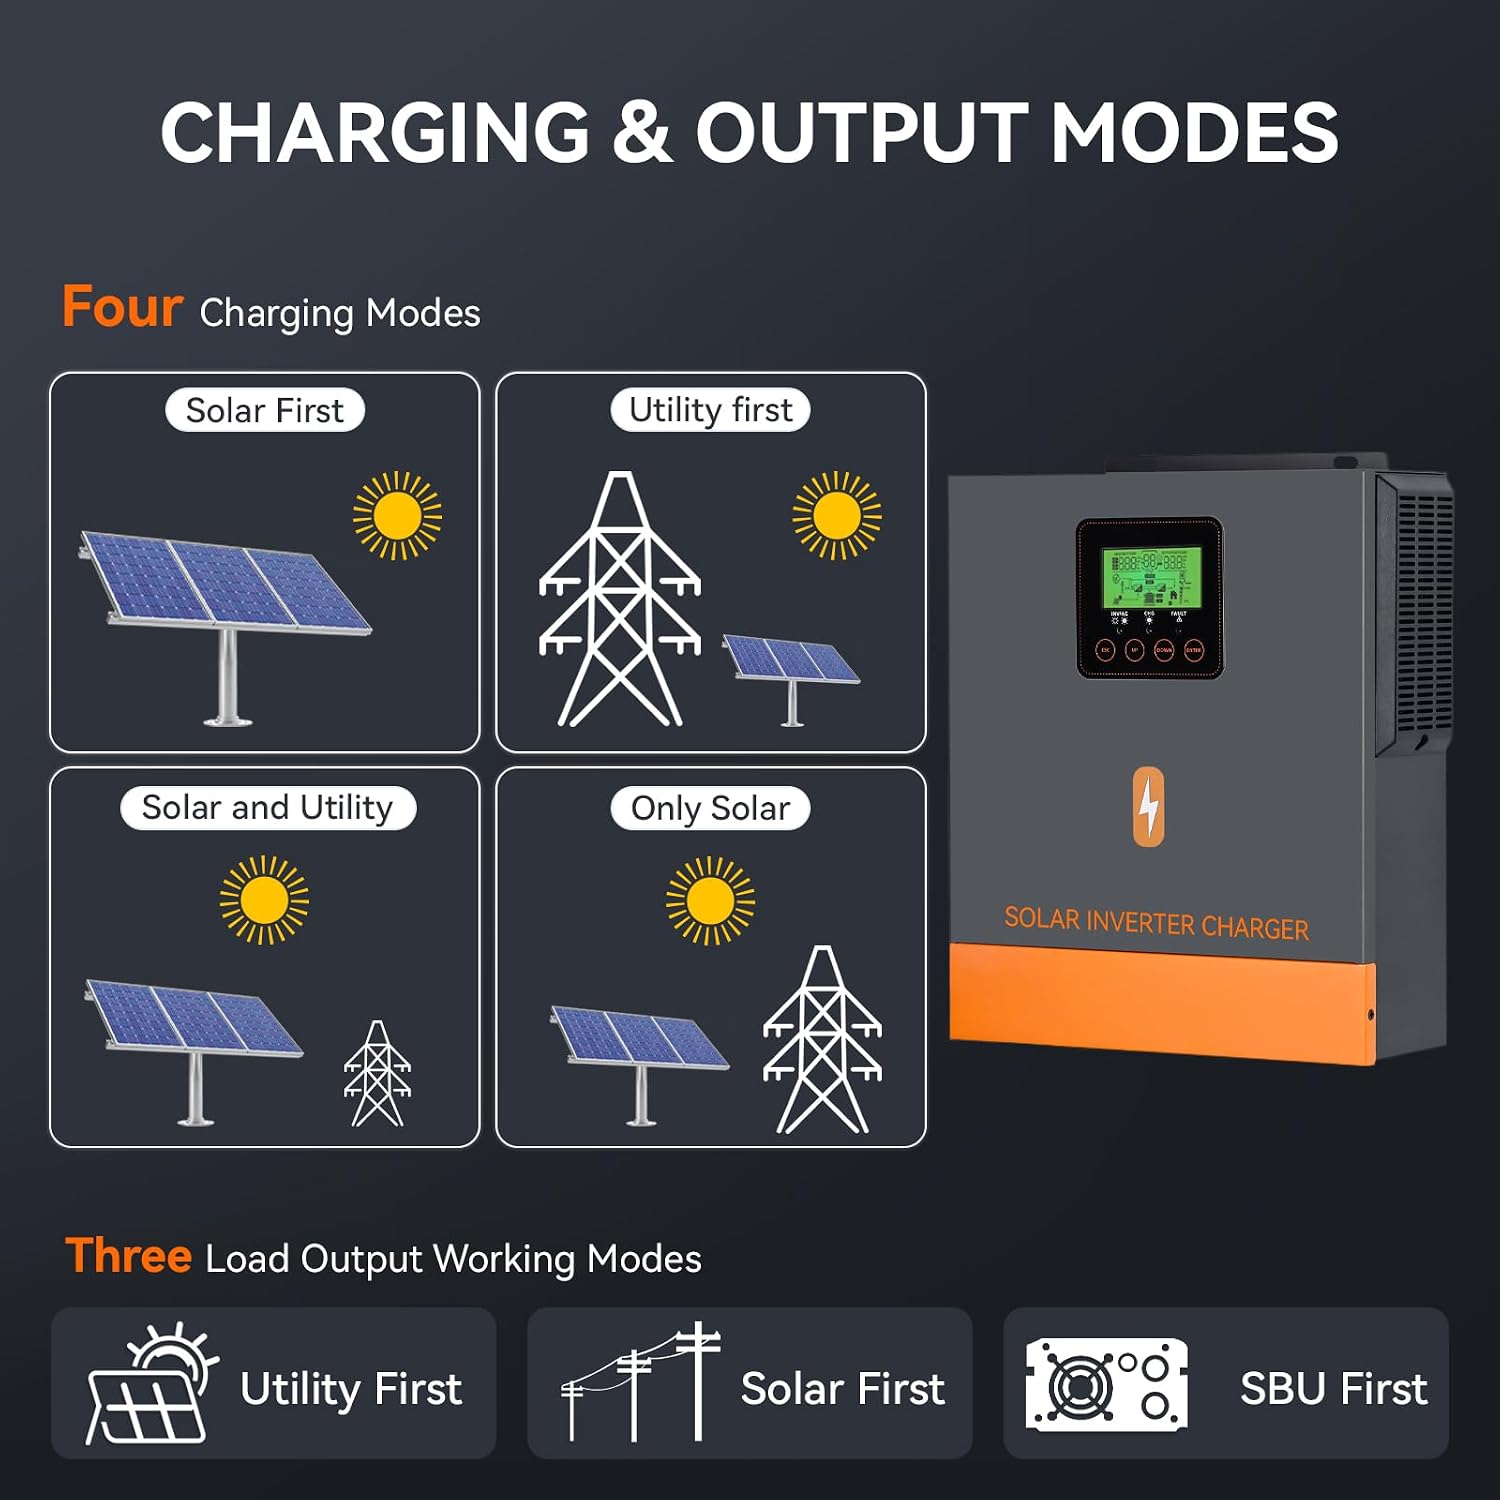
Figure 3.4: Detailed diagram labeling the inverter's components: 1. LCD Display, 2. Status Indicator, 3. Charging Indicator, 4. Fault Indicator, 5. Function Buttons, 6. Power On/Off Switch, 7. AC Input, 8. AC Output, 9. PV Input, 10. Battery Input, 11. Circuit Breaker, 12. Output Receptacles.
4. Setup and Installation
Proper installation is crucial for the inverter's performance and safety. Refer to Figure 3.4 for component identification and Figure 4.1 for a typical hybrid power system setup.
- Mounting: Choose a suitable location that is dry, well-ventilated, and protected from direct sunlight and extreme temperatures. Ensure adequate clearance around the inverter for air circulation.
- Battery Connection: Connect the 24V battery bank to the Battery Input terminals (10) on the inverter. Ensure correct polarity (+ to + and - to -). Install a DC circuit breaker between the battery and the inverter.
- PV Array Connection: Connect your solar PV array to the PV Input terminals (9). Ensure the PV array open circuit voltage and MPPT voltage range are within the inverter's specifications (Max. PV 150Vdc, MPPT range 30-150Vdc).
- AC Input Connection: Connect the utility grid or generator AC power to the AC Input terminals (7). Install an AC circuit breaker for protection.
- AC Output Connection: Connect your household or office loads (e.g., lamps, fans, refrigerators) to the AC Output terminals (8) or Output Receptacles (12).
- Grounding: Ensure the inverter is properly grounded according to local electrical codes.
- Power On: After all connections are secure and verified, switch on the battery breaker, then the PV breaker (if applicable), followed by the AC input breaker, and finally the inverter's Power On/Off Switch (6).

Figure 4.1: Diagram illustrating a typical hybrid power system setup, showing connections between the PV array, generator, utility grid, battery, PowMr Solar Inverter, and various home appliances.
5. Operating Modes
The PowMr Solar Inverter offers flexible charging and output modes to suit various power management needs. These modes can be configured via the LCD display and function buttons.
Charging Modes:
- Only Solar: Prioritizes solar power for battery charging.
- Mains Priority: Prioritizes utility grid power for battery charging. Solar power is used when mains is unavailable.
- Solar Priority: Prioritizes solar power for battery charging. If solar is insufficient, mains power supplements.
- Mains & Solar Hybrid: Uses both mains and solar power simultaneously for charging.
Output Modes:
- Mains Bypass: Loads are powered directly by the utility grid. The inverter acts as a bypass.
- Inverter Output: Loads are powered by the inverter, drawing energy from the battery or solar.

Figure 5.1: Visual representation of the four charging modes (Solar First, Utility First, Solar and Utility, Only Solar) and three load output working modes (Utility First, Solar First, SBU First).
6. Battery Compatibility
This inverter is designed to be compatible with a wide range of 24V battery types, offering flexibility for various energy storage solutions. It also includes a built-in lithium activation feature for LiFePO4 batteries.
- AGM Batteries
- Gel Batteries
- Flooded Lead-Acid Batteries
- Lithium-ion Batteries
- LiFePO4 Batteries (with activation function)
- User-Defined battery settings for custom configurations.

Figure 6.1: Icons representing the compatible 24V battery types: GEL, AGM, Flooded, LiFePO4, Lithium, and User-Defined.
7. Technical Specifications
The following table outlines the key technical specifications of the PowMr 1500W Solar Inverter:
| Specification | Value |
|---|---|
| Rated Output Power | 1500VA / 1500W |
| Nominal DC Input Voltage | 24Vdc |
| Nominal Output Voltage | 230Vac ± 5% |
| Output Frequency | 50Hz |
| Peak Efficiency | 94% |
| Maximum PV Array Open Circuit Voltage | 150Vdc |
| PV Array MPPT Voltage Range | 30-150Vdc |
| Max PV Array Power | 1200W |
| Max Solar Charging Current | 40Amp |
| Cold Start Voltage | 23.0Vdc |
| Display Type | LCD |
| Dimensions (L x W x H) | 28.6 x 24 x 9.2 cm |
| Weight | 3.5 kg |
8. Troubleshooting
The inverter's LCD display provides real-time system data and will show corresponding fault codes if an issue occurs. Refer to the specific fault code displayed to identify and resolve problems.
Common Troubleshooting Steps:
- No Power: Check all circuit breakers (battery, PV, AC input) and ensure they are in the ON position. Verify battery voltage is sufficient.
- No AC Output: Check AC output connections and ensure loads are within the inverter's rated power. Verify the inverter is in an appropriate output mode.
- Charging Issues: Ensure PV panels are receiving adequate sunlight and are connected correctly. Check PV array voltage and current. Verify charging mode settings.
- Overload Warning: Reduce the connected load. The inverter may temporarily shut down to protect itself.
- Over-temperature Warning: Ensure the inverter is in a well-ventilated area and its cooling fins are not obstructed.
For detailed fault code explanations and advanced troubleshooting, please consult the comprehensive manual provided by PowMr or contact their customer support.
9. Maintenance
Regular maintenance helps ensure the longevity and optimal performance of your PowMr Solar Inverter.
- Cleaning: Periodically clean the exterior of the inverter with a dry, soft cloth. Do not use liquid cleaners. Ensure ventilation openings are free from dust and debris.
- Connections: Annually inspect all electrical connections (PV, battery, AC input/output) for tightness and signs of corrosion. Tighten any loose connections.
- Environment: Ensure the installation environment remains within the recommended temperature and humidity ranges.
- Battery Health: Monitor battery health and perform maintenance as recommended by the battery manufacturer.
10. Warranty and Support
For information regarding the product warranty, please refer to the warranty card included with your purchase or visit the official PowMr website. Keep your purchase receipt as proof of purchase.
If you encounter any issues or require technical assistance, please contact PowMr customer support through their official channels. Provide your product model number (POW-HVM1.5K-24V) and a detailed description of the problem to facilitate faster service.