
Product Overview
The Young Hitch Mount Bike Rack with Ramp is designed for securely transporting up to two electric bikes or conventional bicycles. Engineered for durability and ease of use, this rack features a robust steel and aluminum construction, a convenient loading ramp, and a 200 lbs total capacity. It is compatible with vehicles equipped with a 2-inch hitch receiver, making it suitable for cars, SUVs, RVs, and trailers.
Key Features:
- Durable and Safe Construction: Reinforced steel and aluminum ensure strength and stability, carrying up to 100 lbs per bike. Features 2-arm fix, secure wheel cradles, and an anti-wobble structure.
- High Total Capacity: Boasts a 200 lbs total capacity, ideal for heavier electric bikes or multiple standard bicycles.
- RV Approved: Specifically designed and approved for use with RVs, ensuring safe and stable transport during motorhome adventures.
- Easy Loading with Ramp: Equipped with a built-in ramp for effortless rolling of bikes onto the rack. The ramp can be neatly stowed when not in use.
- 2-Inch Hitch Receiver Compatibility: Exclusively fits vehicles with a 2-inch hitch receiver, providing a sturdy and secure connection.
Setup and Installation
Most parts of the Young Hitch Mount Bike Rack come pre-assembled for a straightforward installation process. Follow these steps carefully to ensure proper setup and secure attachment to your vehicle.
- Unpacking and Component Identification:
Carefully unpack all components. Verify that all parts listed in the packing list are present. Familiarize yourself with the main rack assembly, the loading ramp, and all hardware including the locking hitch pin.

Image: Main components of the Young Hitch Mount Bike Rack, including the rack frame, upright arms, wheel cradles, and loading ramp.
- Attaching to Vehicle's 2-Inch Hitch Receiver:
Insert the main arm of the bike rack into your vehicle's 2-inch hitch receiver. Align the hitch pin holes and secure the rack using the provided locking hitch pin. Ensure the connection is tight to prevent wobbling during transit. This rack is designed exclusively for 2-inch receivers.
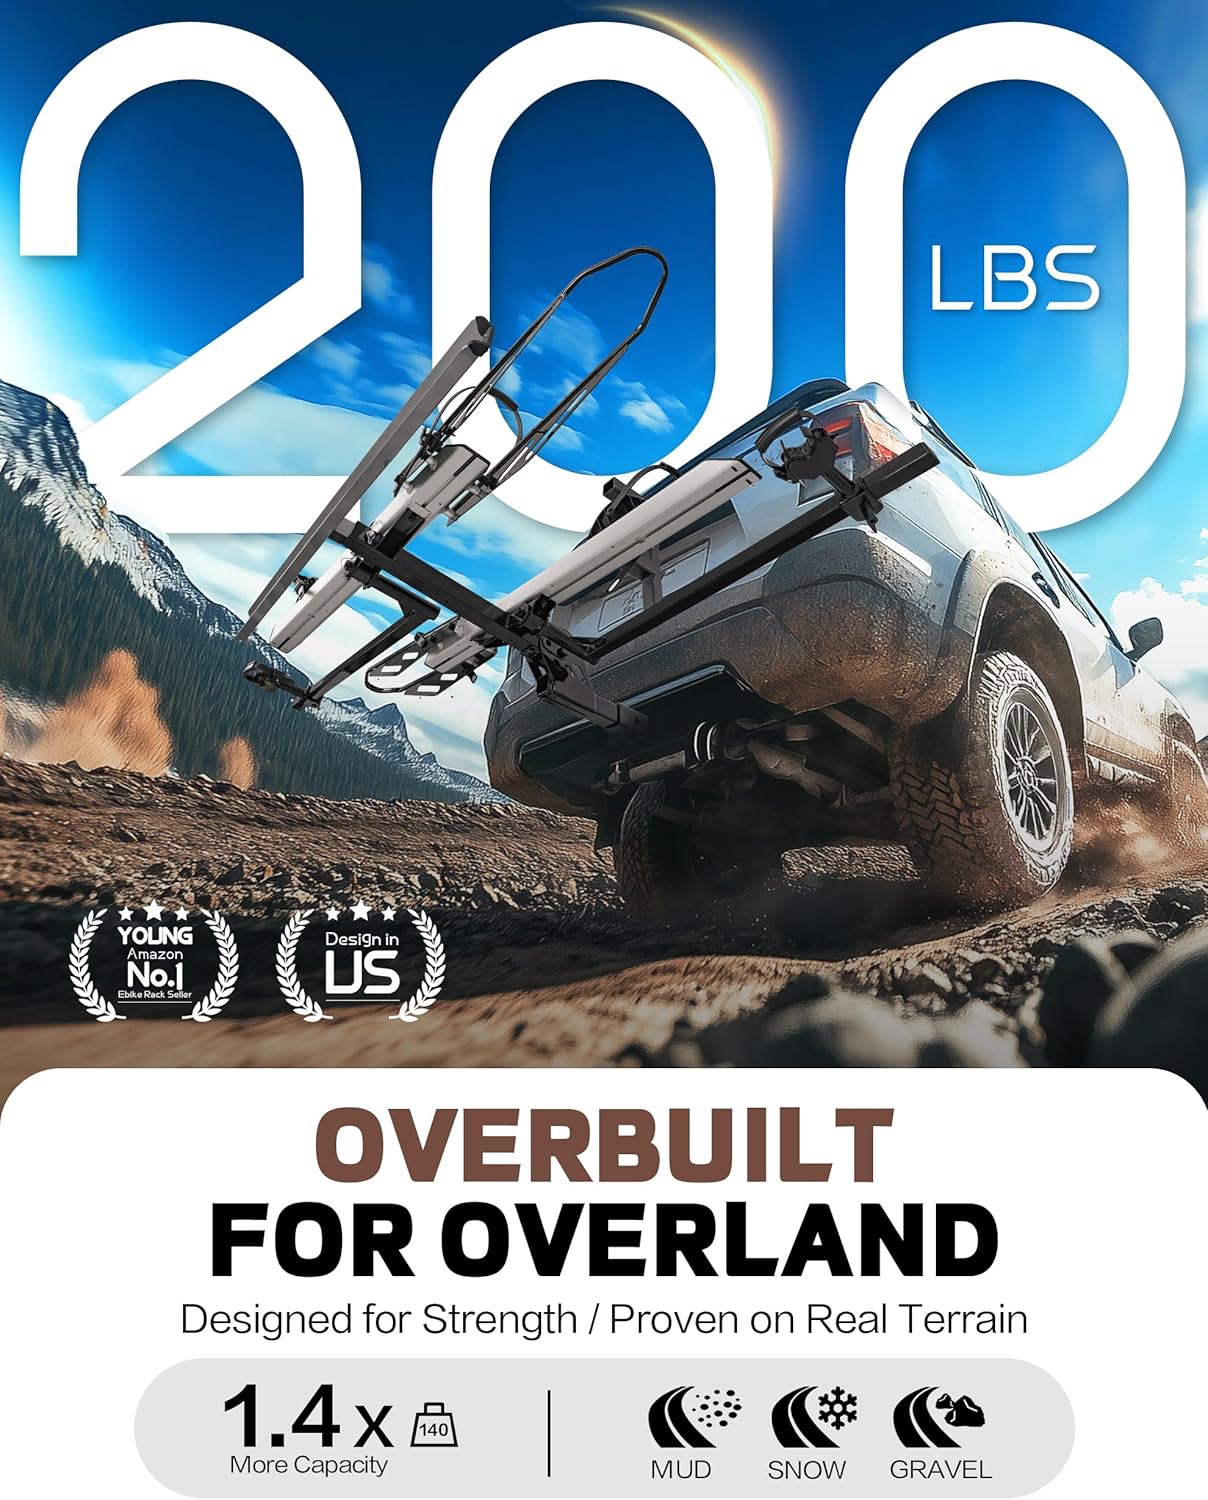
Image: The bike rack securely mounted to a vehicle's hitch receiver, demonstrating its robust attachment.
- Assembling Upright Arms and Wheel Cradles:
Attach the upright arms and wheel cradles to the main rack frame as per the instructions. These components are crucial for securing your bikes. Ensure all bolts are tightened securely. The design includes adjustable sliders for varying bike wheelbases and stable-grip mega cradles for wide wheel support.
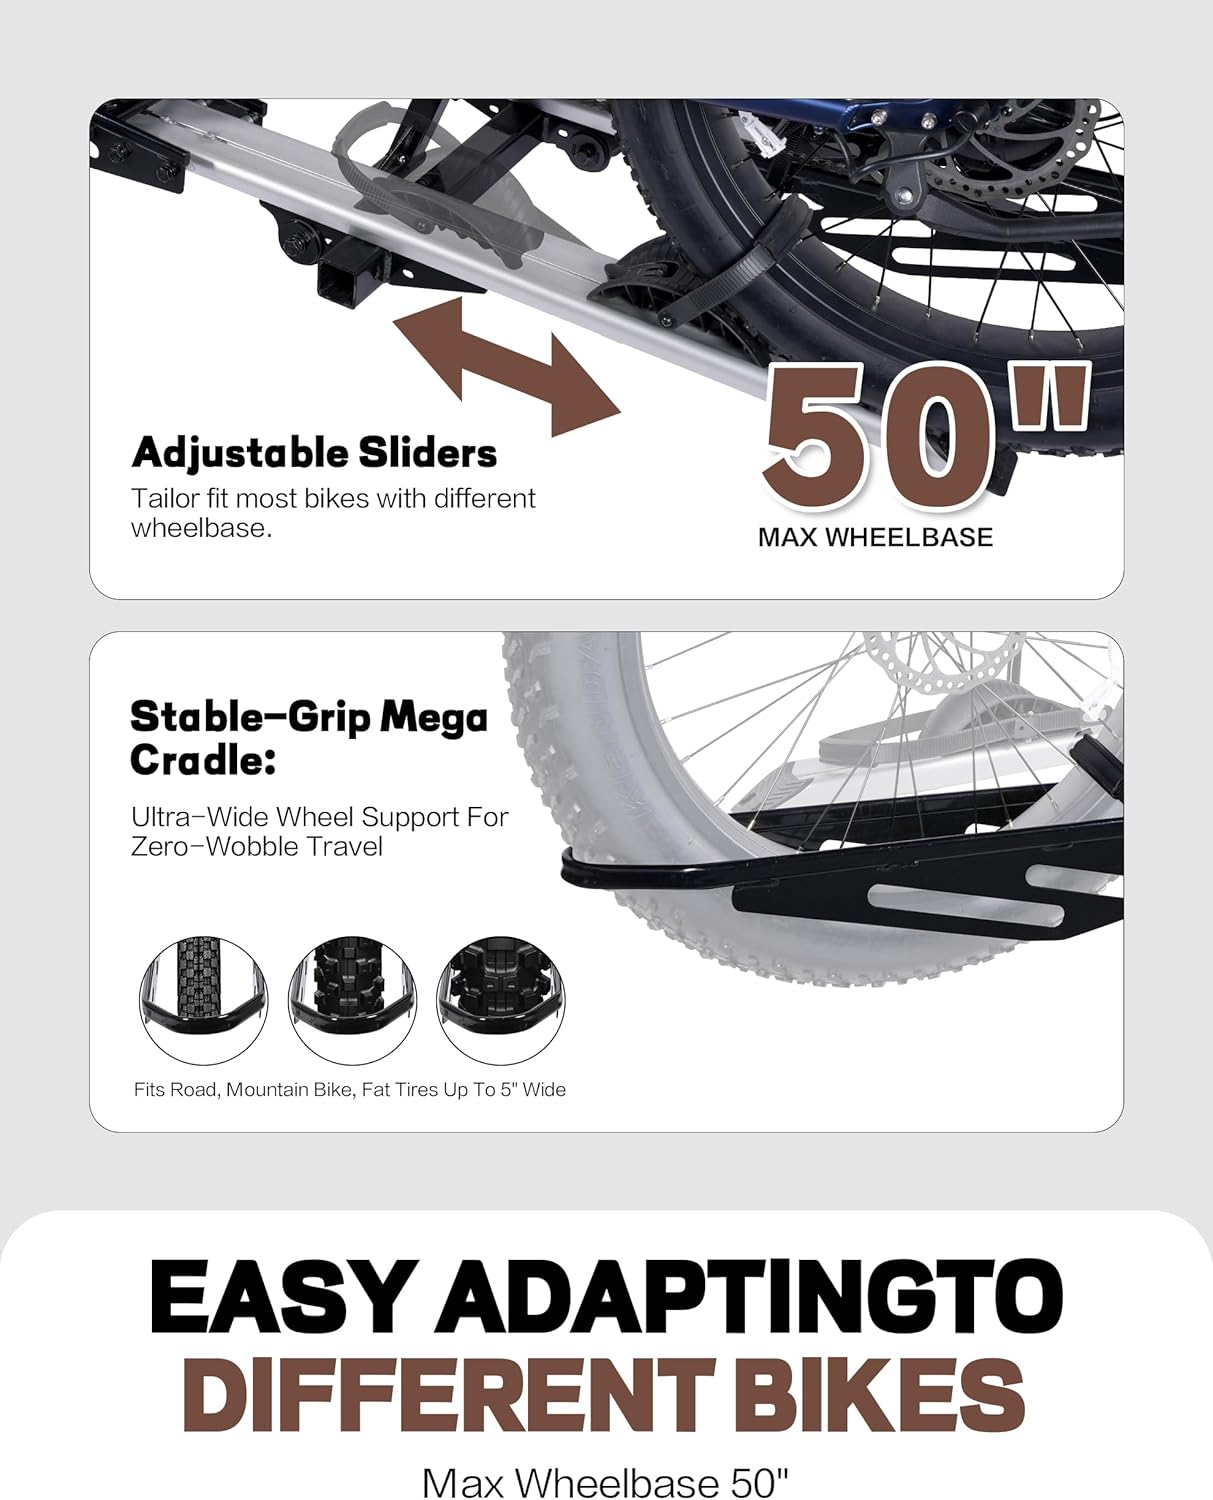
Image: Detailed view of the adjustable sliders and stable-grip mega cradle, designed to accommodate various bike sizes and tire widths up to 5 inches.
- Attaching the Loading Ramp:
The loading ramp can be easily attached to the rack when needed. It provides a convenient way to roll heavy e-bikes onto the rack without lifting. When not in use, the ramp can be neatly stowed within the rack's frame.

Image: An electric bike being rolled up the integrated loading ramp, illustrating the ease of loading.
Operation
Operating your Young Hitch Mount Bike Rack is designed to be intuitive. Follow these guidelines for safe and efficient use.
Loading Bikes:
- Prepare the Rack: Ensure the rack is securely attached to your vehicle and the upright arms are in the correct position for loading.
- Attach the Ramp: If using the ramp, securely attach it to the designated slot on the rack.
- Roll Bike Onto Rack: Carefully roll your bike up the ramp and into the wheel cradles. For heavier e-bikes, use caution and maintain control.
- Secure the Bike:
- Position the bike's wheels firmly within the wheel cradles.
- Adjust the upright arm to firmly hold the bike frame.
- Use the provided straps to secure both wheels to the cradles. Ensure the straps are threaded correctly through the designated slots and tightened securely. Refer to the "Correct Usage" image below for proper strap application.

Image: Illustration demonstrating the correct method for securing bike wheels with straps to prevent instability. Incorrect usage is also shown for comparison.
Repeat for the second bike if applicable. Always double-check all securing points before driving.
Folding the Rack:
When not in use, the bike rack can be folded up to save space and for easier parking. Follow the instructions provided with your rack for the specific folding mechanism. The design allows for quick and tool-free folding.

Image: Comparison showing the bike rack in its extended position and folded up against the vehicle, demonstrating its space-saving design.
Maintenance
Regular maintenance ensures the longevity and safe operation of your Young Hitch Mount Bike Rack.
- Cleaning: Clean the rack regularly with mild soap and water to remove dirt, road grime, and salt. Rinse thoroughly and dry to prevent corrosion.
- Inspection: Before each use, inspect all components for signs of wear, damage, or loose connections. Pay close attention to welds, bolts, straps, and wheel cradles.
- Lubrication: Periodically apply a light lubricant to moving parts, such as the folding mechanism and hitch pin, to ensure smooth operation.
- Storage: When not in use, store the bike rack in a dry, protected area to prevent exposure to harsh weather conditions.
Troubleshooting
This section addresses common issues you might encounter with your bike rack.
| Problem | Possible Cause | Solution |
|---|---|---|
| Rack wobbles excessively in the hitch receiver. | Hitch pin not fully tightened or incorrect hitch size. | Ensure the locking hitch pin is fully tightened. This rack is designed for 2-inch receivers only. Verify your vehicle has a 2-inch receiver. |
| Bike straps do not tighten or secure the bike properly. | Straps incorrectly threaded or worn. | Refer to the "Correct Usage" image in the Operation section to ensure straps are threaded and tightened correctly. Replace worn straps if necessary. |
| Difficulty rolling bikes up the ramp. | Ramp not securely attached or obstruction. | Ensure the ramp is firmly clipped into place. Clear any debris from the ramp surface. For very heavy bikes, consider having assistance. |
| Rack components feel loose after use. | Bolts or fasteners have loosened due to vibration. | Regularly check and re-tighten all bolts and fasteners on the rack, especially after long trips. |
Specifications
| Attribute | Detail |
|---|---|
| Brand | Young Electric |
| Model Name | Bike Rack w/ Ramp |
| Model Number | 4148 |
| UPC | 805089690117 |
| Load Capacity | 200 Pounds (100 lbs per bike) |
| Mounting Type | Hitch Receiver (2-inch only) |
| Product Dimensions (L x W x H) | 51.18 x 20.47 x 6.3 inches |
| Item Weight | 66.1 pounds |
| Material | Reinforced Steel Core, Aluminum Tray |
| Max Wheelbase Supported | 50 inches |
| Max Tire Width Supported | Up to 5 inches (Fat Tire compatible) |

Image: Dimensional drawing of the bike rack, indicating key measurements for length, width, and height.
Warranty and Support
Young Electric stands behind the quality of its products. For specific warranty details, please refer to the warranty card included with your purchase or visit the official Young Electric website. For technical support, troubleshooting assistance, or parts inquiries, please contact Young Electric customer service.
Online Support: Visit the Young Electric Store on Amazon for additional product information and resources.
Please retain your proof of purchase for any warranty claims.


